KOR-1A0A/1A0ASLOS(¿ )-Desuk02.4.153:25PM˘ ` 2 MICROWAVE OVEN KOR-1A0A/1A0ASL OPERATING INSTRUCTIONS Before operating this oven, please read these instructions completely.
KOR-1A0A/1A0ASLOS(¿ )-Desuk02.4.153:25PM˘ ` 1 PRECAUTIONS TO AVOID POSSIBLE EXPOSURE TO EXCESSIVE MICROWAVE ENERGY (a) Do not attempt to operate this oven with the door open since open-door operation can result in harmful exposure to microwave energy. It is important not to defeat or tamper with the safety interlocks. (b) Do not place any object between the oven front face and the door or allow soil or cleaner residue to accumulate on sealing surfaces. (c) Do not operate the oven if it is damaged.
KOR-1A0A/1A0ASLOS(¿ )-Desuk02.4.153:25PM˘ ` 2 EARTHING INSTRUCTIONS This appliance must be earthed. In the event of an electrical short circuit, earthing reduces the risk of electric shock by providing an escape wire for the electric current. This appliance is equipped with a cord having a earthing wire with a earthing plug. The plug must be plugged into an outlet that is properly installed and earthed. WARNING: Improper use of the earthing plug can result in a risk of electric shock.
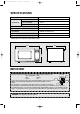
KOR-1A0A/1A0ASLOS(¿ )-Desuk02.4.153:25PM˘ ` 3 SPECIFICATIONS POWER SUPPLY MICROWAVE 230V~50Hz SINGLE PHASE WITH EARTHING POWER CONSUMPTION 1400 W OUTPUT POWER 1000 W FREQUENCY 2450 MHz OUTSIDE DIMENSIONS (W X H X D) 539 x 300 x 406 mm (21.2 x 11.8 x 16.0 in.) CAVITY DIMENSIONS (W X H X D) 354 x 228 x 370 mm (13.9 x 9.0 x 14.6 in.) NET WEIGHT APPROX. 15.5KG (34.2 lbs.) TIMER 99 min. 90 sec. POWER LEVELS 10 LEVELS * Specifications are subject to change without notice.
KOR-1A0A/1A0ASLOS(¿ )-Desuk02.4.153:25PM˘ ` 4 SAFETY INSTRUCTIONS FOR GENERAL USE Listed below are, as with all appliances, certain rules to follow and safeguards to assure top performance from this oven: 1. Do not use the oven for any reason other than food preparation, such as for drying clothes, paper, or any other nonfood items or for sterilizing purposes. 2. Do not use the oven when empty, this could damage the oven. 3.
KOR-1A0A/1A0ASLOS(¿ )-Desuk02.4.153:25PM˘ ` 5 FEATURES DIAGRAM 12 3 4 5 6 9 7 8 6. Door release button - Pushing this button stops oven operation and opens the door. 1. Door latch - When the door is closed it will automatically lock shut. If the door is opened while the oven is operating, the magnetron will automatically shut off. 7. Glass cooking tray - Made of specical heat resistant glass. The tray must always be in proper position before operating. Do not cook food directly on the tray. 2.
KOR-1A0A/1A0ASLOS(¿ )-Desuk02.4.153:25PM˘ ` 6 FEATURES DIAGRAM (continued) q M/W Def. Timer Lock g KOR-1A0A 1. Bread 2. Soup 3. Baked Potato 4. Fresh Vegetable 5. Frozen Vegetable e AUTO COOK r t One Touch Dish Warmer Frozen Pizza Beverage w Pasta Auto Defrost y Fish Poultry ur in 1ho u Power o a in 10m 10min 1m 1min Kitchen Timer Stop/Clear Meat 10sec Defrost Clock Start/Speedy Cook 10. Time set pad - Used to set the cooking time and the present time. 0 p i s 17.
KOR-1A0A/1A0ASLOS(¿ )-Desuk02.4.153:25PM˘ ` 7 OPERATION PROCEDURE This section includes useful information about oven operation. 1. Plug power supply cord into 230V AC 50Hz power outlet. 2. After placing the food in a suitable container, open the oven door and put it on the glass tray. The glass tray and roller guide must always be in place during cooking. 3. Shut the door. Make sure that it is firmly closed.
KOR-1A0A/1A0ASLOS(¿ )-Desuk02.4.153:25PM˘ ` 8 CONTROLS SETTING THE CLOCK When the oven is first plugged in, the display will flash ":0" and a tone will sound. If the AC power ever goes off, the display shows ":0" when the power comes back on. CLOCK 1. Touch CLOCK pad. This is a 12 hour clock system. 2. Touch CLOCK pad once more. This is a 24hour clock system. NOTE: This oven has multiple clock system. If you want 12 hour clock system, omit this step. 3.
KOR-1A0A/1A0ASLOS(¿ )-Desuk02.4.153:25PM˘ ` 9 WEIGHT DEFROSTING WEIGHT DEFROSTING lets you easily defrost food by eliminating guesswork in determining defrosting time. Follow the steps below for easy defrosting. 1. Touch MEAT pad. The DEFROST & g indicator light and "500" is displayed. MEAT The display will show what you touched. 2. Select desired defrosting weight. MEAT DEFROSTING begins. 3. Touch START pad. 1. Touch POULTRY pad. The DEFROST & g indicator light and "800" is displayed.
KOR-1A0A/1A0ASLOS(¿ )-Desuk02.4.153:25PM˘ ` 10 COOKING IN ONE STAGE 1. Touch POWER pad. (Select desired power level.) POWER The M/W indicator lights. The display will show what you touched. x6 NOTE: If steps 1nd 2 are omitted, the oven will cook at full power. 2. Touch the number pads for the cooking time. This example shows power level 5. The display will show the numbers you pressed in the order you touched. 3. Touch START pad. NOTE: Your oven can be programmed for 99 minutes 90 seconds.
KOR-1A0A/1A0ASLOS(¿ )-Desuk02.4.153:25PM˘ ` 11 KITCHEN TIMER MODE Timer operates as a minute timer, can be set to delay cooking and used as a hold setting after cooking.However delay cooking can not be programmed for defrost. Timer operates without microwave energy. HOW TO USE AS A MINUTE TIMER KITCHEN TIMER 1. Touch KITCHEN TIMER pad. The KITCHEN TIMER indicator lights and “ : 0” is displayed. 2. Press the amount of time you want to count down.
KOR-1A0A/1A0ASLOS(¿ )-Desuk02.4.153:25PM˘ ` 12 SPEEDY COOK SPEEDY COOK allows you to reheat for 30 seconds at 100% (full power) by simply touching the SPEEDY COOK pad. By repeatedly touching the SPEEDY COOK pad, you can also extend reheating time to 5 minutes by 30 second increments. SPEEDY COOK 1. Touch SPEEDY COOK pad. When you touch SPEEDY COOK, ":30" is displayed. After 1.5 seconds, the oven starts reheating.
KOR-1A0A/1A0ASLOS(¿ )-Desuk02.4.153:25PM˘ ` 13 ONE TOUCH COOKING (CONTINUED) BEVERAGE 1. Pour beverage in microwave mug. Place it on the turntable. Do not cover. Stir before serving. 2. Touch BEVERAGE pad once for 1 cup, twice for 2 cups or three times for 3 cups. When you touch BEVERAGE pad once, "1" is displayed. After 1.5 seconds, the display changes into cooking time of quantity and the oven starts cooking. * BEVERAGE * (200ml/cup) • 1 cup(mug) : Touch BEVERAGE once.
KOR-1A0A/1A0ASLOS(¿ )-Desuk02.4.153:25PM˘ ` 14 LESS, MORE To alter one touch cooking or cooking time whilst oven is in operation, use LESS or MORE.(except for defrosting) Press LESS/MORE to decrease/increase the one touch cooking time in multiples of 10 seconds. The overall one touch cooking time can be increased to a maximum of 99 minutes 50 seconds. Press LESS/MORE to decrease/increase the cooking time in multiples of 1 minute. The overall cooking time can be increased to a maximum of 99 minutes.
KOR-1A0A/1A0ASLOS(¿ )-Desuk02.4.153:25PM˘ UTENSIL TEST ` 15 Dishes that do not absorb microwave energy are best for microwave cooking. Lock on the label to verify that particular cups, glasses, plates are indeed suitable, especially paper goods. If you are not sure, try this utensil test to check. • Put the empty utensil in the microwave oven. • Put one cup of water in a glass measure next to the empty utensil. • Heat on HI for 1 minute.
KOR-1A0A/1A0ASLOS(¿ )-Desuk02.4.153:25PM˘ ` 16 CARE OF YOUR MICROWAVE OVEN 1 2 Turn the oven off before cleaning. 3 The outside oven surface should be cleaned with soap and water, rinsed and dried with a soft cloth. To prevent damage to the operating parts inside the oven, water should not be allowed to seep into the ventilation openings. 4 If the Control Panel becomes wet, clean with a soft, dry cloth. Do not use harsh detergents or abrasives on Control Panel.
KOR-1A0A/1A0ASLOS(¿ )-Desuk02.4.153:25PM˘ ` 17 USE YOUR MICROWAVE OVEN SAFELY GENERAL USE Do not attempt to defeat or tamper with safety interlocks. Do not place any object between the oven front frame and the door or allow residue to build up on sealing surfaces. Wipe with a mild detergent, rinse and dry. Never use abrasive powders or pads. Do not subject the oven door strain or weight such as a child hanging on an open door.
KOR-1A0A/1A0ASLOS(¿ )-Desuk02.4.153:25PM˘ ` 18 BEFORE YOU CALL FOR SERVICE Refer to following checklist, you may prevent an unnecessary service call. * The oven doesn't work; 1. Check that the power cord is securely plugged in. 2. Check that the door is firmly closed. 3. Check that the cooking time is set. 4. Check for a blown circuit fuse or tripped main circuit breaker in your house. * Sparking in the cavity; 1. Check utensils. Metal containers or dishes with metal trim should not be used. 2.
KOR-1A0A/1A0ASLOS(¿ )-Desuk02.4.153:25PM˘ ` 19 DAEWOO ELECTRONICS SALES UK LIMITED YOUR PRODUCT GUARANTEE Dear Customer, Thank you for buying this Daewoo product. In the unlikely event of a failure all repair work will be carried out by your retailer or Daewoo approved service centre, for a period of 12 months from date of sale. Daewoo Electronics Sales UK Ltd., will provide the following services in order to expedite this guarantee.