Service Manual XGA COLOR MONITOR Model : 531X Warning The data contained within this manual may not reflect your configuration. Please verify this information matches your model before making repairs. For Daewoo technical support call 1-800-245-9870. DAEWOO ELECTRONICS CO., LTD. http : //svc.dwe.co.
CONTENTS SAFETY PRECAUTIONS 1 GENERAL SAFETY INFORMATION 2 SERVICING PRECAUTIONS 3 TECHNICAL INFORMATION 6 GENERAL INFORMATION 7 PIN CONNECTOR 8 CAUTIONS FOR ADJUSTMENT AND REPAIR 8 OPERATION AND ADJUSTMENT 9 ALIGNMENT PROCEDURE 12 TROUBLESHOOTING HINTS 15 BLOCK DIAGRAM 29 PCB LAYOUT 30 SCHEMATIC DIAGRAM 33 EXPLODED VIEW DIAGRAM 37 INFORMATION OF PART DESCRIPTION 38 ELECTRICAL PARTS LIST 39
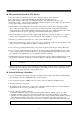
SAFETY PRECAUTIONS CAUTION: No modifications of any circuits should be attempted. Service work should be performed only after you are thoroughly familiar with all of the following safety checks and servicing guidelines. ◆ Safety Check Care should be taken while servicing this analog color display because of the high voltages used in the deflection circuits. These voltages are exposed in such areas as the associated flyback and yoke circuits.
GENERAL SAFETY INFORMATION ◆ Terms in the manual CAUTION Statements identify conditions or practices that could result in damage to the equipment or other property. WARNING Statements identify conditions or practices that could result in personal injury or loss of life. ◆ Terms as marked on equipment CAUTION Statements indicate a personal injury hazard not immediately accessible as one reads the marking or a hazard which is properly included on the equipment itself.
SERVICING PRECAUTIONS CAUTION: Before servicing instruments covered by this service manual, its supplements, and addendum, please read and follow the SAFETY PRECAUTIONS of this manual. NOTE: If unforeseen circumstances create conflict between the following servicing precautions and any of the safety precautions on page 1 of this manual, always follow the safety precautions. Remember: Safety First. ◆ General Servicing Precautions 1. Always unplug the AC power cord from the AC power source before: a.
◆ Electrostatically Sensitive (ES) Devices Some semiconductor (solid state) devices can be damaged easily by static electricity. Such components are commonly called Electrostatically Sensitive (ES) Devices. The typical examples of ES devices are integrated circuits, some field-effect transistors, and semiconductor “chip” components. The following techniques should be used to help reduce the incidence of component damage caused by static electricity. 1.
FIGURE 1. USE SOLDERING IRON TO PRY LEADS ◆ IC Removal/Replacement Some utilized chassis circuit boards have slotted (oblong) holes through which the IC leads are inserted and then bent flat against the circuit foil. When holes are slotted, the following technique should be used to remove and replace the IC. When working with boards using the familiar round hole, use the standard technique as outlined in paragraphs 5 on the page under the title of general soldering guidelines. ◆ Removal 1.
◆ Power IC, Transistor or Devices Removal/Replacement 1. Heat and remove all solders from the device leads. 2. Remove the heatsink mounting screw (if applicable). 3. Carefully remove the device from the circuit board. 4. Insert new device in circuit board. 5. Solder each device lead and then clip off excess lead. 6. Replace heatsink. ◆ Diode Removal/Replacement 1. Remove defective diode by clipping its leads as close as possible to diode body. 2.
GENERAL INFORMATION This color monitor automatically scans all horizontal frequencies from 30KHz to 54KHz, and all vertical frequencies from 50Hz to 160Hz. This color monitor supports IBM PC, PC/XT, PC/AT, personal System/2 (PS/2), Apple Macintosh, and compatible users crisp text and vivid color graphics display when using the following graphics adapters : (VGA, 8514/A, Super VGA, VESA and XGA and Apple Macintosh Video Card).
PIN CONNECTOR Pin 1 2 3 4 5 6 7 8 9 10 11 12 13 14 15 Signal 1 Red Green Blue GND GND GND - Red GND - Green GND - Blue +5Vdc GND - H.Sync GND - V.Sync Bi-directional Data (SDA) Horizontal Sync Vertical Sync (VCLK) Data Clock (SCL) 6 10 15 Arrangement of 15-pin D-sub connector CAUTIONS FOR ADJUSTMENT AND REPAIR • Degaussing is always required when adjusting purity or convergence. • The white balance adjustment has been done by a color analyzer in factroy.
OPERATION AND ADJUSTMENT Control Panel • • Move cursor to the right window on the OSD window. Increase the value of any selected function. • • Move cursor to the left window on the OSD window. Decrease the value of any selected function. • Launch OSD(On-Screen Display) MENU window. • • Move cursor to the high window on the OSD window. Increase the value of V.size or V.center. • • Move cursor to the low window on the OSD window. Decrease the value of V.size or V.center.
Key Process MENU MENU MENU MENU OSD OFF • When you choose the icon on the OSD window, you can exit the OSD screen.
OSD Functions ICON CONTROL FUNCTIONS PINCUSHION Adjust the left and right margins for more convex or more concave margins. TRAPEZOID Adjust the trapezoid of the screen by moving the lines inward or outward. PARALLELOGRAM Adjust the parallelogram when the screen is leaning left or right. PIN BALANCE Adjust the side balance when the sides of the screen are bowed towards left or right. T. PIN CORNER Adjust the pin corner top when the top sides of the screen are bowed. B.
ICON CONTROL FUNCTIONS H. MOIRE Adjust the horizontal picture moire cancellation. V. MOIRE Adjust the vertical picture moire cancellation. LANGUAGE Select language for OSD (5 languages). RECALL Reset the screen to the Factory Preset Display Settings.
ALIGNMENT PROCEDURE ◆ Standard Adjustment Conditions 1. Power source voltage : 100-240Vac 50/60Hz 2. Aging : Take at least 20 minutes warm-up time. 3. Signals Video : Analog 0.7Vpp 75Ω terminal positive polarity Synchronizing : TTL level Negative/Positive Separate Deflection frequency Horizontal Frequency : 30KHz - 54KHz Vertical Frequency : 50Hz - 160Hz ◆ Pre-Adjustment 1. B+ Adjustment Adjust 50Vdc ± 0.1Vdc between D102 cathode and ground at 31.5KHz mode, varying VR001. Adjust 59Vdc ± 0.
6. Static Convergence Adjustment (a) Apply a magenta cross hatch pattern on display. (b) Adjust the focus from the best over all focus on the display. Also adjust the brightness to the desired condition. (c) Vertical red and blue lines are converged by varying the angle between the two tabs of the 4-pole magnets. (d) Horizontal red and blue lines are converged by varying the tabs together, keeping the angle between them constant. (e) Apply a yellow cross hatch pattern on display.
TROUBLESHOOTING HINTS 1.
2. No Raster No Raster Is CRT heater red-hot? Is Heater Voltage (CRT PWB) about 6V? No Yes Trouble in CRT No Yes Trouble in power supply circuit Turn the Brightness & Contrast control to set Maximum Refer to trouble in power supply unit.
3. A Missing Color One color is missing Is input signal normal? No Check video signal cable or video card. No Trouble in IC801 or its ambient circuit 0.
4. Abnormal OSD Font Abnormal OSD Font Is menu key selected? Is OSD Font exist? * If menu key selected. Is Heater Voltage about 6V? No Yes Yes One color is missing Troubie in IC803 or its ambient circuit Yes Is the output of IC204 (pin 13, 14, 15) normal? No Trouble in IC204 and its ambient circuit Yes Refer to Missing Color 18 No Trouble in Heater voltage line. Refer to trouble in P.S.
5. Horizontal Output Circuit MODE B+ Voltage VGA 60Vdc Trouble in Horizontal output circuit (No Raster Super VGA 72Vdc 54KHz 110Vdc Is the B+line voltage over 50V? No Trouble in 50V Yes 3V 0V Is the H-out waveform of IC501 normal? No Trouble in IC501 Yes 50V 0V Is the Collector wave form of Q504 normal? No Trouble in Q505 Yes 70V 0V Is the Drain waveform of Q507 normal? Yes Trouble in Q505 and its ambient circuit.
6. Unstable Picture 6-1. Horizontal Unstable picture Is the pulse of pin 26 of the IC501 correct? Yes Trouble in IC501 or its ambient circuit Yes Check IC501 and its ambient circuit Yes Check IC201 and its ambient circuit No Is the pulse of pin 28 of the IC201 correct? 5Vpp No Is the input H.
6-2. Vertical Unstable picture Is the 12V,-12Vdc line voltage is correct? No Refer to P. S. U Yes 40V -10V 50Vp-p Is the pulse of pin 6 of the IC401 correct? Yes Trouble in vertical D.
7.
8. Convergence Poor convergence Is convergence on the center area bad? Yes Adjust static convergence Refer to Adjustment procedure of convergence No Is convergence on the fringe area bad? Yes Adjust D.
9. Abnormal Picture * At first, adjust controls in the OSD Menu 9-1. Horizontal Size Abnormal H.Size Is the DC level of the base of Q517 changeable? No Is the DC level of IC501 pin 11 changeable ? Check IC501 pin 11 Yes Yes =1100Vp-p Is the collector pulse of Q505 correct? Yes 80-310Vpp No Is the cathode waveform of D509 correct? Yes No Trouble in H.OSC/ Deflection Circuit Trouble in Horizontal output circuit Check the B+ and anode voltage of CRT.
9-2. Vertical Size Abnormal V.Size Is changeable the DC voltage of IC401 pin 1? No Is the 3.5Vdc of pin 21of the IC501? Yes Trouble V.OSC/ Deflection Circuit No Check the IC501 and its ambient circuit Refer to V.
10. Side-Pincushion Circuit Pincusion distortion is excessive or barrel Select the side-pincushion icon in OSD menu, and adjust acceptable position. Yes O.
11. Power Supply Unit (P.S.U) Trouble in P.S.U Is power switch on? No Switch on Yes Is fuse F001 O.K? No Check the power cord outlet and diode D001,D002,D003,D004 Yes Is the IC001 O.
A Is voltage of C109 13Vdc? No Trouble in D106 or horizontal part No Trouble in D104 or vertical part Yes Is voltage of C108 -12Vdc? Yes Is voltage of C105 8Vdc? No Yes P.S.U O.
29 SMPS Transformer AC INPUT D -SUB RGB H/V IIC Control CRT Driver TDA9536 (SGS Thompson) H/V Moire Cancellation H/V OSC Processor TDA4856 (Philips) MCU NT68P62 (Novatek) Geometrical Compensation IIC Control PWM D/A OSD NT6828 (Novatek) TDA9210 (SGS Thompson) Video Pre-amp (65MHz) Dynamic Focus H/V B+ PWM EUT V - Driver KA2142B (Samsung) H/Linearity Coil TRL-531X B+ Booster H-Driver Drive Transformer FBT H/V Converter (Lienchang) H-Size TR : BD677A (Fairchild) CRT : Orion Mini-Neck 15"
PCB LAYOUT Main PCB Component Side 30
Main PCB Solder Side 31
CRT PCB Component Side CRT PCB Solder Side 32
SCHEMATIC DIAGRAM Power & Connection Section 33
Control & Vert.
Horizontal Section 35
Video Section 36
EXPLODED VIEW DIAGRAM 37
INFORMATION OF PART DESCRIPTION Important Safety Notice Components identified with the International Symbol have special characteristics important for safety. When replacing any components, use only manufacturer’s specified parts. Abbreviation of Description RESISTOR Description Allowance F ± 1% J ± 5% K ± 10% M ± 20% G ± 2% Example: Fig & Index Part No Description Resistors RD-4Z820J Carbon: 82J RD-4Z201J Carbon1/4W-200J R101 R102 CAPACITOR Description C D F J K P Z Allowance ± 0.25pF ± 0.
ELECTRICAL PARTS LIST The components identified by mark have special characteristics important for safety and x-ray radiation. These should be replaced only with the types specified in the parts list. LOC PART-CODE 00001 9979800540 PART-NAME PCB MAIN PART-DESC LOC PART-CODE PART-NAME T=1.6*246*247 (531X) C210 CCXB1H181K C CERA PART-DESC 50V B 180PF K (TAPPING) 00002 9979800548 PCB CRT T=1.
LOC PART-CODE PART-NAME PART-DESC LOC PART-CODE CA202 9970770028 PART-NAME 50V RSS 1MF (5X11) TP C538 CEXF1H109V C ELECTRO 50V RSS 1MF (5X11) TP C541 CMXM2A103J C MYLAR 100V 0.01MF J (TP) ! CT001 9979615027 C542 CMXM2A152J C MYLAR 100V 1500PF J (TP) CT801 9979300012 SOCKET CRT ISMW19SD C543 CEXD1H339W C ELECTRO 50V RHD 3.3MF(16*25) CW2019979220102 CONN WAFER SMW200-07 (ST) C550 CMXM2A224J C MYLAR 100V 0.
LOC PART-CODE D612 DRGP10K--- PART-NAME DIODE PART-DESC RGP10K LOC PART-CODE PART-NAME ! Q001 TSPP04N60S FET PART-DESC SPP04N60S5 D613 DRGP10K--- DIODE RGP10K Q002 TZTC3198Y- TR KTC3198Y-(1815Y) (AUTO) D801 DZN4148--- DIODE 1N4148 AUTO 52MM Q101 TZTA1270Y- TR KTA1270Y(AUTO)(562Y) D802 DZN4148--- DIODE 1N4148 AUTO 52MM Q102 TZTC3198Y- TR KTC3198Y-(1815Y) (AUTO) D803 DBAV20---- DIODE BAV20 Q105 TZTC3198Y- TR KTC3198Y-(1815Y) (AUTO) D804 DBAV20---- DIODE BAV20 Q204 TZSR1009
LOC PART-CODE PART-NAME PART-DESC LOC PART-CODE PART-NAME PART-DESC R113 RD-AZ562J- R CARBON FILM 1/6 5.6K OHM J R410 RD-AZ682J- R CARBON FILM 1/6 6.8K OHM J R202 RD-AZ101J- R CARBON FILM 1/6 100 OHM J R411 RD-AZ682J- R CARBON FILM 1/6 6.8K OHM J R203 RD-AZ101J- R CARBON FILM 1/6 100 OHM J R412 RD-AZ562J- R CARBON FILM 1/6 5.6K OHM J R204 RD-AZ202J- R CARBON FILM 1/6 2K OHM J R413 RD-AZ682J- R CARBON FILM 1/6 6.
LOC PART-CODE PART-NAME PART-DESC LOC PART-CODE PART-NAME PART-DESC R545 RD-AZ471J- R CARBON FILM 1/6 470 OHM J R802 RD-AZ330J- R CARBON FILM 1/6 33 OHM J R547 RS01Z688J- R M-OXIDE FILM 1W 0.
DAEWOO ELECTRONICS CO., LTD 686, AHYEON-DONG MAPO-GU SEOUL, KOREA C.P.O. BOX 8003 SEOUL, KOREA TELEX : DWELEC K28177-8 CABLE : "DAEWOOELEC" E-mail : G7F00E@web.dwe.co.