GB LCD TELEVISION INSTRUCTION MANUAL DLT-19L1T DLT-19L2T DLT-19W4T DLT-20J1T DLT-20J3T DLT-20J9T DLT-22L1T DLT-22L2T DLT-22W4T Helpline Number: 0870 100 2525
Caution CAUTION RISK OF ELECTRIC SHOCK DO NOT OPEN CAUTION : TO REDUCE THE RISK OF ELECTRIC SHOCK, DO NOT REMOVE COVER (OR BACK). NO USER-SERVICEABLE PARTS INSIDE. REFER SERVICING TO QUALIFIED SERVICE PERSONNEL. The lightning flash with arrowhead symbol, within an equilateral triangle, is intended to alert the user to the presence of uninsulated “dangerous voltage” within the product’s enclosure that may be of sufficient magnitude to constitute the risk of an electric shock.
Important Safeguards Please read the following safeguards for your TV and retain for future reference. Always follow all warnings and instructions marked on the television. 1. Read, Retain and Follow All Instructions Read all safety and operating instructions before operating the TV. Retain them safely for future reference. Follow all operations and instructions accordingly. 2. Heed Warnings Adhere to all warnings on the appliance and in the operating instructions. 3.
Important Safeguards 12. Power Lines An outside antenna system should not be located in the vicinity of overhead power lines or other electric light or power circuits, or where it can fall into such power lines or circuits. When installing an outside antenna system, extreme care should be taken from touching such power lines or circuits as contact with them might be fatal. 13. Overloading Do not overload wall outlets and extension leads as this can result in a risk of fire or electric shock. 14.
Warning This section must be read carefully and followed by the user prior to the operation of the product. The manual states important instructions for the user’s own safety, and the proper operation of the product. WARNING Ignoring or disregarding the contents of this section and improper operation of the product may result in the person’s death or serious injury. In case of an accident, please unplug the unit from the outlet immediately.
Warning This section must be read carefully and followed by the user prior to the operation of the product. The manual states important instructions for the user’s own safety, and the proper operation of the product. CAUTION Ignoring or disregarding the contents of this section and improper operation of the product may result in the person’s death or serious injury. Please keep the user’s manual in a safe place for future reference. Do not view the TV too closely since it may cause damage to your eyes.
Table of Contents Installation and Maintenance Supplied Accessories . . . . . . . . Install Stand . . . . . . . . . . . . . Parts of the Remote Control . . . Name of Each Part . . . . . . . . . Preparation . . . . . . . . . . . . . . Antenna Connection . . . . . . . . External Equipment Connection. PC Connection . . . . . . . . . . . . Multimedia Connection Notes . . Digital Amp. Connection . . . . . . . . . . . . . . . . . . . . . . . . . . . . . . . . . . . . . . . . . . . . . . . . . . . . . . . .
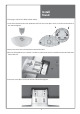
Supplied Accessories Make sure that the following accessories are provided with the product. GE /PA PR OK GE /PA PR T /EXI EL NC CA BC SU E OD Remote control Instruction manual Cover Stand Base * Cover Stand Base ** Batteries 2 x 1,5V AAA Frame Stand * Frame Stand ** Frame Stand Cover ** *) - Screws, Cover Stand Base and Frame Stand are only for DLT-19W4T and DLT-22W4T. For installing stand, see page 9.
Install Stand ※ This page is only for DLT-19W4T and DLT-22W4T. 1. Insert Frame Stand into the Cover Stand Base and insert two screws (Ø3 x 12mm ) in the hole at the bottom of the stand and tighten. * Please insert two screws in the hole at the bottom of the stand. 2. Place the TV faced down on a soft cloth or cushion on a table and insert the assemble stand into the metal at the bottom of the TV. 3. Insert two screws (Ø4 x 14 mm) into the holes indicated and tighten.
Install Stand ※ This page is only for DLT-19L1T/L2T and DLT-22L1T/L2T. 1. Insert Frame Stand Cover into the Cover Stand Base and insert Frame Stand into Cover Stand Base - insert two screws (Ø4 x 14mm ) in the hole at the bottom of the stand and tighten. 2. Place the TV faced down on a soft cloth or cushion on a table and insert the assemble stand into the metal at the bottom of the TV. 3. Insert two screws (Ø4 x 14 mm) into the holes indicated and tighten.
Parts of the Remote Control 1. MUTE : Press this button, and the sound goes off. Press again, and the sound returns. 2. POWER : TV on/off button in STANDBY mode. 3. DVB/Analogue : Each time you press this button, the TV will toggle between DVB & RF Analogue. Also you can come back to the current TV mode from any External mode. 4. AV : Each time you press this button, the TV will cycle through: TV AV1 AV2 Component HDMI PC TV PR/PAGE SELECT 5. SLEEP : Sleep Timer setting.
Parts of the Remote Control 16. LANGUAGE (digital mode only): Moves to multi audio language selection. See page 32. 17. FAVOURITE (digital mode only): Moves to Favourites channel. See page 30. 18. PREV PR : Previous PROGRAMME button in TV mode. 19. MENU : Menu display button. 20. ASPECT : Selects the screen aspect ratio. See page 38. PR/PAGE 21. NORMAL : The NORMAL button changes picture mode as follows: Normal Movie Favourite Dynamic Normal 22.
Name of Each Part Front LED Indicator LED Indicator DLT-19W4T; DLT-22W4T DLT-20J1T; DLT-20J9T Remote Sensor Remote Sensor AV PR Up/Down Volume Up/Down Volume Up/Down PR PR Up/Down AV Menu Power On/Off Power On/Off Remote Sensor LED Indicator DLT-19L1T; DLT-22L1T; DLT-19L2T; DLT-22L2T LED Indicator Remote Sensor DLT-20J3T 13
Name of Each Part Rear DLT-20J1T / DLT-20J3T / DLT-20J9T COMMON INTERFACE DLT-19W4T / DLT-22W4T / DLT-19L1T / DLT-22L1T / DLT-19L2T / DLT-22L2T ANT (7) (1) (1) Component (2) SCART sockets (3) HDMI inputs (4) Headphone jack (5) Audio Input (L+R) Socket (6) Video Input Socket (7) Digital Audio out coaxial (8) PC Input (9) PC Audio (10) CI socket (11) Aerial jack (8) (9) (2) (3) (10) (4) (11) (5) (6) 14
Preparation Inserting Batteries into the Remote Control Unit To load the batteries, turn the remote control handset over and open the battery compartment. Insert the batteries (Two 1.5V, type R03 or AAA). Make sure that the polarity matches with the (+) and (-) marks inside of the battery compartment. Note: To avoid damage from possible battery leakage, remove the batteries if you do not plan to use the remote control handset for an extended period of time. Mains Connection 1.
Antenna Connection Aerial Connection CONNECTING THE TV DIRECTLY TO AN AERIAL Connect an aerial cable (75 ohm coaxial cable) to the Aerial terminal on the back of the TV set.
Antenna Connection Aerial connection with VCR/DVD Connect your ① aerial cable to the RF (aerial) IN terminal on the VCR/DVD. Connect the RF OUT terminal of the VCR/DVD to the Aerial terminal on the TV set with an ② RF cable. Note: If you wish to use only the Aerial (RF) connection, then you should store the VCR/DVD channel on programme number “ZERO” using the “Manual tuning” function (See page 26). If your VCR/DVD has this facility.
External Equipment Connection External Equipment Connection Component cable Component cable Scart cable Set Top Box VCR/DVD/Camcorder/ Video Game HDMI cable AV cable When you connect with a component video cable, please check the colour of the cable between the DVD and TV set. Note: However this will only produce Video output. There1. The meaning of the component marking. fore you must ensure separate Audio cables are con- ‘Y’ is a symbol for ‘Luminance’ nected to the PC AUDIO input.
PC Connection When connecting with PC(D-Sub) cable. 1. First adjust resolution of the PC (refer to table in page 20). Using the PC’s original monitor. 2. Then disconnect your monitor from your PC and connect between PC and TV set using the D-sub and Audio cable as shown in the picture below. 3. Turn on the PC and TV set. 4. Select PC mode by pressing the “AV” button on the remote control or ” ” button of the TV set. PC Back of the tv set When connecting with a HDMI cable. 1.
Multimedia Connection Notes Common notes - If you turn on the TV when the TV is cold, small„flickering” phenomenon can happen. But this is normal and is no malfunction of LCD TV. - Please do not touch or press the LCD screen with your finger or an object like a pen for a long time. It may cause some temporary distortion effects on the screen. - Red, Green or Blue spots may appear on the screen. But monitor performance is not effected.
Digital Amp. Connection If you connect the coaxial output to a digital AMP, you can listen to surround sound and the output will be as shown in the table below.
Method To Use Basic Menu Basic Menu - The basic menu appears on the screen if you press the “MENU” button of the remote control. - There are 6 items Picture, Screen, Sound, Install, Function and DVB in the basic menu. - Each item has sub-items under it. If the desired item is selected, the relevant sub-items are displayed upward. 1. Press the “MENU” button. • The main menu appears if you press the “MENU” button.
To Watch TV - If the AV1 terminal on the TV set is connected with an external device, which is switched on, the TV will come ON in AV1 mode. Otherwise, TV will come ON in the last mode used. 1. Turning on the TV. a) If the stand-by indicator is red (blue in DLT-19/ 22L1/L2), then the TV set is in stand-by mode. You can switch on using the remote control “POWER” button (press and hold 0,5 second), the NUMBER 0…9 buttons, or PR UP/DOWN buttons. The local PR UP/DOWN buttons on the TV can also be used.
To Watch TV which also allows quick restart by remote control (see above: Turning on the TV). • Pressing the TV set local MAIN POWER button, you can power off the TV set. In this case, you must use the same local “POWER” button to switch on again (see above: Turning on the TV). 5. Checking TV operation status. ) button, the status of • Pressing the “RECALL” ( channel or broadcasting currently being watched or entry status of video component is displayed on the screen.
Setting Up TV Analogue Stations Auto Tuning - All analogue stations that can be received are stored by this method. It is recommended that you use Auto tuning during installation of this set. NB: Ensure set is in Analogue TV mode. PR/PAGE 1. Press the “MENU” button to select the Install menu. • Move the selection bar to the Install menu with “ / ” buttons.
Setting Up TV Analogue Stations Manual tuning NB: First ensure the TV is in analogue mode. 1. Press the Number buttons (0…9) or the “ PR ” button to select a program number you want. PR/PAGE SELECT OK PR/PAGE 2. Locate the selection bar on the Manual tuning at the Install menu. • Press the “MENU” button to select the Install menu. • Move the selection bar to the Install menu with “ / ” buttons. • Place the selection bar on Manual Tuning and press the “ ” button.
Setting Up TV Analogue Stations Setup The Setup menu shows you information as follows: - Channel, System, Frequency, Station name, Program number and Store to PR number. NB: First ensure the TV is in analogue mode. 1. Searching for channels in the Setup menu. • Press the “ PR “ buttons to select a program number you want. • Move to Setup in the Install menu. • Search real channel information (Channel eg.eg. channel 38, System eg. PAL/SECAM and Program eg. 2) with “ / “ buttons.
Setting Up TV Analogue Stations Edit NB: First ensure the TV is set to analogue TV mode. The Edit menu shows you information as follows: - Program position assignment: Program number and Station name, Real channel number. - Skip information: Yes or No. 1. Deleting the program positions. • Move to Edit in the Install menu. • Move the selection bar to the program number to delete with the “ / ” buttons. • Press the “Delete” (RED) button.
How To Install and Use DVB (Digital Video Broadcasts) The very first time that you switch to DVB mode, the Country UNITED KINGDOM will appear on the screen. Press the OK button to commence automatic scanning of the Digital TV Channels. After auto scanning has completed the TV and radio channels are separated. To select radio channels press the FAVOURITE button on the remote. DVB Menu - Press the “MENU” button to display the main menu. Then, select DVB menu.
How To Install and Use DVB (Digital Video Broadcasts) Favourite List You can select the desired item by using the “ / ” buttons and press the “OK” button to enter selected one. Favourite lists CREATE Select Create item and press “OK” button to enter. The menu will be displayed on the screen. Once you enter the Create a Favourite list menu,a new channel list will be created, you can create a maximum of 4 favourites list.
How To Install and Use DVB (Digital Video Broadcasts) MODIFY You can modify the favourite list that you have created. The list named “TV” and “RADIO” are the default list and all the favourite lists are made from those. Select a favourite list and press the “OK” button to modify the list as you do in the create a favourite list menu.
How To Install and Use DVB (Digital Video Broadcasts) - New Channels shows the channels that you add in the channel list of new channels now being transmitted in your area. The type icon of the program is displayed against the channel name. Note : • The DVB system requires a good signal to provide the best picture. For the DVB system, interference can disrupt the flow of data causing the picture to appear to be made up of large blocks or to freeze intermittently.
How To Install and Use DVB (Digital Video Broadcasts) SYSTEM PARAMETERS Using the “ / ” buttons to select the system parameters item and press “OK” button to enter each item. System Parameters System Information Access Factory Settings Access Software Upgrade Access Select - System Information You can see the system information but you cannot modify anything in this menu. Press the “OK” or “MENU” button to return to System Parameters menu.
How To Install and Use DVB (Digital Video Broadcasts) CONDITIONAL ACCESS - This allows you to upgrade your TV set with additional features including access to extra channels (if available) using a conditional access module (eg. TopUp TV). - If there is no CI Card in the slot,“No CI or CA device present” appears on the screen. - The Common Interface menu allows you to access a pay-per-view(PPV) service on your TV set. This feature operates once you have obtained a CI module and a viewing card.
How To Install and Use DVB (Digital Video Broadcasts) EPG (Electronic Programme Guide) You can check program schedules by pressing the “GUIDE” button on the remote control. When you enter EPG the current program is highlighted and you can navigate the channels by pressing the channel up/down “ / ” buttons to change channels and view the other programmes on the selected channel. Press the “ / ” navigation buttons to scroll through and show programme content.
AV Selection Setting screen modes Adjustment of Screen Size in TV and AV mode - Pressing the “AV” button on the remote control the screen changes as follows: TV AV1 AV2 Component HDMI PC TV - When you select HDMI or PC mode, check the following. 1. For optimum picture quality, use to the parameters shown below for your computer or set top box outputs as shown below. Using other formats or refresh rates may result in reduced picture quality.
Screen Adjustment When adjusting the screen to taste - You can enjoy various screens by adjusting Brightness, Contrast, Colour, Sharpness, etc. to the user’s taste. PR/PAGE 1. Select “Picture” by pressing the “MENU” button. • The menu screen appears as follows.
Screen Adjustment Adjustment of Screen Size in TV and AV mode Default ZOOM format will be selected.
Screen Adjustment PR/PAGE 4. Adjustment of the Phase. • Move to Phase in the Screen menu. • Press the ” / ” buttons to adjust the phase to get a clear picture. Picture SELECT OK Screen PC Auto Adjustment Start H Position PR/PAGE Sound Install V Position Phase Frequency Function DVB Select Access Exit PR/PAGE 5. Adjustment of the Frequency. • Move to Frequency in the Screen menu. • Press the ” / ” buttons to adjust the frequency to fit the size of the screen.
Sound Adjustment When adjusting sound to taste - The user can enjoy various sounds by adjusting AVC, Effect, Balance and Equalizer. 1. Select AVC Mode. • Select AVC (Auto Volume Correction) On/Off by pressing ” / ” button. • Each sound source has its own signal conditions and its not so easy to adjust the volume level every time. However if you select AVC On, when the modulation signal is high (as in the adverts) then the sound output will be lowered automatically.
Sound Adjustment Multi-Sound and Stereo 1. Mono Sound Selection. • During Stereo sound reception if the stereo is weak, you can switch to MONO by pressing the “ ” button. Then the colour of “MONO” character will change to Red. In Mono reception the depth of sound is improved. • To switch back to stereo, press the “ ” button again. PR 19 ––––– Mono Full Screen PR 19 ––––– Mono Full Screen Note : •“ PR/PAGE ” only works in analogue TV mode. 2. Adjustment of Bilingual sound.
Analogue Menu Language Selection Analogue Menu Language Selection 1. Press the “MENU” button and select “Function”. PR/PAGE Picture SELECT OK Screen PR/PAGE Language English Child Lock Off Sound Install Function DVB Select Change Exit 2. Select “Language” by pressing “ / ” button. 3. Select your desired language by pressing the “ / ” button. Then it will set automatically. The language changes as follows.
Other Functions Child Lock • Move to Child Lock in the Function menu. • Select Child Lock to On using the “ ” button PR/PAGE Picture SELECT OK Screen PR/PAGE Note : • If the stand-by indicator is flashing red, and green then the TV set is in child lock mode. It is necessary to use the remote control POWER button, NUMBER 0…9 buttons, or PR UP/DOWN buttons to bring the set out of stand-by mode. The local PR UP/DOWN buttons on the side of the TV will not function.
Sudoku Game (option) Sudoku Game - This TV set allows you to enjoy playing the Sudoku game, it offers 3 levels of difficulties, enables you to save your grid and resume it later. ENTERING / EXITING GAME MODE Pressing the “GAME” key on your remote handset will switch the TV Set into game mode. If you press the same key in game mode, you will exit game mode without saving your grid.
Sudoku Game (option) PLAYING Use direction keys on the remote handset to move the cursor to desired position. Press digit keys to enter a number. It is always possible to overwrite a number previously entered. Trials and errors: - To erase a cell press “0”. - You might want to draw some numbers in a different colour (trial numbers) because you need to fill up more cells to confirm that your option is valid. This can be done by typing twice the same digit.
Teletext Teletext SWITCHING TELETEXT ON/OFF Press the “TEXT” button ( ). The index page or the page viewed last will appear. Press the “TEXT” button again to return to the TV mode. NOTE: Teletext works only in TV/AV mode. However digital broadcasts have digital text. To use digital text press the “TEXT” button when in DVB mode. COLOUR BUTTONS IN TOP (Tables Of Pages) NB. not used in the UK /FLOF (Full Level One Feature) TELETEXT A red, green, yellow and blue field is shown at the bottom of the screen.
Troubleshooting Symptoms and Solutions Please check the following list prior to calling Daewoo Electronics Customer Service Centre for assistance. Symptom Check items Neither picture nor sound - Check the contact of sockets is OK. - Check the TV main power is on. Picture is OK but no sound - Check the Volume control is not set to minimum or mute. Sound is OK, but no colour. - Check the colour control and adjust it properly. - Check the program is in colour and not in black & white.
Troubleshooting In PC mode Symptom Check items “NO SIGNAL” appears on the screen. - Ensure that the signal cable is firmly connected to PC and TV. - Check the resolution and frequency of your PC. Then, adjust them to optimum condition for LCD TV. - Refer to the table of PC mode input format (If registered resolution and frequency on the table not listed then no picture will be displayed.) Image is not clear. - Adjust the PHASE control. Image is not centred.
Specifications DLT-19W4T Model Screen Size DLT-19L1T/L2T 481.4mm (diagonal) DLT-20J1T/J3T/J9T DLT-22W4T 510.5mm (diagonal) Display Colour DLT-22L1T/L2T 558.7mm (diagonal) 16.7 M Aspect Ratio 16:10 4:3 16:10 Resolution 1440 x 900 (WXGA+) 640 x 480 (VGA) 1680 x 1050 (WSXGA+) Pixel Pitch 0.2835 x 0.2835 0.6375 x 0.6375 0.2835 x 0.2835 Contrast Ratio 1000:1 350:1 1000:1 Appearance (W x H x D) w/o stand 476.3 x 346 x 80 466.5 x 346 x 80 514 x 460 x 85 545.4 x 400 x 81 547 x 398.
DMP39