IMPORTANT SAFEGUARDS RISK OF ELECTRIC SHOCK DO NOT OPEN CAUTION: TO REDUCE THE RISK OF ELECTRIC SHOCK, DO NOT REMOVE COVER (OR BACK). NO USER-SERVICEABLE PARTS INSIDE. REFER SERVICING TO QUALIFIED SERVICE PERSONNEL. The exclamation point within an equilateral triangle is intended to alert the user to the presence of important operating and servicing instructions in the literature accompanying the appliance.
IMPORTANT SAFEGUARDS (CONTINUED) This set has been designed and manufactured to assure personal safety. Improper use can result in electric shock or fire hazard. The safeguards incorporated in this unit will protect you if you observe the following procedures for installation, use and servicing. This unit is fully transistorized and does not contain any parts that can be repaired by the user. 1 Read Instructions All the safety and operating instructions should be read before the unit is operated.
IMPORTANT SAFEGUARDS (CONTINUED) iii Downloaded From Disc-Player.com Daewoo Manuals IMPORTANT SAFEGUARDS by items placed upon or against them, paying particular attention to cords at plugs, convenience receptacles, and the point where they exit from the unit. 13 Lightning For added protection for this unit during a lightning storm, or when it is left unattended and unused for long periods of time, unplug it from the wall outlet and disconnect the antenna or cable system.
TABLE OF CONTENTS BEFORE USE Features ........................................................................................................................ 1 Warning or Notice for safety ....................................................................................... 2 Name for each part ...................................................................................................... 5 Buttons on the remote control ..............................................................................
FEATURES [SUPERB QUALITY OF SOUND] You can enjoy lively original sound and magnificent sound effects by the adopted AC-3 type, new surround sound developed by Dolby Research Institute. [CLEAR IMAGE] The clear image looks so real, you will mistake them as the real thing. When you connect the player to a wide screen (16:9), you will feel the sensation of the screen of a movie theater.
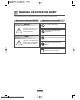
WARNING OR NOTICE FOR SAFETY You should follow the instructions to prevent any danger or material loss. [DESCRIPTION OF WARNING/NOTICE] [DESCRIPTION OF INDICATION] Warning this shows prohibition A person may die or get serious wound by the following matter. this shows disassembling prohibited Notice this shows contacting prohibited A person may get hurt or material loss may happen by the following matter. this shows things you must follow. this shows you must disconnect the plug from the outlet.
WARNING OR NOTICE FOR SAFETY_CONTINUED Do not plug many things in one outlet. * Cause for extraordinary generation of heat and fire. Do not bend excessively or put heavy material on the power cable which causes damage. * Cause for fire. Do not put a container with fluid on the product. * If the liquid gets in to the machine it will cause malfunction. Do not use water or thinner or organic cleaning agent for cleaning. * Cause for malfunction and electric shock. Use dry cloth for cleaning.
WARNING OR NOTICE FOR SAFETY_CONTINUED NOTICE Do not push in the plug when the outlet is loose. * Cause for electric shock or fire. Do not pull or push the tray with excessive force. * Cause for malfunction. Do not allow dust or alien substance on the surface of the disc. Do not move the product while playing a disc. * Cause for malfunction. Do not allow alien substance getting in the product. * Cause for malfunction. Do not put heavy object on the product. * Cause for malfunction.
NAME FOR EACH PART FRONT BEFORE USE 1 2 9 10 5 3 4 8 7 ! Stand-by button : Use when turning it on or off. @ Open/Close button : Use when opening and closing the tray. # Play button $ Pause button % Stop button ^ Skip FWD button : Use when going to the next music or chapter. & Skip REV button : Use when going back to the previous music or chapter. * Tray : Place various disc for playing.
NAME FOR EACH PART _CONTINUED VFD INDICATOR 1 8 2 3 4 5 6 ! Playback mode indicator @ Screen angle indicator # Disc type indicator $ PBC indicator of VCD Disc % Title, Track, Chapter, Time message indicator ^ Playback indicator & Track, Chapter indicator * Repeat playback indicator 6 Downloaded From Disc-Player.
NAME FOR EACH PART _CONTINUED BACK 2 3 4 5 ! Power cable : Only for 120V. @ S Video output jack : Connect to a TV with a S video input jack. # Audio output jack (L, R 2 for each) : Connect to audio input jack on a TV or audio component. $ Video output jack : Connect to video input jack on a TV. % Optical Digital Sound Output jack : Connect to an audio component with optical digital input jack. 7 Downloaded From Disc-Player.
NAME FOR EACH PART _CONTINUED ACCESSORIES Œ Remote Control ´ Batteries ¨ Video/Audio connection cable ˆ Product Warranty /User manual 8 Downloaded From Disc-Player.
BUTTONS ON THE REMOTE CONTROL 16 2 1 15 24 10 29 28 25 8 7 3 17 5 9 4 18 22 23 19 21 20 14 26 13 12 27 6 BASIC OPERATING BUTTONS ! Stand-by button @ Open/Close button # Play button $ Pause button % Stop button ^ Volume control button (Up, Down) & Fast FWD/STEP, Fast REV/STEP : Use to find the desired music or screen. Or STEP play on pause mode. * Skip FWD, Skip REV : Use to move to desired music or Chapter. ( Slow FWD, Slow REV : Use to play the DVD showing in slow-motion.
BUTTONS ON THE REMOTE CONTROL _CONTINUED DVD RELATED BUTTONS OTHER ADDITIONAL FUNCTION BUTTONS 2 AUDIO select button : Use to select spoken language. 3 Subtitle select button : Use to select subtitle language. 4 Angle select button : Use to change angle view of the screen. (When there is Angle Option on the disc) 5 Menu button : Use for the menu offered by the disc. (Use PBC button for VCD) 6 Title button : Use to play title.
PREPARATION BEFORE USE 1. INSTALL AND CONNECTION First connect TV and audio component on the DVD player. 1 Power connection : The product is for use on 120V only. 2 Audio connection : Red jack is right, white jack is left on the audio output jack. 3 TV connection : Connect the video output jack (yellow) on TV’s video input. If you have S-video input jack on the TV, connect DVD player’s S-video output jack to it. You’ll enjoy a better quality picture. 2. TURNING ON THE DVD PLAYER.
WHAT IS DVD? DVD is a disc that uses Dolby Digital(AC-3) newly developed by Dolby research center and image compressed in MPEG-II type for outstanding quality of sound and image which makes home environment available for movie theater quality image and sound. * DVD is a disc with image and sound recorded for 135 minute (max.). * It is very convenient to play the desired part because of the conversation type menu screen. Get the movie theater into your home.
TO PLAY A DVD 1. DVD PLAYING INSTRUCTION 1 Select “Video“ by pressing the TV/VIDEO button on the TV. *Some TV may show “outside input“ instead of “Video“. 2 Select “AUX“ or “CD“ on the function selection menu on the audio component. *May be different according to the audio component, refer to user manual of the audio component. 3 Press Open/Close button after pressing the Power button. Pressing the Power button makes the VFD Indicator show “-ON-“, and pressing the Open/Close button opens the disc tray.
TO PLAY A DVD _CONTINUED 2. TO CHANGE SPOKEN LANGUAGE This is possible only when there are several spoken languages available. Do you desire to change the language spoken during play? You can change the language easily and quickly using just the Audio button. (Disc with a menu, languages can be changed with the menu button) 1 Press the Audio button.
TO PLAY A DVD _CONTINUED 4. TO CHANGE THE ANGLE OF THE MOVIE 1 2 Check if the “Angle“ indication is showing on the screen. When the “Angle“ is showing, press the Angle button. As you press the button, angles of the shot will be changed to such as Angle 1Angle 2-Angle 3, as recorded on the disc. ANGLE 1 ANGLE 2 ANGLE 3 ANGLE N SS * On the part where angle change is available, some buttons may not work. *“Angle“ indication will disappear after showing for 6 seconds.
TO SEE THE MENU ON THE DISC * * * * There are various menus on the DVD disc. Menu shown on screen will be different for each disc. Select an item after you see the menu. Menu screen can be seen only when the menu is recorded on the disc. 1 Press the “Menu“ button to see the menu. MENU 1 AUDIO 2 SUB PICTURE 3 ANGLE MENU 1 LOVE STORY 2 RAMBO MENU 1 PLAY 2 ETC * Above menu is just an example, usually it includes various graphics and different menu for each disc.
WHAT IS VCD? TO PLAY A VCD * Turn on the TV and the Audio component by pressing the Power button. * Some menu may not be available depending on the disc. 1. VCD PLAYING INSTRUCTION 1 Select “Video“ mode by pressing the TV/Video button of TV. *Some TV may show outside input. 2 Select “AUX“ or “CD“ on the function selection on the audio component. *It may be different for some audio component, refer to the user manual of the audio component. 3 Press the Open/Close button after pressing the Power button.
TO PLAY A VCD _CONTINUED To stop the play temporarily Press the Pause button. * The picture will stop and the sound will stop. * To play again press play button or pause button once again. To stop the play Press the Stop button. * This product has a Resume Stop function which makes the DVD player Resume Play on the point where it stopped by pressing the play button. * When the Resume Stop and Resume Play function is not needed, press the Stop button twice. To pull out the disc Press the Open/Close button.
PBC(PLAYBACK CONTROL) FUNCTION_CONTINUED MENU 1 2 3 4 5 MENU 1& ENTER RETURN 1 2 3 4 5 2) If you desire to watch the movie after looking at the various additional data provided by the disc select “Watch Movie“. *It will be seen as in the order set by the menu instead of the order of the track number by pressing the Skip button. 5 Playing while the PBC is off 1) The movie will start from the first part of the disc by pressing the play.
WHAT IS CD? * CD is the most popular format for a disc, which has clear sound quality and can be stored for a long period of time. * Only sound is recorded in CD, and there are two types of CD, 12cm(74 minutes) and 8cm(20minutes). * Sound of CD is recorded in digital signal unlike LP, which makes it virtually the same as the original, and long period use does not drop the quality of the sound. * CD-R(Compact Disc Recordable) is also playable.
ABOUT COMMON USE SECTION WHEN THE SCREEN FLOWS BECAUSE OF THE DIFFERENCE OF THE TV SYSTEM * Pressing the “NTSC/PAL“ button on the remote control will set to your TV System. (Refer to TV System on Set-Up) 21 Downloaded From Disc-Player.com Daewoo Manuals VCD SECTION & CD SECTION * There are many functions such as searching or repeating the screen or music while playing. * Some functions may not be available according to DVD, VCD and CD.
TO SET THE SET-UP MENU * If you set several things following the below instruction, you won’t have to set the DVD each time you watch it. * It is to control the menu if you just know one method of setting because the setting method is same for every menu. WHAT IS SET-UP? * It is setting the preference so that once it is done, even if the power is off or the value has changed the value of the Set-Up will be maintained.
TO SET THE SET-UP MENU_CONTINUED Language : OSD subtitle selection LANGUAGE ENGLISH ENTER LANGUAGE FRENCH ENTER LANGUAGE GERMAN ENTER ENTER LANGUAGE ENTER SPANISH LANGUAGE ITALIAN * Selecting the OSD Subtitle using the Input button will change the language of the Set-Up menu. * Press the Input button repeatedly until the desired language comes up. * When the desired OSD Subtitle language comes up, press the List Move button to move to other items.
TO SET THE SET-UP MENU_CONTINUED TV Type : Setting the TV Type TV TYPE TV type is 4:3; letterbox preferred for widescreen material: (factory default) 4:3 LB ENTER 4:3 PS ENTER TV TYPE ENTER TV TYPE TV type is 4:3; pan-scan preferred for widescreen material: (if not pan-scan, revert to letterbox) TV type is 16:9; show widescreen anamorphic, 4:3 material letterbox: 16:9 * Press the Input button until the desired TV Type comes up.
TO SET THE SET-UP MENU_CONTINUED PASSWORD ---- PASSWORD ENTER PASSWORD ENTER PASSWORD **** ENTER PASSWORD ---- **** ENTER ---- PASSWORD * Press 4 digits for the password and press input for lock. ---- * Press the 4 digits of the password to unlock. Rating : Setting for the password needed to play for certain discs.
TO MOVE QUICKLY TO A DESIRED MUSIC OR SCREEN * You can go through quickly while playing and go to next track or chapter quickly. 1. TO SEARCH FOR A SCREEN OR MUSIC QUICKLY 1 2 Press the search button. * Pressing the F.F./STEP ( ) button will play the disc quickly. Pressing the F.R. ( ) will play the disc quickly backwards. * Pressing the F.F./STEP ( ) and F.R. ( ) repeatedly will speed up the process.
TO SEARCH AND PLAY DESIRED SCREEN OR MUSIC TO PLAY THE DESIRED TITLE/CHAPTER OR TRACK IMMEDIATELY 1 Pressing the Search button will show below screens. [For DVD] [For VCD or CD] GO TO TIME CHAPTER TITLE 2 TM/CH/TL -:--:-**5 -- DISC SEARCH TIME -:--:-TRACK *5 TM/CH/TL -:--:-**5 -- Input the number of the Title using the Number button. [For DVD] GO TO TIME CHAPTER TITLE 6 DISC SEARCH TIME -:--:-TRACK -- * Omit (4) and (5) then go straight to (6) for VCD and CD.
TO PLAY THE DESIRED TIME 1 Pressing the Search button will show the below screen. [For DVD] [For VCD or CD] GO TO TIME CHAPTER TITLE 2 TM/CH/TL -:--:---- DISC SEARCH TIME -:--:-TRACK -- Input the desired time using the Number button. [For DVD] [For VCD or CD] GO TO TIME CHAPTER TITLE 4 DISC SEARCH TIME -:--:-TRACK -- Select the “Time“ using the List Move button.
SLOW, EACH FRAME PLAYBACK, ZOOM, 3D 1 Press the Slow play button. * Pressing the Slow F ( ) button will slow down the play, Pressing the Slow R ( ) button will slow down the backward play. * Pressing the Slow F ( ) and Slow R ( ) button repeatedly will change the speed of the play. 1/10 TIMES 2 1/5 TIMES 1/2 TIMES To play normally, press the play ( ) button. TO PLAY BY EACH FRAME 1 2 3 Press the Pause button while playing. Pressing the F.F./Step button will play frame by frame.
MARK, A-B REPEAT FUNCTION TO USE THE MARK FUNCTION 1 * Using the Mark button will mark the desired scene, and play it again later as desired. To mark while playing press the Mark button. * ”Mark 1” is lighted. MARKS * You can select between ”Mark 1”~”Mark 3” using the MARK 1 *:**:** MARK 2 : : List Move button. * ** ** MARK 3 *:**:** 2 Press Enter button on the scene you desire to leave a mark. * You can erase the mark using the Erase button.
TO USE THE PLAY MODE 1 Pressing the Play mode button will show the below screen, [For DVD] [For VCD or CD] PLAY MODES REPEAT OFF RANDOM OFF PLAY MODES REPEAT OFF RANDOM OFF PBC ON <0K> <0K> * You can select between several modes of playing using the List Move button. REPEAT FUNCTION * Repeat function is a convenient function that repeats playing desired image or sound. 1 Press Input button after selecting “Repeat” using the List Move button.
TO USE THE PLAY MODE_CONTINUED RANDOM FUNCTION 1 Press Input button after selecting “Random“ using the List Move button. * Pressing Input button repeatedly will change the setting as shown below. RANDOM 2 OFF RANDOM ON * “Random” function randomizes the order of the image or music for your enjoyment. When it is set as desired, use the List Move button to select “Exit” and press Input button or press Play mode button one more time to set, then the OSD screen will disappear.
TO USE THE PLAY MODE_CONTINUED * The function sets the playing order as desired. 1 Press the Input button after selecting “Program“ using the List Move button. [For DVD] [For VCD or CD] TC **-** **-** **-** **-** TC **-** **-** **-** **-** TC **-** **-** **-** **-** TC **-** **-** **-** **-** PROGRAM EDIT 1** 5** 9** 2** 6** 10** 3** 7** 11** 4** 8** 12** <0K> 1-_ 13** 14** 15** 16** <0K> 2 Use the List Move button and number button to set the play order.
TO USE THE DISPLAY, VOLUME UP/DOWN FUNCTION TO USE THE DISPLAY FUNCTION * The Display function can be used to verify Media type, elapsed time/ left time, whole Title/Chapter/Track number, current Title/Chapter/Track number, Spoken language, language of the subtitle, and the kind of angle. 1 Press the Display while the disc is loaded. [For DVD] [For VCD or CD] DVD * The elapsed/left time is the elapsed/left time of the current Chapter.
BASIC CONNECTION INSTRUCTION CONNECTION WITH THE TV yellow white red *Connect one of these cables. INSTRUCTIONS FOR USING THE TV 1 2 Turn on the TV and select video mode. Select the “Video“ or “S-Video” mode pressing the TV/Video selection button. * Some TV may show outside or S-Image input. 35 Downloaded From Disc-Player.com Daewoo Manuals COMMON USE SECTION Connect the player referring to following connection instruction.
BASIC CONNECTION INSTRUCTION_CONTINUED CONNECTION WITH THE AUDIO COMPONENT *Connect one of these cables. INSTRUCTIONS FOR USING THE AUDIO COMPONENT 1 2 Press the Power button of the audio component Select CD or AUX from the function selection menu. * Select after verifying where the DVD player is connected to. 36 Downloaded From Disc-Player.
CONNECTION VARIATION INSTRUCTION INSTRUCTION OF CONNECTION FOR CLEAR IMAGE. Connecting to a TV with a S-Video input jack yellow white red *Connect one of these cables. INSTRUCTION FOR USING TV 1 2 Press the Power button of the TV. Select “S-Video“ mode pressing the TV/Video button. * Some TV may show S-Image. 37 Downloaded From Disc-Player.com Daewoo Manuals CONNECTION SECTION instructions of connection for enjoying better image and sound.
CONNECTION VARIATION INSTRUCTION_CONTINUED INSTRUCTION OF CONNECTION FOR CLEAR SOUND. Connection with an amp capable of Dolby Pro Logic function. Front left speaker Center speaker Rear left speaker Front right speaker Rear right speaker Dolby Pro-Logic Amp *Connect one of these cables. *Connect one of these cables.
DISC TYPE AND FEATURES 1 Disc type Diameter -- 8cm, 12cm 2 Recording time 12cm : Sound only 74 minutes 8cm : Sound only 20 minutes 3 Features Sound of CD is recorded in digital signal unlike LP, which makes it virtually the same as the original, and long period use does not drop the quality of the sound.
TROUBLESHOOTING GUIDE MALFUNCTION THINGS TO CHECK The power is not turned on when the power button on the remote control is pressed - Confirm there is enough battery in the remote control The tray does not come out - Confirm if the power is turned on - Verify the voltage On time search, it searches different time from the set time. - Confirm if there is excessive alien substance on the disc or modified. The sound does not come out - Confirm if the screen is playing as slow or frame by frame.
TROUBLESHOOTING GUIDE_CONTINUED THINGS TO CHECK While playing the DVD, the menu did not show up on the screen even if the menu button was pressed - There is no menu on the disc - There are many contents recorded on the DVD, it may not work with the button. DVD does not play - DVD bought in foreign countries may not work. 41 Downloaded From Disc-Player.
SPECIFICATIONS GENERAL SUBJECT Source of electricity 120V/60hz Consuming electric power 18W Weight 4kg Size 420(W) X 305(D) X 80(H) Allowed temperature for operation 5°C~40°C Allowed humidity for operation 10%~75% RH 2 Channel left(1/L) right(2/R) Output level Analog sound quality 2Vms(1khz) Digital sound (5Vp_p) Digital sound features Frequency characteristic 20Hz - 20Khz S/N ratio 90dB Channel Separation 80dB Optical Digital Output USED DISC RCA Jack 2 Channel CD: 12cm CD : 8cm Video CD 1.
DAEWOO DVD PLAYER MODEL : DQD-2000 Downloaded From Disc-Player.