CONTACT INFORMATION Website : http://www.e-daewoo.com Call : 1-877-393-7823(1-877-DWESVC3) Electric and Gas Dryer DWR-WE5413WC/SC/RC DWR-WE6413WC/SC/RC PRODUCT FEATURES " OUTSTANDING PERFORMANCE Besides the large capacity, you can benefit from faster drying time, quiet operation, and energy efficiency. " STAINLESS STEEL DRUM Stainless steel drum resists rust. " DIGITAL FABRIC CARE Multi-Level temperature control takes better care of your clothes.
IMPORTANT WARRANTY AND SAFETY INSTRUCTIONS [SEEKING WARRANTY SERVICE] The warranty information for your dryer is located at the end of this manual. Warranty Service is available by contacting the nearest DAEWOO Service Center. If this product is installed and operated according to the instructions in this manual, DAEWOO will repair or replace any parts defective in material or workmanship throughout the warranty period, beginning with the date of purchase.
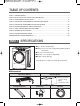
TABLE OF CONTENTS PART 1. SPECIFICATIONS............................................................................................................................3 PART 2. INITIAL STEPS FOR INSTALLING YOUR DRYER........................................................................7 PART 3. ACCESSORIES INSTALLATION ..................................................................................................17 PART 4. ELECTRICAL REQUIREMENTS FOR ELECTRIC DRYER ........................................
[IMPORTANT SAFETY INSTRUCTIONS] WARNING! To help reduce any risk of electric shock, fire, or other personal injury or property damage when using your Appliance, please exercise care and follow basic safety precautions, including the following: 1) Read all instructions before using the appliance.
[GROUNDING INSTRUCTIONS] A. For a grounded, cord-connected appliance: This appliance must be grounded. In the event of malfunction or breakdown, grounding will reduce the risk of electric shock by providing a path of least resistance for electric current. This appliance must be equipped with a cord having an equipment-grounding conductor and a grounding plug. The plug must be plugged into an appropriate outlet that is properly installed and grounded in accordance with all local codes and ordinances.
WARNING! To reduce the risk of fire or explosion, electric shock, property damage, personal injury or death when using this appliance, please follow all instructions and information, including those in this manual and instructions provided by your gas supplier. • Do not store or use any gasoline, dry-cleaning solvents other flammable vapors or liquids in the area surrounding this appliance. • Do not dry anything that has or ever had anything flammable on it, even after washing.
PART 2 INITIAL STEPS FOR INSTALLING YOUR DRYER The following instructions will guide you through the initial steps of setting up your dryer. Please note that every section of this manual provides important information regarding the preparation and use of your dryer, and it is important that you review this entire manual before proceeding with any installation or use.
Minimum clearances on above, behind, and sides of the unit, as shown below, are required. Those required minimum clearances are set forth in the picture below. Please keep the following instructions in mind when installing in a closet or recessed area: • Consider allowing additional clearance for installation and servicing. • Wall, door and floor molding may necessitate additional clearances. • Additional inches of clearance are recommended to reduce noise while operating.
Installation nstructions Open in position, adjust the leveling legs of the dryer until it is level from left to right and front to back. Be sure to tighten the leveling leg lock nuts against the bottom of the dryer. The leveling legs must remain firmly on the floor and the dryer should not rock. The maximum slope of the dryer from left to right or front to back should not exceed 1”(2.5 cm). If the dryer is not level, and if the slope exceeds 1” (2.
STEP 2. Connecting the Exhaust System WARNING! • To reduce the risk of fire this appliance MUST BE EXHAUSTED OUTDOORS. • The appliance shall not be exhausted into a chimney, a wall, a ceiling, an attic, a crawl space, or a concealed space of a building. • Only rigid or flexible metal duct should be used, for exhausting. • The total length of flexible metal duct shall not exceed 2.4 m. • Do not use plastic or thin foil duct. • Failure to follow these instructions can result in death or fire.
■ ALTERNATE EXHAUST DIRECTIONS 1. Remove screw and exhaust duct. 2-1. Detach and remove the knockout that matches the desired venting direction 2-2. Reconnect the new duct[8.66 inch(22cm)] to the blower housing, and fixing the duct to the base. (Right side not available on Gas Dryers) 3-1. Insert the male end of a 4" elbow into the female end of a short duct. Tape the joint. 3-2.
STEP 3. Connection of Gas Supply (Gas dryer only). In addition to the following, please refer to manual section on Gas Requirements and Instructions. 1 2 5 3 4 1. New stainless steel flexible connector. Use this type of connector only if allowed by local codes. Use Design AGA Certified Connector. 2. 1/8" NPT Pipe Plug (for checking inlet gas pressure) 3. Equipment Shut-Off Valve Installed within 6’ (1.8 m) of dryer. 4. Iron Pipe. Shorter than 20’ (6.1 m) Use 3/8" pipe. Longer than 20’ (6.
STEP 4. Electrical Plug Connections Following steps are several warnings and instructions concerning making the electrical connection for electric dryers. More detailed information concerning the electrical connection is provided in the manual section entitled Electrical Requirements for Electric Dryer. It is important that you thoroughly review that section and the remainder of this manual, before taking any steps to install or use this dryer. 1. Use only a new UL listed No.
STEP 5. Preparation of the Dryer Prior to the first use of this appliance, use all purpose cleaning products or a solution of detergent and water, with damp cloth to remove from the inside of the dryer drum/drying compartment any dust or dirt that may have accumulated inside the dryer. Plug-in your dryer after reviewing the following parts on your dryer’s Electrical Requirements. STEP 6.
STEP 8. Procedure for Reversing the Door The door on your dryer can be installed to open either to the left or the right. Follow these instructions to reverse the direction in which your door opens: Note : Door and latch should be aligned at the center when closed. STEP 9. Additional Instructions for Installation of Your Dryer in a Manufactured or Mobile Home. The following instructions are applicable to installations of the dryer in a manufactured or mobile home.
STEP10. Connecting the inlet water hose for steam features Caution! The dryer must be connected to the cold water faucet using the new inlet hose. Do not use old hoses Do not overtighten, as it may damage the coupling. 1. Before installing dryer turn the cold water faucet off. 2. Attach the brass female end of the “Y” connector to the cold water wahser fi ll valve. 3. Connect the hose to cold waher faucet and “Y” connector 4.
PART 3 ACCESSORIES INSTALLATION Stacking Kit Installation Instructions(DRYER & PEDESTAL) To ensure safe and secure installation, please observe the instructions below. WARNING! Incorrect Installation can cause serious accidents. The weight of the dryer and the height of installation makes the stacking procedure too risky for one person. This procedure should be performed by 2 or more experienced service personnel. 1) Remove pedestal, installation hardware, and instructions are in the shipping carton.
PART 4 ELECTRICAL REQUIREMENTS FOR ELECTRIC DRYERS The following are additional instructions regarding electrical connections and requirements for electric dryers. Important Warning To help prevent fire, electric shock, serious injury or death, the wiring and grounding must conform to the latest edition of the National Electrical Code, ANSI/NFPA 70 and all applicable local regulations.
Review the following options to determine the appropriate electrical connection for your home: Use the instructions in this section if your home has a 4-wire receptacle (NEMA type 14-30R) and you will be using a UL listed, 120/240 volt minimum, 30 amp, dryer power supply cord. Use the instructions in this section if your home has a 3-wire receptacle (NEMA type 10-30R) and you will be using a UL listed, 120/240 volt minimum, 30 amp, dryer power supply cord.
4-wire connection : Direct wire Important : Grounding through the neutral conductor is prohibited for (1) new branch-circuit installations, (2) mobile homes, (3) recreational vehicles, and (4) areas where local codes prohibit grounding through the neutral conductor. Prepare minimum 5 ft (1.52 m) of length in order for dryer to be replaced. First, peel 5 inches (12.7 cm) of covering material from end. Strip 5 inches of ground wire insulation. After cutting 11/2 inch (3.
3-wire connection : Direct wire Important : Grounding through the neutral conductor is prohibited for (1) new branch-circuit installations, (2) mobile homes, (3) recreational vehicles, and (4) areas where local codes prohibit grounding through the neutral conductor. Prepare minimum 5 ft (1.52 m) of length in order for dryer to be replaced. First, strip 3 1/2 inches (8.9 cm) of outer sheath from end and strip 1 inch of insulation from each conductor.
Option 1: 4-wire connection with a power supply cord. • lf your local codes or ordinances do not allow the use of a 3-wire connection, or you are installing your dryer in a mobile home, you must use a 4-wire connection. 1. Connect neutral wire (white) of power cord to center terminal block screw. 2. Connect red and black wires to the left and right terminal block screws. 3.
Option 2: 3-Wire connection with a power supply cord. lf your local codes or ordinances permit the connection of a frame-grounding conductor to the neutral wire, use these instructions. If your local codes or ordinances do not allow the connection of a frame-grounding conductor to the neutral wire, use the instructions under Section 1: Optional 3- wire connection. Section 1 Option 3: Optional 3-wire connection.
PART 5 ELECTRICAL REQUIREMENTS FOR GAS DRYERS 120 Volt, 60 Hertz, with 3-Prong Grounding Plug Following are additional instructions regarding electrical connections and requirements for gas dryers. Important Warning To help prevent fire, electric shock, serious injury or death, the wiring and grounding must conform to the latest edition of the National Electrical Code, ANSI/NFPA 70, or the Canadian Electrical Code, CSA C22.1, and all applicable local regulations.
PART 6 GAS REQUIREMENTS AND INSTRUCTIONS Following are important instructions and information concerning the requirements for the gas supply and service for gas dryers. Important Warning The gas supply and service for a gas dryer must comply with all local codes and ordinances. In the absence of any local codes or ordinances in your area, the gas supply and service for your gas dryer must comply with the latest edition of the National Fuel Gas Code, ANSI Z223.1/NFPA 54. 1.
PART 7 USER-MAINTENANCE INSTRUCTIONS Following are important instructions and information concerning the exhaust requirements for your dryer. Important Warning To reduce the risk of fire, electric shock, or injury to person, read the IMPORTANT SAFETY INSTRUCTIONS before operating this appliance.
Exhaust and Dryer Maintenance WARNING! Disconnect the dryer’s electric power prior to any cleaning or maintenance. 1. After one year of use, the interior and complete exhaust system of the dryer should be examined and cleaned if necessary. 2. Before one year of use, when drying performance has become unsatisfactory, please examine and clean the exhaust duct for better drying performance. 3.
PART 8 OPERATING YOUR DRYER Following are instructions for starting and using your new dryer. Please refer to specific sections of this manual for more detailed information. Important Warning: To reduce the risk of fire, electric shock, or injury to person, read this entire manual, including the Important Safety Instructions. before operating this dryer.
■ Select cycles designed for option Level Time Dry MoreTime LessTime Custom Program Rack Dry Anti Crease damp dry beep Perm Press O O O Bulky O O O Delicate O O O Towel O O O O O Normal O O O O O Speed Dry O O O O O O O O O O O O O Steam Spray Air Dry O O O Iron dry Gym Shoes O O O * When the course is set on reduce static, the cooling time will turn to 30 sec. A. If you select Rack Dry, the previous course and operation goes off. B.
1 Power Button Speed Dry Use for small loads or loads that need less drying time. Air Dry Use the Air Dry Modifier for items that require drying without heat such as rubber, plastic and heatsensitive fabrics. Steam Spray Use this cycle to remove wrinkles from items, such as clothes packed in a suitcase or items wrinkled from being left in the dryer too long. • Use this button for power on or off. 2 Cycle Selection • Turn the knob to select the desired cycle based on laundry types and conditions.
Mist More Time Less Time 3 Time Change Button 7 Option Buttons More Time • Press MORE TIME or LESS TIME until the desired drying time is set. (1) CUSTOM PROGRAM Less Time Set up your favorite combination of settings and save them here for one touch recall. NOTE: Time change button is available only with Manual Dry, Time Dry and Rack Dry programs. Rack Dry 4 Status/Clean Filter/Anti Crease Indicator • When Anti Crease is selected, the light for Anti Crease will glow in the display.
Rack Dry Anti-Crease Mist Reduce Static (5) Damp Dry Beep Suggested Items Temperature Suggested for Rack Drying Setting Time* (Minutes) When you select the damp dry beep option, a beep will alert you when your load is just damp enough for ironing or pressing. This notice will allow you to remove lightweight items that are dried or other items that you may wish to iron.
• Check to see that coverings are securely stitched. • Shake and fluff pillows by hand periodically during the cycle. • Dry item completely. Foam rubber pillows are slow to dry. Starting your dryer 1 Before use • Clean lint screen before or after each cycle. • Place laundry into dryer and shut door. See Loading. • Turn the knob to select the drying cycle you want. The preset setting for Sensor Dry Cycles or Manual Cycles will glow. The estimated or actual cycle time (in minutes) will show in the display.
4 To use a manual dry cycle 5 Pausing or restarting • Select a Manual Dry Cycle. • Press MORE TIME or LESS TIME until the desired drying time is displayed. Tap MORE TIME or LESS TIME and the time will change by 1 minute interval. • To pause the dryer at any time:Open the door or press START/PAUSE. • To restart the dryer Close the door. Press START/PAUSE. NOTE: The MORE TIME or LESS TIME feature can be used with Manual Dry, Time Dry and Rack Dry Cycles.
PART 9 TROUBLESHOOTING GUIDE Save time and money! Review the charts on the following pages first and you may not need to call for service. 1. Problem: My Dryer Won’t Start Question What to Do • Is the dryer plugged in? Confirm that the dryer’s plug is securely and completely pushed into the laundry room’s power outlet. • Is the fuse blown, or is the circuit breaker tripped? Check your home’s or laundry room’s fuse box/circuit breaker box and replace the fuse or reset the circuit breaker.
5. Problem: There Is Lint On My Clothes Question What to Do • Is your lint filter full? Please refer to the manual section on cleaning the lint filter, and please confirm that the lint filter is clean. It is important that the lint filter is clean before each new load of laundry.
9. Problem: It Takes Too Long For My Clothes To Dry Question • Did you properly sort your loads of laundry? What to Do Separate heavy weight items from light weight items when creating loads. • Are you drying large loads of heavy fabrics? Heavy fabrics take longer to dry because they tend to retain more moisture. To help reduce and maintain more consistent drying times for large and heavy fabrics,separate these items into smaller loads of a consistent size.
12. Problem: If the steam has something wrong Question What to Do • Water drips from nozzle when steam cycle starts. This is the condensation of water. Dripping water will be stopped in the short time. • Steam doesn’t generate but no error code is shown Check if the cord of dryer is connected. If the steam doesn’t generate when the cord connection has no problem, call the service center.
DAEWOO DRYER LIMITED WARRANTY - USA Your DAEWOO will be will repaired or replaced, at DAEWOO's option, if it proves to be defective in material or workmanship under normal use, during the warranty period ("Warranty Period") set forth below, effective from the date ("Date of Purchase") of original consumer purchase of the product. This limited warranty is good only to the original purchaser of the product and effective only when used in the United States, including Hawaii, and U.S. Territories.
ABOUT THIS MANUAL VISION CREATIVE, INC. 서울 종로구 통의동 6번지 이룸빌딩 4층 담 당 전은일 님 브 랜 드 DAEWOO B. MODEL DWR-WE5413WC/SC/RC 언 어 영어 DWR-WE6413WC/SC/RC MODEL 미주향 DRYER MANUAL 일 1차 정 2차 3차 4차 제 판 인 한 쇄 MEMO 접수: (총39p) 11.09.