Service Manual RN-271N RN-272N RN-273N RN-274N RN-331N RN-332N RN-333N RN-334N RN-335N RN-336N
CONTENTS 1. SPECIFICATION 1-1. Model Information -------------------------------------------------------------------------------------------------------------------------------2 1-2. Interior Parts -----------------------------------------------------------------------------------------------------------------------------------------3 1-3. Machine Compartment View -----------------------------------------------------------------------------------------------------------------5 1-4.
1. SPECIFICATIONS * is the Door Type 1-1. Model Information Buyer No. RN-27*N RN-33*N Factory No. RFP-24*N….N RFP-301*N….N Control Type Total 271 337 Freezer 110 111 Refrigerator 161 226 Total 240 305 Freezer 83 84 Refrigerator 157 221 Net Width (Packing) 545(584) 595(634) Net Depth (Packing) 629(667) 650(685) Net Height (Packing) 1800(1900) 1870(1970) Gross Vol. ISO 15502 (unit: L) Storage Vol.
1. SPECIFICATIONS 1-2. Interior Parts 1-2-1. RN-271 model 2 7 1 3 5 4 6 8 10 10 9 10 11 12 13 1. Refrigerator Shelves 7. Refrigerator Pocket "R" 2. Lamp Window 8. Refrigerator Pocket "J" 3. Multi Duct 9. Freezer Shelves 4. Knob R Control 10. Freezer Case "A" 5. Cover Vegetable Case 11. Freezer Case "B" 6. Vegetable Case 12. Adjusting Leg (Left) 13.
1. SPECIFICATIONS 1-2. Interior Parts 1-2-2. RN-331 model 2 7 1 3 4 5 6 8 10 9 10 11 12 13 1. Refrigerator Shelves 7. Refrigerator Pocket "R" 2. Lamp Window 8. Refrigerator Pocket "J" 3. Multi Duct 9. Freezer Shelves 4. Knob R Control 10. Freezer Case "A" 5. Cover Vegetable Case 11. Freezer Case "B" 6. Vegetable Case 12. Adjusting Leg (Left) 13.
1. SPECIFICATIONS 1-3. Machine (Compressor) Compartment View - Features are model dependent ( Below is RN-271 model ) 1 13 12 2 3 4 5 6 7 8 9 10 1.Box Power As (Capacitor Run) 8. Suction Pipe As 2. Power Cord 9. Dryer As 3. Switch P Relay As 10. Case vaporization As 4. Earth Comp Wire 11.Pipe connector A 5. Fixture Compressor (Washer) 12. Pipe Wire Condensor As 6. Drain Hose 13. Pipe Hot 7.
1. SPECIFICATIONS 1-4.
1. SPECIFICATIONS 1-5. Temperature Diagram * Features are model dependent ( Below is RN-271 model ) Refrigerator Dial Mode MIN: 5 ~ 8℃ MID: 2 ~ 5℃ MAX: -1 ~ 2℃ Vegetable compartment : 1 ~ 5℃ Freezer Mode LOW: -17 ~ -19℃ MID: -19 ~ -22℃ HIGH: -22 ~ -25℃ ; The actual inner temperature varies depending on the food status, as the indicated setting temperature is a target temperature, not actual temperature within refrigerator. ; Refrigeration function is weak in the initial time.
1. SPECIFICATIONS 1-6.
1. SPECIFICATIONS 1.7.
2. FUNCTIONS 2-1. "PCB VOLUME" Control INPUT CONTROL OBJECT - Turn 'DIAL KNOB' on the 'COVER M/FLOW DUCT'. -PCB Volume - Temperature is controlled by "PCB Volume" assembled with "Dial Knob". - 12step(0step ~ 11step) mode of successive temperature mode - Each model is diffrent using range.
2. FUNCTIONS 2-2. Temperature Control of Refrigerator Compartment INPUT CONTROL OBJECT - Turn 'DIAL KNOB' - R sensor - COMPRESSOR - FAN A. COMP and FAN will be controlled by the on/off condition of each mode. B. Temperature Difference of Refrigerator each step : STEP 0 1 2 3 4 5 6 7 8 9 10 11 ON(℃) 8.19 7.52 6.85 6.18 5.51 4.84 4.17 3.5 2.83 2.16 1.49 0.82 OFF(℃) 0.19 -0.48 -1.15 -1.82 -2.49 -3.16 -3.83 -4.5 -5.17 -5.84 -6.51 -7.
2. FUNCTIONS 2-3. Defrost Mode INPUT CONTROL OBJECT - Accumulated Compressor Run Time - Running Time Ratio of Compressor - Accumulated Door Open Time - Ambient temperature (RT) - Compressor - F Fan - Defrost Heater A. Defrost Mode Operation conditon (1) In case accumulated compressor run times: 6, 8, 10, 12 hours, - when there occur any errors: R1, D1, C1, RT, Door SW error etc. (Check "2-9.
2. FUNCTIONS 2-3. Defrost Mode D. Flow chart of How to Start Defrost Mode ※ A.C.R.T. : Accumulated Compessor Run Times ※ R.R.O.C. : Running Rate of Compressor ※ RT: Ambient temperature Start A.C.R.T.= 6,8,10,12hours Yes Yes Any Error No Yes R.R.O.C.(per 2hrs of A.C.R.T.)≥90% No Yes Accumulated Door Open Time≥2min. No Yes RT≥38℃ No Yes A.C.R.T.
2. FUNCTIONS 2-4. Function of Low Ambient Temperature (RT) INPUT CONTROL OBJECT RT - R HTR - COMP A. Condition of LOW RT - RT sensor below 19℃ - When the RT sensor is over 20℃, the system comes to be “General Operation Mode”. - When the RT sensor is between 19°C to 20°C, the system keeps the previous mode. B. Control - When the temp of RT sensor is between 14°C to 19°C, COMP on/off temp is 3°C UP - When the temp of RT sensor is below 14°C, COMP ON/OFF temp is 4°C UP 2-5.
2. FUNCTIONS 2-7. Time Saving Function INPUT CONTROL OBJECT ”FAST KEY” Buzzer A. How to Save - 1 min : Click FAST KEY one time on MAIN PCB. - 30 min : If you press FAST KEY continuously, you can reduce 30 minutes on each 2.5 seconds with buzzer. B.
2.FUNCTIONS 2-8. Control of R-sensor OFF Point INPUT CONTROL OBJECT ”J1” , “J2” On Main PCB Control Resistance of R sensor OFF Point - When the refrigeration of refrigerator is poor or weak though Fan and COMP are working continuously, the following actions are recommended for service. (1) Resistance (R25) : Default resistance (31.4Kohms) (2) Resistance (R26) : Cut the “J1” off to reduce basic resistance by 1.5°C.
2. FUNCTIONS 2-9. Error Display INPUT CONTROL OBJECT Sensor Error LED Lamp - ERROR DISPLAY - If appliance has any errors, LED on the Main PCB is flickering. - If the appliance is normal (no error), LED IS off. A. 'R1' ERROR : It happens when R-Sensor is OPEN or SHORT. (1) LED DISPLAY: Shortly flickering(0.3sec.) 1 times. (2) CONTROL: Controlled by the following condition of RT RT sensor TEMP (unit:℃) COMP. Operating ON/OFF TIME (unit:min.
3. DISASSEMBLY 3-1. Door Switch No Procedure No Procedure 1 Inuput a thin driver in the upper part as above picture. And lift up 'Door Switch' carefully. 3 2 Inuput a thin driver in the lower part as above picture. And lift up 'Door Switch' carefully. Disconnect the wire housing.
3. DISASSEMBLY 3-2. Cover Multi-Flow Duct As (in Fresh food Compartment) Procedure No No Procedure the Mark of Locking Position 1 Push (2) Lever Push (1) Push (2) Lever 4 Unlock the lamp window Unlock the 'COVER M/FLOW DUCT' (1) Push the window right side (1) Check the marks of locking position on 'Cover'. (2) Lever two window lock with flat driver (Number of the marks are model dependent) (2) Push the 'cover' inside and Unlock.
3. DISASSEMBLY 3-3. Louver F As (in Frozen Food Compartment) No Procedure Procedure No 1 4 Unscrew to disassemble the 'Louver F As' from Freezer. Unscrew to disassemble as each component part. 2 'A' axis Remove the 'Louver F As' pulling the top side. Unlock carefully. (especially, inside 3 locks) 5 inside 3 3 'KNOB F' ※Default position of 'KNOB F' is 'MID' Disconnect Fan motor wire housing.
3. DISASSEMBLY 3-4. DOOR F/R No Procedure No Procedure 1 Remove door in fresh food compartment. Tilt down the appliance to the rear. And unscrew middle hinge. 4 washer 2 ※ Don't forget the washer for middle hinge. Lift up top cover hinge to remove. 3 5 Unscrew and remove top hinge. Lift up middle cover hinge to remove.
3. DISASSEMBLY 3-4. DOOR F/R Procedure No No Procedure 7 6 Turn the 'Adjusting Leg (Left)' CCW and Remove. Unscrew and remove under hinge. washer 8 ※ Don't forget the washer for under hinge. ※ The washer for under hinge's bigger than middle one. Remove door in frozen food compart ment.
4. How To Change Door Position Features are model dependent ( Below is RN-271 model ) 1-1> Tilt down the appliance to the rear. (Watch out for "Pipe Wire Condensor" damage.) a 1-2> Disassemble following parts in order.
5. How To Charge R-600a Refrigerant 5-1. Safety Warning ( R-600a Refrigerant Models Only) This appliance contains a certain amount of isobutane refrigerant (R600a) a natural gas with high environmental compatibility that is, however, also combustible. When transporting and installing the appliance, care should be taken to ensure that no parts of the refrigerating circuit are damaged. Refrigerant squirting out of the pipes could ignite or cause an eye injury.
5. How To Charge R-600a Refrigerant 5-3. Process Summary 1st Step. R-600a ref. discharging 2nd Step. Removing the remaning refrigerant - Connect the discharging hose to the outdoors. - Time : 7 min. 4th Step. Welding coupling pipe Coupling cap and gas charging cap should be seperated before welding. 3th Step. Exchanging comp. & dryer / pipe welding - For removing of remaning refrigerant., connect the discharging hose to the vacuum pump -Time : 10min - Exchange Comp.
fire/explosion as leakage gas in the room. 1. Discharge the R-600a ref. to outdoor. [Befor connecting the vacuum pump] 3 Discharging the R-600a ref. 5. How To Charge R-600a Refrigerant ※ It should have enough time more than NO. SVC process 14 Connecting the pinch-plier Remov ing the & ref. remaining discharging hose Image Details 7 minutes to discharge. 1.
8 Disassembly of charging v alv e (Coupling pipe) NO. SVC process 1 9 Connecting the pinch-plier Coupling pipe & welding discharging hose SVC process NO. Valve Ass'y 1. Decap the couplig pipe cap and Valve Ass'y disassemble the vlave ass'y. 5. How To Charge R-600a Refrigerant ※ If you don't disassemble, the coupling Image rubber would beDetails melted. Connect the discharging hose to pipe 1. Weld after inserting the coupling the pinch-plier to the compressor. OUT DOOR 2.
5. How To Charge R-600a Refrigerant NO. SVC process Image Details 1. Conect can adapter to the coupling pipe. 14 2. Charge the ref. with open lever slowly. Connecting of coupling pipe & adapta ※ Refrigerant should never leak in the room. 1. On the power of refrigerator and then start to charge the ref. (10min) 15 Charging ※ Charge the ref. until going out the water vapour condensing on the can outlet. 1. Check the leakage. 16 Leakage Test ※ You must rework from Step.1 when the leakage is detected.
6-1. Cabinet / Evaporator / Compressor Compartment 6. PART LIST NO A19-1 A4 A3 A1 A28-2 A23 A22 A19 A18 A24 A20 A25 A26 A5 A6 A16 A29 A30 301149CB00 COVER M/PCB BOX AS SECC (WHITE) 1 1 301149CB10 SECC (GRAY) 301149CB20 SECC (BLACK) A3 A4 3012937900 HINGE *T AS 3001448500 COVER HI *T RFP-301 PP (WHITE) 1 1 1 1 A5 3001448510 3001448520 301179DP00 DOOR S/W AS PP (GRAY) PP (BLACK) HC-050K4 250V2.
6-2. Frozen Food Compartment 6. PART LIST RN_27* NO B4 B1 B1 B4-4 B3 B1 B5 B4-2 B4-3 B6 B4-4 B7 30 0 GPPS(CRYSTAL) 301119UY10 301119UY20 GPPS(GRAY) GPPS(BLUE) B3 B4 B4-1 3017861400 SHELF GLAS F 3018932200 LOUVER F AS 3015922200 MOTOR F AS GLASS T3.2 RFP-241 RFP-241(AC 230V 50HZ) AC220V/50HZ,2500RPM 3 1 1 0 0 1 B4-2 3010664700 BRACKET FAN MOTR PP, T2.0 (AC) 1 1 B4-3 B4-4 3011835900 FAN 3013415800 KNOB F CONTL OD100,SHAFT OD3.
6-3. Fresh Food Compartment 6. PART LIST RN_27* NO C5 C1 C5-3 C5-5 C2 C14 C13 C3 C5-1 RFP-241 2 0 0 T3.
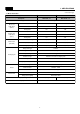
6-4. Door Compartment 6. PART LIST 6-4-1. RN_27* Models NO D1 PART-CODE PART NAME SPEC.
6-4. Door Compartment 6. PART LIST 6-4-1. RN_27* Models NO PART-CODE PART NAME SPEC.
6-4. Door Compartment 6. PART LIST 6-4-2. RN_33* Models NO E1 PART-CODE PART NAME SPEC.
6-4. Door Compartment 6. PART LIST 6-4-2. RN_33* Models NO E3 E3-1 E4 E5 E5-1 E5-2 E5-3 E6 E6-1 PART-CODE PART NAME SPEC.
6-4. Door Compartment 6. PART LIST 6-4-2. RN_33* Models NO E7 E8 E9 E9-1 PART-CODE PART NAME SPEC.
6-4. Door Compartment 6. PART LIST 6-4-2. RN_33* Models E12 NO E10 E11 PART-CODE PART NAME SPEC.