User Manual
Table Of Contents
- Cybersecurity Recommendations
- Regulatory Information
- Foreword
- 1 Product Introduction
- 2 Basic Settings
- 3 Daily Operation
- 3.1 Live
- 3.2 PTZ
- 3.2.1 Bullet Camera
- 3.2.2 Dome Camera
- 3.2.2.1 Configuring Protocol
- 3.2.2.2 Configuring PTZ Functions
- 3.2.2.2.1 Configuring Preset
- 3.2.2.2.2 Configuring Tour
- 3.2.2.2.3 Configuring Scan
- 3.2.2.2.4 Configuring Pattern
- 3.2.2.2.5 Configuring Pan
- 3.2.2.2.6 Configuring PTZ Speed
- 3.2.2.2.7 Configuring Idle Motion
- 3.2.2.2.8 Configuring Power Up
- 3.2.2.2.9 Configuring Time Task
- 3.2.2.2.10 Restarting PTZ Manually
- 3.2.2.2.11 Restoring PTZ to the Default Settings
- 3.2.2.3 Operating PTZ
- 3.2.2.4 Configuring Preset Backup
- 3.3 Playback
- 3.4 Reports
- 3.5 Alarm
- 4 Setting
- 4.1 Configuring Camera
- 4.1.1 Configuring Lens
- 4.1.2 Configuring Video Parameters
- 4.1.3 Configuring Audio Parameters
- 4.2 Configuring Network
- 4.3 Peripheral
- 4.4 Smart Thermal
- 4.5 Event
- 4.6 Temperature Measuring Settings
- 4.7 Storage Management
- 4.8 System Management
- 4.1 Configuring Camera
- 5 System Maintenance
- 6 Additional Accessing Methods

Setting 102
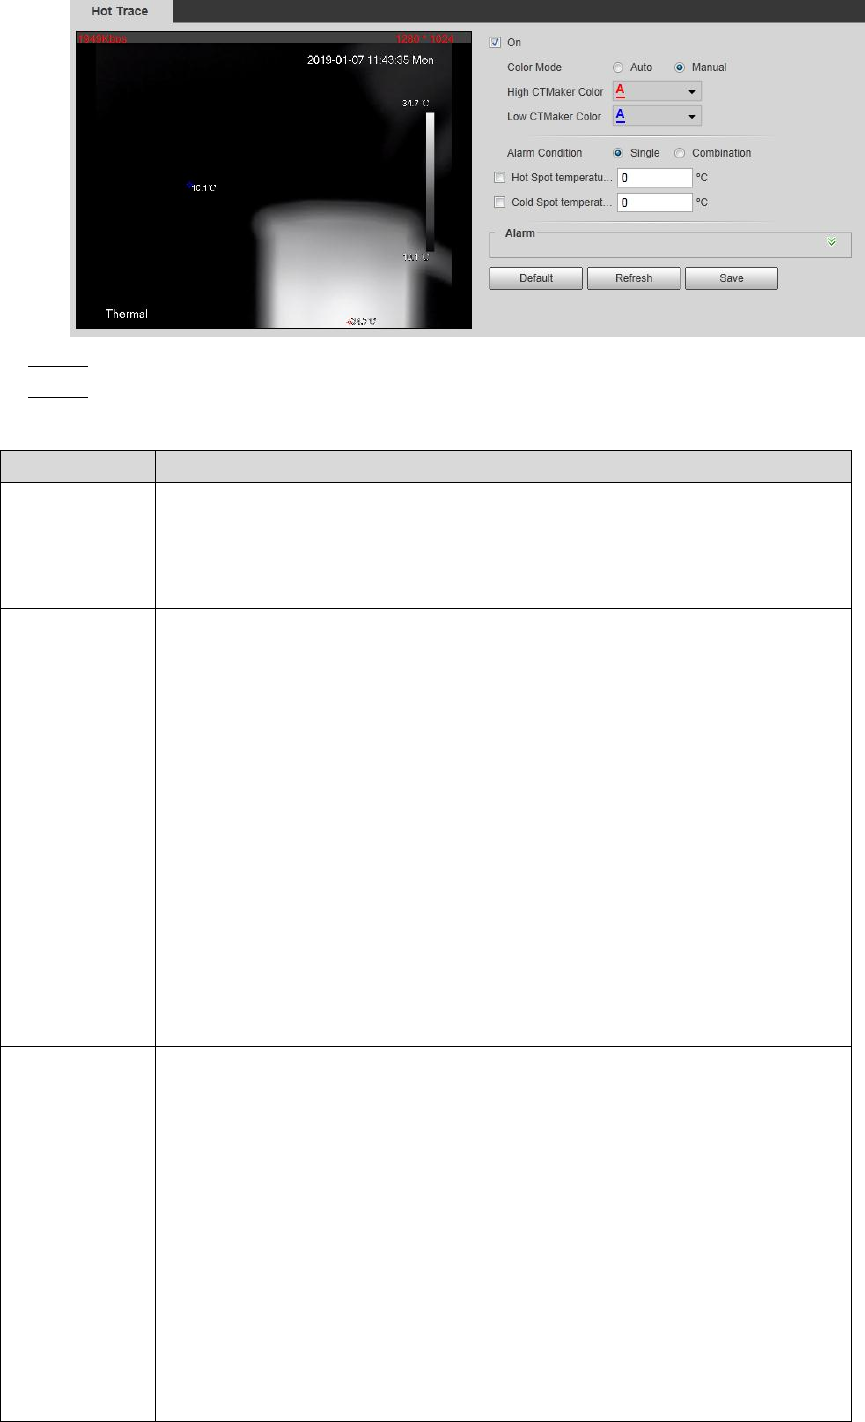
Hot trace Figure 4-49
Select the On check box. Step 2
Configure parameters of cold/hot spot tracking. See Table 4-28 for details. Step 3
Table 4-28 Parameters of hot trace
Parameters
Description
Color Mode
Select a color for cold and hot spots.
Auto: Select colors for the highest/lowest temperature automatically
according to surveillance images.
Manual: Define colors for the highest/lowest temperature.
Alarm
Condition
Conditions under which an alarm is triggered.
Single
Select the Hot Spot temperature more than check box and
when the highest temperature is larger than the temperature
you have set, an alarm is triggered.
Select the Cold Spot temperature less than check box and
when the lowest temperature is smaller than the temperature
you have set, an alarm is triggered.
If you select both conditions above at one time, an alarm is
triggered once any one condition is satisfied.
Combination
Only when the highest temperature is larger and the lowest
temperature is smaller than the temperature you have set, an alarm
is triggered.
Period
Define a period during which the alarm settings are active.
1. Click Setting, and the period setting interface is displayed.
2. Configure period.
Method 1: Hold down and drag the left mouse button to select
working period you need.
Method 2: Select Setting > Event > Video Detection and click
Setting on the right side of Period. An interface is displayed. In
this interface, there are seven Settings altogether each of
which corresponds to a day in a week. Select a Setting you
want and there are six periods (period1-period6) below for you
to pick up.
3. Click Save to finish configuration of working period.


