
Installation manual


3P130767-4K English 3
• Use electric insulation between the duct and the wall
when using metal ducts to pass metal or wire laths or
metal plating into wooden buildings.
This may cause electric shock and a fire.
• Carry out drain piping properly to ensure complete
drainage.
If drain piping is not carried out properly, drain will not flow
out. Then, dirt and debris may be accumulated in the drain
piping and may cause water leakage. If it occurs, stop the
Heat Reclaim Ventilator unit and call your local dealer for
assistance.
• Do not locate the remote controller wherever there is a
risk of wetting.
If water gets into the remote controller there is a risk of elec-
trical leakage and damage to electronic components. It may
result electric shocks or a fire.
WARNING
(For moving and reinstalling/
repairing)
• Do not modify the Heat Reclaim Ventilator unit.
This may cause electric shock or a fire.
• Consult your local dealer regarding relocation and rein-
stallation of the Heat Reclaim Ventilator unit.
Improper installation work may result in leakage, electric
shocks or a fire.
• Do not disassemble or repair the unit yourself.
This may cause electric shock or a fire.
Contact your local dealer to have such work done.
• When removing the Heat Reclaim Ventilator unit, be
sure not to tip it.
The water inside the unit may drip or leak out, and get on
furniture, etc.
• Do not relocate or reinstall the remote controller by
yourself.
Improper installation may result in electric shocks or a fire.
Consult your local dealer.
• When the Heat Reclaim Ventilator unit is malfunctioning
(giving off a burning odor, etc.), turn off the power to the
Heat Reclaim Ventilator unit and contact your local dealer.
Continued operation under such circumstances may result
in a failure, electric shocks or a fire.
<CHECK LIST EXCEPT SAFETY CAUTION>
The items described below should be checked and ask your
local dealer when you feel uncertain or you can’t check by your-
self.
CHECK LIST ABOUT SELECTING INSTALLATION SITE
• Is the outdoor unit installed in a well-ventilated location
with no obstructions in its vicinity?
• Do not use in the locations described below.
a.
Locations with mineral oil such as cutting oil in the atmosphere.
b. Locations with salt in the air, such as coastal areas.
c. Locations with sulfide gas in the air, such as hot springs.
d.Locations where voltage fluctuates, such as factory.
e.In automobiles or marine vessels.
f. Locations containing steam in the atmosphere or splat-
tered oil, such as kitchen.
g.Locations with mechanical equipment generating electro-
magnetic wave.
h.Locations enveloped in acidic or alkaline steam.
• Has any action for snow protection been taken?
Contact your local dealer for details.
CHECK LIST ABOUT ELECTRIC WIRING WORK
•
All wiring must be performed by an authorized electrician.
Do not conduct the work yourself. Contact your local dealer.
• Electrical wiring must be done according to the local
standards.
• Is the circuit specific to air conditioner?
CHECK LIST CORRESPONDING TO OPERATING NOISE
• Is the unit installed at the following locations?
a.Location strong enough to support the weight of the unit,
and which will not amplify noise or vibration.
b. Location where the warm air and the noise from the outlet
vent of the outdoor unit will not bother neighbors.
•
Are any obstructions near the outlet vent of the outdoor unit?
They may reduce the function and increase the operating noise.
• If any abnormal noise is heard during the operation, con-
tact your local dealer.
CHECK LIST ABOUT DRAIN PIPING AND WATER
SUPPLY WORK
• Make sure the drain works properly.
During cooling operation, no drainage from the outdoor drain
piping may clog the drain piping with dirt or dust, causing
water leakage from the indoor unit.
Stop the unit operation, and contact your local dealer.
2 WHAT TO DO BEFORE OPERATION
This operation manual is for the following systems with standard
control. Before initiating operation, contact your local dealer for
the operation that corresponds to your system type and mark.
If your installation has a customized control system, ask your
local dealer for the operation that corresponds to your system.
2.1 NAMES OF PARTS (Refer to figure 1)
(1) Hanger bracket
(2) Duct connecting flange
(3) Exhaust fan
(4) Air filter (Long life filter)
(5) Damper
(6) Control box
(7) Maintenance cover
(8) Heat exchanger elements
(9) Name plate
(10) Air supply fan
(11) Direct expansion coil
(12) Gas pipe
(13) Liquid pipe
(14) Drain outlet
(15) Humidifier (Natural evaporating type)
<VKM-GBMV1 series only>
(16) Strainer (included) <VKM-GBMV1 series only>
(17) Feed water tank <VKM-GBMV1 series only>
(18) Solenoid valve <VKM-GBMV1 series only>
(19) Remote controller (Optional accessory)
(20) Damper motor
(21) EA Exhaust air to outdoors
(22) OA Fresh air from outdoors (outdoor air)
(23) RA Return air from room
(24) SA Supply air to room
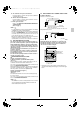
2.2 REMOTE CONTROLLER AND CHANGEOVER
SWITCH: NAME AND FUNCTION OF EACH
SWITCH AND DISPLAY (Refer to figure 3)
• Only the items marked with an asterisk (
mark) are explana-
tion relating to the functions and display of the unit.
Unmarked items are functions of the combined air condition-
ers. When using buttons for functions which are not available
(buttons which are not described in the text) will cause “NOT
AVAILABLE” to be displayed. Contact your local dealer for
more detailed descriptions of those functions (buttons).
1 ON/OFF button
Press the button and the system will start. Press the button
again and the system will stop.
01_EN_3P130767-4K.fm 3 ページ 2013年3月21日 木曜日 午前11時50分