Dako Autostainer Plus | User Guide Document Number 0003107 Revision D March 2007 For In Vitro Diagnostic Use UL and cUL Dako Colorado, Inc. 4850 Innovation Drive Ft.
Dako Autostainer Plus Universal Staining System Dako Autostainer Plus Information Dako Autostainer Model: _______________________ Serial Number: _______________________ Software Version: _______________________ Computer Configuration: _______________________ CPU: _______________________ Hard Drive: _______________________ Floppy Drive: _______________________ Internal Memory: _______________________ Monitor: _______________________ Dako Autostainer Software Product License IMPORTANT: Pleas
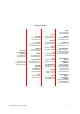
Contact Dako Australia Tel. 2 9316 4633 Fax 2 9316 4773 Austria Tel. 0800 0800 7153 Fax 0800 0800 7154 Corporate Headquarters Denmark +45 44 85 95 00 Fax 44 85 95 95 www.dako.com Distributors in more than 50 countries Belgium Tel. 016 38 72 20 Fax 016 38 72 21 Canada Tel. 905 858 8510 Fax 905 858 8801 Czech Republic Tel. 420 541 423 710 Fax 420 541 423 711 Denmark Corporate Headquarters Tel. 44 85 95 00 Fax 44 85 95 95 Sales Tel.
This page is intentionally blank.
Table of Contents Section 1 | Introduction ........................................................................................................ 9 Dako Autostainer Plus Features.......................................................................................... 9 Universal System............................................................................................................. 9 Quick Start-up.................................................................................................
The Options Screen .......................................................................................................... 36 Program Grid ................................................................................................................. 36 IHC Report..................................................................................................................... 37 Custom Options ...........................................................................................................
Replacing a reagent with skip step (no reagent added to slide): ................................... 60 Editing a reagent in a staining step for one run only:..................................................... 61 Printing Options................................................................................................................. 61 Slide Labels ................................................................................................................... 61 Reagent Labels...................
Printing a Run Log............................................................................................................. 94 Printing a Run Log Without Saving................................................................................ 94 Printing and Saving a Run Log ...................................................................................... 94 Printing a Temporary Run Log .......................................................................................... 94 Emergency Stop.......
Section 1 | Introduction The Dako Autostainer Plus System is an automated slide processing system compatible with currently available reagents for the staining of paraffin-embedded and frozen tissue sections, cytospins, cell smears and fine needle aspirates. This system is designed to automate manual staining methods routinely used in immunohistochemistry and cytochemistry, enabling the transfer of established protocols from the bench to the Autostainer Plus.
Data Management and Report Generation The Dako Autostainer Plus is designed to track a variety of data. It can generate patient, reagent and real-time operation data reports, as well as track reagent usage and log instrument maintenance. Slide and Reagent Labels The Dako Autostainer Plus software provides a simple and efficient means to print slide labels through one-time programming of information for the staining run. Each label has a bar code to assure accuracy.
Section 2 | System Specifications The Dako Autostainer Plus is a combination of hardware and software integrated with the appropriate reagents to automate immunohistochemical and immunocytochemical staining methods. This section describes the hardware and software specifications and the accessories provided with the system.
Slide Rack Glass Slide Reagent Racks 1 and 2 Reagent Probe Wash Station Sink Y Axis Mechanism X Axis Mechanism Z Head Assembly 12 is a slide carrier holding 12 microscope slides in a horizontal position. The instrument holds a maximum of 4 racks. These racks are removable and interchangeable for slide loading and unloading. is a standard microscope slide to which specimen(s) is mounted for processing on the instrument. Slide dimensions are 25 mm x 75 mm x 1 mm. hold the reagent vials.
Hardware Specifications Dako Autostainer Plus Dimensions Weight Electrical Requirements Normal operating temperature Slide rack capacity Total slide capacity Reagent capacity Reagent dispense volumes Reagent probe volume capacity Computer Controller These are the minimum features provided. Dako reserves the right to change the computer controller specifications at any time. Monitor Printer Surge Protector 1.02m W x 0.69 m D x 0.61 m H 40” W x 27” D x 24” H 140 lb. (63.
Accessories included with the Dako Autostainer Plus Slide Racks Reagent Racks Reagent Vials Buffer Container Deionized Water Container Waste Containers User Guide Seymour Glass Label Printer 14 4 non-disposable slide racks with a 12-slide capacity/rack. The slide racks are suitable for standard glass slides; they are removable and interchangeable 2 removable reagent racks. Each reagent rack holds a maximum of 32 reagent vials. 100 reagent vials and caps. Each vial holds a maximum of 15 mL of reagent.
Section 3 | Installation Requirements For installation of the Dako Autostainer Plus, the following requirements should be met to ensure that the instrument functions properly. Requirements Surface Size Environment Buffer Container Deionized Water Container Waste Containers User Guide Seymour Glass Label Printer Prior to unpacking the Dako Autostainer Plus, ensure that the area to be used for instrument is a solid, level surface that can safely support the weight of the system (approximately 240 lbs.
This page is intentionally blank.
Section 4 | Typical Operation A few “off instrument” preparations will make the staining run more time-efficient. Prior to starting a run you should have the following items: • • • • • A list of slide cases to be run with requested protocols. Deparaffinized and rehydrated slides soaking in buffer. This buffer should contain 0.05% Tween 20. A minimum of 5 minutes soaking time is recommended. The reagents required for the staining run brought to room temperature.
Selecting the UNPRINTED LABELS button will print all labels that were not printed through the PRINT feature and bring the user to the REAGENT LAYOUT MAP. Selecting the NONE button will direct the user to the REAGENT LAYOUT MAP. The CANCEL button will return the user to the PROGRAMMING GRID. 18. Load reagents using the REAGENT LAYOUT MAP. 19. Select the NEXT button. The LOAD AND SCAN SLIDES screen appears. 20. If the Bar Code feature is disabled, load slides using the SLIDE LAYOUT MAP.
Section 5 | Programming Overview The Dako Autostainer Plus is a computer controlled system. The PROGRAMMING GRID is the main screen used to define slide information, primary antibodies, staining reagents and staining protocols. 1. Five menus are accessible from the menu bar. The Slides menu item is used to enter the number of slides to be run on the Autostainer Plus. The File menu is used for general information such as opening, saving and printing previously saved runs.
Menu Bar Options Slides Function The Slides option may be used as an alternative to expedite programming by reducing the amount of information required to program a staining run. The Slides option may be used to enter the total number of slides for the current staining run. The Slides function can be accessed by moving the mouse pointer to Slides on the menu bar and pressing the left mouse button. This selection displays the SLIDE COUNT window for entering the number of slides for the current staining run.
New Open Save Save As Print Note: displays a blank grid to program a new staining run displays the LOAD PROGRAM FROM DISK window with a list of all saved staining runs available to be opened. saves the current staining run program. saves an existing staining run program under a new name while the original program remains under its saved name. prints the current Program Grid, IHC Report, Slide Labels, Reagent Labels, Reagent List, or any Run Log.
Substrate Auxiliary displays the EDIT REAGENT LIST screen for substrates, allowing programming and editing of substrate reagents. displays the EDIT REAGENT LIST screen for auxiliary reagents (e.g. counterstain), allowing programming and editing of auxiliary reagents. Copy Function The Copy function can be accessed by moving the mouse pointer to Copy on the menu bar and pressing the left mouse button.
Section 6 | Accessing the Dako Autostainer Plus Software The SIGN IN screen is the first screen that appears after the Dako Autostainer Plus icon is double clicked. The SIGN IN screen allows you to enter your assigned user name (up to 28 alpha-numeric characters) and password (up to 8 alpha-numeric characters). Your user security status (programmed in the INITIALIZE screen) determines the functions you are able to access. If the sign-in process is executed correctly (i.e.
If the accessing operator is assigned a middle or low security level, the INITIALIZE button is replaced with the CHANGE PASSWORD button. A middle or low security level does not allow access to set or change the parameters for slide labels, Main Grid and IHC Report printing formats, cleaning schedule or signing on new users and doctors. NOTE: In the example above, the INITIALIZE button is displayed, indicating this user is set at high security level.
Section 7 | Initializing the Dako Autostainer Plus The INITIALIZE screen is used to establish and update default information for the system. This includes the institution information, Autostainer Plus serial number, user names, the doctors requesting IHC tests, a library of tissues that may be used during staining, the number of slides allowed between routine cleaning runs, the default volume and the drop zone for reagent dispense.
Cleaning Schedule The Slides/Cleaning permits you to program the number of slides stained between routine cleanings. Dako recommends a cleaning cycle after every 150 slides. Once the programmed number is exceeded, the MAIN MENU screen displays the number of slides since the last cleaning. The maximum slides allowed between cleaning cycles is 200. Once this number is exceeded, the PROGRAM button is not available.
7. Type in serial number, name, or unique identifier, for your Autostainer Plus and press ENTER or TAB. 8. Select the OK button to save the entered information. The MAIN MENU screen is displayed. Select the CANCEL button to escape without saving the entered information. The MAIN MENU screen is displayed. Editing Institution Information 1. Select INITIALIZE on the MAIN MENU screen. The INITIALIZE screen is displayed with the cursor in the Name box and the previously entered information listed. 2.
5. Type in the same password again and press ENTER. The High security level option becomes highlighted. If a different password is entered the window “TRY AGAIN: Password must be identical” appears. 6. Using the mouse, select the desired security level. A mark appears in the raised diamond. Selecting the High Level option allows full access to the software features. Select OK and the INITIALIZE screen appears.
Deleting User Information 1. Select INITIALIZE on the MAIN MENU screen. The INITIALIZE screen is displayed with the cursor in the Name box and the previously entered information listed. 2. Press ENTER or TAB key until the cursor flashes in the Users box. 3. Select the user name from the list and press ENTER. The PASSWORD AND SECURITY LEVEL screen appears. The DELETE USER button located to the right of the entry boxes becomes available. 4. Select the DELETE USER button.
Deleting Doctor Information 1. Select INITIALIZE on the MAIN MENU screen. The INITIALIZE screen is displayed with the cursor in the Name box and the previously entered information listed. 2. Press ENTER or TAB key until the cursor flashes in the Doctors box. 3. Select a doctor from the current list of doctors. 4. Press ENTER. A dialog box appears asking if you want to delete the selected doctor. 5. Select the YES button. The selected doctor is deleted from the current list and the INITIALIZE screen appears.
Select the CANCEL button to escape without saving. The MAIN MENU screen is displayed. NOTE: The dispense volume selected on this screen is the default volume assigned to all reagents in any programmed staining run. The volume for all reagents as well as for specific reagents applied to all slides in a particular staining run can be changed in the PROTOCOL TEMPLATE DESIGN screen.
Select the CANCEL button to escape without saving. The MAIN MENU screen is displayed. NOTE: This number can be changed by highlighting the entered number and typing the new number of slides. Select the OK button and the MAIN MENU screen is displayed. NOTE: The maximum number of slides allowed per cleaning cycle is 200 slides. If a number greater than 200 is placed in this field, then you will be prompted to reduce your slide number to 200 or less.
3. Select the desired option for the field. The list box disappears and the selected option is displayed in the field. NOTE: Static information can be entered into the field. This information is printed on every label. For example, the institution name can be printed on every label. To enter static information, highlight the text in the desired field and type the text in the text box. Press ENTER. 4.
static information, highlight the text in the desired field and type the text in the text box. Press ENTER. 4. Select the number of characters for each line (10, 12, 14, or 16) by selecting a number from the LENGTH list (selecting 10 characters will display bold text). NOTE: The greater the number of characters, the smaller the text will appear on the labels.
Label Adjustment To check the position of the text on the slide or reagent label and to generate a test label, select the ADJUST LABEL button from the DESIGN SLIDE LABEL or DESIGN REAGENT LABEL screen. The ADJUST LABEL screen is displayed. 1. Select the TEST PRINT button. A label is generated by the label printer. 2. Adjust the printing on the label using the scroll bar on the right side of the displayed information field. The displayed image moves on the screen in relation to the image on the label. 3.
NOTE: The communication port for the printer is identified using the Port box on the DESIGN SLIDE LABEL screen. The number displayed in the box must match the computer serial port where the label printer is connected. 2. Select the OK button to save. The INITIALIZE screen is displayed. Select the CANCEL button to escape without saving. The INITIALIZE screen is displayed. Printer Selection 1.
NOTE: Selecting the Comment item creates a column for data entry on the Programming Grid printout. This column is not displayed on the PROGRAMMING GRID. NOTE: Slide ID, Block ID, Doctor, Tissue, and Comment items were selected to create this Programming Grid example. IHC Report This function enables the user to select printing options for the IHC Report. 1. Select the IHC Report option by clicking on a raised diamond. Only one option can be selected.
NOTE: The Delayed Start Water Rinse options cannot be selected while the No PreRinse option is selected. Add Rinse to Protocol Steps: When creating a new protocol template, a buffer rinse can be added automatically, following each step. Select the Add Rinse to Protocol Steps option to automatically add buffer rinses. If this option is not checked, the rinse step must be manually selected. No Pre-Rinse: When creating a new protocol template, the default pre-rinse step may be removed.
Section 8 | Entering Slide Information Slides can be programmed from the PROGRAMMING GRID either through the Slides function for quick programming of total slide count, or through the SLIDE INFORMATION button for entering specific slide identification information. This section describes both options for programming slides. Slides Function Adding Slides The Slides option expedites programming by reducing the amount of information required to program a staining run. 1.
Deleting a Slide When using the Slides option to program a staining run, a slide can be deleted if there is at least one entirely blank (unprogrammed) row. 1. Select the Slides menu item. 2. Adjust the number of slides and click OK. NOTE: If all rows have a programmed tile the slide must be deleted from the PROGRAMMING GRID (see Deleting a Specific Slide, later in this section.) The SLIDE INFORMATION Button The SLIDE INFO button enables the entry of specific information for every slide to be stained.
Entering Slide Information Through the SLIDE INFORMATION Button 1. Select the PROGRAM button on the MAIN MENU screen. The PROGRAMMING GRID is displayed. 2. Select the SLIDE INFO button on the PROGRAMMING GRID. The SLIDE INFORMATION screen is displayed. The information to be entered on this screen is determined by a user, with high security level, during initialization (see Initializing the Dako Autostainer Plus, Section 6). The minimum entry required is a Case # and the # slides/case.
NOTE: A maximum number of 48 slides can be entered for each staining run. If the total number of slides programmed exceeds 48, a warning message displays the number of excess slides. 11. Press ENTER to return to the Case # box and enter additional cases. 12. Press ENTER to return to the Slide ID box and enter additional slide identifications. 13. Select the FINISH ENTRY button or press ENTER until the FINISH ENTRY button is highlighted to complete the slide identification entry process.
Deleting a Case # This method deletes all slides associated with the selected slide identification’s case. 1. Select the SLIDE INFO button on the PROGRAMMING GRID. The SLIDE INFORMATION screen is displayed. 2. If the cursor is in the Slide ID box, press the DOWN arrow key until the desired slide identification appears highlighted in the Slide ID box. Press ENTER and the selected slide identification appears in the Slide ID box. The cursor moves to the Case # box. 3.
Deleting a Specific Slide This method deletes one slide at a time. 1. On the PROGRAMMING GRID select the slide number on the row representing the slide. A dialog box asks if you want to delete the selected slide. 2. Select the YES button and the selected slide is deleted from the current program and all subsequent rows in the programming grid shift up one line. Select the NO button to return to the PROGRAMMING GRID.
Section 9 | Designing a Protocol Protocol templates are defined as a sequential series of steps required to stain a microscope slide. Each template is built by selecting the individual protocol steps listed under the Protocol Elements column in the correct order to complete a staining protocol. Protocol templates can be saved for future use. The PROTOCOL TEMPLATE DESIGN screen enables you to create a staining protocol template. An unlimited number of protocol templates can be saved for future use.
Protocol Elements The Protocol Elements are categories of reagents used to build the Protocol Outline in the PROTOCOL TEMPLATE DESIGN screen. Reagents can be added, deleted and edited by choosing Protocol Element categories from the Edit Lists menu item on the PROGRAMMING GRID.
Substrate-Batch This step splits the staining run into two distinct operations. The first includes all steps prior to the application of the substrate and the second batches all steps starting with the substrate application. This feature allows you to use unstable substrates that need to be prepared immediately prior to application. The Autostainer Plus stops after the steps in the first operation (non-Substrate protocol steps) are completed.
5. Additional steps can be inserted in the Protocol Outline by highlighting a step in this column and then clicking on the desired step from the Protocol Elements. The selected step will be inserted above the highlighted area in the Protocol Outline. NOTE: The Dako Autostainer Plus can accommodate protocol templates containing as many as 35 steps (including rinse steps between reagent incubations). Saving a Protocol Template NOTE: Low level security does not allow access to saving a Protocol Template.
Deleting a Protocol Template NOTE: Low level security does not allow access to deleting Protocol Templates. 1. Select the PROTOCOL TEMPLATE button on the PROGRAMMING GRID. The PROTOCOL TEMPLATE DESIGN screen appears. 2. Select the GET TEMPLATE button. The GET TEMPLATE screen is displayed with the cursor flashing in the File Name box. 3. Select the template to be deleted by either scrolling and clicking on the file name or using the DOWN arrow key. The name appears in the file name box. 4.
2. Select the GET TEMPLATE button. The GET TEMPLATE screen is displayed with the cursor in the File Name box. 3. Select the template by clicking on it. The name appears in the file name box. 4. Press ENTER or click on the OK button. The PROTOCOL TEMPLATE DESIGN screen appears with the selected protocol template displayed in the Protocol Outline column. 5. Click on the USE TEMPLATE button. The PROGRAMMING GRID appears with the selected protocol template displayed in the grid header.
2. Select the desired reagent dispense volume by clicking on the raised diamond next to the appropriate volume. The diamond becomes recessed and a smaller black diamond appears. The selected volume is applied to all steps in the Protocol Template. 3. Select the OK button to save. The PROTOCOL TEMPLATE DESIGN screen appears. 4. Select the USE TEMPLATE button. The TEMPLATE CHANGED dialog box is displayed asking “Save on Disk now”. Select the YES button and the SAVE TEMPLATE dialog box is displayed.
This page is intentionally blank.
Section 10 | Programming Slides The Dako Autostainer Plus can process a maximum of 48 microscope slides in a single staining run. Each slide can be stained using an independently designed protocol. After the slide information is entered and protocol template is selected, specific reagents are assigned to each slide. This is accomplished from the PROGRAMMING GRID. The following section describes how to program the specific reagents for a staining run.
Defining Primary Antibodies Each primary antibody reagent is programmed individually and will appear in the PROGRAMMING GRID with its programmed pretreatment (see Reagent Management, section 11). Primary antibodies and/or pretreatments can be manual steps and are noted on the PROGRAMMING GRID and printouts. If a reagent is a manual step, then that step is preformed before the slides are loaded on the Autostainer Plus (i.e., overnight incubations, Target Retrieval, etc.).
3. To insert a matching positive control, click on the POS.CTL button. One slide will be added to the PROGRAMMING GRID with matching reagents to the last programmed slide. In the slide number column, PC will be displayed signifying that this is a positive control reagent. Negative Controls Two options are available for Negative Controls: • Individually matched Negative Controls where unique negative controls for each primary antibody are used.
4. A compatibility code must be entered. Enter the correct compatibility code for the antibody (see Compatibility Check, Reagent Management section). 5. Assign the Universal Negative Control by selecting the Neg.Ctl Type. Select UNC or UNC plus. A UNC is assigned to any Dako N-series ready-to-use antibodies for detection systems such as LSAB2 or EnVision. A UNC plus is assigned to any Dako NP-series, high sensitivity antibodies for detection systems such as LSAB+ or EnVision+.
selection: rinse buffer, rinse (DI) water, blow, or none (for details of each option, see Designing a Protocol, section 9). 2. In a rinse column, position the mouse pointer over a tile with a (blue) rinse buffer icon and click the right mouse button. This will change the buffer rinse to a blow step. To change the blow step back to a buffer rinse, position the mouse pointer over the blow icon and left click the mouse button. 3.
row is high-lighted. Release the mouse button and the Save Auto Program window is displayed. NOTE: An Auto Program can consist of one or more rows of programming. 6. Enter a file name for the saved protocol. The Auto Program file name must be 8 alphanumeric characters or less; symbols and spaces cannot be used. Select the OK button. The PROGRAMMING GRID appears. 7. Select Setup from the menu bar. Setup changes to Auto and exits the Auto program function.
4. Select the desired Auto program file name. The Auto program is inserted where indicated in step 3 above. 5. If the Auto Program does not contain a primary antibody a message box appears prompting: “Assign to all following slides”. Click YES to assign this Auto Program to all unprogrammed slides. Click NO to assign Auto Program to only this slide. NOTE: (Skip) is the first item in the Auto Program list. To leave a slide unprogrammed, select (Skip) from the Auto Program list. 6. Select Program.
Copy/Paste Entire Rows 1. Select Copy from the menu bar on the PROGRAMMING GRID. The word Copy changes to Select. 2. Move the mouse pointer over the slide number to be copied. As the pointer is moved, hold the left mouse button down, multiple rows may be selected and highlighted. 3. Release the left mouse button after all the desired rows are highlighted. The word Select changes to Paste. 4. Move the mouse pointer to the slide(s) where the items are to be pasted and press the left mouse button.
Editing a reagent in a staining step for one run only: 1. To edit a reagent in a staining step or to use a reagent not listed in the reagent list, click on the step and select the (edit slide) item from the reagent list. The EDIT INDIVIDUAL SLIDE REAGENT box displays the information associated with the reagent. NOTE: Lot and date cannot be edited here and are grayed out. Only the reagent long name, short name, compatibility, and incubation time can be edited. 2.
1. From the PROGRAMMING GRID, select the PRINT button. The WHICH REPORT? screen appears. 2. Select the SLIDE LABELS button. The PRINT SLIDE LABELS window appears. 3. To print all slide labels for the program, select the ALL LABELS button. All slide labels for the current program will be printed. The format of each slide label is determined by the SLIDE LABEL DESIGN screen that is accessed from the INITIALIZE screen (see Initializing the Dako Autostainer Plus, section 6).
Printing reagent labels not from a program. 1. From the PROGRAMMING GRID, select the PRINT button. The WHICH REPORT? screen appears. 2. Select REAGENT LABELS button. The PRINT REAGENT LABELS screen appears. 3. Select the OTHER REAGENTS button. Another PRINT REAGENT LABELS screen appears displaying all reagents available from the reagent list. To print all reagent labels, select the PRINT ALL button.
The IHC Report can be configured to print in one of the following formats: • • • The One case/page option prints one case on each page of the report. The One slide ID/page option prints each Slide ID on a separate page. The No page break option prints all slides for a run in a continuous print out.
Each cell on the screen represents a microscope slide. Cells contain the position number, case number and primary antibody short name. If case number and primary antibody name have not been assigned, the cells contain only the position number. The buttons and their functions are: NEXT BACK TO GRID PRINT HELP Displays the RUN TIME CALCULATION window to calculate the optimal run time for the current staining run. Returns to the PROGRAMMING GRID. Generates a printout of the slide layout map.
adjusting reagent application amounts. These functions may be performed in the PROGRAMMING GRID, using the ALL SLIDES tool. ALL SLIDES Tool At the upper left corner of the PROGRAMMING GRID screen is an ALL SLIDES tool. This tool allows users to change the dispense pattern and volume for all slides with one click. 1. Select a new reagent dispense location on the slide in the ALL SLIDES tool by clicking on the desired dispense location using the mouse pointer.
NOTE: The INDIVIDUAL SLIDE TOOL functions identically to the ALL SLIDES TOOL except the user is only able to manipulate drop zone and reagent application amount to the individual slide selected. Printing a Slide Layout Map The Slide Layout Map provides a record of reagent dispense volume and dispense location. It is useful for ensuring that slides are loaded in the proper location. 1. Select the NEXT button on the REAGENT LAYOUT MAP. The SLIDE LAYOUT MAP:LOAD SLIDES screen appears. 2.
This page is intentionally blank.
Section 11 | Reagent Management Reagent lists are defined using the commands on the Edit lists menu on the PROGRAMMING GRID. A new reagent can be created and existing reagents can be modified or deleted from the reagent list using this function. Changes can be made to all reagent-related information (reagent name, abbreviation, compatibility code, lot #, expiration date, and incubation time). The following procedures are applicable to all lists except Primary Antibody (see Notes below).
5. Enter the correct compatibility code and press TAB or ENTER. Assigning compatibility information to reagents is optional (See Compatibility Check at the end of this section). The cursor moves to the Lot box. 6. Enter the reagent lot number and press TAB or ENTER. The lot # cannot exceed 8 alphanumeric characters. Assigning lot number information to reagents is optional. The cursor moves to the Exp. Date box. 7. Enter the reagent expiration date and press TAB or ENTER.
3. Type the full name of the antibody you want to add to the current list and press TAB or ENTER. The software allows the entry of 32 alpha-numeric characters for primary antibodies. No symbols can be used in the reagent long name. Once the box is filled an audible signal alerts that no additional characters can be entered. The cursor moves to the Short Name box.
NOTE: Manual Step setting can also be changes from the Programming Grid, see Programming Slides, section 10. NOTE: A minimum of 2 minutes incubation time is required for proper operating conditions. 13. Enter the reagent incubation time and press TAB or ENTER. NOTE: If Manual Step was selected, the incubation time will be “0”. Do not change this time. The cursor moves to the first text box to allow addition of the next primary antibody. Follow steps 3-13 until all antibodies have been added.
Deleting Reagents from Reagent Lists 1. From the PROGRAMMING GRID select Edit lists on the menu bar. The reagent list categories are displayed. 2. Select the reagent category. The corresponding EDIT REAGENT LIST screen is displayed and the cursor will be flashing in the Reagent Name box. 3. Display the specific reagent by using the down arrow button in the Reagent Name box or press the UP or DOWN arrow key on the keyboard until the target reagent appears highlighted.
Printing Reagent Labels Printing reagent labels from a programmed run. 1. Program or retrieve a previously saved run on the PROGRAMMING GRID, select the PRINT button. The WHICH REPORT? screen appears. 2. Select REAGENT LABELS button. The PRINT REAGENT LABELS screen appears displaying all reagents from the programmed run on the PROGRAMMING GRID. 3. To print all reagent labels, select the PRINT ALL button.
Compatibility Check A compatibility check has been built into the Dako Autostainer Plus software to minimize programming errors resulting from assigning incompatible reagents (such as alkaline phosphatase-labeled streptavidin and DAB substrate) to a slide protocol. This feature has two check levels. The first check is the species reactivity compatibility of the primary antibody and the secondary reagent used. The second addresses the compatibility rules dictated by the enzyme used in the detection system.
This page is intentionally blank.
Section 12 | Loading Reagents After programming is completed the Dako Autostainer Plus calculates the time required for the staining run, the amount of wash buffer/deionized water required and the most efficient placement for the reagent vials. 1. When the Bar Code feature is disabled, select the NEXT button in the PROGRAMMING GRID screen. 2. A dialog box prompts “Save program on disk”. 3. Select the YES button and the “Save program on disk” window is displayed.
The buttons and their functions are: 1. The reagent volume displayed in the REAGENT LAYOUT MAP screen includes a dead volume of at least 200 µL. 2. Load the reagent vials according to the reagent map. NOTE: Using the Reagent Layout map information, make sure that enough reagent is in the vials to complete the programmed run and that the reagent rack is properly seated in its correct location and orientation. NOTE: Check that the reagent vials have no bubbles on top of the solution. Remove any bubbles.
reagent vial. If sufficient volume of a reagent is not available, the Autostainer Plus will provide a list on the Run Log of skipped or partially applied slides. To program the Autostainer Plus to check for insufficient volumes at the start of the run, select the Check volumes option on the SET START TIME screen (see Starting a Run, section 14). Paused to Add Reagent Reagent vials are loaded on the Autostainer Plus and a run has been started. 1. The reagent probe senses insufficient or a missing reagent.
2. A 60 second count begins to count down and an alarm sounds. 3. If the user does not notice the MORE REAGENT alarm, after 60 seconds the RUN LOG screen appears and the pause in the run is recorded. 4. The Autostainer Plus pumps and dispenses all the reagent available. A Low Reagent button appears at the right of the screen. Selecting this button exposes the ADD REAGENT window (reagent layout map) with the low reagent location and volume displayed. 5.
Section 13 | Loading and Scanning Slides After programming is completed and the reagents have been loaded, you are ready to load the slides on the slide racks and scan the slides. When the bar code feature is disabled, print the Slide Layout Map by selecting the PRINT button in the SLIDE LAYOUT MAP:LOAD SLIDES screen. This map provides a guide for loading slides and can be saved as part of your staining record.
Scanning Slides 1. Select SCAN SLIDES from the LOAD AND SCAN SLIDES screen. 2. The system will ask you to verify that the arm is clear. 3. The Autostainer Plus will then scan the slides, beginning at Position #12. It will scan the number of slides that have been programmed. For example, if you have programmed 6 slides and loaded 7 slides, it will only scan 6. If all slides have been located, the SET START TIME screen will appear. 4.
Section 14 | Starting a Run After the specimen-containing slides and reagent vials have been loaded and scanned, it is advisable to go through the following checklist: Slides • • should be flooded with buffer containing 0.05% Tween 20 using a squirt bottle to prevent slides from drying while loading additional slides. should be seated securely in slide rack. Racks • should be properly seated in the Autostainer Plus. Reagents • • • • should be at room temperature.
The Start Time is listed as +0:01 and the current time. The Finish Time is listed as the +HH:MM required to complete the run. The calculated finish time is also displayed. 2. Select the PRIME PUMP (Water) button. A dialog box appears asking if the pathway is clear for the arm to move. Select the YES button. The Autostainer Plus calibrates the reagent dispensing mechanism and primes the water-dispensing pump. Select the NO button and the SET START TIME window is displayed.
The current step, total and current time are always displayed in blue at the bottom of the Run Log. NOTE: If the current time is not accurate do not change it during the run. Adjust the time at the completion of the run. To reset time refer to the Windows 98 or XP documentation.
NOTE: The “01” hardware version of the Dako Autostainer Plus does not have an additional reservoir for deionized water. If your Autostainer Plus does not have this option the software does not prompt to prime the water pump. 3. Select the PRIME PUMP (Buffer) button. The buffer dispensing pump is primed. 4. Select the START RUN button. The RUN LOG screen is displayed. The Run Log is visible throughout the run and displays the steps performed by the Autostainer Plus.
NOTE: The Priority Slides feature is not available until the initial Pre-Rinse is complete. 2. After the Pre-Rinse is completed, the PRIORITY SLIDES button is available. Select the PRIORITY SLIDES button. NOTE: The NEW PROGRAM and REVIEW PROGRAM buttons are not available after the PRIORITY SLIDES button has been selected. NOTE: The PRIORITY SLIDES button changes to a time display countdown, which represents the wait time before continuing. 3.
Select the NO button to combine the priority slides with the original slide run and complete the staining of all slides at the same time. Select the YES button to run the priority slides before the original slide run. These priority slides can be removed before the original slides are completed. NOTE: The “Set Slide Priority” dialog is not displayed if the priority Protocol Template is different than the original Protocol Template.
Select the NO button for the “Ready to Unload Priority Slides” prompt if the priority slides should remain on the Dako Autostainer Plus. The original run will resume and be completed. Select the time display button (i.e., 0:09) to remove the priority slides from the Dako Autostainer Plus. NOTE: The time display button will count down and display the time remaining to remove the priority slides.
Select the NO button to return to the RUN LOG screen to continue the original run. NOTE: The time display button will count down and display the time remaining. If no action is taken before the time expires, the “Ready for Priority Slides” dialog disappears and the PRIORITY SLIDES button changes to TIMED OUT. If the TIMED OUT button is selected, the time display button will display the next time the Priority Slides option is available. 4. The PROGRAMMING GRID screen is displayed.
Delaying the Start of a Run using Substrate-Batch Batch Time indicates when to load the freshly prepared substrate. 1. Select the gray scroll bar and hold the left mouse button down. Move the scroll bar to the right until the desired Start Time and Finish Time is displayed. The Batch Time indicates the time when the substrate should be loaded. NOTE: The total amount of buffer is calculated and displayed below the scroll bar. 2. Select the START RUN button. The RUN LOG screen is displayed.
This page is intentionally blank.
Section 15 | Completing a Staining Run During a staining run the RUN LOG screen is displayed and updated with each step performed. The current step is highlighted in blue and displayed at the bottom of the screen. Previously performed steps can be reviewed using the scroll bars. NOTE: To view previous steps, use the scroll bar to get to the desired view field, then release the mouse button. Do not hold the button depressed for an extended period.
3. Position the slide rack for unloading slides by picking up the slide rack, tilting it at a 30° angle away from you and mounting the posts on the rack handles into the slots in the sink frame. 4. Unload slides by placing your thumb and forefinger on each slide of the slide (away from the frosted end) and pull the slide straight out.
4. Position the mouse pointer over the Name heading and press the mouse button. All the files will be listed in alphabetical order (if pressing this button sorts all files in reverse alphabetical order, then click again on Name to sort again). At the top of the list, there will be files that are preceded by the following symbol: ~. 5. Double click on the file named: ~runlog. This will launch the temporary Run Log. NOTE: If the Run Log does not automatically launch, an OPEN WITH window will be displayed.
• the No page break option prints all slides for a run in a continuous print out The IHC Report groups all slides by case number and prints the following information for every slide: • • • slide # primary antibody information (Full name, Species reactivity, Catalog #, Lot # (if entered), Expiration date, and Incubation time) full name and incubation time for all reagents used The report includes a Staining Signal/Noise and a Comments section for grading the individual slides at the microscope.
Section 16 | Programming During Staining Run This feature allows the user to program subsequent runs while the Autostainer Plus is in operation. All programming screens are accessible, including the PROGRAMMING GRID, SLIDE LAYOUT MAP screen, RUN TIME CALCULATION screen and REAGENT LAYOUT MAP screen. The system cannot scan slides while it is engaged in another run. A printout of all screens can be generated after the current run is completed. The Run Log screen displays the features described below.
Reviewing the Current Program during a Staining Run This feature allows the user to review the PROGRAMMING GRID for the current run while the Autostainer Plus is in operation. No changes can be made using this function. While the current run is in process and the RUN LOG screen is displayed: 1. Select the REVIEW PROGRAM button on the RUN LOG screen. The PROGRAMMING GRID appears with the programming grid of the current run displayed. 2. To return to the RUN LOG screen select the NEXT or EXIT button.
Section 17 | System Maintenance It is recommended that the Dako Autostainer Plus be cleaned after 150 slides have been processed on the instrument. The cleaning procedure can be divided into a manual phase and an automated phase. Manual cleaning consists of wiping down any areas exposed to reagents and buffer using deionized (DI) water and a detergent. Organic solutions are not recommended for cleaning.
NOTE: Do not use bleach in the Dako Autostainer Plus. Bleach may react with other chemicals and create toxic fumes. NOTE: If running protocols that require more frequent cleaning (i.e., using hematoxylin counterstain or high salt buffers), Dako recommends performing a cleaning run a the end of each day the instrument is used. Cleaning Log Each time the Autostainer Plus is cleaned, this is logged in a Cleaning Log so that a record of each cleaning is maintained.
Slide Rack Cleaning Dako recommends additional cleaning for slide racks. 1. Soak the slide racks overnight in a container of deionized water. 2. After soaking the racks, rinse with deionized water and brush off any salt residue before beginning the next run. Reagent Vial Cleaning The cleaning and re-use of reagent vials is not recommended by Dako. Additional vials can be purchased from Dako (Code No. S3425). Computer Maintenance Follow instructions as defined by the computer operator’s manual.
This page is intentionally blank.
Section 18 | Reagent Tracking Reagent Tracking allows you to monitor the total volume of each reagent that has been used on the Autostainer Plus. A Dako Autostainer Plus Tracking Report can be generated to display various information about all the reagents used on the instrument. After each Autostainer Plus run, the usage of each reagent is tracked on the Reagent Tracking screen.
Remove Reagent from the Reagent Tracking Log Reagents that are outdated or not critical to tracking can be removed from the Reagent Tracking log. Remove all Reagents from the Reagent Tracking Log 1. Select the RESET ALL button. A RESETTING REAGENT window appears and asks if you are sure you want to reset all reagents. 2. Select YES to remove all reagents from the Reagent Tracking Log. Select NO to cancel this action and return to the REAGENT TRACKING screen.
Section 19 | Wash Buffers Wash buffers are required for all immunohistochemical staining procedures. They function to eliminate background by washing away the nonspecifically bound proteins from the specimen. Commonly used buffers for immunohistochemical staining are Tris-buffered saline (TBS) or phosphate buffered saline (PBS). These buffers are recommended by Dako for use on the Dako Autostainer Plus. The following pages describe detailed instructions for preparation of TBS and PBS buffer solutions.
4. The final solution is 50mM Tris-HCl, 150mM NaCl buffered saline, pH 7.6 with 0.05% Tween 20. Five Liters of Tris-Buffered Saline Solution (S1968) 1. Add 5 L (5000 mL) of deionized water to a 5 L carboy, flask or beaker. 2. Empty entire contents of one packet. Use a magnetic stir plate to mix and dissolve the TBS granules. 3. Add 2.5 mL of Dako Tween 20 (Code No. S1966) to the Tris-buffered saline solution and mix using a magnetic stir plate. 4.
Materials Required 1. Clean carboy, flask or beaker graduated to 1L 2. Deionized water 3. Magnetic stir plate with stir bar 4. Common laboratory chemicals Chemical Trizma Base Trizma HCI NaCl Tween 20 Hydrochloric Acid 12N Manufacturer and Product No. Sigma, T-1503 Sigma, T-3252 Sigma, T-9625 Dako, S1966 EM, HX0603-3 Reagent Preparation One Liter of 10x Tris-Buffered Saline containing 0.5% Tween 20 1. Add approximately 500 mL of deionized water to a 1 L (1000 mL) carboy, flask or beaker. 2. Add 13.
Shelf Life and Storage TBS solutions should be stored at 2-8?C to inhibit bacterial growth. TBS solutions that become turbid should be discarded. If Tris-buffered saline is stored at 4?C, the expected shelf life is 7 days. If Tris-buffered saline is stored at room temperature, the expected shelf life is 4 days. NOTE: The above formulation for Tris-buffered saline does not contain any preservatives.
Shelf Life and Storage PBS solutions should be stored at 2-8° C to inhibit bacterial growth. PBS solutions that become turbid should be discarded. If phosphate buffered saline is stored at 4° C, the expected shelf life is 7 days. If phosphate buffered saline is stored at room temperature, the expected shelf life is 4 days. NOTE: Dako PBS does not contain any preservatives.
4. Once pH 7.0 is reached, add 0.5 mL of Tween 20 and mix using a magnetic stir plate. 5. Adjust the final volume of buffer to 1 liter with deionized water. 6. The final solution is 20mM Phosphate, 150mM NaCl, buffered saline, pH 7.0 with 0.05% Tween 20. Shelf Life and Storage PBS solutions should be stored at 2-8° C to inhibit bacterial growth. PBS solutions that become turbid should be discarded. If phosphate buffered saline is stored at 4° C, the expected shelf life is 7 days.
Section 20 | Troubleshooting Symptom Autostainer Plus will not turn on (top green LED not on). A Cannot Continue box displays “Instrument Not On” when a run is started. The Autostainer Plus does not respond when you initiate a prime pump or a run. (bottom LED not on) A Cannot Continue box displays “Instrument Not On” when a run is started. Possible Causes The Autostainer Plus is unplugged at the power source.
Symptom Buffer or DI Water does not flow out during a run or a prime. All waste collects into one waste container. Waste backs up in the sink. 112 Possible Causes Autostainer Plus was not primed properly. Solutions Prime pump, see Starting a Run, section 14. Pump may need to be activated several times in order to activate a prime Not enough buffer or DI water in the appropriate reservoir. Fill the reservoir with the proper level of fluid. Then prime the pump, see Starting a Run, section 14.
Symptom Reagent probe is not dispensing reagent. Z-head assembly is hitting slide racks during priming or during run. Possible Causes Insufficient reagent in reagent vial. Solutions The Autostainer Plus is equipped with a liquid level sensor. If the sensor detects insufficient reagent to complete the current step, a message appears on the screen prompting you to add missing reagent to the correct reagent vial. You have one minute to add reagent after which some slides may be skipped.
Symptom No Staining The text of the label does not begin along the left edge of the label and the text is getting cut off. 114 Possible Causes Insufficient reagent in reagent vial. Solutions The Autostainer Plus is equipped with a liquid level sensor. If the sensor detects insufficient reagent to complete the current step, a message appears on the screen prompting you to add missing reagent to the correct reagent vial. You have one minute to add reagent after which some slides may be skipped.
Symptom Error occurs during printing. Possible Causes Labels/ribbon has run out. Solutions Replace labels/ribbon in the printer and the printer will restart. For instructions, refer to the Eltron printer User’s Manual. Incorrect COM port selected. Select the correct COM port from the Slide Label Design screen, see Initializing the Autostainer Plus, section 7. Incorrect printer is selected. Select correct printer model from Slide Label Design screen, see Initializing the Autostainer Plus, section 7.
Symptom User is unable to access many of the functions in the Initialize section of the program. Possible Causes User has been set up as a “Non-Authorized” user. Autostainer Plus software will not accept your log-in name and password. Illegal or Fatal exception errors. Name and password not entered properly. EWP/DWP messages on Run Log. Enable waste pump/disable waste pump. EWL/PFR messages on Run Log. Faulty waste removal/probe failed to retract. The computer will not turn on.
Symptom Monitor will not turn on or goes blank intermittently (power LED is not on). Possible Causes The monitor is unplugged at the power source. The monitor screen is not displaying normally. The cable between the monitor and the computer is not connected properly. Screen saver utility installed. Monitor screen went blank (power LED is green). Monitor screen went blank (power LED is orange). Words on your monitor screen are too dim.
This page is intentionally blank.
Section 21 | Warnings and Symbols Keep the cover closed during operation. The robotic arm will move unexpectedly during the operation - stay clear. Do not pour liquid down the Dako Autostainer Plus sink. The Dako Autostainer Plus is not equipped to drain large liquid volumes poured at high speed. Do not use bleach in the Dako Autostainer Plus. Bleach may react with other chemicals and create toxic fumes. Do not impair the movement of the Dako Autostainer Plus robotic arm in any way.
Do not relocate the Dako Autostainer Plus System within your facility Do not relocate the Dako Autostainer Plus System within your facility before contacting your local Dako representative for vital information that may affect your warranty. (See Dako Companies and Distributors, Section 23) Contact your local Dako representative prior to using non-Dako reagents or solutions on your Autostainer Plus (See Dako Companies and Distributors, Section 23).
Section 22 | General Limitations Immunohistochemistry is a multi-step diagnostic process that requires specialized training in the selection of the appropriate reagents, tissue selection, fixation, and processing, preparation of the IHC slide, and interpretation of the staining results. Tissue staining is dependent on the proper handling and processing of tissues prior to staining.