
Installation Guide


• Tile may be installed over most structurally
sound substrates.
• Make sure surface is clean, smooth, dry and free of wax,
soap scum and grease.
• Any damaged, loose or uneven areas must be repaired,
patched and leveled.
• Remove any moldings, trim, appliances or anything that
could interfere with installation.
• Doorjambs may be undercut for tile to
slip under.
• Mark the center point of all four walls.
• Snap chalk lines between the center points of opposite walls.
(Adjust if necessary.)
• Using tile spacers, lay out a row of loose tiles along
the center lines in both directions. Leave space for uniform
joints.
TIP: If cuts leave tiles smaller than half of their original size,
adjust the center line by snapping a new line a
half tile closer to the wall. Repeat along other center
line if necessary.
• Divide the room into smaller grids (approx. 2 ft. x 3 ft.) by
snapping additional lines parallel to center lines.
STEP 2: LAYOUT
STEP 1: SURFACE PREPARATION
Continued on next page
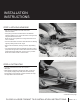
INSTALLATION
INSTRUCTIONS
FLOOR & LARGE FORMAT TILE INSTALLATION INSTRUCTIONS PAGE 1 OF 4