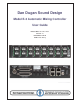
Dan Dugan Sound Design Model E-3 Automatic Mixing Controller User Guide Release Date: December 2012 Version: 1.
Important Safety Instructions and Warnings The Model E-3’s circuitry is made in the USA and meets applicable national safety standards. Standards Compliance The third-party power supply provided with this product has been certified to comply with UL. Safety Instructions 1. Read these instructions. 2. Keep these instructions. 3. Heed all warnings. 4. Follow all instructions. 5. Do not use this apparatus near water. 6.
Warranty Statement Warranty: One year parts and labor Dan Dugan Sound Design warrants that Model E-3 hardware will be free from defects in components and workmanship for a period of 12 months from the date of invoice. During the warranty period, Dan Dugan Sound Design will cover the cost of all parts and labor to remedy the defect, or replace products which prove to be defective.
Dugan Model E-3 User Guide Table of Contents Chapter 1: Introduction ............................................................................................. 9 Model E-3 Modes ...................................................................................... 10 Eight-channel........................................................................................ 10 Fourteen-channel ................................................................................. 10 Sixteen-channel..................
Dugan Model E-3 User Guide Chapter 4: Operation ................................................................................................. 27 How it Works .............................................................................................. 27 Settings ........................................................................................................ 28 If You Must Use a Pre-fader Insert..................................................... 29 Muting Channels ...........................
Dugan Model E-3 User Guide Dugan Music System and Gain Limiting ......................................... 47 Dugan Music System........................................................................... 47 Gain Limiting ........................................................................................ 50 Chapter 6: Updates ..................................................................................................... 53 Appendix A: Power-up Commands ............................................
Dugan Model E-3 User Guide 8
Dugan Model E-3 User Guide Chapter 1: Introduction The Model E-3 Automatic Mixing Controller helps professional audio mixers handle multiple live mics without having to continually ride their individual faders. This signal processor patches into the input insert points of an audio mixing console. It detects which mics are being used and makes fast, transparent cross-fades, freeing the mixer to focus on balance and sound quality instead of being chained to the faders.
Dugan Model E-3 User Guide Model E-3 Modes The Model E-3 can operate in eight-, fourteen-, or sixteen-channel modes. Eight-channel This mode uses both the main and auxiliary AES connectors to offer these features: • The Dugan Speech System™ automatically manages live mics in any situation where dialogue is unscripted. • The Dugan Music System™ offers automatic downward expansion to help reduce feedback and bleed in live music performances (i.e., opera, background vocals).
Dugan Model E-3 User Guide Chapter 2: Quickstart This section provides step-by-step instructions to help you get started quickly using the Dugan Speech System to mix up to eight channels. Fourteen- and sixteen-channel I/O is available using the Dugan Control Panel software. See Chapter 5: Dugan Control Panel to learn about these options. Typical Setup 1. Connect the provided power supply to the Model E-3. 2. Hold the channel 1 bypass button down and power up the unit.
Dugan Model E-3 User Guide Figure 2-2 Post-fader, pre-compressor insert patch for the Dugan Speech System on a Yamaha digital mixer 6. With the room quiet, raise your console preamp gains until the Model E-3’s green level LEDs stay illuminated. The level LED illuminates green when the input level is within the acceptable range for automatic mixing and flashes red to indicate clipping. There should be enough gain ahead of the Model E-3 to maintain the green LED at all times.
Dugan Model E-3 User Guide Quickstart Linking Up to eight Dugan units can be linked into a single automatic mixing system. The audio I/O for each must be configured and connected individually. Linking passes only control information between Dugans, not audio. One unit must be set to be the master and the others slaves. 1. Designate one unit as the master by setting the NORM–SLAVE switch on the rear panel to NORM (up). 2.
Dugan Model E-3 User Guide 14
Dugan Model E-3 User Guide Installation and Configuration Chapter 3: Installation and Configuration We recommend placing the Model E-3 in a convenient place in the engineer’s line of sight. Figure 3-1 Model E-3 placed conveniently Rack Mounting All E-Series Dugan controllers are a half-rack wide, so one or two can be mounted in a single rack space. Each unit ships with one long and one short rack ear and one joining plate.
Dugan Model E-3 User Guide Power Supply Units shipped to the USA include a 12 V, 1.5 A, 120 VAC power supply. Contact the factory if you require a different power supply. In an emergency, the Model E-3 can accept power supplies within the following ranges: • 12–24 VDC, either polarity, 1.5 A • 9–18 VAC, 1.5 A System Reset Hold down the channel 1 bypass button and power up the unit. Keep holding the bypass button down for about three seconds until the unit finishes booting.
Dugan Model E-3 User Guide Installation and Configuration Figure 3-2 Model E-3 rear panel I/O connectors AES Move the AES/ADAT switch to AES (up position). If you do not need the Dugan Music System, fourteen channels of automixing are available using both AES connectors. The content of the upper DB25 connector depends on the state of the 8–14 Ch switch. This can be set in the Dugan Control Panel (see Chapter 4: Dugan Control Panel) or with a power-up command (see Appendix A: Power-up Commands).
Dugan Model E-3 User Guide ADAT Move the AES–ADAT switch to the ADAT (down) position. This switches the I/O to the ADAT connectors. Word clock is available on the upper DB25 connector. The state of the 8–16 Ch switch determines the I/O count and linking capability. This can be set in the Dugan Control Panel (see Chapter 4: Dugan Control Panel) or with a power-up command (see Appendix A: Power-up Commands). 8-Ch • Channels 1–8 on AUD IN/AUD OUT.
Dugan Model E-3 User Guide Installation and Configuration Linking Up to eight Dugan units can be linked into a single automatic mixing system. The audio I/O for each must be configured and connected individually. Linking passes only control information between Dugans, not audio. One unit must be set to be the master and the others slaves. 1. Designate one unit as the master by setting the NORM–SLAVE switch on the rear panel to NORM (up). 2.
Dugan Model E-3 User Guide Patching the Model E-3 as an Insert to your Console Figure 3-4 Post-EQ, post-fader, pre-compressor insert patch for the Dugan Speech System on a Yamaha digital mixer On your digital mixer’s patch configuration screen, patch the channels as post-EQ, post-fader, pre-compressor inserts. Split Outputs When using the AES setting, the ADAT AUD OUT connector can send unprocessed signals (channels 1–8) to a multitrack recorder.
Dugan Model E-3 User Guide Installation and Configuration Connecting the Model CP-2 Control Panel The Dugan Model CP-2 Control Panel hardware can be connected to the four-pin mini-XLR connector. When a CP-2 is connected, the channel weight and master NOM gain limit, music system threshold, and automix depth values can be set only on the CP-2 and are read-only on the Dugan Control Panel(s).
Dugan Model E-3 User Guide We strongly recommend that Windows users turn the Windows firewall off. The Windows Firewall blocks port 9776 used by the Dugan software to communicate. If you must leave the Windows firewall on, either open this port or use the workaround described in Connecting when Windows Firewall is On on page 26. We recommend turning off the computer’s WiFi during this process because it sometimes interferes. You can turn it back on after the connection has been established.
Dugan Model E-3 User Guide Installation and Configuration 3. Click on the first unit in the list so it is highlighted. The Network Parameters section displays information about that unit. If Unit Reachable is YES, you are ready to use the Dugan Control Panel with that unit. If you have additional Dugan units to connect, select the next unit in the list and repeat this step. If you are finished with installation, proceed to Chapter 4: Dugan Control Panel. If Unit Reachable is NO, proceed to the next step.
Dugan Model E-3 User Guide Manually Add Unit If the Dugan unit does not appear in the Dugan Utility list pane, you can manually add the unit: 1. Power down the Model E-3. 2. Hold down Channel 1’s mute button and power up the unit. This performs a network reset. 3. Click Manually Add Unit. 4. Enter the default IP address: 192.168.1.xx xx = last two digits of serial number, unless they are 00, in which case enter 100. 5. Click OK to exit the dialog. 6. Click Refresh List.
Dugan Model E-3 User Guide Installation and Configuration Software Configuration for a Specific IP Address This section explains to users with IT expertise how to set a specific IP address for any Dugan unit on the network. 1. Launch Dugan-Utility-vxx.jar. Figure 3-7 Dugan Utility 2. Wait a minute and if the list pane is blank, click Refresh List. If the list pane remains blank, skip back to Manually Add Unit above. If the list pane displays Dugan units, continue. 3.
Dugan Model E-3 User Guide Connecting when Windows Firewall is On The Windows Firewall blocks access to port 9776, which is used by the Dugan software. If you must leave the Windows Firewall on, you can operate the Dugan Control Panel in a browser window. Enter the Model E-3’s IP address directly in the browser’s address field. The browser uses the Dugan Control Panel that is stored in the Model E-3’s hardware, not the version that you may have downloaded to your computer.
Dugan Model E-3 User Guide Chapter 4: Operation How it Works The Dugan Model E-3 Automatic Mixing Controller uses the Dugan Speech System™, a patented and trademarked automatic mixing function. The Dugan Speech System distributes the gain of one open microphone over the entire system, maintaining a natural one-mic ambience. It is essential to distinguish this behavior from the annoying fluctuation of levels and uneven ambience in a conventional gating system.
Dugan Model E-3 User Guide Settings 1. Put all the live mic channels in automatic mixing mode by deactivating bypass and mute. 2. Activate the mute buttons for all unused channels. Figure 4-2 Channel controls 3. Using a normal speaking voice, adjust the console input trim controls to the highest possible gain without clipping. The input gain to the Model E-3 should be high enough keep the level LED lit green during silences.
Dugan Model E-3 User Guide Operation 5. Balance the preamp gain controls so the fluctuating ambient noise registers equally on the Model E-3’s meters. Note that raising the preamp gain of one channel causes its gain to rise and the others to fall; it’s a balancing act. When balanced, all mics have equal access to the system gain. 6. If clipping occurs because someone speaks louder than expected, turn down all of the console’s input trim controls the same amount, which maintains the ambient noise balance.
Dugan Model E-3 User Guide Controller Control System Gain Control Console Microphone Input Insert Point A EQ Mix Bus Insert Point B Fader Insert Point C Figure 4-6 Insert points on most analog mixers are at point B To properly mute a channel: • Leave the console faders up, adjust levels while people are talking, and mute a mic by pressing the Dugan’s mute mode button. Enable the mic when needed by deactivating the mute button.
Dugan Model E-3 User Guide Chapter 5: Dugan Control Panel The Dugan Control Panel has both Java and iPad versions. This chapter discusses the Java version and notes the iPad app’s few differences.
Dugan Model E-3 User Guide Launch the Dugan-Control-Panel-vxxx.jar. If this file is not available and you have an Internet connection, you can obtain the latest version from: http://www.dandugan.com/downloads - OR http://tech.groups.yahoo.com/group/duganusers/files/ If you do not have an Internet connection, you can use the version of the Dugan Control Panel stored inside the unit’s firmware. See Using the Internally Stored Dugan Control Panel on page 25. The Dugan Control Panel has three panes.
Dugan Model E-3 User Guide Dugan Control Panel Add Units Manually To add a unit manually with a known IP address, click the + sign at the right of the Top Pane and enter the IP address in the dialog that appears. To add a unit manually without a known IP address: 1. Power down the Model E-3. 2. Hold down Channel 1’s mute button and power up the unit. This performs a network reset. 3. Click the + sign at the right of the Top Pane. 4. Enter the default IP address: 192.168.1.
Dugan Model E-3 User Guide Setting Controls Controls can be adjusted five ways: • Enter a dB value in the numeric field. • Drag in the numeric field (not on iPad). When a slider is present: • Drag the slider up or down. • Click in the slider track to raise or lower the value by 0.5 dB. • Ctrl-click anywhere on the slider to reset its value to 0 (touch and hold on iPad). Naming Units and Channels Connected units are displayed in the top pane in alphabetical order.
Dugan Model E-3 User Guide Dugan Control Panel Channel Pane The Channel Pane contains the controls and indicators for each channel. Channels are always in one of three modes: man, auto, or mute. The active channel mode illuminates. All transitions are made with a smooth, rapid fade. Select a channel mode by pressing the individual mode buttons or the Master PRESET button. Figure 5-3 shows a typical system: channels 1–4 in auto with ambient noise, and channels 5–8 in mute.
Dugan Model E-3 User Guide Bypass When bypass is active, the signal passes through without automixing. That channel appears inactive, with all lights extinguished. Figure 5-4 bypass button lit Since channels 1–8 are bypassed when the power is off, it is not necessary to unpatch the Model E-3 if not in use. Man and bypass modes are the same except for the transition. Bypass is instantaneous, which can cause an audible click, while man performs a quick fade without sonic ar- tifacts.
Dugan Model E-3 User Guide Dugan Control Panel Man In man mode there is no automixing, and the signal passes through at unity gain. Even though man and bypass modes perform similar functions, we recommend using man during live mixing to prevent clicks. Auto This is the normal Dugan automixing mode. Mute The channel is muted when mute is active. Preset Use the Preset function to store your favorite channel mode settings, which may be restored by pressing the Master PRESET button.
Dugan Model E-3 User Guide Channel Groups Each channel can be assigned to one group: a, b, or c. Each group functions as a separate, independent automatic mixer that can span multiple linked Dugans. Applications where groups are helpful include: • Separate Rooms: Assign the mics in each room to different groups so they function as separate automatic mixers. • Stereo Panning: Assign the mics panned left, right, and center to groups a, b, and c, respectively, to maintain a stable stereo ambience.
Dugan Model E-3 User Guide Dugan Control Panel Meters The meters have three display modes. Meter Displays Meter Color auto mix gain action of the Dugan Speech System green input input level yellow output output level Table 5-1 Meter modes blue The default meter display is auto mix gain. This is the most useful choice during normal operation; the input and output meters are only used when setting or checking levels.
Dugan Model E-3 User Guide It is important to understand that weight does not set that mic’s level in the mix when that person speaks, but only its sensitivity in activating automatic mixing. The Speech System detects the ratios of the levels between channels, not their absolute levels. The weight control is not a gate threshold! The following example illustrates how weight affects auto mix gain (see Figure 5-9).
Dugan Model E-3 User Guide Dugan Control Panel Figure 5-10 shows eight- and four-mic systems with appropriate auto mix gain displays when no one is talking.
Dugan Model E-3 User Guide Master Pane The content of the Master Pane changes to reflect the Dugan device selected. In the figure below, the selected device is “Dan’s E-3.” The following version numbers are displayed below the Dugan logo. • the selected unit’s firmware • the currently running Control Panel (CP-J) software This section documents the Master Pane’s controls and indicators.
Dugan Model E-3 User Guide Dugan Control Panel The Master controls, located on the far right, include channels (8, 14, or 16), reset, meters, clock source, system, mix bus, OVERRIDE, PRESET, and MUTE. A set of OVERRIDE, PRESET, and MUTE buttons appears for each active group. Each control is discussed below. Selecting the Number of Channels The state of the rear panel AES/ADAT switch determines the number of possible channels.
Dugan Model E-3 User Guide Clock Source Click the clock source button to select a word clock source. The default is Automatic, which selects the first valid source from the menu below. Figure 5-12 Clock source menu The Model E-3 can perform sample rate conversion on input signals with sample rates in the range 32–96 kHz. For inputs other than 48 kHz, set the clock source to Internal. The Dugan’s output is always 48 kHz.
Dugan Model E-3 User Guide Dugan Control Panel Mix Bus Matrix Click the mix bus button to open the mix bus matrix screen (see Figure 5-13). In eightchannel mode, an internal mix matrix can route processed or unprocessed inputs to six mix bus outputs (aux out 1–6) on the AES/EBU AUX I/O connector. Figure 5-13 Mix bus matrix screen in Dugan Control Panel The default mix bus assignment routes automix 1–8 to aux out 1.
Dugan Model E-3 User Guide Group Master Controls The Master Pane displays a set of group master control buttons for each group in use. Override Activating the Master OVERRIDE button has the following effect on individual channels: • Channel override button active: puts the channel in man mode with full gain (no automixing); - OR - • Channel override button inactive: mutes the channel. De-activating the Master OVERRIDE button returns the channels to normal operation.
Dugan Model E-3 User Guide Dugan Control Panel Dugan Music System and Gain Limiting These functions require the physical or software Dugan Control Panels. Dugan Music System The Dugan Music System is a soft-gating or ducking system with its threshold set by an audio side-chain, typically from a mic measuring the ambient sound level. Each channel has a 2:1 expansion ratio below the floating threshold.
Dugan Model E-3 User Guide Frame 1 Frame 2 Frame 3 Frame 4 70 60 2:1 expansion region Sound levels at mics (dB) 50 40 0 Resulting automix gains (dB) -10 -20 -30 Figure 5-14 Function of the Dugan Music System • Frame 3 shows a different person singing. The system automatically fades his/her gain to full, while the previous singer’s mic fades down and the other input stays down. • Frame 4 shows two people singing together.
Dugan Model E-3 User Guide Dugan Control Panel 8. On the console, set a ballpark level using the preamp gain of the music system threshold’s mic so all music system channels hover around -15 dB. Subsequently, use the Master music system threshold settings to fine tune the master threshold for each group. If all the channel auto mix gain displays stay at full gain, the threshold signal is missing or too low. 9.
Dugan Model E-3 User Guide 2. Reduce the maximum attenuation by setting the auto mix depth field to -10 dB. This limits the range of downward expansion and mixes in a steady ambience. If you use the Model CP-2 Control Panel, the last hold function is available: press both the master override and preset buttons at once. Their LEDs blink to indicate that last hold is on; toggle it off the same way. The last hold function keeps the last mic on that stays above -3 dB gain for 0.5 seconds.
Dugan Model E-3 User Guide Dugan Control Panel 10 8 6 Gain Reduction (dB) 4 2 0 0 2 4 6 8 Number of Open Mikes (NOM) Figure 5-16 NOM and gain reduction The Dugan’s unique implementation allows you to set the number of mics at full gain before gain limiting occurs. Set the NOM gain limit field in the range 1–10 (see page 34 to learn how to set controls). For example, if there is enough gain before feedback to tolerate four open mics, set the NOM gain limit to 4.
Dugan Model E-3 User Guide Gain Limiting Tip To see how Gain Limiting works: 1. Turn on NOM for all channels. 2. Mute all channels. 3. Click the arrow on the right edge of the Master Pane to open the Music System panel. 4. Set the NOM gain limit to 1. 5. Switch channels 1 and 2 to man mode. Note the master gain reduction on the NOM gain limiting display. 6. Switch additional channels to man mode to see more attenuation. 7. Click and drag in the NOM gain limit field to set it to a higher number than 1.
Dugan Model E-3 User Guide Chapter 6: Updates Updates for the Model E-3 can be downloaded. iPad To update the firmware in your Dugan unit, iPad users must connect a computer and run the Dugan Utility. To update the Dugan Control Panel for iPad, connect to the Apple App Store. To update your device’s software and firmware: 1. Connect to the Internet and download Dugan-Software-yyyymmdd.zip from: http://www.dandugan.com/downloads/ - OR http://tech.groups.yahoo.
Dugan Model E-3 User Guide Figure 6-1 Dugan Utility If you do not see the Dugan unit(s) on your network in the list, see Establishing Network Connections on page 22. 5. Select the unit to update from the list and click Update Firmware. The unit reboots after the update completes. NOTE: To force an update when the Update Firmware button is not blue, Ctrl-click the button.
Dugan Model E-3 User Guide Appendix A: Power-up Commands The Model E-3 can execute five power-up commands that can choose essential settings without being connected to a computer. Select the command by holding down a specific button during the entire power-up process (see table below). Power-up is complete after the LEDs stop flashing. To execute more than one command, turn the unit off after it finishes powering up, and repeat for the next command.
Dugan Model E-3 User Guide 8 or 14/16-Channel Mode Hold down the channel 4 bypass button to select 14 (AES) or 16 (ADAT) channel mode. Hold down the channel 4 mute button to select 8-channel mode.
Dugan Model E-3 User Guide Appendix B: Connector Pinouts DB25 connectors are wired with the Tascam/Digidesign standard.
Dugan Model E-3 User Guide Table B-1 Main Audio Connector Pinout Pin Signal 1 Chs. 7-8 Out Hi 2 Chs. 7-8 Out Gnd 3 Chs. 5-6 Out Lo 4 Chs. 3-4 Out Hi 5 Chs. 3-4 Out Gnd 6 Chs. 1-2 Out Lo 7 Chs. 7-8 In Hi 8 Chs. 7-8 In Gnd 9 Chs. 5-6 In Lo 10 Chs 3-4 In Hi 11 Chs. 3-4 In Gnd 12 Chs. 1-2 In Lo 13 nc 14 Chs. 7-8 Out Lo 15 Chs. 5-6 Out Hi 16 Chs. 5-6 Out Gnd 17 Chs. 3-4 Out Lo 18 Chs. 1-2 Out Hi 19 Chs. 1-2 Out Gnd 20 Chs. 7-8 In Lo 21 Chs. 5-6 In Hi 22 Chs.
Dugan Model E-3 User Guide Table B-2 Auxiliary Audio and Word Clock Pin 8-Channel Signal 14-Channel Signal 1 Word Clock Out Word Clock Out 2 Word Clock Gnd Word Clock Gnd 3 Aux 5-6 Out Lo Chs. 13-14 Out Lo 4 Aux 3-4 Out Hi Chs. 11-12 Out Hi 5 Aux 3-4 Out Gnd Chs. 11-12 Out Gnd 6 Aux 1-2 Out Lo Chs. 9-10 Out Lo 7 Word Clock In Word Clock In 8 Word Clock Gnd Word Clock Gnd 9 DARS-AES In 14 Lo Chs. 13-14 In Lo 10 MST 3-AES In 12 Hi Chs 11-12 In Hi 11 MST 3-AES In 12 Gnd Chs.
Dugan Model E-3 User Guide Table B-3 10 BASE T (Ethernet, TCP/IP) Pin Signal 1 T2 2 T1 3 R2 4 n/c 5 n/c 6 R1 7 n/c 8 n/c Table B-4 CP-2 Control Panel Pin Signal 1 Gnd 2 Tx+ 3 Tx- 4 V+ 60
Dugan Model E-3 User Guide Appendix C: Specifications Digital Audio I/O Main (AES/EBU) Eight inputs, eight outputs Auxiliary (AES/EBU) Optical (ADAT) Six inputs and TTL word clock in Six outputs and TTL word clock out Eight channels in and eight channels out 16-Channel mode: eight additional I/O channels using LINK connectors Gain Unity Sample Rate Input: 32 – 96 kHz (integral sample rate conversion) Output: 48 kHz Bit Depth 24 bit Audio Latency 2 ms Frequency Response 10 Hz – 22 kHz, Output N
Dugan Model E-3 User Guide Power Connector Coaxial with locking collar, 5.5 mm o.d., 2 mm i.d. Electrical Nominal 12 VDC, 1.5 A maximum; accepts 12–24 VDC, either polarity, or 9–18 VAC Input: 120 VAC, 60 Hz, 27 W Output: 12 VDC, 1.5 A External Supply Approved UL, CUL International supplies available by special order Dimensions 1RU Weight 3.5 lb (1.6 kg) 7 lb (2.5 kg) in shipping box with power supply H = 1.75 in (4.5 cm) D = 8.3 in (21 cm) W = 8.75 in (22.