V5.5 GPS Navigation Suite for T-Mobile: Sidekick LX on the Danger Environment User’s Guide Copyright © 2003-2009 TeleNav, Inc. All rights reserved. TeleNav is a trademark of TeleNav, Inc. © 2008-2009 Tele Atlas. All rights reserved. This material is proprietary and the subject of copyright protection and other intellectual property rights owned by or licensed to Tele Atlas North America, Inc. The use of this material is subject to the terms of a license agreement.
Table of Contents 1. Welcome ...............................................................................................................................................................5 2. Safety and Legal Notices...................................................................................................................................6 3. Data Service Options..........................................................................................................................................
Stop Navigating ........................................................................................................................................... 24 Recalculate Route ....................................................................................................................................... 24 Turn Icons Only ........................................................................................................................................... 24 2D Moving Map .......................
Commute Alerts.................................................................................................................................................. 45 Create New Alert .................................................................................................................................. 46 Weather............................................................................................................................................................... 47 12. Menu Options ..........
1. Welcome TeleNav™ 5.5 utilizes the integration of GPS position determination technology, the Danger programming environment, and access to your wireless carrier’s data network. The TeleNav application provides: • GPS navigation that punctually guides you turn-by-turn to any destination address in the Continental U.S and Canada. If you miss a turn or get off-track, TeleNav will calculate a new route for you.
2. Safety and Legal Notices Please read this section carefully before using TeleNav GPS Navigator TeleNav will not accept any responsibility whatsoever for accidents resulting from failure to observe common sense precautions. Your personal judgment, traffic regulations, and common sense must always take precedence over any driving direction produced by TeleNav. WARNING: Keep your eyes on the road.
3. Data Service Options The TeleNav GPS Navigator application that you install on your device requires a means of accessing the public Internet, which is typically provided by your carrier’s data network. The TeleNav GPS Navigator application on your phone communicates with the TeleNav servers to get routing, maps, and points of interest via your carrier’s data network. You do not need to purchase additional data services if you already have a data or email services plan for your phone.
Clicking the Menu key while using the TeleNav application may give you a variety of options, depending on what screen you are on. The options are discussed in the appropriate sections below. There is usually an option for Help to give you more guidance about a field or feature. © TELENAV, INC.
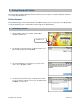
5. Getting Started with TeleNav The TeleNav GPS Navigator application that you install on your device requires a TeleNav subscription and means of accessing the public Internet. TeleNav Account TeleNav GPS Navigator can be downloaded from the T-Mobile Catalog. If you encounter any issues with launching or using the application, please call TeleNav Customer Support at 1-888-353-6284. 6. Launching TeleNav 1. On the T-Mobile Jump screen, find the TeleNav GPS Navigator and click on it. TeleNav’s icon 2.
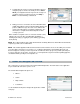
5. TeleNav will ask to track your current geographic location for navigation purposes. Please note that if you choose Never Allow, your navigation functions may not work correctly. You can always change your privacy preferences in Jump >> Menu >> Location & Privacy >> Advanced. 6. During your first use of TeleNav, the device will download the audible and graphical content needed to build the displays and produce audible messages.
Drive To Tab You can select a variety of ways to get driving directions to a destination. The Drive To Tab options are: • My Favorites • Recent Places • Address • Intersection • City • Businesses • Airports • Contact Select one of these items in the drop-down menu. See page 13 for more information on how to use the Drive To tab.
Maps & Traffic Tab This option shows you a map of your current location. Click Menu >> Get New Map to view a map of: • Your Current Location • A Favorite Place • A Recent Place • An Address you type or speak in • An Intersection • A City • A Business • An Airport • A Contact from your Address Book See page 39 for full details on these features.
8. Drive To Tab There are several ways to get driving directions to a desired location. 1. Select the Drive To tab. Then select one of the Drive To options in the drop-down menu. 2. Use the Search tab and search for a Point of Interest. In the Details screen, click Menu >> Drive To. The Getting Route progress bar appears after you select a Drive To address. To edit your route, click the Edit Route button before the progress bar reaches 100%.
To use the Drive To tab, do the following steps: 1. Select the “Drive To” tab at the top of the screen. 2. Select one of the following options from the drop-down menu as shown in the graphic to the right and discussed below. TIP: Coaching for each screen is available using the Menu >> Help option. My Favorites Favorites are places that you have saved in the past so you can quickly access them. Many TeleNav users save their home and work addresses as a Favorite so they can easily reuse the addresses later.
Click on a Favorite to begin navigation. You can also highlight a Favorite and press the Menu key for the following options. Not all the options below may be available, depending on the address you select. • Drive To – Get driving directions. • Call – Call the location (this option is only available if there is a phone number listed with the business). • View Reviews – View other people’s reviews of this location (if available). • Rate This – Enter your rating for the location.
there is a phone number listed with the business). • View Reviews – View other people’s reviews of this location. • Rate This – Enter your rating for the location. • Save as Favorite – Save the address to your Favorites list. The address will also remain in your Recent Places list. • Delete – Delete the Recent Place from the list. © TELENAV, INC.
Address – Typing In Enter a street address by typing in the appropriate fields. The address is automatically saved to your Recent Places list. 1. On the Drive To tab, choose “Address” in the drop-down menu. 2. Scroll down to the fields and enter a street address. Partial entry (5 or more letters) is okay for the street name. You can also leave the Address field blank and just type in a city and state or zip code to use the address of the city’s center.
Intersection Enter an intersection by typing in the appropriate fields. The intersection is automatically saved to your Recent Places list. 1. On the Drive To tab, choose “Intersection” in the drop-down menu. 2. Type in an intersection. As you enter characters, nearby cities or intersections that you have recently visited will be automatically suggested. To save time, you can select the suggestions before you finish typing. 3. Click Ok when you are finished typing. 4.
The Search options are: • What – Type in a search keyword • Category – Define a search category • Where – Define a search location In the Category directory, you can find the addresses and phone numbers of businesses such as restaurants, hotels, and gas stations. Once you find what you are looking for, click Done to get navigation directions to the business. The search result is automatically saved to your Recent places list. See page 17 for information on dictating an address.
Airports Quickly find airports by Airport Code or City Name. The airport is automatically saved to your Recent places list. 1. In the Airport screen, type the three-letter abbreviation of the airport, or type the whole name of the airport. As you type, matching airports will be suggested. You may highlight and select one of the suggestions to save you keystrokes. 2. Click OK to get navigation directions to the airport. See page 17 for information on dictating an address.
Edit Origin Highlight the “Origin” field on the Trip Confirmation screen and click the trackball to select a new starting point for the trip. Then pick a new origin from the drop-down. Edit Destination Highlight the “Destination” field on the Trip Confirmation screen and click the trackball to select a new ending point for the trip. Then pick a new destination from the drop-down.
Initial Driving Directions Within a few seconds of selecting a Drive To location, TeleNav GPS Navigator calculates what it believes to be an optimal route to your destination and tells you how to start your trip. If you are not moving, TeleNav GPS Navigator may not know your direction of travel, so the first few driving directions may be incorrect since TeleNav GPS Navigator may initially make an incorrect assumption.
It may take approximately 15 to 30 seconds for TeleNav GPS Navigator to update your route. If during this process you make additional deviations from your current route, TeleNav GPS Navigator may have to contact its servers for another new route. Since TeleNav GPS Navigator requires access your carrier’s network, if you are off route and outside of the carrier’s coverage area, you must return to your carrier’s coverage area in order for TeleNav GPS Navigator to recalculate your route.
The View menu has the following options: Stop Navigating This option exits the current navigation session (same as pressing the Escape key). Simply choose OK on the pop-up confirmation. Recalculate Route Use this option to refresh the calculation to your destination, for example, if you have selected the “Avoid Traffic Delays” routing option and you want to proactively refresh your route to optimize for traffic.
You will see the distance along the route until the accident and hear an audio warning. 3D Moving Map A 3-dimensional map with turn icons (default). This view allows you to see how the road ahead is organized, similar to the perspective of a bird flying above the route. You can see the route to your destination as a blue overlay on one of the roads with white triangles leading you in the correct direction. Orange arrows mark any upcoming turns.
In 3D and 2D moving maps, you can zoom in or out while navigating by using the “Q” and “P” keys. You can also pan the map up, down, left, and right by using the trackball. You may see a small network activity indicator comprised of two arrows in the upper right corner of the display when you change map scale factor. If you pan out of the current route, the map will snap back to the current route after 15 seconds with no click activity. The content on the 3D Moving Map navigation view is explained below.
Route Summary A text listing of every turn for this navigation session from your starting location to your destination along with mini turn icons. Highlight a segment and press the SPACE key to hear the audio for that segment. Map Summary The entire route from your starting location to your destination is drawn on a map, complete with the latest traffic alerts and traffic flow information. The route is displayed as a blue line connecting the Start and Finish flags.
Traffic Summary Displays overall delay from traffic, a summary of incidents on the route, and the average speed for each segment where available. You can click on any line to view more details. Below is an explanation of what you will see on the Traffic Alert screen: • • Incidents (triangle icons) – Total number of remaining incidents directly along the route.
• Incident Detail – Each incident is displayed with the following: -Incident icon color-coded by severity -Location -Additional comments • NOTE: If there is no flow information for a segment, the Average Speed bar on the Details page is grayed out. © TELENAV, INC.
Search Along Route Use the Search tab to find the desired locations along your navigation route. For example, find every Mexican restaurant on your route between San Francisco and Sacramento. This also displays how many miles off your route each restaurant is. Select a restaurant from the Search Along list to get driving directions from your current location to the restaurant. NOTE: Once on the Search screen, press the Left Shoulder button to search by voice.
3. A progress bar indicates how long until a new route is generated. 4. The Suggested Route screen shows the proposed new route, outlining the original (blue) and suggested route (green), as well as listing the estimated time saved. • Click the trackball to accept the Suggested Route and start navigation. • Click the Cancel key to cancel and go back to the Traffic Summary screen.
9. Search Tab The Search tab provides you with a few different ways to find the addresses and phone numbers of businesses such as restaurants, hotels, and gas stations. You can also find WiFi spots for Internet access (TeleNav marks which are free) and parking lots or garages. If the search succeeds, you will be presented with a list of businesses that are near the search point, or within the search area you specified.
4. The Results screen appears with details about your selection. The screen shows: a) the name of the business, b) the distance from the search point, c) the street address, d) the phone number (if available), and e) user-submitted ratings for the business. 5. Click the trackball to expose the menu and choose from the following options: • Drive To – Get driving directions (this option will call up the Going To confirmation pop-up).
Define a Location You can choose to either search for the business near your current location or near another location that you specify. 1. In the Search screen, highlight the “Where” field and click the trackball. 2. In the pop-up, select a location in the drop-down menu and enter the required information for your new search point. 3. Click OK when you are finished. Then choose Done on the Search screen to begin the search. Sorting Options You have a variety of options to sort your search results.
Sort By Relevance This is the default sorting option, a combination of best match and distance. “Sort by Relevance” is not valid for “Gas by Price” searches. Sort by Distance Sort the businesses in your Search Results screen by order of distance to your chosen location. Sort by Star Rating Sort the businesses in your Search Results screen by the amount of stars they received from user ratings. Highlight a business in the list to view the distance from your chosen location.
On the Map Results screen, press 1-9 to center on a certain location. Press the 0 key to view more results. Points of interests are ordered based on how they were sorted on the Search Results page. If sorted by distance, the #1 point of interest is the one closest to the search location. If sorted by rating, the #1 point of interest is the one with the highest rating.
Search for Gas by Price You can search for the cheapest gas prices around your current location or another location that you specify. 1. Choose the “Search” tab at the top of the screen. 2. Click “Category” >> Gas By Price and choose a fuel grade. NOTE: Choose “Any” To search through all the categories. 3. Choose a search location in the “Where” field. 4. Click Done to get the search results. 5. The Search Results screen displays with a list of gas stations sorted by price.
Read Reviews 1. In the Search Results screen, select a location. 2. In the Details screen, press the Menu key and choose “View Reviews.” NOTE: This option is not available if the business currently does not have any reviews written yet. 3. A summary of all the reviews is presented on the next screen. Highlight a line and click the trackball to read the full review. Submit Your Own Rating 1. In the Search Results screen, select a location. © TELENAV, INC.
2. In the Details screen, press the Menu key or the trackball and choose “Rate This.” 3. In the Rating screen, use the phone’s keypad to enter a rating from 1 to 5 and then click Submit. Your rating will be averaged with other users’ ratings and will affect the location’s popularity points. NOTE: If you click on the “Rate This” option for a location that you have already rated, the original rating is displayed by default.
2. From the “Map It” option for any location that you have found using the Search directory. For example, select Search from the tabs across the top of the screen. Search the category for your desired location and then select the Map It option in the menu for the location that you found. Map Menu Options You have the following options on the menu when viewing a map: • Show/Hide Traffic – View or hide the traffic conditions for your current route (see “Check Traffic” section below).
Check Traffic In the Maps & Traffic tab, you can also check traffic conditions around a certain area. 1. Select “Maps & Traffic” from the tabs at the top of the page. Then choose a location from the drop-down menu. 2. The map of your chosen location appears. By default, traffic will be shown on this page. You can choose “Hide/Show” Traffic from the menu. NOTE: You can zoom in or out using the “Q” and “P” keys. Use the trackball to pan the map.
My Favorites You can view your Favorites or create new ones in this screen. • Create New Favorite – Select an address to mark as a Favorite. • Received Addresses – This folder contains addresses that other TeleNav users have shared with you. You can delete favorites from this category, but the category itself may not be deleted or renamed. In the Received Addresses folder, highlight any address to see who sent the address to you. The name and phone number of the person will be displayed.
Category This option allows you to organize where a location should be stored. 1. In Tools/Extras >> My Favorites, highlight an individual Favorite in the list. 2. Click Menu and choose Edit. The Edit Favorite pop-up appears. 3. Highlight the Category field and click the trackball. 4. On the Categories pop-up, check the category folder in the list to add the location to the folder. You may select as many categories as you would like. 5. Click Done to go back to the Edit Favorite pop-up.
1. Choose Tools/Extras >> My Favorites. 2. Highlight the category that you want to rename or delete. Then press Menu >> Rename or Menu >> Delete. 3. You have the following delete options: • Category Only – Delete just the category. All favorites will be moved out of it and appear on the Favorites screen. • Category & Favorites – Delete the category and all favorites in it. This deletes the favorites in this category only.
Record Location To record your current location as a Favorite and mark it for future use, do the following: 1. Go to Tools/Extras >> Record Location. 2. The Create Favorite pop-up appears. Fill out the following information: • Address – Your current location is listed by default. Click the trackball to select a different address. • Category – Manage your locations by saving them in categories (see “Category” on page 43). • Label – The default label is based on the current location.
• View Current Map – View this route on a map, complete with any traffic incidents and flow information. • Edit Alert – Edit details of the alert, including origin, destination, and time and frequency of commute. • Delete Alert – Delete the alert from the list. • Turn Off Alert – Save the alert in the list, but turn notification off. • Create Copy – Create another copy of the alert (useful for when you would like to create a similar alert and do not want to re-type all the information).
3. Click Save when you are finished. Weather Check the weather conditions for your current location or for another location that you select. You can also see the extended weekly forecast. 1. Go to Tools/Extras >> Weather. 2. The weather condition for your current location is displayed. 3. Click Change Location to view weather for another location. 4. Click Week Forecast to see weather conditions for the next seven days. Click on any line to view details for that day. © TELENAV, INC.
12. Menu Options When you highlight any of the main tabs at the top of the screen, you can press the Menu key for additional options, explained below. Location Permissions & Privacy This menu option explains why TeleNav uses your current location and discusses TeleNav’s privacy policy, which you can find in full detail on http://www.telenav.com You can change TeleNav’s location access permissions by going to Jump >> Menu >> Location & Privacy >> Advanced.
Preferences Choose Menu >> Preferences to set personal preferences. Click the Menu key on each line to choose form the options available for that particular feature. After you select your new preference, choose Done. General In Menu >> Preferences >> General, you can edit the following: • Region – Select North America. • Language – Determines the language used for screen labeling and audio prompts. • Distance Units – Miles/feet or kilometers/meters.
• Avoid – Select what to avoid on your route: HOV lanes, Tolls, and Traffic Delays. You can make multiple selections. • Moving Maps – Choose between 2D Moving Maps or 3D Moving Maps to use as your default during navigation. • Traffic Alerts – On or Off. If this feature is on, audio and visual traffic alerts will appear on the 2D or 3D Moving Maps screen if there is a traffic incident on the route ahead.
About TeleNav This menu option shows the exact version of TeleNav GPS Navigator that is on your phone. Knowing the exact version of your software may be helpful if you ever have to call TeleNav Technical Support. Support Info Find contact information for TeleNav Customer Support here. Once you are on the Support screen, you can click Menu to quickly call Customer Support, send an email, or view additional support information from your device’s Internet browser.
13. Suspending TeleNav GPS Navigator Making a Phone Call from TeleNav GPS Navigator You can Call In to a location that you have found in a Search such as a restaurant, a hotel, or a church. Simply select the “Call It” option when available in the menu of Search Details screens. Taking an Incoming Call When you are using TeleNav GPS Navigator and your phone receives an incoming call, your phone rings and displays a screen that gives you the option to Answer the call or Ignore the call.
Calendar and E-mail Events When a scheduled calendar event occurs, or an e-mail message arrives while you are using TeleNav, a pop-up notification will appear similar to that shown on the right. You can interact with the Calendar or e-mail event by Opening it, or you can Dismiss it. If you Open the application associated with the notification, TeleNav will be suspended while you are interacting with the other application, but it will still be navigating.
15. Removing and Reinstalling TeleNav GPS Navigator Removing TeleNav TeleNav GPS Navigator can either be uninstalled or discarded from your device from the Applications folder. • Uninstall – This option removes the application title from your Applications folder, which can be useful for when you need more storage space. You will still be billed monthly for the service. You can go back to the T-Mobile Catalog at any time to reinstall TeleNav GPS Navigator for free (see “Reinstalling” below).
• Business search for finding restaurants, hotels, stores, schools, government offices, etc. You can also get addresses, phone numbers, maps, and directions. • Contact Customer Support. If you need to migrate your TeleNav account to a different phone number, please call TeleNav Customer Care at 1-888-353-6284. For security reasons, you cannot perform this change unassisted. 17. Error Conditions Account cancelled/not found You do not have a valid TeleNav GPS Navigator account.
18. FAQs Why do I need the carrier’s data service? The data plan allows you to access nationwide routes, maps, and Directory content from the TeleNav GPS Navigator servers using the data communication features of your phone. These services are different from your cellular airtime. To order a data plan from your wireless carrier, please contact their customer support directly.
traveled at your last recorded rate of speed. TeleNav GPS Navigator recalculates your current position when you regain a GPS signal and adjusts your driving directions accordingly. 19. Customer Support Send an email with your questions or comments to TeleNav GPS Navigator Customer Support, or enter a comment through the TeleNav GPS Navigator Web site. We will promptly reply to your inquiries. Technical Support Toll Free Customer Support Line: 1-88-TeleNav-4 (1-888-353-6284) Fax: 408-245-0238 care@telenav.