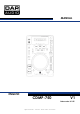
MANUAL ENGLISH CDMP-750 V1 Ordercode: D1155 Highlite International B.V.
CDMP-750 Table of contents Warning ...............................................................................................................................................................................2 Unpacking Instructions .................................................................................................................................................2 Safety Instructions .............................................................................................................
CDMP-750 Warning Unpacking Instructions Immediately upon receiving this product, carefully unpack the carton and check the contents to ensure that all parts are present, and have arrived in good condition. Notify the dealer immediately and retain packing material for inspection if any parts appear damaged while shipping or the carton itself shows signs of mishandling. Save the carton and all packing materials.
CDMP-750 IMPORTANT: The manufacturer will not accept liability for any resulting damages caused by the non-observance of this manual or any unauthorized modification to the system. Never let the power cord come into contact with other cables! Handle the power cord and all connections with the mains with particular caution! Never remove warning or informative labels from the unit. Never use anything to cover the ground contact. Never leave any cables lying around.
CDMP-750 Return Procedure Returned merchandise must be sent prepaid and in the original packing, call tags will not be issued. Package must be clearly labeled with a Return Authorization Number (RMA number). Products returned without an RMA number will be refused. Highlite will not accept the returned goods or any responsibility. Call Highlite 0031-455667723 or mail aftersales@highlite.nl and request an RMA prior to shipping the device.
CDMP-750 Description of the device Features The CDMP-750 is a professional DJ CD/MP3 Player from DAP Audio.
CDMP-750 Fig. 02 USB port Memory C button CD/ USB button Reloop/ Exit Edit Memory D button / encoder Folder button Reverse button Prog.
CDMP-750 Frontside Backside Fig. 03 Disc Slot Digital out Line out L/R Remote jack Relay jack Power switch Power cord Installation Remove all packing materials from the CD Player. Check if all the foam and plastic padding is removed. Connect all cables. Always disconnect from electric mains power supply before cleaning or servicing. Damages caused by non-observance are not subject to warranty.
CDMP-750 Functions Names and Functions Below is a description of the control functions. 01) USB port Use this port to connect a USB stick or an external hard disk. The USB port is only active when you’re in USB mode. Note: The CDMP-750 can handle a maximum of 2 Tbyte, 999 folders and 999 files. 02) CD/ USB button Use this button to select CD mode or USB mode.
CDMP-750 15) LCD Display Fig. 04 16) 17) 18) 19) 20) 21) 22) 23) 24) TOTAL TRACK: Shows the current track number or the folder number while selecting folders. : Indicates that the unit is in playback mode : Indicates that the unit is in pause mode CUE: indicates that a cue point has been memorized. CD: Indicates that the unit is in CD mode. USB: Indicates that the unit is in USB mode. PC: No function in the CDMP-750.
CDMP-750 playback, so stop playback before pressing the button.
CDMP-750 25) FX On/Off button This button allows you to toggle the effect processor on or off. Press the Relay (06) button to switch between gain and parameter. Once gain is selected, the button will light up and show the gain value on the LCD display (15) will show the gain value blinking. If the parameter is selected, the Relay (06) button will blink, just like the parameter value on the LCD display (15).
CDMP-750 37) Master tempo button Allows you to toggle the master tempo mode on or off. When master tempo mode is active, the button will light up in red. While master tempo mode is active, the pitch fader allows you to shift the pitch of the song played back while the tempo of the song stays the stays unchanged. 38) Range 100% LED Indicates that the maximum range for the Pitch control fader (32) is ± 100%. 39) Disc slot Place the disc gently in the slot. The disc will load automatically.
CDMP-750 Operations Loading a CD Hold the disc by the edges and Press it gently in the Disc Slot (39). The Disc will now be loaded automatically. Unloading a CD 01) The disc can't be ejected during playback. Stop the playback first. 02) Press the Eject (24) button. The disc will be ejected. 03) If the movement of the disc stops, take the disc by the edges and remove it completely from the slot.
CDMP-750 Stop playback There are two ways to stop playback: 01) Press the Play/Pause (13) button during playback mode to pause at that point. 02) Press the Cue (11) button during playback to return to the cue point and enter pause mode. Fig. 09 Pausing 01) Press the Play/Pause (13) button to switch between play and pause. 02) The Play/Pause (13) button and the Cue (11) button will flash when the unit is in pause mode. 03) Playback resumes when the Play/Pause (13) button is pressed again.
CDMP-750 Frame search Frame search is a function for monitoring the sound at a certain section of the disc and manually changing the position. Searching is used to set a starting point with precision. 01) Turn the Jog wheel (10) while in pause mode or cue mode to begin searching. The sound for one revolution of the disc is output repeatedly. The point at which the sound starts is indicated on the display.
CDMP-750 Program play 01) Press the Play/Pause (13) button to enter the pause mode. 02) Press the Prog. (05) button, the player will enter the program mode. 03) Select the desired track by rotating the Edit encoder (03), confirm by pressing the track encoder. The selected track will be added to the program sequence. 04) Repeat the previous steps desired number of times. A maximum of 99 tracks can be programmed. 05) Press the Prog. (05) button to store the program sequence.
CDMP-750 Creating a hot loop Creating a hot loop is the action of “storing” the current loop in one of the four hot loop memories. 01) If you already have made a loop, skip steps 1 – 3 and proceed to step 4. Otherwise, you have to make a loop first and go to the next step. 02) Press the Loop In (17) button to set the loop start point, The Loop In (17) button will light up, indicating that the start point is memorized. 03) Press the Loop Out (19) button to set the loop end point.
CDMP-750 Maintenance The DAP Audio-CD-Player CDMP-750 requires almost no maintenance. However, the unit should be kept clean. Disconnect the mains power supply, and then wipe the cover with a damp cloth. Do not immerse in liquid. Do not use alcohol or solvents. Keep connections clean. Disconnect electric power, and then wipe the audio connections with a damp cloth. Make sure that connections are thoroughly dry before linking equipment or supplying electric power.
CDMP-750 Product Specifications Quantization: Oversampling rate: Sampling Frequency: Frequency response: T.H.D. + NOISE: S/N ratio (IHF-A): Dynamic range: Output level: Disc Type: USB Ports: Time Display: Text Mode: Pitch control range: 1 bit linear/Channel, 3 Beam Laser 8 Times 44.1 kHz 20 Hz to 20 kHz ±2db < 0,03% > 75 dB > 75 dB 1,0 Volts R.M.S. ±0.
CDMP-750 Dimensions Ordercode: D1155 20
CDMP-750 Notes Ordercode: D1155 21
CDMP-750 Ordercode: D1155 22
CDMP-750 Ordercode: D1155 23
©2015 DAP Audio