Palladium P-400 P-500 P-700 P-900 P-1200 P-1600 P-2000 ORDERCODE D4131(B) ORDERCODE D4132(B) ORDERCODE D4133(B) ORDERCODE D4134(B) ORDERCODE D4135(B) ORDERCODE D4136(B) ORDERCODE D4137(B) Highlite International B.V.
Congratulations! You have bought a great, innovative product from DAP Audio. The DAP Audio Palladium Series brings excitement to any venue. Whether you want simple plug-&-play action or a sophisticated show, this product provides the effect you need. You can rely on DAP Audio, for more excellent audio products. We design and manufacture professional audio equipment for the entertainment industry. New products are being launched regularly. We work hard to keep you, our customer, satisfied.
DAP Audio DAP Audio Palladium™ Product Guide Warning ........................................................................................................................................................................... 3 Safety Instructions ..................................................................................................................................................... 3 Operating Determinations ........................................................................................
Warning FOR YOUR OWN SAFETY, PLEASE READ THIS USER MANUAL CAREFULLY BEFORE YOUR INITIAL START-UP! Unpacking Instructions Immediately upon receiving this product, carefully unpack the carton and check the contents to ensure that all parts are present, and have been received in good condition. Notify the dealer immediately and retain packing material for inspection if any parts appear damaged from shipping or the carton itself shows signs of mishandling. Save the carton and all packing materials.
Only use device indoor, avoid contact with water or other liquids. Only operate the fixture after having checked that the housing is firmly closed and all screws are tightly fastened. Only operate the device after having familiarized with its functions. Avoid flames and do not put close to flammable liquids or gases. Always disconnect power from the mains, when device is not used or before cleaning! Only handle the power-cord by the plug.
Connection with the mains Connect the device to the mains with the power-plug. Always pay attention, that the right color cable is connected to the right place. International L N EU (including UK) From April 2004 Brown Blue Green/Yellow North America Black White Green Pin Phase Neutral Protective Earth Make sure that the device is always connected properly to the earth! Return Procedure Returned merchandise must be sent prepaid and in the original packing, call tags will not be issued.
Description of the device Features The Palladium is an amplifier from DAP Audio. There are 7 different versions: P-400, P-500, P-700, P-900, P1200, P-1600 and P-2000.
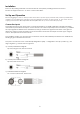
Backside Fig.
Installation Remove all packing materials. Check that all foam and plastic padding has been removed. Secure the equipment into a 19" rack. Connect all cables. Set Up and Operation Before plugging the unit in, always make sure that the power supply matches the product specification voltage. Do not attempt to operate a 120V specification product on 240V power, or vice versa. Do not supply power before all components of the system are set up and connected properly.
Connecting Outputs Speakers can be connected using Banana plugs, Speakon plugs or bare wire to the binding posts on the rear panel of the amplifier. Consult the Wire-Gauge-Chart to determine suitable wire gauges for different load impedances and cable lengths. The red binding posts are considered „hot“, connected to the positive poles of the speakers, while the black binding-posts are Signal Ground, connected to the negative poles of the speakers.
Bridged Mono Operation Both amplifier channels can be bridged together to make a very powerful single channel amplifier. When the Mode switch is set to the “Bridge” position, 1 channel “pushes”, while the other “pulls” equally. Thus effectively doubling the power. Use extreme caution when operating the amplifier in the bridged mode. To bridge the amplifier, set the mode switch to the “Bridge” position.
Signal-LED This green LED lights, when its channel produces an output signal of about 4 Volt RMS or more (0,1V or more at the input, with 0dB attenuation and standard 40X voltage gain). It is useful to determine whether the amplifier is amplifying a signal. Protect LED When the red LED lights, indicating that the channel has overheated, the channel’s output relay is open, and the speaker(s) has been disconnected for any of the following reasons: 1.
Connection Cables Take care of your cables, always holding them by the connectors and avoiding knots and twists when coiling them: This gives the advantage of increasing their life and reliability. Periodically check your cables. A great number of problems (faulty contacts, ground hum, discharges, etc.) are caused entirely by using unsuitable or faulty cables.
Maintenance The DAP Audio Palladium-series requires almost no maintenance. However, you should keep the unit clean. Disconnect the mains power supply, and then wipe the cover with a damp cloth. Do not immerse in liquid. Do not use alcohol or solvents. Keep connections clean. Disconnect electric power, and then wipe the audio connections with a damp cloth. Make sure connections are thoroughly dry before linking equipment or supplying electric power.
Product Specification Specification 8 Ω Stereo Power (RMS) 4 Ω Stereo Power (RMS) 8 Ω Bridge Power (RMS) P-400 P-500 P-700 P-900 P-1200 P-1600 P-2000 150W 180W 240W 350W 530W 600W 700W 225W 270W 360W 525W 800W 900W 1050W 450W 540W 720W 1050W 1600W 1800W 2100W Frequency Response THD + N <0.05% <0.05% <0.05% <0.05% <0.05% <0.05% <0.05% IMD <0.01% <0.01% <0.01% <0.01% <0.01% <0.01% <0.
Wire Gauge Chart (Metric) Stranded Cable Length (m) 2 5 10 30 Wire Gauge Power Loss % Power Loss % Power Loss % 0,3 0,5 0,75 1,5 2,5 4 0,5 0,75 1,5 2,5 4 6 0,5 0,75 1,5 2,5 4 6 0,75 1,5 2,5 4 6 10 (8 ohm load) 2,9 1,74 1,16 0,58 0,35 0,22 4,3 2,9 1,45 0,87 0,55 0,37 8,24 5,6 2,9 1,74 1,09 0,73 15,5 8,2 5,1 3,2 2,2 1,31 (4 ohm load) 5,6 3,4 2,3 1,16 0,7 0,44 8,2 5,6 2,9 1,74 1,09 0,73 15,5 10,8 5,6 2,9 1,74 1,09 0,73 15,5 9,8 6,3 4,3 2,6 (2 ohm load) 10,8 6,7 4,5 2,3 1,39 0,87 15,5 10,8 5,6 3,4 2
Wire Gauge Chart (AWG: American Wire Gauge) Stranded Cable Length(ft) 5 10 40 80 Wire Gauge Power Loss % Power Loss % Power Loss % (AWG) 18 16 14 12 10 18 16 14 12 10 18 16 14 12 10 8 18 16 14 12 10 (8 ohm load) 0.81 0.51 0.32 0.2 0.128 1.61 1.02 0.64 0.4 0.25 6.2 4 2.5 1.6 1.01 0.6 11.9 7.7 5 3.2 2 (4 ohm load) 1.61 1.02 0.64 0.4 0.25 3.2 2 1.28 0.8 0.51 11.9 7.7 5 3.2 2 1.2 22 14.6 9.6 6.2 4 (2 ohm load) 3.2 2 1.28 0.8 0.51 6.2 4 2.5 1.6 1.01 22 14.6 9.6 6.2 4 2.4 37 26 17.8 11.8 7.