
User guide

Sheet Metal/Wood Point Drill Attachment
1/16” through 1/2” ( 2.5 -20 mm)
(DAREX Part # 4500)
Installation and Operating Instructions
Installation
The #4500 attachment uses the chuck and alignment
fixture that comes with your standard Darex Drill
Sharpener. All that is required for mounting is to take the
standard sharpening mechanism off by removing the
wing nut and then attaching the #45OO sharpening
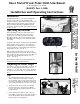
mechanism. Set the point angle at two marks to the left
of 180 as shown.
Adjusting the Relief Angle
To increase or decrease the relief angle, loosen the two
bolts “A” shown below and slide the fixture arrow
towards the + for more and - for less relief. Retighten
the bolts making sure the fixture is perpendicular to the
base.
Tips
1 By using different point angle settings. you can
achieve many different point styles. The further to
the left (towards 135) you set the point angle arrow
the shorter center point you will produce. At the 180
angle setting you will produce a longer center point.
2 The further off the left hand edge of the grinding
wheel the thicker the center part of the drill will
become. This setting is made by turning the wheel
positioning knob.
3 If the center tip of the drill is too wide or flat, the
point splitter of your M-5 is used to sharpen or thin it.
Some experimentation will be required to find the
proper position for your application.
Figure 4
Figure 1
Operating Instructions
Before attempting to sharpen a drill using the sheet
metal/wood point attachment make sure you have
learned to use your sharpener using the Standard
Operating Instructions. Once you have mastered stan-
dard drill points, learning to use this attachment will be
very simple
Position the drill using the standard chuck and alignment
fixtures and the same procedure as you would for a
standard drill. The only difference is you must align the
chuck arrow with the second mark from the right on the
chuck band as shown. ( See Fig. 2 )
With the grinder turned off place the chuck into the
sharpening mechanism and using the wheel positioning
knob. position the drill so that the center of the drill is off
the left edge of the grinding wheel about 1/16” as
shown. (See Fig. 3)
Now sharpen the drill as you would a standard point,
rotating the chuck in a clockwise direction.
Figure 2
Figure 3