Set pets Dario® LC Blood Glucose Monitoring System User Guide
© 2018 LabStyle Innovation® Ltd., ALL RIGHTS RESERVED BASIC INFORMATION Please read this user guide thoroughly. If you have questions, you can contact our customer support toll-free in the U.S. at 1-800-895-5921, 9:00 AM – 5:00 PM EST Monday through Friday. Internationally visit www.mydario.com. Please contact your health care provider for questions or concerns outside of the normal customer support hours. Manufacturer: LabStyle Innovation® Ltd. 8 Hatokhen St.
Table of Contents CHAPTER 1 INTRODUCTION AND IMPORTANT SAFETY INSTRUCTIONS ...............................6 Glucose Monitoring for a Mobile Age....................................................................... 6 Intended Use ........................................................................................................ 6 System Limitations................................................................................................. 7 Important Safety Instructions............................
Blood Glucose Testing Precautions .........................................................................40 Test Strip Precautions ...........................................................................................41 Factors That Interfere with Blood Glucose Testing....................................................42 Interpreting the Results.........................................................................................43 Measurement Range................................................
Compliance with Electrical and Safety Standards ......................................................68 Disposing of Used Products....................................................................................68 CHAPTER 8 WARRANTY, REPAIRS AND SUPPLIES ............................................................ 69 Repair Policy ........................................................................................................69 Manufacturer’s One Year Warranty ...................................
CHAPTER 1 INTRODUCTION AND IMPORTANT SAFETY INSTRUCTIONS Glucose Monitoring for a Mobile Age Congratulations on your choice of the Dario LC Blood Glucose Monitoring System. The Dario LC System was created to make life easier for people with diabetes by providing the right tools, information, and support in your pocket. It is a smart phone-based monitoring system, featuring a pocket-sized meter with an integrated lancing device and test strips, combined with an easy-to-use mobile application.
The Dario Glucose Control Solutions are for use with the Dario LC Blood Glucose Meter and the Dario Blood Glucose Test Strips to check that the meter and test strips are working together properly and that the test is performing correctly. System Limitations The Dario LC System should not be used for the following purposes: • • • • • The diagnosis of, or screening for, diabetes. Testing the glucose levels of neonates (children younger than 4 weeks of age). Testing glucose levels of arterial or venous blood.
Important Safety Instructions The meter and lancing device are for single-patient use. Do not share them with anyone, including other family members. Do not use on multiple patients. All parts of the kit are considered bio-hazardous and can potentially transmit infectious diseases even after you have performed disinfection.
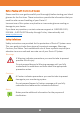
Before Testing with the Dario LC System Please read this user guide carefully and thoroughly before testing your blood glucose for the first time. These instructions provide the information that you need for safe use and handling of your Dario LC. Incorrect use of this system may lead to an inaccurate glucose reading or damage to your device. If you have any questions, contact customer support at 1-800-895-5921, 9:00 AM – 5:00 PM EST Monday through Friday. Internationally visit www.mydario.com.
Practices Used in This User Guide The following sections describe the formats and symbols used throughout this user guide, on the Dario LC System packaging and inserts, and on actual system parts. Procedure Instructions • Procedure instructions are clearly identified and presented as numbered steps. If relevant, a system response is written below the step in italics. • You should perform all procedures in the order of the steps provided.
Symbols and Descriptions The following table lists and describes the symbols that appear throughout this guide, on packaging or package inserts, or on the actual system parts. Symbol Description Symbol LabStyle Innovation Ltd. logo Consult instructions for use Do not use if seal is broken or missing In Vitro Diagnostic Batch code Expiry date 1M Shelf life after you first opened the package Do not reuse Temperature limitation Catalog number Contents Manufacturer: LabStyle Innovation Ltd.
General Precautions This section provides information about potential hazards that may harm your Dario LC System or cause it to not function properly. Inspect the Dario LC System prior to use. Avoid using any part of the system with broken seals or expired dates. Do not attach or use a component if it is damaged in any way, as it may not work properly.
• • by a laboratory. Ask your health care provider about other possible backup methods. Do not change your treatment based on a single result that is inconsistent with how you feel or if you believe that your test result could be incorrect. The blood glucose reading displayed on your smart mobile device by Dario LC System should not be the only information you use to make decisions about your health. Always consult your health care provider to interpret and understand the measurement results.
CHAPTER 2 DARIO LC SYSTEM OVERVIEW AND FEATURES This chapter provides an overview of the Dario LC System components and describes how to set up the Dario LC System for the first time. Your Dario LC System at a Glance The Dario LC System is a cloud-based diabetes management solution that combines software applications with a stylish all-in-one device. The all-in-one device features a lancing device, test strip cartridge, and a compact meter.
Dario LC Components The Dario System components are shown in the image below and described in the following table.
Component Glucose Meter (A) Dario LC Meter (B) Dario LC Meter release panel Description The miniature glucose meter consists of the following components: • A Lightning connector that is plugged into the Lightning port of your smart mobile device. • A strip port for insertion of the test strip. The glucose meter receives its power from the mobile device. It does not require batteries or any other electrical source. When not in use, the meter snaps into its slot in the housing for protected storage.
Component Test Strip Description The Dario Test Strip is the only strip which is used with the Dario LC System. A new test strip is inserted into the test strip port of the glucose meter prior to each glucose measurement. Lancets The Dario LC System uses a 30G lancet. To replace the lancet, remove the orange lancing device cover, pull out the used lancet, and replace it with a sterile one.
Supported Platforms for the Dario App The Dario LC Glucose Meter uses smart phone technology to view and store unlimited numbers of glucose test results. You can also track other diabetes information and view graphs and trends. You can even share your diabetes management information with your health care provider. The Dario LC System is compatible for use on iOS smart mobile devices.
Dario LC System Welcome Kit Contents As soon as you receive your Dario LC System Welcome Kit: 1. Carefully unpack the kit and verify that it contains the following parts: • Dario LC System, which includes the lancing device and built in blood glucose meter • Dario 25 Sterile Lancets (10 Sterile Lancets in the USA) • Dario 10 Disposable Covers (4.37”X 8.
• • By contacting customer support toll-free in the U.S. at 1-800-8955921, 9:00 AM-5:00 PM EST Monday through Friday. Internationally by visiting www.mydario.com. For details on product availability, refer to Supplies and Accessories on page 70. Getting Started with the Dario LC System Your Dario LC Glucose Meter works seamlessly with your smart mobile device.
Assembling the Dario LC System for the First Time To set up the Dario LC System for the first time, you must complete the following procedures: • • • • • ! Insert a test strip cartridge, as described in Inserting the Test Strip Cartridge on page 21. Insert a lancet, as described in Inserting a Lancet on page 22. Set the lancet depth, if desired, as described in Setting Lancet Depth (Optional) on page 24.
4. 5. Insert the cartridge into the housing until it snaps into place. Return the housing cover by sliding it into place until it clicks, as shown in the image below. ! If the cover does not close properly, the cartridge may not have been inserted correctly. Ensure you have properly inserted the cartridge, as described in steps 3 and 4. Inserting a Lancet To insert a lancet: 1. Remove the orange lancet device cover from the Dario Housing, as shown in the images below.
2. Remove the used lancet, if one exists, by grasping and pulling it straight out of its housing. ! 3. Remove a new lancet from the packaging. ! 4. To avoid accidental injury, dispose of used lancet in accordance with the instructions provided by your health care provider for biohazardous waste. Do not use the lancet if the cap is missing or damaged. Insert a sterile lancet as far as it will go and ensure it is firmly set.
• • • 5. Only use a lancet authorized by LabStyle Innovation Ltd. (30G). If the lancet does not set into place or the lancet holder does not hold the lancet properly, insert another sterile lancet. If the problem persists, you may need to replace your Dario Housing. Contact customer support tollfree in the U.S. at 1-800-895-5921, 9:00 AM-5:00 PM EST Monday through Friday. Internationally visit www.mydario.com. Carefully twist off the lancet cap, as shown in the image below.
2. Replace the lancing device cover by sliding it into place until it clicks. Be careful not to touch or bend the lancet. The Dario App The Dario App is available on the iOS operating system. For full list of compatible devices, refer to the list of devices in Supported Platforms for the Dario App on page 18 or at www.mydario.com/support/getting-started. Your Dario LC Glucose Meter is operated from the Dario App displayed on the screen of your smart mobile device.
! For accurate use of the Dario LC System with the app, the time and date must be correctly set on your smart mobile device. For instructions on setting the time and date, refer to the documentation for your device. To download the Dario App from the Apple App Store: 1. Turn on your smart mobile device and launch the App Store app. Alternatively, for quicker access, you can use an app that scans QR codes to scan the following code: 2. Search for the Dario App by LabStyle Innovation Ltd.
! The Dario App needs to be installed once on each of your smart mobile devices. ! Updates may be downloaded periodically from the App Store. Creating Your Account and Personalizing Your Settings To setup your Dario App: 1. 2. After installing the Dario App on your mobile device, press the orange Dario icon . The icon appears on your smart mobile device’s Home screen. Select Sign Up to register a Dario user. Dario App registration requires Email and Password to create your account.
3. Continue by following the instructions on the screen to register. You can register by entering your e-mail address and password; or, alternatively, you can connect with Facebook. ! Your password must have at least seven (7) characters and include an upper case letter, a lower case letter, and a number. ! Your e-mail address and password will be used to log in to the Dario App and the Dario web portal. ! If you already have a Dario account, you can skip the next steps. 4.
Setting Your Personal and Diabetes Profiles To set your personal profile: 1. 2. 3. Tap the Menu icon in the upper left corner and select MY PROFILE. Tap the pencil icon in the upper right corner to edit the information. Enter your gender, weight, height, and date of birth in the appropriate fields. You can also upload a photo from your device by tapping UPLOAD PHOTO. 4. Press DONE To set your diabetes profile: 1.
CHAPTER 3 CHECKING YOUR DARIO LC GLUCOSE METER This chapter provides information on checking the accuracy of your meter with a control solution. To ensure that your results are always accurate, you need to check the performance of your meter in the following cases: • • • • If you drop the meter. Whenever your result is inconsistent with how you feel. If you have repeated a test and the blood glucose result is still lower or higher than expected.
• • • • • • • • fluorescent light, and heat. Do not freeze. Once you open a new bottle of control solution, mark the date on the bottle. Ensure that your control solution has not expired. Check the expiration date on the bottle. Ensure that your control solution was not opened more than three (3) months ago. Keep the control solution out of reach from children. Shake the control solution well before using. After each use, wipe the container tip clean and close the container tightly.
The remaining chemical components of the Dario Control Solution are: • • • • • Buffer 75mM Polyvinylpyrolidone 5% Polyethylene glycol 5% SDS 0.1% Preservative 0.
3. Grasp the meter with two fingers and remove it from the housing. Do not plug the Dario LC Glucose Meter into any device other than a compatible smart mobile device Lightning port. For a list of compatible devices, refer to www.mydario.com/support/gettingstarted. Removing a Test Strip from the Cartridge You should have a test strip cartridge already inserted in your Dario Housing. If this is not the case, refer to Inserting the Test Strip Cartridge on page 21.
To remove a test strip from the cartridge: 1. Remove the cartridge cover of the Dario Housing by pushing it outwards until it comes off (use the removal indication lines), as shown in the images below. 2. 3. Snap open the test strips cartridge cap by pushing up the edge. Remove a test strip from the cartridge, as shown in the image below. 4. Close the cartridge cap immediately and return the white cartridge cover to the closed position by pushing it into place until it clicks.
! You should use the test strip immediately after removing it from the cartridge. It is not recommended that you use a test strip that has been outside of the cartridge for more than three (3) minutes. ! If the cover does not close properly, the cartridge may not have been inserted correctly. Ensure that you have correctly, returned the cartridge cover to the closed position as described in step 4. • • Do not touch the yellow testing site when handling the test strip. Do not use a damaged test strip.
The Dario LC Meter should be inserted with logo facing up. ! 3. 4. The screen notification changes. Verify that the meter is inserted as far as it can go into the Lightning port of the smart mobile device and no other device or cable is connected to the smart mobile device. Hold the test strip with the gold contacts facing the meter. Without bending the strip, insert it into the test strip port (marked in orange) of the Dario Glucose Meter as far as it will go.
5. Shake the control solution container and apply a drop of control solution onto the edge of the test strip, allowing the test strip to automatically draw the control solution into the yellow window. ! Important: Verify that you apply enough control solution to fill the window so that it turns red. Do not put control solution on top of the test strip. When the meter detects the solution, the “Measuring...” message appears.
! You can delete this control test from memory, if desired. For more information, refer to the Dario App User Guide at www.mydario.com. 6. Compare the results on the meter with the values displayed on the test strip cartridge. If the results are: • Within the acceptable target values, then your meter is ready for use. • Outside of the acceptable target values, perform the test again with a new test strip. If the problem recurs, contact customer support toll-free in the U.S.
Menu icon , selecting HELP&INFO > CONTROL SOLUTION TEST or the results will be included in the blood glucose averaging functions of the device. 10. Place the meter back into the housing by holding the meter at an angle with the part that connects to the smart mobile device facing away from the ridged orange panel. Then, push the meter into the housing at an angle and push downwards until the meter clicks into place.
CHAPTER 4 TESTING YOUR BLOOD GLUCOSE LEVEL The Dario LC Glucose Meter measures the amount of glucose in your blood. Once you place a small drop of blood from your fingertip onto the test strip, the result will display in six (6) seconds on the screen in the Dario App. Carefully read and follow the instructions provided in this chapter and in the package inserts for the test strips and control solutions. It is very important to follow the instructions to prevent an incorrect result or improper treatment.
Incorrect test results may result in the wrong therapy recommendation and may lead to serious adverse health conditions. Therefore, follow the proceeding instructions carefully and read the items listed in Test Strip Precautions below. Test Strip Precautions • • • • • • • • • • • • • • Only use Dario Test Strips. Using other test strips with the Dario LC Glucose Meter can produce inaccurate results. Inspect each test strip cartridge before opening it for the first time.
• Do not apply blood or control solution to the test strip before inserting it into the glucose meter. Do not reuse test strips. Once control solution or blood is placed on a test strip, discard the strip. If you need to retest, use a new test strip. Do not bend, cut, or alter the test strips. Do not get dirt, food, or other substances on the test strip. It is recommended that you use the test strip immediately after removing it from the cartridge.
Interpreting the Results If the displayed test result is consistent with how you feel, continue as instructed by your health care provider. If the test result is inconsistent with how you feel, check your Dario LC System by running a control solution check, as described in Performing a Control Solution Test on page 35. Repeat the blood glucose test afterward.
If your blood glucose test results in a LOW! or HIGH! message, repeat the blood glucose test following all of the instructions in Step Five: Testing Your Blood Glucose on page 47. • If your blood glucose test results in a LOW! or HIGH! message a second time, follow the protocol established by your health care provider or contact your health care provider immediately. • Note that many factors determine whether your blood glucose reading is outside the range of 20 mg/dL-600 mg/dL (1.1-33.
• ! Your glucose meter has been dropped. If your meter has been dropped and you are receiving error messages or implausible results, contact customer support tollfree in the U.S. at 1-800-895-5921, 9:00 AM-5:00 PM EST Monday through Friday. Internationally visit www.mydario.com. Do not rely on the blood glucose measurement alone in making health care decisions.
Step Three (relevant to the US market only): Inserting the Smart Mobile Device into the Disposable Cover Before starting the testing procedure, you should cover your phone with a disposable cover. ! To avoid the risk of transmitting bloodborne pathogens, it is recommended that you use a disposable sleeve to cover your smart mobile device while taking the blood glucose test. The disposable cover protects the mobile device from direct contact with blood during the glucose measurement.
Place the glucose meter Lightning connector into the Lightning port at the bottom of the disposable cover. Verify that the meter is inserted as far as it goes into the Lightning port of the smart mobile device and no other device or cable is connected to the smart mobile device. A “Connecting...” message appears in the Dario App, and then the screen displays the following instruction: INSERT A NEW STRIP. The Dario LC Meter should be inserted with logo facing up. The screen notification changes.
• • • • • • • • While applying blood to the test strip, verify that you apply enough blood to fill the test strip window so that it turns completely red. Testing blood from sites other than the fingertip may generate inaccurate results. If you have not applied enough blood to the test strip, an alert displays that informs you that the sample size is too small and you should try again with a new strip. Blood glucose results are automatically saved to memory.
Removing a Test Strip from the Cartridge ! You should have a test strip cartridge already inserted in your Dario Housing. If this is not the case, refer to Inserting the Test Strip Cartridge on page 21. To remove a test strip from the cartridge: 1. 2. 3. Wash your hands with warm, soapy water and dry thoroughly. If you use alcohol wipes to clean your fingers, ensure the puncture area is completely dry before lancing your finger.
4. Remove a test strip from the cartridge, as shown in the image below. 5. Close both the lid and cartridge cover. ! 6. 7. If the cover does not close properly, you may not have inserted the cartridge correctly. Hold the test strip with the gold contacts facing upward. Without bending the strip, insert it into the test strip port of the Dario LC Glucose Meter as far as it will go. Verify the test strip direction, as shown in the image below.
8. Proceed to the next section. Performing a Glucose Test ! If you receive a phone call while the glucose measurement is in progress, Dario will stop the test and the results will not be saved. To avoid interruption of the glucose test, you can set your phone to airplane mode before beginning this procedure. For more information, refer to your mobile device’s instructions. 1. Set the lancing device for activation by sliding it with two fingers as far as it will go, as shown in the image below. 2.
3. Apply a drop of blood to the tip of the yellow window of the test strip, as shown in the images below. Capillary action will pull the blood into the strip. ! Important: Continue applying blood to the test strip until the window turns red, which indicates that enough blood has been collected to take a reading. Do not put blood on top of the test strip.
When the meter detects that blood has been applied, the “Measuring...” message appears in the Dario App. The border of the circle gradually fills with orange, indicating that the test is in progress. 4. Remove your finger from the strip once the above message appears. Do not add blood to the test strip once you have removed your finger because you may receive an inaccurate result. 5. The test result appears on the screen after approximately six (6) seconds.
6. 7. 8. You may continue to complete the information about the glucose measurement that displays on the Dario App screen (e.g., measurement setting, carb consumption, exercise, insulin intake). When the test is done, remove the test strip and disposable cover and dispose of them in accordance with the instructions provided by your health care provider for biohazardous waste.
CHAPTER 5 CLEANING AND MAINTENANCE This chapter provides information for cleaning and disinfecting for your Dario LC Glucose Monitoring System. The Dario LC Blood Glucose Monitoring System should be cleaned and disinfected once a week. The Dario LC System should be properly maintained for safe and accurate use. The meter should be properly cleaned and disinfected to prevent the spread of infectious diseases.
manufactured by Professional Disposables International, Inc. and are available online through amazon.com and officedepot.com. Before cleaning, remove the meter from its housing. The meter must not be connected to the mobile device while cleaning. Clean the meter, housing, orange lancet cover, and white cartridge cover by wiping the outside surfaces with a Super Sani-Cloth Germicidal Disposable Wipe to remove all visible dirt. Remove the white cartridge cover and wipe the cartridge cap as well.
To ensure effective disinfection, let the solution sit on the meter, housing, orange lancet cover, and white cartridge cover for at least two (2) minutes. Allow the meter, housing, orange lancet cover, white cartridge cover and cartridge cap to completely dry before use. Wipe off any remaining residues with a clean, soft, and dry paper cloth. Your Dario LC System has an expected life of three (3) years. It should withstand the cleaning and disinfection recommended (156 cycles) in this user guide.
Do not: • • • • • Allow any moisture to get into the test strip port. Spray any cleaning solution directly onto the glucose meter or the lancing device. Submerge any part of the Dario LC System in liquid. Attempt to clean any internal parts. Attempt to dry any parts using a blow dryer. Please observe the following cautions when cleaning the Dario LC System to avoid damaging the device: If the device becomes wet, wipe off all moisture and allow sufficient time for the device to dry before using.
CHAPTER 6 TROUBLESHOOTING This chapter provides information about all the symbols and error messages that may display in the Dario App. To ensure safe and accurate use of Dario, pay attention to all symbols and messages that occur while using the system as they provide you with important information. If you still have questions after reading this chapter, call customer support tollfree in the U.S. at 1-800-895-5921, 9:00 AM-5:00 PM EST Monday through Friday.
Message Content The strip is used, please insert a new strip. Possible Cause / Recommended Action A test strip was used more than once. Perform a new measurement with a new test strip. HIGH! Measure with a new strip, if recurs contact your physician Immediately. Glucose level is above operating range. LOW! Measure with a new strip, if recurs contact your physician immediately. Glucose level is below operating range Temperature out of range (XX°F).
Message Content Possible Cause / Recommended Action Dario device failure (0x00). If the problem occurs again, please contact Dario’s customer support. Communication failure. Dario device failure (0x01). If the problem occurs again, please contact Dario’s customer support. Firmware software failure. Dario device failure (0x02). If the problem occurs again, please contact Dario’s customer support. Voltage failure. Unknown device, please connect Dario.
Message Content Possible Cause / Recommended Action If another device is connected to the Lightning port, disconnect it and connect the Dario LC Glucose Meter. You can still use the Dario App if another device is connected. If you received this message while the Dario LC Glucose Meter is connected, disconnect and reconnect the meter. If this message still appears, contact customer support toll-free in the U.S. at 1-800-895-5921, 9:00 AM-5:00 PM EST Monday through Friday. Internationally visit www.mydario.
You cannot pierce skin with lancet. • • • The needle depth may be incorrect. Adjust the lancet depth lever to a different depth. For more information, refer to Setting Lancet Depth (Optional) on page 24. The lancet needle may be bent. Replace the lancet. For more information, refer to Step One: Inserting a New Lancet into the Lancing Device on page 45. The cartridge cover may be in the place of the lancing device cover. Please be careful to return each cover to the correct end.
Lancet Depth Indicator lever is stuck. The indicator lever may be faulty. Replace the Dario Housing. Contact customer support toll-free in the U.S. at 1-800-895-5921, 9:00 AM-5:00 PM EST Monday through Friday. Internationally visit www.mydario.com. Lancing device release button does not work properly. The lancing device is faulty. Replace the Dario Housing. Contact customer support toll-free in the U.S. at 1-800-895-5921, 9:00 AM-5:00 PM EST Monday through Friday. Internationally visit www.mydario.com.
CHAPTER 7 TECHNICAL INFORMATION AND SPECIFICATIONS This chapter provides technical information about your Dario LC System. How the Glucose Meter Works The Dario LC System determines the amount of glucose in fresh capillary blood using electrochemical biosensor technology. An electrical current is generated by the reaction of glucose with the reagent on the test strip (glucose oxidase). The strength of the current produced by the reaction depends on the amount of glucose in the blood sample.
Meter Specifications Operating Relative Humidity 15-85% Altitude Up to 10,000 feet (3,048 meters) Memory Unlimited results Memory is limited to smart mobile device memory Power Source From the smart phone or mobile device Meter Size 1.3 x 0.63 x 0.39 in (32.9 x 16.1 x 9.9 mm) Weight 40 gram (1.4 oz.) Meter Life Time 3 years Protection degree from ingress of water or particulate matter IP 21 Part number 1021-04 Do not store near solvents and ionizing radiation sources.
(Electronic Protected Health Information), Labstyle Innovation has performed a risk analysis and has implemented the standard and applicable security safeguards and is compliance with the HIPAA Security Rule and HITECH Act requirements for breach notification. Labstyle Innovation ongoing compliance program includes policies and procedures for secure cloud operations.
CHAPTER 8 WARRANTY, REPAIRS AND SUPPLIES This chapter provides repair, warranty, service support, and ordering information for your Dario LC System. Repair Policy When under warranty, repair and service must be performed by LabStyle Innovation Ltd. When the LabStyle Innovation Ltd. warranty is not applicable, repairs may be performed by LabStyle Innovation Ltd. on a parts and labor basis. After replacement, verify that the unit is fully functional by performing the normal setup procedure.
Supplies and Accessories Dario LC System supplies and accessories are available from LabStyle Innovation Ltd. or from customer support at www.mydario.com. Item System Test Strip Cartridge Catalog Number 1138-05 – Dario LC Welcome Kit 1120-05 – Dario Test Strip (1 x 25) 1024-05 – Dario Test Strip (2 x 25) 1074-05 – Dario Test Strip (4 x 25) 1121-05 – Dario Lancet (1 x 100) 1054-05 – Dario Glucose Control Solution (2x2.