
User manual


MANAGING USERS AND GROUPS
31
WD MY CLOUD USER MANUAL
Import Users: Allows you to import a list of users into the device. Continue to
“Import Mult
iple Users” on page 31.
Creating Multiple Users
1. Enter the following information on the Create Multiple Users screen, then click Next:
User Name Prefix: Enter a prefix for your user name. This will be added to the
Account Prefix to create the User Name (Example: HR).
Account Prefix: Enter a numeric account prefix. This will be added to the User
Name Prefix to create the User Name (Example: 143).
Number of Users: Enter the number of user accounts you’d like to create. The
maximum number you can add appears to the right.
Password: Enter a password for the user accounts.
Confirm Password: Confirm the password for the user accounts.
Overwrite Duplicate Accounts (optional): Select this check box to overwrite any
existing duplicate accounts on your device.
2. To assign the new users to a group, click the check box next to a group, then click
Next.
3. Enter the Quota Amount or leave the values blank for unlimited
space, then click Next.
(See “User Quotas” on page 32.)
4. Your new user accounts appear on screen. Click Save to save them to your device.
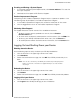
Import Multiple Users
1. Click Download to download a .txt file identifying the format you’ll need to set up your
user import file.
2. Create and save your import file. For details on how to cr
eate and format your user
import file, see “Appendix E: Creating a User Import File” on page 112.
3. Click Import User List and select the import
file you created.
4. Click Next.
5. Select the group(s) you’d like the new user accounts to have access to, then click
Next.
6. Click Save. Y
our new user accounts save to your personal cloud.
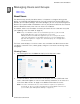
Editing User Settings
1. On the Set Up Users screen, select the user whose information you want to edit. The
User Profile and Share Access panels display.
2. Modify the required and optional settings, as desired.
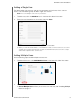
3. Assign an access level for private shares in the Share Access area. (See “Making a
Share Private” on page 39 for information on creating a private shar
e.)