PhysioDetect User Guide Data Sciences International 119 14TH STREET NW SUITE 100 ST. PAUL, MN 55112 USA (651)481-7400 • 1(800)262-9687 OVERVIEW This user guide highlights how to utilize the PhysioDetect application and associated hardware with the PhysioTel Digital system. This document will provide an overview of the system components, application structure, and basic operation of the device. www.datasci.com PN: 011283-001 REV02 1|P a g e ©2019 Data Sciences International.
Table of Contents Welcome ......................................................................................................................................... 3 Overview ......................................................................................................................................... 3 Hardware ......................................................................................................................................... 4 Tablet..........................................
WELCOME Congratulations on joining the community of users worldwide who rely on DSI’s products to perform preclinical physiologic research. Thank you for choosing to work with DSI. We are committed to providing you with quality products and services. This manual will help you get to know your PhysioDetect. The structure of the manual was designed to sequentially guide you through using PhysioDetect to help setup your PhysioTel Digital system. WHAT 1. 2. 3.
HARDWARE TABLET The main functional component of PhysioDetect is the electronic tablet, housed in a rugged, waterproof case. The case utilizes a back-mounted plate to mount the receiver to the tablet’s case in order to enhance mobility. Specifications: Battery Life Charging Port Waterproof 10 Hours (Continuous PhysioDetect Use) Apple Lightning Port With DSI Case Restrictions: Certain iOS features have been disabled (e.g. Camera) on the PhysioDetect tablet.
Specifications: Battery Life Charging Port Waterproof 10 Days (Continuous use) USB-C No Cleaning recommendations: • • • The PhysioDetect receiver is not water-resistant and should not be directly exposed to water. Direct exposure to water may damage the electronics of the receiver, making it unusable, and may void the warranty. DSI only recommends surface decontamination using disinfectant wipes. Any other decontamination process may damage your receivers and could potentially void its warranty.
The above picture depicts the communication pathway between the PhysioTel Digital implants and a Ponemah acquisition system. This is a two-way communication pathway. The role of PhysioDetect is to passively listen for the same signal that the Digital implants are sending to the TRX and display pertinent information about the implants broadcasting within range of PhysioDetect. PHYSIODETECT IOS APPLICATION This section will outline how to use PhysioDetect to perform the following tasks: 1.
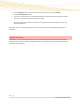
2. 3. 4. Tap the Navigation button on the upper left-hand side of the screen and select Settings. Tap the Connect Receiver button. A new screen will load with a list of PhysioDetect Receivers detected by the tablet. Select the receiver with serial number desired to be connected to the tablet. Note: The receiver serial number can be found on the sticker located next to the power port for the PhysioDetect Receiver.
To detect PhysioTel Digital Implants: 1. Ensure the receiver is turned on and selected through the Settings menu. 2. Bring the PhysioDetect tablet and receiver within 3 to 5 meters of the implant(s) you want to detect. 3. Turn on the Digital Implant by briefly holding a magnet near the device. 4. Repeat as necessary for the number of implants in use. a. If incomplete implant information is received, a message will pop up, there are two possible outcomes when the User attempts to dismiss the pop-up: i.
activation. 5. 6. Please see the following Article to learn more about battery passivation. The implant information should populate the Implant Detection page. Once all the implants have been added, select the Add Implant(s) to Favorites button on the bottom of the screen. The Dashboard page will appear with the implants listed. USING THE DASHBOARD The main page for the application is the Dashboard. This is automatically the first page displayed when the PhysioDetect application is launched.
Note, the dashboard will display both favorite and other implants within its 3-5-meter range. Other implants may include implants associated with the same PhysioTel Digital system or neighboring systems. Favorites allow the User to manually manage implants of interest. Also, the user-defined Implant Name which is designated in Ponemah is saved when implants are added to Favorites in the Implant Detection page after the implants have been added to an experiment.
Battery Implant Battery Life. The battery status will display a percentage next to the battery icon and the days remaining for that implant will be displayed below this information. Note: Battery information will only be displayed during an active data collection. The correct Implant Model must also be select for the Implant within the PhysioDetect App. To select Implant Model: 1. Tap an Implant from the Dashboard. 2. Tap the Unknown selection associated with Model.
3. Select the correct model from the implant from the list presented. 12 | P a g e ©2019 Data Sciences International.
4. The battery information can be displayed as shown: 13 | P a g e ©2019 Data Sciences International.
5. Frequency 1. Close the Implant Details page using the X in the upper right-hand corner. The frequency that the device is currently transmitting on. The Implant ID a. A User defined Implant Name can be associated with a given implant in the Ponemah hardware configuration menu. This name will become visible after the implants have been added to an experiment and assigned an Implant Name. 14 | P a g e ©2019 Data Sciences International.
b. Note: This information will only be available if the implant is saved as a favorite from the implant detection page. ORGANIZING THE DASHBOARD By default, the Dashboard lists implants in numerical order. However, users can Favorite implants to separate implants into a Favorites and Other Devices Category. Favoriting implants may be performed during the Implant Detection Stage or directly from the Dashboard. To favorite an implant during Implant Detection: 1.
SCAN INTERVAL The Scan Interval adjusts the length of time with which the receiver scans over the frequency spectrum. The time it takes for the system to scan for implants on the Dashboard is determined by the CLC firmware that is being used. A CLC using any firmware version older than 1.30.80 may take up to 45 seconds to show implants on a given frequency. A CLC that utilizes firmware version 1.30.80 or newer will only take 15 seconds to display the implant devices.
By default, PhysioDetect Scan Interval is defined to 45 seconds. If using CLC firmware 1.30.80 or newer, the Scan Interval may be updated to 15 seconds. To update the Scan Interval: 1. Tap the Navigation button. 2. Tap Settings. 3. Tap 15 under the Scan Interval (Seconds) header. SEARCH AND VERIFY The PhysioDetect system has the capability to search for specific implant devices based on the serial number information for that specific device.
Once the implant number in question has been identified, it can be typed into the search bar and then click the blue search button to the right. The PhysioDetect system will then cycle through each frequency to look for that implant information associated with that specific serial number. If the implant is found, the information will be displayed on the screen. Additionally, PhysioDetect will store a list of serial numbers that have been previously searched for by the system.
APPENDIX TERMS AND CONDITIONS Subscription Services: DSI may supply supplemental hardware to support the use of subscription services. By using any DSI subscription service, the Purchaser agrees to use any supplemental hardware supplied by DSI only for its Intended Use, within the agreed upon subscription period. The Purchaser assumes liability for damage to any supplemental hardware caused by the Purchaser’s use and will be responsible for any resulting fees.
4) ISED RSS-Gen Notice: This device complies with Industry Canada’s licence-exempt RSSs. Operation is subject to the following two conditions: (1) This device may not cause interference; and (2) This device must accept any interference, including interference that may cause undesired operation of the device. Le présent appareil est conforme aux CNR d’Industrie Canada applicables aux appareils radio exempts de licence.