Printer Driver for the Datacard 150i, 28x, and 450 Series Printers on Windows® 95 and 98 Installation and Technical Reference Manual November 2001 Part No.
Revision Log Printer Driver for the Datacard Printers on Windows® 95 and 98 Installation and Technical Reference Manual Revision Date Affected Pages Description of Changes A May 1998 All New Release B December 2001 All Update for new company information and Windows 98. Liability Statement This Datacard product has been built to the high standards of DataCard Corporation. Please note and heed the WARNING and CAUTION labels that have been placed on the equipment for your safety.
Table of Contents Introduction _______________________________________________________________________ 1 What’s in this Manual___________________________________________________________________1 Related Documents ____________________________________________________________________2 System Requirements___________________________________________________________________3 Printer Driver Limitations ________________________________________________________________4 Embossing Limitations __________________________
List of Tables Table 1: Supported Printer Capabilities................................................................................................ 1 Table 2: Text Fonts ................................................................................................................................. 18 Table 3: Embossing and Indent Type by Printer ............................................................................... 19 Table 4: Magnetic Stripe Tracks .............................................
Introduction The Datacard Printer Drivers for Windows® 95 and 98 provide users with the ability to print from those Microsoft® Windows operating systems to the Datacard 150i, 280, 285, and 450 Series card printers. The capabilities of these printers are listed in Table 1.
Printing in a Windows Environment. This chapter tells how to get information and procedures for pausing, resuming, and deleting print jobs. Troubleshooting. This chapter includes information and procedures for solving printing problems.
System Requirements The minimum system requirements for installing and using the printer driver for Windows 95 or 98 are: · Microsoft Windows 95 or 98 · An computer that meets the Windows minimum requirements · One of the following: · A 150i printer with the following firmware: Mainboard: · · 556228-501 Rev. A or above A 2xx printer with the following firmware: Mainboard: 596006-501 Rev. H or above Graphics: 596199-50x Rev.
Printer Driver Limitations The Datacard printer driver for Windows 95 or 98 does not support: · Two-sided badge printing using the Datacard QuikWorks software · Encapsulated postscript (.eps) files · Microsoft Windows 3.
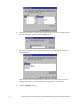
Installing the Printer Driver The Datacard printer driver for Windows 95 or 98 creates CPX ports. CPX ports are virtual ports that use your existing COM ports to communicate with your Datacard printer. No additional hardware is needed. Setting up an additional port in this way tells Windows to use a software component (called a Port Monitor) for printing to your Datacard printer. 1. From the Windows Start button, choose Settings and then Printers. The Printers dialog box appears. 2.
6. Insert the driver disk or CD into the appropriate drive on your computer. Enter the drive identifier, and then click the OK button. 7. Select the description of your Datacard printer from the Printers list and click the Next button. After several seconds, the driver files will be on your system. You must now configure the driver so it knows which port the printer is connected to. 8. 6 Click the Add Port button.
The Port Name dialog box appears. 9. Type the name of the CPX Port, and then click OK. The CPXx: dialog box appears. 10. Select the baud rate appropriate for your printer.
If you select Confirmation for each data block processed, the operator must acknowledge the following message before the printer will continue to the next record. Card-by-card confirmation will reduce throughput. If you select Cache bitmaps in printer memory, the speed of printing can increase significantly when you use Printer type fonts and print the same bitmap (for example, a logo) on several consecutive cards. Other settings are optional.
14. Select whether you want Windows to use your Datacard printer as the default printer. In most cases you should select No. 15. Click the Finish button. Windows completes the installation of your printer. Go on to the next procedure, Selecting Embossing and Indent Fonts.
Selecting Embossing and Indent Fonts The information that follows explains how to identify to your Windows 95 application program which fonts are resident in your Datacard printer and how to complete the software settings. For a complete explanation of printer fonts, see Printer Fonts. Use the following procedure to select the printer fonts and complete the software settings 1. In the Printers window, select your Datacard printer. Then from the File menu, select Properties.
4. For the 280, 285, and 450 printers, in the Page size area select the card size you are using. The printer driver refers to the card size as the paper size. Select a logical page size to restrict the printing and embossing to legal areas. If your Windows application does not use page sizes, you must manually position your information in the allowable print area. Be sure to allow a margin of at least 0.200 inch to the centerline of text for normal text, and a top margin of 0.35 inch for embossing fonts.
9. Click OK to close the dialog box. 10. Click OK on the Properties dialog box to save your settings. Go on to the printer configuration options procedure for your printer. Setting 150i Printer Configuration Options The following procedure tells how to change the 150i printer configuration to work with the printer driver. The instructions begin with the printer powered off. 1. Power ON the 150i. When “150i/CPX” is displayed, immediately press the # key.
Setting 28x Printer Configuration Options The following procedure tells how to change the 28x printer configuration to work with the printer driver for Windows 95 or 98. The instructions begin at the main menu of the printer’s display window. Setting Customer Engineer Configuration Options 1. At the Datacard 28x printer front panel, press Esc to go to the Main Menu. 2. Press F3 to choose Set Up. 3. Select F3 to choose Customer Engineer. 4. When prompted for an access code, press F2 and then F1. 5.
Setting Supervisor Configuration Options 1. Press F2 to choose Supervisor. 2. When prompted for an access code, press F1 and F2. 3. Verify and set the configuration options identified below. Use the function keys (F1, F2, and F3) to scroll through menus, select a menu, select menu options, and save options.
Setting 450 Printer Configuration Options The information that follows explains how to change the 450 printer configuration to work with the printer driver for Windows 95 or 98. Disabling Auto Remake 1. Press the READY button. The message, “Operator Setup Press Option Key” appears. 2. Press the OPTION button eight times. The current Auto Remake setting appears. 3. If necessary, press the ENTER button to set Auto Remake to Off. 4. Press the READY button. Setting Communication Parameters 1.
15. If necessary, press the ENTER button until CR is displayed. 16. Press the OPTION button. The current Buffered Mode setting appears. 17. If necessary, press the ENTER button until Off is displayed. 18. Press the OPTION button. The current Data Conversion setting appears. 19. If necessary, press the ENTER button until ## is displayed. 20. Press the OPTION button. The current Protocol setting appears. 21. If necessary, press the ENTER button until CPX Special is displayed.
Printer Fonts The printer driver for Windows 95 and 98 uses two types of fonts: text and pseudo. Refer to the tables on the pages that follow for specific fonts that are available. text fonts Text fonts are the “flat” fonts printed on a card. They are available on the 280 with graphics and the 285. Text fonts come in two varieties: TrueType and Printer. · The Windows operating system provides TrueType fonts, which are similar to graphics.
The text fonts shown in Table 2 are available in point sizes 4, 6, 8, 10, 12, 14, 18, 24, and 36.
Embossing and Indent Type The Datacard 150i, 280, and 450 printers support the embossing and indent type sets listed in Table 3. The printer uses an area on all sides to hold the card during embossing. If you try to place embossed text in this area, an error occurs and the embossed font will not print. If a character isn’t available in the printer/embosser, that character is ignored.
Magnetic Stripe Encoding Datacard printers support the Magnetic Stripe tracks listed in Table 4. Table 4: Magnetic Stripe Tracks Magnetic Stripe Style 3 Track 2 Track 20 Encoding Font Track # Maximum Length Character Set IATA (210 BPI) 1 76 alphanumeric ISO standard characters (64 characters) ABA (75 BPI) 2 37 numeric and special characters ., :, ;, <, =, > (16 characters) TTS (210 BPI) 3 104 numeric and special characters .
Translating Characters If you use special characters (for example, accent marks for some languages, the Visa V), you will need to translate the characters sent by your Windows application to the corresponding positions on the embossing wheels. 1. Select the Character Translations tab of the CPXx: properties sheet. (If necessary, from the Windows 95 Start button, select Settings and then Printers.
For exact values to enter, refer to your country’s code page in the Windows Resource Kit, available from Microsoft Corporation. Decimal values 00 through 31 (hexadecimal values 00 through 1F) are non-printing control codes. 5. In the Output Character area, select Hex to work with hexadecimal values or Decimal to work with decimal values. 6. Click the arrows until the character value you want to translate to appears. 7. Click OK.
Changing a Character Translation 1. Select the Character Translations tab of the CPXx: properties sheet. (If necessary, from the Windows Start button, select Settings and then Printers. Select your Datacard printer from the list of printers, and then click the right mouse button and select Properties. Select the Details tab, and then the Port Settings button.) 2. In the characters list, select the row you want to change. 3. Click the Edit button. The Edit Character Translation dialog box appears. 4.
10. Click OK to save your changes and return to the printer Properties dialog box. Click OK to close the printer Properties dialog box. Deleting a Translated Character 24 1. Select the Character Translations tab of the CPXx: properties sheet. (If necessary, from the Windows Start button, select Settings and then Printers. Select your Datacard printer from the list of printers, and then click the right mouse button and select Properties. Select the Details tab, and then the Port Settings button.) 2.
Printing in a Windows Environment You manage print jobs on your Datacard printer in exactly the same way you manage other print jobs in Windows. See Windows help, available from the Start button menu, for information on: · Pausing print jobs · Restarting print jobs · Deleting print jobs Adding CPX Ports If you need to change the CPX port that you use to communicate with your Datacard printer, you may need to create another CPX port.
The Port Name dialog box appears. 5. Type in the name of the CPX port, and then click the OK button. The CPXx: dialog box appears. 6. 26 Verify that the baud rate is set appropriately for your printer. Other settings are optional. Datacard recommends that only authorized Datacard service representatives alter the remaining settings.
7. The new CPX port is created and assigned to your Datacard printer.
Restoring Default Spool Settings Normally, the spool settings need not be changed. If they were changed, you can restore the default settings by clicking the Restore Defaults button on the Spool Settings dialog box. 1. Open the Datacard printer’s Properties dialog box from the Printers window or the menu in the printer’s job window. 2. Select the Details tab. 3. Click the Spool Settings button. The Spool Settings dialog box appears. 4. Click the Restore Defaults button.
Troubleshooting Why do I get an error using embossed fonts? The most common error occurs when embossed fonts are not positioned correctly on a card. Embossed fonts can be placed anywhere on a card, except for the margin area, which varies by printer. If embossed text is placed in the margin area of the card, an illegal font placement error will be detected by the printer and the card will not print the embossed text. The error message will appear both on the printer and on the computer screen.
Applications may need to be restarted to ensure that the new fonts are recognized and updated in the menu. Also, in the application, make sure the correct printer is selected and the Page Setup is configured properly for card size, card orientation, and margins. Why don't magnetic stripe fonts appear in the font menu? The magnetic stripe fonts are special printer fonts.
Initial setup problems printing Graphics, Embossing or Magnetic Stripe If you have followed the prescribed steps to select embossed fonts and/or magnetic stripe fonts and still cannot print successfully, the problem may be an incorrect setting in the printer itself. In other words, some parameter is turned off that should be turned on (for example, Graphics off or Magnetic Stripe Track XX off).
& 32 Windows 95 and 98 Printer Driver Installation and Technical Reference
Index .eps ......................................................................... 8 150i printer configuration options ................... 16 28x printer configuration options....................... 17 supervisor settings ........................................ 18 450 Auto Remake setting..................................... 19 communication parameters.......................... 19 printer configuration options....................... 19 baud rate .......................................................
& 36 Windows 95 and 98 Printer Driver Installation and Technical Reference