
Installation manual
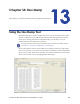


200 Hex Dump
Perform the following steps to use the Hex Dump tool:
1. Select Application | Utilities | Hex Dump.
2. Select a Data File to view by clicking Browse and then navigating to the file’s
location. The data for the selected file will appear in the display.
3. Optionally select a corresponding Data Setup (whose encoding you would
like to use to convert the data file selected) by clicking Browse and then
selecting an available Data Setup from the list.
4. Select a format option.
• Blocks - Fixed size portions of a file. The size to display can be configured
by selecting the block size from the list. You can browse through the block
using the navigator at the bottom of the window.
• Records - Only available if a Data Setup is selected. The file is displayed
by record. You can select Record Length or Record Delimiter if these are
defined in the Data Setup. You can browse through the records using the
navigator at the bottom of the window.
5. Select an Offset option.
• Absolute - Offset relative to the beginning of the file.
• Relative - Offset relative to the beginning of the block or record.
6. If desired select option to Only Display Latin-1 Characters.
7. If desired click Toggle Grid Lines to toggle-on grid lines in the table, click
again to toggle-off.
8. Navigate through the data using the Job and Record number (if available)
navigation buttons located at the bottom of the screen. You can navigate by
job, single record, 10 records at a time, or the beginning or end of a job. The
Record Type, Record Length and Product Number are displayed on the
bottom right of the Hex Dump screen.