User Guide
Copyright Information This manual and any examples contained herein are provided “as is” and are subject to change without notice. Datamax-O’Neil makes no warranty of any kind with regard to this manual, including, but not limited to, the implied warranties of merchantability and fitness for a particular purpose. Datamax-O’Neil shall not be liable for any errors or for incidental or consequential damages in connection with the furnishing, performance, or use of this manual or the examples herein.
Important Safety Instructions This printer has been carefully designed to provide many years of safe, reliable performance. As with all types of electrical equipment, however, there are a few basic precautions you should take to avoid hurting yourself or damaging the equipment: • • • • • • • • • Carefully read the provided installation and operating instructions. Read and follow all warning instruction labels on the printer. Place the printer on a flat, firm, solid surface.
Agency Compliance and Approvals UL60950-1; 2nd Edition CSA C22.2 No. 60950-1-07 2nd Edition The manufacturer declares under sole responsibility that this product conforms to the following standards or other normative documents: Applicable Directive 2004/108/EC, 73/23/EEC Applicable Standards RL3 Printers: EN55022 (2006) Class A; RL4 Printers: EN55022 (2006) Class B EN55024 (1998), A1 (2001), A2 (2003) IEC60950-1 (2005) 2nd Edition The RL3 and RL4 printers with the 802.
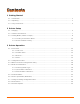
Contents 1 Getting Started 1.1 Introduction ............................................................................................................ 1 1.2 Unpacking ............................................................................................................... 1 1.3 Carry Accessories ..................................................................................................... 3 2 Printer Setup 2.1 Charging .........................................................................
4 Maintenance and Adjustments 4.1 Cleaning Intervals .................................................................................................. 31 4.2 Cleaning the Printhead ............................................................................................ 32 5 Troubleshooting 5.1 Introduction .......................................................................................................... 35 5.2 Troubleshooting Tips ...............................................................
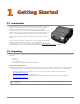
1 Getting Started 1 1..1 1 IIn nttrro od du uccttiio on n Congratulations on your RL3/4 printer purchase. The RL3/4 printer family, hereafter referred to as ‘the printer’, blends the rugged durability with state-of-the-art electronics and user-friendly features to redefine the standard in portable thermal printers. The printer’s RS-232 serial, USB, or optional wireless LAN or Bluetooth® wireless technology allows easy interfacing to any host system.
The table below identifies the P/N and printer features of the RL3 and RL4 printers. The model number can be found on the label located on the back of the printer. RL3: MODEL NUMBER RL3-DP-00000000 RL3-DP-00000100 RL3-DP-00000200 RL3-DP-00100000 RL3-DP-00100100 RL3-DP-00100200 STANDARD FEATURE(S) SERIAL/USB SERIAL/USB SERIAL/USB SERIAL/USB SERIAL/USB SERIAL/USB RL3 RL3 RL3 RL3 RL3 RL3 - OPTIONAL FEATURE(S) RS-232 and USB only (Serial) Serial and Bluetooth v2.1 Serial and 802.
1 1..3 3 C Ca arrrry yA Acccce esssso orriie ess Several accessories are available for the printer to allow for ease of use and portability. Belt Clip Included with printer, the Belt Clip allows easy attachment to a belt or similar object. Belt Clip Attachment Points Shoulder Strap/Hand Strap Choose either a hand or longer shoulder strap for maximum comfort and flexibility.
IP54 Soft Case Optional, proper use of this case will allow the printer to be used in harsh, dusty, or rainy environments. This case is certified to an IP54 rating, so when properly used, it will protect your product against particles as small as dust, and water from any direction. This case can be used in conjunction with the hand/shoulder straps as well the belt loop and belt clip accessories. The IP54 case has been tested at an accredited lab for use in dust and heavy water environments.
2 Printer Setup 2 2..1 1 C Ch ha arrg giin ng g The battery is charged by an external auto-ranging power supply, which connects between the printer and an electrical outlet. If the battery is completely dead, the battery will need to be charged before the printer can be turned on. The printer will only operate with the battery installed, the printer will not function on AC power alone.
3) Connect the Power Supply to Power Jack of the printer. 4) Connect the AC Power Cord to the Power Supply. 5) Connect the AC Power Cord to an Electrical Outlet. For RL3 printers the printer will not turn on button.. automatically and must be turned on by pressing the Do not operate the printer while it is connected to the AC Power Supply. 312 Power Supply AC Power Cord Electrical Outlet Power Jack Battery Guidelines: • DO NOT store batteries in cold or hot conditions.
2 2..2 2 IIn ntte errffa acce eC Co on nn ne eccttiio on nss The printer can be connected to the host via the USB, serial, optional wireless LAN 802.11 A/B/G, or Bluetooth. The printer will automatically connect to the first port that delivers valid data. Once established, the printer’s power must be cycled ‘Off’ and ‘On’ to change an interface connection. Once the cable connection has been made see section 3.3 for information on using the configuration software (NETira CT).
2 2..3 3 LLo oa ad diin ng gM Me ed diia a ((LLa ab be ellss o orr P Pa ap pe err)) Load media into the printer as follows: 1) Slide the Thumb latch rearward and then lift up on the printer’s Cover. Thumb-Latch Supply Hubs Cover 2) Slide and hold open the Supply hubs.
3) Orient the Roll of Media (paper or labels) as shown and insert it into the printer. Roll of Media 4) Allow the Supply Hubs to retract onto the Roll of Media. Then close the printer’s Cover and press downward until latched. Supply Hubs Roll of Media Cover 5) Press the button a couple of times to normalize tracking. The printer should advance the media to the start of the next label for each press.
2.3.1 Loading for Presenter Mode The printer must be configured for use in “Presenter Mode”. See section 3.5 for connecting and configuring the printer’s settings. 1) Load media as described in Section 2.3, (steps 1-3). 2) Remove about 8 inches (200mm) of labels from the Media Backing. 3) Open the Peeler Door. Route the media as shown below. 312 Media Backing Peeler Door 4) Pull the media backing tight and then close the Peeler Door. 5) Press the button a couple of times to normalize tracking.
2.3.2 External Media Loading Load media into the printer as follows: 1) Slide the Thumb latch rearward and then lift up on the printer’s Cover. Thumb-Latch Cover 2) Open the External Media Door located in the bottom of the printer.
3) Slide and hold open the Supply hubs and install the Media Spacer Supply Hubs Media Spacer 4) Insert the Media through the External Media Door and through the printer as shown: Media 5) Then close the printer’s Cover and press downward until latched. 6) Press the button a couple of times to normalize tracking. The printer should advance the media to the start of the next label for each press.
3 Printer Operation 3 3..1 1 F Frro on ntt P Pa an ne ell The Front Panel is an event-driven interface composed of a graphic display and four buttons. In addition to providing current printer information, the mode-dependent panel allows the items in the main display area and the button functions to change as operational events require. RL3 & RL4 printer displays will turn off and enter during sleep mode after 1 minute of inactivity; press any button to wake. 3.1.
3.1.3 Buttons Ready Mode Button Function Short Press: Wakes the printer from sleep or off mode. Short Press: Puts the printer into sleep mode. Press and hold (~4s) then release: Turns off the printer (RL3 models only). Press and hold (~10s): Resets the printer.
3 3..2 2 C Co on nffiig gu urra attiio on n LLa ab be ell Initiation of this mode causes the printer to print its Configuration Label. The Configuration Label provides valuable printer information including the firmware version, memory allocations, enabled options, communications settings, and label-counter data. To print the Configuration Label: 1) Be sure the printer is properly loaded with media (at least 4 inches wide), and that the power to the printer is off.
3 3..3 3 N NE ET Tiirra aC CT TP Prriin ntte err C Co on nffiig gu urra attiio on nU Uttiilliitty y The NETira CT printer configuration utility (available for download at www.datamax-oneil.com) is a Windows based configuration utility that allows the user to make changes to the existing printer setup via a serial or Wireless LAN connection.
For Wireless LAN Connections: Close the ‘Open a configuration file…’ dialogue box. a) In the toolbar, Click on the ‘ TCP/IP Configuration’ Icon . b) In the ‘TCP/IP Configuration’ dialogue box enter the IP address of the printer and click ‘OK’. (The IP address should be displayed on the printers LCD). c) In the toolbar, from the drop down menu box, select “TCP_IP”. Then click on the Query Printer Icon .
3 3..4 4 M Me ed diia aa an nd dC Ca alliib brra attiio on n 3.4.1 Selecting Media Type To accommodate a variety of media types the printer is equipped with two sensors. A transmissive sensor (for gap and notch type label media) and a reflective sensor (for “black mark” type label media).
Common Settings: Name Continuous Label Length (1/100 inch) Value 425 New value Distance the printer will advance after pressing the FEED button. Distance is measured in 1/100 inch. i.e. 1000=10 inches. 2 Label Width (1/100 inch) 425 3 Maximum Label Length (1/100 inch) 800 200 = 2 inch media 300 = 3 inch media 400 = 4 inch media Distance must be greater than the length of your media. i.e.
3.4.2 Quick Media Calibration The printer is factory calibrated for operation with most media types (both gap and black mark). Try your media without performing any calibration adjustments first, this will determine if the factory settings are compatible. Only perform the calibration adjustments if you are experiencing media registration issues. The Quick Media Calibration should be performed first, if it fails to detect your label media proceed to the Manual Media Calibration procedure, see section 3.4.
3.4.3 Manual Media Calibration The Manual Media Calibration is intended for use when Quick Media Calibration printer has failed to detect the start of each label. This procedure performs a complete recalibration of the sensors and will optimize the printer to your media. In some instances you may need to perform a Quick Media Calibration after the Manual Media Calibration to further optimize the printer’s sensor.
7) NETira CT will display a message indicating the process has finished. In case of any error, a FAILED CALIBRATION message will be displayed. Repeat the process. 8) To confirm changes, observe that Gap Back Value and Gap Paper Value have changed. Procedure for Black Mark Media: (be sure the printer is set to sense Black Mark media, see Section 3.4.1). 1) Click on the ‘Sensor Calibration’ printer component. 2) Click the ‘Manual Media’ button to start the manual calibration process.
Note: A special media with black marks is needed to perform this calibration. See the image to the right. A sample image is included at the end of this document, it can be printed and used for this calibration procedure. 4) Load Stock: Place a white section of media under the sensor, close the door then click ‘OK’. Printing Area Sensor 5) Load Special Q-Mark Media for Reflective Media: Place a black section of the media under the sensor and close the door then click ‘OK’.
7) NETira CT will display a message indicating the process has finished. In case of any error, a FAILED CALIBRATION message will be displayed. Repeat the process. 8) To confirm changes, observe that the Black Mark values have changed.
3 3..5 5 P Prre esse en ntte err M Mo od de e To set the printer to work in Presenter Mode, follow the following steps: - Set the “Presenter Sensor Equipped” parameter to enable the presenter sensor. - Calibrate the Presenter Sensor to store the media settings (liner and media). These setting changes can be performed using the NETira CT configuration utility, (see section 3.3 for more information on NETira CT). Launch the NETira CT configuration utility, and query (connect) to the printer.
Calibrate the Presenter Sensor: After calibration is complete the presenter sensor will be disabled. You must re-enable the presenter before use. 1) Install the media in the printer and route the liner through the peeler door, see section 2.3.1. 312 When the FEED key is pressed, the label will be peeled and presented for the operator. Media Backing Peeler Door 2) Click on the ‘Sensor Calibration’ printer component. 3) Click the ‘Presenter Sensor’ button to start the calibration process.
3 3..6 6 P Prriin ntte err IIn np pu utt M Mo od de e ((E Em mu ulla attiio on n)) The printer supports several printer languages such as CPCL, ZPL, DPL, etc. However, the printer has an AUTO input mode that will detect the type of script and switch to the desired printing language. By default the printer is configured as an AUTO mode. To manually change the printer language used, perform the following steps. These setting changes can be performed using the NETira CT configuration utility, (see section 3.
3 3..7 7 S Sa av viin ng g& & LLo oa ad diin ng gC Co on nffiig gu urra attiio on nF Fiille ess The NETira CT configuration program allows printer configuration files to be saved to a file. These files can be useful for saving a printer configuration for a particular application or media. Saved configuration files can be shared with other printers/users. Saving and Loading a Configuration file can be performed using the NETira CT configuration utility, (see section 3.3 for more information on NETira CT).
3 3..8 8 P Prriin ntte err D De em mo o There are two ways to send demo label formats to the printer, NETira CT and the standalone Printer Demo program available for download at www.datamax-oneil.com. NETira CT Printer Demo: 1) Launch the NETira CT configuration utility, select Tools, then Printer Demo. 2) Browse to folder containing print files, highlight files to be printed and click Add>. 3) Click on Print to send the file(s) to the printer. Standalone Printer Demo: 1) Launch the Printer Demo utility.
3 3..9 9 F Fiirrm mw wa arre eU Up pd da atte e When program updates and/or new features are added, they can be downloaded to the printer as follows: 1) Identify the new version for your model of printer from the Datamax-O’Neil Web site at www.datamax-oneil.com and download it onto your computer’s hard drive. Note RL3 and Rl4 firmware files are not interchangeable. 2) Launch the NETira CT configuration utility, and query (connect) to the printer, (see section 3.3 for more information on NETira CT).
Maintenance and Adjustments 4 4 4..1 1 C Clle ea an niin ng g IIn ntte errv va allss This section details the cleaning, adjusting, and troubleshooting tips for the printer. Proper cleaning is critical. To maintain peak performance of the printer, Datamax-O’Neil offers a complete line of cleaning products including pens, cards, films and swabs. Visit our website at www.datamax-oneil.com to learn more. The following table outlines the recommended maintenance schedule for the various printer parts.
4 4..2 2 C Clle ea an niin ng g tth he eP Prriin ntth he ea ad d If print quality declines (symptoms include non-compliant bar codes, print dropouts, and streaks) the typical cause is debris build-up on the printhead. Furthermore, when the build-up is not removed it may lead to reduced service life or printhead failure. Streaks in printed labels usually indicate a dirty or faulty printhead.
3) Close the Cover and then Press the button several times until the cleaning card has been completely fed through the printer. Repeat if necessary. Cleaning Card Cover Feed Button 4) Reload the media. Close the Cover, push down until it latches closed. Press the normalize tracking. button to To clean the printhead (using Datamax-O’Neil Cleaning Pens #770189-000): The Cleaning Pens are typically intended for use on linerless model printers or any printer with adhesive build up.
34
5 Troubleshooting 5 5..1 1 IIn nttrro od du uccttiio on n Occasionally, situations arise that require troubleshooting. Possible problem situations and potential solutions are listed below. Contact a qualified technician for problems that persist or problems not covered in this section. 5 5..2 2 T Trro ou ub blle essh ho oo ottiin ng gT Tiip pss The following section lists the symptoms and the associated page numbers of the topics covered.
Light print on the right side of the label: The printer’s cover is not latched down: Latch it. The printhead is not properly aligned: Call for service. Printer fails to power ON: The battery may need to be charged: Charge the battery (see Section 2.1). For RL3 models make sure the printer is turned on. (see Section 3.1.3). Label advances 8 inches before a fault indication: The media may not be properly loaded: Reload it (see Section 2.3).
A Specifications Physical Characteristics Dimensions RL3: 5.6” w x 7.6” h x 3.2” d (142 x 193 x 81 mm) RL4: 6.5” w x 7.9” h x 3.2” d (166 x 200 x 81 mm) Weight (printer only): RL3: 1.95 lbs. (0.88 kg) RL4: 2.16 lbs. (0.98 kg) Drop Specifications 6ft (1.8m) User Interface 128x64 LCD display with white LED backlighting.
Communications Serial Interface RS232, up to 460.8 kbps USB Interface 2.0 (full speed) Bluetooth Interface Supported versions: Version 2.1, Class 2; Serial port profile Wireless LAN Network standard: IEEE 802.11 a/b/g Wireless access modes: Infrastructure and ad-hoc Security Protocols: WEP (64/128), WPA (TKIP/RC4), WPA2 (CCMP/AES) Authentication: LEAP, EAP-PEAP, EAP-FAST, EAP-TTLS, EAP-LEAP: Network Support DHCP, TCP, UDP, DNS, BOOTP Power Source Battery 14.
Software/Firmware • NETira CT Configuration Tool - complete printer set-up utility • Control Language Compatibility: - DPL, ZPL II®, CPCL, IPL, XML • Device management compatibility: - Wavelink® Avalanche MC, Motorola MSP 3.
A-4
B Wireless LAN and Bluetooth Setup B B..1 1 IIn nttrro od du uccttiio on n The printer makes IP requests at power-up, so before making a network connection to the printer consider how your IP addressing needs to be assigned. The IP addressing of the printer can be configured in one of two ways: Using a static IP Address or Using IP Discovery (DHCP, BootP, or RARP). Default Network Settings: The following table lists some of the printer’s default network setting.
B B..2 2 S Stta attiicc IIP P/ /D DH HC CP PS Se ettttiin ng g The printer can be configured to use a static IP or an dynamic IP obtained from a DHCP server. Using a Dynamic IP Address (DHCP): 1) Click on the ‘Wireless General Network’ printer component. 2) Change (or confirm) the following parameter setting: IP address method: DHCP 3) After updating the “New Value” column, click the Send button to send these changes to the printer.
B B..3 3 IIn nffrra assttrru uccttu urre e/ /A Ad d--h ho occ S Se ettttiin ng g 1) Click on the ‘WIFI’ printer component. 2) Change (or confirm) the following parameter settings: ESSID: (Default: D-O) Type name that match the name of your access point Network Type: Infrastructure or Adhoc 3) After updating the “New Value” column, click the Send button to send these changes to the printer.
B B..4 4 W Wiirre elle essss LLA AN NS Se eccu urriitty yS Se ettttiin ng gss The printer can be configured to utilize several Wireless LAN security protocols. The following sections outline the most popular configurations. B.4.1 WEP 64 & 128 Bit 1) Click on the ‘WIFI’ printer component. 2) Click the ‘Static WEP’ radio button.
B.4.2 WPA2-PSK w/CCMP 1) Click on the ‘WIFI’ printer component. 2) Click the ‘Click the WPA/WPA2’ radio button. 3) Change (or confirm) the following parameter settings: Group Cipher: CCMP Network Authentication Type: WPA2-PSK 4) Type the Pass Phrase under the “WPA_PSK_TKIP/ WPA2_PSK settings” section. Note that Pass Phrase is case sensitive. 5) After updating the “New Value” column, click the Send button to send these changes to the printer. B.4.
B.4.4 WPA2-Enterprise 1) Click on the ‘WIFI’ printer component. 2) Click the ‘Click the WPA/WPA2’ radio button. 3) Change (or confirm) the following parameter settings: Network Authentication Type: WPA-Enterprise Phase 2 Method: EAP-MSCHAPv2 EAP Type: Select EAP-PEAP Note: EAP Type can be variable. Other values supported: EAP-LEAP, EAP-TTLS, EAP-PEAP, EAP-FAST 4) Type the user name and password under the “WPA/WPA2 Enterprise” section.
B.4.5 WPA-PSK TKIP w/TKIP 1) Click on the ‘WIFI’ printer component. 2) Click the ‘Click the WPA/WPA2’ radio button. 3) Change (or confirm) the following parameter settings: Group Cipher: TKIP Network Authentication Type: WPA2-PSK_TKIP 4) Type the Pass Phrase under the “WPA_PSK_TKIP/WPA2_PSK settings” section. Note that Pass Phrase is case sensitive. 5) After updating the “New Value” column, click the Send button to send these changes to the printer.
B B..5 5 R Re esse ettttiin ng g tth he eP Prriin ntte err In the event of a Wireless LAN communication problem (drop offs, hangs, can’t communicate, ect..), the printer can be reset. To reset the printer: 1) Press and hold the button until the “Radio Off” message is displayed and then release. 2) Next, press and hold the release.
C USB Setup C C..1 1 IIn nttrro od du uccttiio on n The printer can be connected to a PC or a handheld device using a USB cable. Before connecting the printer to your host device, the type (or class) of USB connection must be determined.
C C..2 2 P Prriin ntte err C Co on nffiig gu urra attiio on n Before attempting an USB connection the printer must first be configured to use the desired USB class. Set the printer to appropriate USB class for your particular application by using NETira CT configuration utility. 1) Turn the printer ON and connect it to the computer using the serial cable. 2) Install and Open the NETira CT configuration utility application on your PC, (see section 3.3 for more information).
C C..3 3 C Co om mp po ossiitte eC Clla assss IIn nsstta alllla attiio on n Do not plug the USB cable into the computers USB port. If you have done so, unplug it now. Software/Files Needed: The following files are required and can be downloaded from: www.datamax-oneil.com. Datamax-O’Neil Windows Drivers “Datamax-O'Neil Composite Class.inf” file Create a new folder on your local computer named “Drivers”. Download the necessary files and place them in this folder.
Step B: Windows Port Driver Installation: 1) Turn on the printer and wait until the “Ready” screen appears. The PC will then detect the printer and launch the “Found New Hardware Wizard”. 2) Select the “No, not this time” radio button and then click Next. 3) Select the “Install from a list or specific (Advanced)” radio button and then click Next. 4) Select the “Search for the best driver in these locations” radio button. 5) Check the “Include this location in the search” checkbox and then click Browse.
8) When prompted click “Continue Anyway” 9) Windows will now load the drivers to assign the necessary ports to the printer. 10) Click Finish to close the wizard. Proceed to Step C to begin the installation of the Windows Printer Driver. Step C: Windows Printer Driver Installation: 1) The PC will launch the “Found New Hardware Wizard” again. 2) Select the “No, not this time” radio button and then click Next.
3) Select the “Install from a list or specific (Advanced)” radio button and then click Next. 4) Select the “Search for the best driver in these locations” radio button. 5) Check the “Include this location in the search” checkbox and then click Browse. 6) Navigate to “C:\Seagull” folder on your computer’s hard drive. 7) Select the folder and then Click ‘OK’. Then Click Next. 8) Select the driver that matches your model printer. (there may be multiple models listed) and then click Next.
9) When prompted click “Continue Anyway” 10) Windows will now install the necessary files for the Windows printer driver. 11) Click Finish to close the wizard. The printer can now be selected for use in the printer dialogue box of any windows application.
C C..4 4 C CD DC CO On nlly y IIn nsstta alllla attiio on n Do not plug the USB cable into the computers USB port. If you have done so, unplug it now. Files Needed: The following file is required and can be downloaded from: www.datamax-oneil.com. “Datamax-O'Neil CDC Class.inf” file Create a new folder on your local computer named “Drivers”. Download the necessary file and place it in this folder. 1) Turn on the printer and wait until the “Ready” screen appears.
8) When prompted click “Continue Anyway” 9) Windows will now load the drivers to assign the necessary ports to the printer. 10) Click Finish to close the wizard. The printer can now be selected for using the virtual com port assigned to the printer.
C C..5 5 P Prriin ntte err C Clla assss O On nlly y IIn nsstta alllla attiio on n Do not plug the USB cable into the computers USB port. If you have done so, unplug it now. Software/Files Needed: The following file is required and can be downloaded from: www.datamax-oneil.com. Datamax-O’Neil Windows Drivers Create a new folder on your local computer named “Drivers”. Download the necessary file and place it in this folder.
Step B: Windows Printer Driver Installation: 1) The PC will launch the “Found New Hardware Wizard” again. 2) Select the “No, not this time” radio button and then click Next. 3) Select the “Install from a list or specific (Advanced)” radio button and then click Next. 4) Select the “Search for the best driver in these locations” radio button. 5) Check the “Include this location in the search” checkbox and then click Browse. 6) Navigate to “C:\Seagull” folder on your computer’s hard drive.
8) Select the driver that matches your model printer. (there may be multiple models listed) and then click Next. 9) When prompted click “Continue Anyway” 10) Windows will now install the necessary files for the Windows printer driver. 11) Click Finish to close the wizard. The printer can now be selected for use in the printer dialogue box of any windows application.
R Re efflle eccttiiv ve eM Me ed diia aC Ca alliib brra attiio on n LLa ab be ell