User Ma nua l MP Direct Thermal Thermal Transfer MP Nova4 DT MP Nova4 TT MP Nova6 DT MP Nova6 TT MP Nova8 DT N ova
Table of Contents User Manual 1. Introduction 2. Safety 3. Product Presentation 4. Product Overview 4.1 In the Box 4.2 Printer Parts MP Nova4, 6 & 8 DT 4.3 Opening and Closing the Cover of MP Nova4, 6 & 8 DT 4.4 Printer Parts MP Nova4 & 6 TT 4.5 Opening and Closing the Cover of MP Nova4 & 6 TT 5. Getting Started 5.1 Overview 5.2 Overview Peel-Off 5.3.1 Inserting Media MP Nova4 & 6 5.3.2 Inserting Media MP Nova8 5.4 Inserting Media - Peel-Off Kit 5.5 Inserting Ink Ribbon 5.6 Connecting 5.
1. Introduction Conditions © Copyright Datamax Corporation 2006 The MP Nova printers with their unique technology have been developed to offer a range of different applications. Thank you for choosing an Datamax printer for your business needs. The high quality, user-friendliness and simple maintenance procedures of the MP Nova direct thermal (DT) and thermal transfer (TT) printers make them the perfect choice.
2. Safety Safety & Certification Safety Requirements Datamax disclaims all responsibility regarding the CE directive if the printer is used, altered or installed in any way other than described in this manual. This symbol is used to indicate circumstances that may be dangerous to the user or that cause damage to the equipment. Please Note the Following Warnings: • Never use sharp or pointed tools when cleaning or replacing the print head. • Remember to handle the print head with care.
2. Safety Safety & Certification • The printer should be connected to the power supply indicated on the voltage plate. If you are unsure of the type of power supply available, please contact Datamax service personnel. • The printer is equipped with a plug suitable for earthed sockets. This is a safety measure. If the plug does not fit the power socket, a qualified electrician must replace it. • We do not recommend the use of extension cables. The power cable must not be subjected to pressure.
2.
2. Safety Safety & Certification The MP Nova printers are certified in accordance with the requirements for CE marking. CE = European Commission The MP Nova printers are UL-approved.
3. Product Presentation The MP Nova Series Datamax achieves diversity with its thermal printers, the MP series. Powerful and intelligent with a multitude of functionality you would not expect from one of the smallest printers on the market. They are built on a platform with advanced software, offering wide possibilities from simple local solutions to integrated solutions working over Internet.
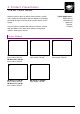
4. Product Overview 4.1 In the Box MP Nova4 DT & MP Nova6 DT The following items should be included in the box when you receive your new MP Nova4 DT or MP Nova6 DT printer: 1. 1 x MP Nova4 DT or MP Nova6 DT 2. 1 x Cleaning cloth 3. 1 x Communication cable (Serial RS 232) 4. 1 x Power cable 5. 1 x Media roll 6.
4. Product Overview 4.1 In the Box MP Nova4 TT & MP Nova6 TT The following items should be included in the box when you receive your new MP Nova4 TT or MP Nova6 TT printer: 1. 1 x MP Nova4 TT or MP Nova6 TT 2. 1 x Cleaning cloth 3. 1 x Communication cable (Serial RS 232) 4. 1 x Power cable 5. 1 x Media roll 6. 1 x Getting Started CD 7.
4. Product Overview 4.1 In the Box MP Nova8 DT The following items should be included in the box when you receive your new MP Nova8 DT printer: 1. 1 x MP Nova8 DT 2. 1 x Cleaning cloth 3. 1 x Communication cable (Serial RS 232) 4. 1 x Power cable 5. 1 x Fan-folded media 6. 1 x Getting Started CD 7.
4. Product Overview 4.2 MP Nova4, 6 & 8 DT – Printer Parts 1. Print button 2. Status lamp (LED) 3. Cover 4. Media roll 5. Roll steering 6. Roll guide lock 7. Media track 8. Handle 9. Communication ports 10. Unroll shaft 11. Power connection 12. Power switch 13. Fan-fold steering (MPNova8) 14.
4. Product Overview 4.2 MP Nova4, 6 & 8 DT – Printer Parts 15. Print head 16. Print roll 17. Media Positioning Sensor (MPS) 18. Paper guide 19.
4. Product Overview 4.3 Opening and Closing the Cover Open MP Nova4, 6 & 8 DT 1. Pull handle. 2. Open cover.
4. Product Overview 4.3 Opening and Closing the Cover Close MP Nova4, 6 & 8 DT 1. Close cover. 2. Fold handle. (Print head will be engaged.) Note: Make sure the handle is folded all the way down.
4. Product Overview 4.4 MP Nova4 & 6 TT – Printer Parts 1. Print button 2. Status lamp (LED) 3. Front cover 4. Rear cover 5. Media roll 6. Roll guide lock 7. Roll steering 8. Media track 9. Handle 10. Ink ribbon guide 11. Rewind spool 12.
4. Product Overview 4.4 MP Nova4 & 6 TT – Printer Parts 13. Communication ports 14. Unroll shaft 15. Power connection 16.
4. Product Overview 4.5 Opening and Closing the Cover Open MP Nova4 & 6 TT 1. Open cover. The inner cover slides automatically up together with the cover.
4. Product Overview 4.5 Opening and Closing the Cover Close MP Nova4 & 6 TT 1. Close cover. The inner cover slides automatically down together with the cover.
5. Getting Started 5.1 Overview MP Nova4, 6 & 8 DT 1. Insert media, MPNova4 & 6 DT, see chapter 5.3.1 MP Nova4 & 6 TT 1. Insert media. See MP Nova4 & 6 DT (no 1) in the left column. 2. Insert ink ribbon, see chapter 5.5. Insert media, MPNova8 DT, see chapter 5.3.2 2. Connecting, see chapter 5.6. 3. Connecting, see chapter 5.6. 3. Run a test print, see chapter 5.7. 4. Run a test print. See MP Nova4 & 6 DT (no 3) in the left column.
5. Getting Started 5.2 Overview Peel-Off MP Nova4 & 6 DT Peel-Off MP Nova4 & 6 TT Peel-Off 1. Insert peel-off media, see chapter 5.4 1. Insert peel-off media. See MP Nova4 & 6 DT Peel-off (no 1) in the left column. 2. Insert ink ribbon, see chapter 5.5. 2. Connecting, see chapter 5.6. 3. Connecting, see chapter 5.6. 3. Run a test print, see chapter 5.7. 4. Run a test print. See MP Nova4 & 6 DT Peel-off (no 3) in the left column.
5. Getting Started 5.3.1 Inserting Media MP Nova4 & 6 Note: The pictures shown describe an MP Nova4 DT. The process works just the same for MP Nova6 DT and MP Nova4 & 6 TT. 1. Undo the roll guide lock. 2. Remove the roll guide from the media shaft. 3. Pull handle to lift the print head from the roller. 4. Position a new media roll onto the spool and insert the media from the side into the printer’s media track. 5. Check that the media is aligned with the internal printer wall.
5. Getting Started 5.3.1 Inserting Media MP Nova4 & 6 7. Lock the roll guide lock (turn the handle clockwise). The roll steering shall guide the roll, but shall not be tight. ! Note: If the roll guide lock cannot be properly tightened (Note: not too tight), lift the lock upwards, rotate it back half a turn, lower it and retighten. 8. Fold the handle (the print head folds automatically onto the roller). 9.
5. Getting Started 5.3.2 Inserting Media MP Nova8 DT Adjusting the Fan-Fold Steering Note: It is only necessary to adjust the fan-fold steering when changing media type. 1. An Allen key (2 mm) is mounted underneath the fanfold steering. 2. Loosen the Allen screw to unlock the fan-fold steering. 3. Position the fan-fold steering to fit the width of the media. 4. Tighten the Allen screw to lock the fan-fold steering in its new position. 5. Replace the Allen key. .
5. Getting Started 5.3.2 Inserting Media MP Nova8 DT Inserting Media 1. Pull handle to lift the print head from the roller. 2. Insert the media through the fan-fold steering and through the printer. Note: Make sure the fan-fold steering suits the width of the media. To adjust the steering se previous page. Make sure the media is placed so that it will feed easily into the printer.
5. Getting Started 5.3.2 Inserting Media MP Nova8 DT 3. Pull out some of the media. 4. Fold the handle (the print head folds automatically onto the roller). 5. Press the print button a few times until the printer automatically finds the correct position of the media. Note: If necessary, make a test printout and auto adjust the media positioning sensor as described in chapter 5.7.
5. Getting Started 5.4 Inserting Media – Peel-Off Kit Note: The pictures shown describe an MP Nova4 DT Peel-Off. The process works just the same for MP Nova4 & 6 TT Peel-Off & MP Nova6 DT Peel-Off. First insert media. The peel-off media inserts in the same way as the media described in chapter 5.3.1. 1. Lift the handle and then pull, 40 cm of the label roll, out of the printer. 2. Fold the handle. 3. Remove all the labels on the exposed section. 4. Pull the backing paper under the printer. 5.
5. Getting Started 5.4 Inserting Media – Peel-Off Kit 6. Open the rewind unit slot by turning the knob clockwise while holding the cylinder firmly. 7. Slide the backing paper into the rewind unit slot.
5. Getting Started 5.4 Inserting Media – Peel-Off Kit 8. Close the rewind unit slot by turning the knob counterclockwise while holding the cylinder and backing paper firmly. 9. Roll the backing paper around the rewind unit by turning the knob counterclockwise. This increases the tension of the backing paper. 10. Press the print button a few times until the printer automatically finds the correct position of the media.
5. Getting Started 5.5 Inserting Ink Ribbon – MP Nova4 & 6 TT 1. Undo the handle and open the cover. 2. Remove the old ink ribbon. 3. Slide the new ink ribbon on to the spool. 4. Feed the ink ribbon under the print head. Note: Check that the inked side of the ribbon is facing downwards.
5. Getting Started 5.5 Inserting Ink Ribbon – MP Nova4 & 6 TT 5. Note: The ink ribbon must not pass under the MPS (Media Positioning Sensor). 6. Move the empty roll, which will collect the used ink ribbon, up and around the print head. 7. Slide the roll onto the take up spool.
5. Getting Started 5.5 Inserting Ink Ribbon – MP Nova4 & 6 TT 8. Fold the handle. 9. Press the print button. The ink ribbon will automatically wind around the rewind spool, thus tensioning the ink ribbon. 10. Close the cover.
5. Getting Started 5.6 Connecting Note: This process works for all the MP Nova printers. 1. Make sure the printer is switched off (the power switch is set to ‘0’). 2. Connect the communication cable from the PC to the printer. The connection cable enclosed is designed for communication port COM 1 and COM 2. Note: Check that the cable is connected to the correct communication port (COM1, COM2, USB or LAN). 3. Connect the printer to the mains supply. 4. Switch on the printer. 5.
5. Getting Started 5.7 Test Print & Sensor Auto Adjustment To be sure the printer is working, and to adjust the media positioning sensor, MPS, to the media, make a test printout: 1. Switch off the printer. 2. Press the print button. Switch on the printer and keep pressing the print button until the whole printout is printed and then for another 7 seconds. This will start the sensor auto adjustment. Release the print button when auto adjustment starts. 3. Restart the printer to exit test print mode.
4. Operation 4.
6. Operation 6.2 Interpreting the Status Lamp - LED Red End of media roll, end of ink ribbon or the handle is not folded down. Note: The handle has to be folded all the way down. Red (flashing) System temperature too high, printer has entered cool down state Yellow Printer is starting up or is in test print mode. Note: Restart the printer to exit test print mode.
6. Operation 6.3 Media Positioning Sensor Settings The MP Nova printers are equipped with media positioning sensors (MPS). The MPS detects the media and can be set to three different modes depending on how and where gaps and marks are positioned on the media: 1. Outer sensor mode – detects label gaps about 16 mm from the edge of the media. Note: This is the default setting. 2. Inner sensor mode – detects label gaps about 5 mm from the edge of the media. 3.
6. Operation 6.4 Adjusting the Print Head Adjusting Print Head Position Note: These adjustments are only necessary when changing to media with different thickness or width. The pictures shown describe an MP Nova4 DT. The process works the same for all MP Nova printers. Changing the position of the adjustment screws can be necessary if the labels are very narrow 1. Check that the printer is turned off. Open the cover and fold the handle. 2.
6. Operation 6.4 Adjusting the Print Head 6. Note: MP Nova4 DT only. On the MP Nova4 DT the position of the print head itself can be changed. As default there is a 3 mm non-printable area on the left side. To be able to print all the way to the edge of the label the margin has to be set to 0 mm. Pull the handle. Loosen the finger nut and slide the print head into position. Tighten the finger nut. Adjusting Print Head Pressure 7.
7. Maintenance Cleaning the Print Head and Roller Only use cleaning cloths from Imaje. These are specially designed for cleaning Imaje thermal printers. See chapter 10.2 for correct type. Note: Frequent cleaning prevents print head and roller damage, and is especially important in demanding environments. • • • Do not use liquids or aerosols when cleaning this printer. Never use sharp or pointed tools when cleaning or replacing the print head.
8. Troubleshooting To Begin With When troubleshooting the Nova printer, it is necessary to narrow down the various possible causes of faults: does the printer, the media or the application software cause the fault? A simple way of beginning your troubleshooting is to carry out a test print, which provides valuable information about the printer, for example if: • The printer can feed the media • The printer can print • It shows which program version, typeface, etc. is installed.
8. Troubleshooting Test Method 1 A printout using test method 1 shows the printer’s parameters and settings, for example: date, time, program version, communication settings and which typefaces are available. 1. Switch off the printer. 2. Press the print button, but do not release it. 3. Switch on the printer without releasing the print button. 4. Keep the print button depressed until the printer starts printing the test pattern. 5. Then, release the print button.
8. Troubleshooting Test Method 2 Note: This method is only for advanced troubleshooting by service technicians. This shows all information sent to the printer in hex-code and the function is used to determine possible communication faults, since it is possible to see exactly what data the printer receives. 1. Switch off the printer. 2. Press the print button, but do not release it. 3. Switch on the printer without releasing the print button. 4. Release the print button when the printer starts printing.
8.
9. Changeable Parts 9.1 Replacing the Roller Note: The pictures shown describe an MP Nova4 DT. The process works just the same for all MP Nova printers. 1. Check that the printer is turned off and open the cover (chapter 4.3 DT or 4.5 TT). 2. Pull the roller and the roller bearing support to the right (use the rubber surface when pulling right). 3. Lift the left-hand end of the roller towards the interior of the printer. 4. Lift out the right-hand end of the roller. 5.
9. Changeable Parts 9.1 Replacing the Roller 6. Pay carefully attention to the drive belt when removing the left-hand end of the roller from the printer. 7. Unpack the new roller.
9. Changeable Parts 9.1 Replacing the Roller 8. Insert the left-hand end of the roller (the end with the cog wheel). Check that it fits inside the drive belt.
9. Changeable Parts 9.1 Replacing the Roller 9. Insert the right-hand end of the roller into position. 10. Push the left-hand end of the roller downwards into the notch until the roller is parallel with the edge of the printer.
9. Changeable Parts 9.1 Replacing the Roller 11 and 12 Push the roller slightly to the left so that the left-hand end slots into the groove. 13. Close the cover (chapter 4.3 DT or 4.5 TT). 14. Switch on the printer.
9. Changeable Parts 9.2 Replacing the Print Head Note: The pictures shown describe an MP Nova4 DT. The process works just the same for all MP Nova printers. 1. Make sure the printer is turned off and open the cover. 2. Check and remember the current lateral position of the print head. 3 mm is the default position. Note: Only adjustable on MP Nova 4 DT. 3. Carefully push the print head downwards until the finger nut becomes visible. Unscrew the finger nut. Note: Take care not to loose the finger nut.
9. Changeable Parts 9.2 Replacing the Print Head 4. Carefully remove the print head. 5. Carefully remove the cables from the back of the print head. Note: There is a “button” on top of the right cable. Push the “button” before removing the cable.
9. Changeable Parts 9.2 Replacing the Print Head 6. Unpack the new print head and attach the cables to the new print head. Remember to handle the print head with care! 7. Carefully insert the print head into position.
9. Changeable Parts 9.2 Replacing the Print Head 8. Check that the lateral position has not changed. 3 mm is the default position. Note: Only adjustable on MP Nova 4 DT. 9. Hold the print head in place and tighten the finger nut. 10. Close the cover (chapter 4.3 DT or 4,5 TT). 11. Switch on the printer.
10. Printer Options and Spare Parts 10.1 Printer Options Peel-Off Kit MP Nova4 & 6 DT, MP Nova4 & 6 TT Item number: 533541 Nova4 533542 Nova6 The peel-off device separates the labels from the backing paper, which is rolled up behind the printer. LTS – Label Taken Sensor MP Nova4 & 6 & 8 DT, MP Nova4 & 6 TT Item number: 533625-01 The Label Taken Sensor (LTS) is often used in association with the Peel-Off Kit. Printing is controlled by a photocell.
10. Printer Options and Spare Parts 10.1 Printer Options 215 mm Kit MP Nova4 & 6 DT, MP Nova4 & 6 TT Item number: 533615 The 215 mm Kit makes it possible to use media rolls with diameters up to 215 mm.
10. Printer Options and Spare Parts 10.2 Spare Parts Consumables Part number Description 501933 501934 501935 501936 501937 501938 1. 10 x Cleaning cloths (4") 1. 50 x Cleaning cloths (4") 1. 10 x Cleaning cloths (6") 1. 50 x Cleaning cloths (6") 1. 10 x Cleaning cloths (8") 1. 50 x Cleaning cloths (8") 533529 533667 533529 533667 533640 533640 531675 2. Print head – 200 dpi – MP Nova4 DT 2. Print head – 300 dpi – MP Nova4 DT 2. Print head – 200 dpi – MP Nova4 TT 2.
11. Consumables Media General Self-adhesive labels are backed with silicon-coated backing paper, from which the label is removed. There are different types of adhesive: • • • • Tickets are printed on non-adhesive paper, which means there is no need for backing paper. Both labels and tickets are available as rolls or as fan-folded continuous paper tracks. Fan-folded labels and tickets are supplied in boxes, in which labels are stored before passing through the printer.
12. Technical Specifications MP Nova4 DT & TT Dimensions (H x W x L) DT: 150 x 232 x 360 mm (6” x 9⅛” x 14⅛”) TT: 210 x 250 x 360 mm (8¼” x 9½” x 14⅛”) Weight DT: 5.8 kg (12 lbs), TT: 7.
12. Technical Specifications MP Nova6 DT & TT Weight DT: 150 x 292 x 360 mm (6” x 11½” x 14 ⅛”) TT: 210 x 310 x 360 mm (8⅓” x 11⅞” x 14 ⅛”) DT: 6.
12. Technical Specifications MP Nova8 DT Dimensions (H x W x L) DT: 150 x 345 x 360 mm (6” x 13½” x 14⅛”) Weight DT: 7.