Digital Solutions Division Strata CIX and CTX IPT/DKT Telephone Telephone Administrator Manual December 2004
Publication Information Toshiba America Information Systems, Inc., Digtal Solutions Division, reserves the right, without prior notice, to revise this information publication for any reason, including, but not limited to, utilization of new advances in the state of technical arts or to simply change the design of this document. Further, Toshiba America Information Systems, Inc.
TOSHIBA AMERICA INFORMATION SYSTEMS, INC. (“TAIS”) Digital Solutions Division License Agreement IMPORTANT: THIS LICENSE AGREEMENT (“AGREEMENT”) IS A LEGAL AGREEMENT BETWEEN YOU (“YOU”) AND TAIS. CAREFULLY READ THIS LICENSE AGREEMENT.
Toshiba America Information Systems, Inc. Digital Solutions Division Limited Warranty Toshiba America Information Systems, Inc., (“TAIS”) warrants that this telephone equipment (except for fuses, lamps, and other consumables) will, upon delivery by TAIS or an authorized TAIS dealer to a retail customer in new condition, be free from defects in material and workmanship for twenty-four (24) months after delivery.
Contents Introduction Organization....................................................................................................................... iii How to Use This Guide...................................................................................................... iii Conventions ........................................................................................................................iv Related Documents/Media...................................................................
Contents Chapter 3 – IPT2008-SDL Settings Initializing the IP Telephone..............................................................................................16 IPT Setup Instructions........................................................................................................17 IP Telephone Start Up Sequence ....................................................................................18 IP Telephone Function Settings .................................................................
Introduction This Telephone Administrator Manual provides Administrator level instructions for the Toshiba Strata CTX28, CTX 100-S, CTX100, and CTX670 telephone systems • Strata IP telephone (IPT1020-SD, IPT2010-SD, IPT2020-SD and IPT2008-SDL) • Strata DKT3000- and 2000-series digital telephones • Strata Digital Add-on Module (DADM) • Strata IP Add-on Module (IADM2020) • Strata Direct Station Selection (DSS) console Organization • Chapter 1 – Administrator Mode • Chapter 2 – DKT/IPT Settings • Chapter 3 –
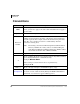
Introduction Conventions Conventions Conventions Description Note Elaborates specific items or references other information. Within some tables, general notes apply to the entire table and numbered notes apply to specific items. Important! Extension Number Calls attention to important instructions or information. Press to answer a call to the Extension Number. Each station can have multiple extension buttons. Incoming calls ring the extension button(s) from the top down.
Introduction Related Documents/Media Related Documents/Media Note Some documents listed here may appear in different versions on the CD-ROM or in print. To find the most current version, check the version/date in the Publication Information on the back of the document’s title page.
Introduction Related Documents/Media vi Strata CIX and CTX Telephones Administrator 12/04
Administrator Mode 1 This chapter contains some of the functions that can be performed using Administrator Mode. Important! These functions require Strata CTX release 2.22 or higher software. You can access the Administrator mode using either the DKT2000 or DKT3000 series telephones. Toshiba recommends using the DKT3020-SD. To access the Admin mode, the telephone must be enabled for this function in system programming by the telephone system administrator.
Administrator Mode General Operation General Operation ³ Use these buttons to navigate the different functions Navigation Button Function Mode Previous Menu; exit Admin mode Scroll Next Item/screen (Forward) or move cursor to Right column Page Previous Item/screen (Back) or move cursor to Left column Hold Enter Notes • You can use Scroll/Page button to select Menu and Hold key to enter the Menu. • You can enter digits or alphanumeric Name from Dial Pad.
Administrator Mode General Operation Administrator Mode ³ To enter Administrator Mode 1. Press the 0RGH button. BC2 NOV 20 SK1 NO. 304 THURSDAY SK2 SK3 4:20 SK4 7587 2. Press 6FUROO. (6FUROO is the “ADMIN” Soft Key. The “Password” prompt appears. ...or to return to the first screen, press 0RGH. 3. Enter the password + +ROG. Default password = 0000 BC2 NO.
Administrator Mode General Operation DOOR NAME SYSTEM SD/NAME Note To enter a speed dial number, refer to Speed Dial in the Advanced section of this guide. STATION SD/ NAME Note To enter a speed dial number, refer to Speed Dial in the Advanced section of this guide. CO LINE NAME 4 Press +ROG. DOOR PHONE NO. 01 Enter the Door Phone number (01~24). Enter the Door name that corresponds with that Door Number. Press +ROG pressing Hold will register the name and let you make the next Phone name entry.
Administrator Mode General Operation DNIS NAME Press +ROG. ILG Enter the ILG number (1~128). Pressing 0RGH lets you return to the previous screen and +ROG registers the entry. Enter the DID number ILG 003 DID Enter the alphanumeric name that corresponds to the DID Number Press +ROG to register the entry.
Administrator Mode General Operation 6 Strata CIX and CTX Telephones Administrator 12/04
DKT/IPT Settings 2 This chapter explains how to enter data for your IP and DKT telephones (IPT2010-SD and IPT2020-SD only). Important! • This chapter does not apply to the Strata CTX28. • The IPT2010-SD telephone should not be used to program the telephone system. • Make sure you have the following information before doing any of the steps found in this chapter: IP address, subnet mask number, router address, Station ID, CTX Strata Net node number, IP address for the BIPU-M2A, etc.
DKT/IPT Settings FB Buttons FB Buttons When you press + + ++ROG (simultaneously) to enter telephone programming mode, you may need to press Feature Buttons ()%). The following illustrations show you the location of these )% buttons on 20, 10, and 14 button telephones.
DKT/IPT Settings FB Buttons FB buttons for 14-button phones DKT3014-SDL Mode Feature Page Scroll Q Z Msg Spdial Mic Redial Spkr Cnf/Trn Vol FB07 FB14 FB06 FB13 FB05 FB12 FB04 FB11 FB03 FB10 FB02 FB09 FB01 FB08 Hold 5442 Strata CIX and CTX Telephones Administrator 12/04 9
DKT/IPT Settings Telephone Programming Mode Telephone Programming Mode The DKT3000-series and IPTs enable you to set a number of features directly from the phone, including: Call Waiting Tone (On/Off), Flex Key, Msg Key, LCD contrast, Speakerphone/Microphone Room Noise Sensitivity (On/Off), and Country settings. “Telephone Programming Mode A” programs settings on a ROM chip inside the telephone. Note Some of the procedures use Feature Buttons (FB1, FB2, etc.).
DKT/IPT Settings Telephone Programming Mode Dial Pad and Button Beeps Digital telephones can emit a “beep” sound whenever a dial pad or feature button is pressed. The “beeps” are On by default. Follow these steps to turn the “beeps” On or Off on 3000-series DKTs. 1. Press + + ++ROG (simultaneously). 2. Press . 3. Press Feature Button 1 (FB1) to toggle On/Off. FB1, LED On: buttons beep. FB1, LED Off: buttons do not beep. 4. Press +ROG to set the option. 5.
DKT/IPT Settings Telephone Programming Mode Call Waiting and Camp-on Ring Tone Over Handset/ Headset Option Call Waiting and Camp-on tones are sent to a busy telephone’s speaker to indicate that a call is waiting. Call Waiting and Camp-on Tones can be sent, as an option, to the telephone handset or headset, in addition to the speaker. Follow these steps to turn handset/headset Call Waiting and Camp-on tone On/Off for a 3000-series telephone. The default is Off. 1. Press + + ++ROG (simultaneously). 2.
DKT/IPT Settings DKT2000 Mode On/Off 4. Press +ROG. This sets the LCD lightness/darkness contrast on the middle setting. 5. Go off-hook, then on-hook to exit the program mode. ³ Test the Display on Large LCD Telephones (DKT3014-SDL only) 1. 2. 3. 4. 5. 6. 7. 8. Press + + ++ROG (simultaneously). Press 3DJH. Press . LCD screen is blank. Press . Each segment shows three vertical lines, in all eight rows. Press . Each segment contains five short horizontal lines, in all eight rows. Press .
DKT/IPT Settings Changing the Functions of the Flex and Msg Buttons (DKT3001 only) 4. Press +ROG. 5. Lift the handset to exit programming mode. Wait a few seconds for the telephone to reset itself. 6. Connect Cordless Telephone to DKT3000 Telephone. Changing the Functions of the Flex and Msg Buttons (DKT3001 only) You can change the functions of the Flex and Msg buttons on your DKT3001 telephone to be different from the defaults.
DKT/IPT Settings Headset Transmitter Level Adjustment Msg/Feature Button Activation/Deactivation Your 0VJ button has been set by default to work as a 0VJ button; however, you can reprogram it to work as Feature Button. 1. Press + + ++ROG (simultaneously). 2. Press . 3. Press 0VJ to toggle On/Off. 0VJ LED On: 0VJ operates as Feature Button 0VJ LED Off: Works as a 0VJ button. 4. Press +ROG to set the option. 5. Go off-hook, then on-hook to exit the program mode.
DKT/IPT Settings Initializing the IP Telephone Important! • On the IPTs, the soft keys do not have names such as Page, Mode, Scroll and Feature. In the manual, the soft keys are referenced as SK1, SK2, SK3 and SK4 from Left to Right. • On the IPT2010-SD, use the soft key SK3 (Scroll) to switch between FB1~FB10 and FB11~FB20. Initializing the IP Telephone CAUTION! If you initialize the IP telephone, all settings return to default. 1. Press + + ++ROG (simultaneously). 2. Press 9RO V.
DKT/IPT Settings IPT Setup Instructions IPT Setup Instructions 1. Press + + ++ROG (simultaneously). 2. Press , then press +ROG to select the Network Setting Mode. 3. Press )% to see if the DHCP server is in use or not. Press one of the following (normally, use : manual setting): : manual setting, then press +ROG. : auto setting by DHCP server, then press +ROG. 4. Press )% . Enter the IP address for this IPT and press +ROG. To enter the period in an IP address, press the button on your dialpad (e.g.
DKT/IPT Settings IPT Setup Instructions IP Telephone Start Up Sequence After the IP telephone network setting has been programmed, the following displays occur after the IP telephone is hung-up: Action 1. IPT initializes. 2. IPT searches for IP address. LCD Indication Remarks INITIALIZING PLEASE WAIT... IPaddress setting... Possible errors: • IP address is not set. IPaddress setting... Can’t set IPaddress • No DHCP server, etc. If error occurs, IP address setting is carried out continuously. 3.
DKT/IPT Settings IP Telephone Function Settings Action LCD Indication 4. Registering to BIPU 5. Registering completion - normal action. Remarks When registering fails, IPT retries by starting at Step 2 again. Error message: Registering IPT “Exxx” is error Can’t register IPT:EXXX number. Registering IPT LCD data is indicated from the system. Example: NO.
DKT/IPT Settings Setting the IP Telephone Headset Transmit Volume Setting the IP Telephone Headset Transmit Volume 1. Press + + ++ROG (simultaneously). 2. Press . 3. Press the Feature Buttons to turn the LEDs On/Off for the desired volume transmission level (see Table 4). Table 4 Volume Level Transmitted from Headset Microphone FB3 ON ON ON ON OFF OFF OFF OFF LEDS FB2 ON ON OFF OFF ON ON OFF OFF FB1 ON OFF ON OFF ON OFF ON OFF Transmit Level Level 7 (min.
3 IPT2008-SDL Settings This chapter contains instructions to configure the IPT2008-SDL telephone. All instructions found in this chapter pertain to the items found in the CONFIG tab of the IPT2008-SDL telephone. Configurations ³ Select the CONFIG tab. The screen shown right displays. This is the Configurations main screen ³ To access any of the screens that relates to an item on the Configurations screen ³ Press the soft key that corresponds to the item. The details pertaining to that item display.
IPT2008-SDL Settings Configurations ITEM INFORMATION DISPLAY Network Displays or sets the DHCP, IP Address, Subnet, the default gateway, station information and LIPU Address. Advance Displays the Primary Name Server, the Secondary Name Server, GRQ Port, RRQ Port, and AP Address Sound Displays settings for Keybeep, Roam Noise, Handset BOV, and Carbon Headset Others Key Repeat Net Diag Factory Initialize Reset Loop Back Test ³ Select Configuration > Network Diagnosis > Loop Back Test.
IPT2008-SDL Settings Configurations ³ Setting Ping Send-to Address 1. Press the Ping Address soft key. The Ping Address Setting Screen displays (shown right. 2. Using the dial pad, press 1 ~ 0 and * to enter an IP address or change an IP address. Input the delimiter “.” by pressing key. Press 9RO W to backspace. 3. Press 6(7 soft key to go back to the Loop Back Test Screen (after rewriting the NV-RAM data if an IP address is changed). (“Ping to xxx.xxx.xxx.
IPT2008-SDL Settings Configurations Ping Start and Stop ³ From the Loop Back Test Screen, press the Ping Start soft key. The Pinging Screen displays (shown right) and Pinging starts. Notes 2KPIKPI 2KPI VQ 'ZGEWVKPI • Pinging is attempted ten times on the Pinging Screen and is stopped automatically. The screen will move to the Loop Back Test Screen. The result is displayed in the third line of the Loop Back Test Screen as “Last result n/10 (successful operations/10).
IPT2008-SDL Settings Configurations Network Settings ³ To access the Network Setting screens ³ Select the CONFIG tab, then Network soft key. Note There are two screens for Network Settings (shown below). Use the “J” and “I” soft keys to move from one screen to another and to go back to the Configurations main screen. 0GVYQTM 5GVVKPI &*%2 10 +2 #FFT 5WDPGV &HNV )9 5VCVKQP =5'6? =%#0%'.
IPT2008-SDL Settings Configurations DHCP Server Settings 1. Select Configuration > Network > DHCP. The DHCP Mode screen displays. The current default set is underlined. 2. Press the ON or OFF soft keys to change the set value. 3. Press the SET soft key to accept the change. ...or press the CANCEL soft key to cancel the change. Notes &*%2 /QFG 10 1(( =5'6? =%#0%'.? 2*10' %10(+) 9'$ • The Network Setting Screen displays when you press SET or CANCEL.
IPT2008-SDL Settings Configurations IP Address ³ Select Configuration > Network > IP Addr. The IP Address screen displays (shown right). The current IP Address displays. ³ To change settings on the screen The following applies to the IP Address, Subnet Mask, Default Gateway, and Primary DNS Server. 1. Use the dial pad (1~0, *) to enter a new IP address. +2 #FFTGUU %WTTGPV 0GY $CEMURCEG 8QN &QYP =5'6? =%#0%'.
IPT2008-SDL Settings Configurations Subnet Mask 1. Select Configuration > Network > Subnet. The Subnet Mask screen displays (shown right). The current subnet displays on the one-line text field. 2. Follow the steps to change settings on page 27. 5WDPGV /CUM %WTTGPV 0GY $CEMURCEG 8QN &QYP =5'6? =%#0%'.? 2*10' Default Gateway Address 1. Select Configuration > Network > Dflt-GW. The Default GW Address screen displays (shown right).
IPT2008-SDL Settings Configurations Station ID ³ Select Configuration > Network > Station. The Station ID screen displays (shown right). The current Station ID displays. ³ To Change or Add Information on this screen 1. Enter the New Station ID to change or add a Station ID. 2. Press the SET soft key to accept the change ...or press the CANCEL soft key to cancel the change and go to the Network Setting screen.
IPT2008-SDL Settings Configurations CIX System /IPU Address Mode 1. Select Configuration > Network Setting Screen 2 > IPU Mode. The IPU screen displays (shown right). 2. Press the Manual or Broadcast soft key to change the set value. The value set is underlined in the display. 3. Press the SET soft key to accept the change ...or press the CANCEL soft key to cancel the change and go to the Network Setting screen. +27 /QFG /CPWCN $TQCFECUV =5'6? =%#0%'.
IPT2008-SDL Settings Configurations Advanced Network Settings ³ To access the Advanced Network Setting screens ³ Select the CONFIG tab, then Advanced soft key. Note There are two screens for Advanced Settings (shown below). Use the “J” and “I” soft keys to move from one screen to another, and to go back to the Configurations main screen. #FXCPEGF 5GVVKPI 2 &05 5 &05 )43 2QTV 443 2QTV #2 #FFT =5'6? =%#0%'.
IPT2008-SDL Settings Configurations IP Address for DNS Server (Primary Name Server) Note If DHCP Mode is ON, you don’t have to set any parameters for the DNS server. 1. Select Configuration > Advanced > P-DNS. The 2TKOCT[ &05 #FFTGUU Primary DNS Address screen displays (shown %WTTGPV right). 0GY 2. Follow the steps to change settings on page 27. $CEMURCEG 8QN &QYP =5'6? =%#0%'.
IPT2008-SDL Settings Configurations RRQ Port Number 1. Select Configuration > Advanced > RRQ Port. The current RRQ Port Number displays (shown right). 2. Enter the New number. 3. Press the SET soft key to accept the change ...or press the CANCEL soft key to cancel the change and go to the Network Setting screen. Note For other notes, refer to “Station ID” on page 29. 443 2QTV 0WODGT %WTTGPV 0GY $CEMURCEG 8QN &QYP =5'6? =%#0%'.? 2*10' Application Server Address 1.
IPT2008-SDL Settings Configurations Table 5 Dial Pad Alphanumeric Characters Dial Number of times to press the dial pad button Pad 1 2 3 4 5 6 7 8 Buttons space a b c A B C goto a d e f D E F goto d g h i G H I goto g j k l J K L goto j m n o M N O goto m p q r s P Q R S t u v T U V goto t w x y z W X Y Z VW . / : @ _ ~ QG “ # $ % ^ & ‘ ( UG * + , ; < = > ? WK ] ‘ { l } goto .
IPT2008-SDL Settings Configurations External Administration Terminal IP Address Upper Bound Setting This screen can be used to set an External Administration Terminal IP Address Upper Bound. External accessing is not enabled if the Upper and Lower bound IP addresses are initial values (0.0.0.0). External accessing is enabled if the External Administration Terminal IP address is within the Upper and Lower bound IP address range. 1. Select Configuration > Advanced Screen 2 > Admin_U.
IPT2008-SDL Settings Configurations External Administration User ID Setting Use this screen to set an User ID. External accessing is enabled when the user can successfully log in with correct User ID and Password 1. Select Configuration > Advanced Screen 2 > USER ID. The External Administration User ID Setting screen displays (shown right). 2. Enter the New User ID to change or add a User ID. 3. Press the SET soft key to accept the change ...
IPT2008-SDL Settings Configurations Sound Settings ³ To access the Sound Setting screens ³ Select the CONFIG tab, then Sound soft key. Note There are two screens for Sound Settings (shown below). Use the “J” and “I” soft keys to move from one screen to another and to go back to the Configurations main screen. 5QWPF 5GVVKPI -G[DGGR 10 4QQO 0QKUG 1(( *CPFUGV $18 1(( %CTDQP *CPFUGV 1(( %CTDQP *GCFUGV 1(( =5'6? =%#0%'.
IPT2008-SDL Settings Configurations Keybeep, Room Noise, Handset BOV, Carbon Handset, and Carbon Headset Important! The following steps apply to all of the above items. 1. Select Configuration > Sound > Keybeep (or any of the above items). The appropriate screen displays. 2. Press the ON or OFF soft keys to change the set value. 3. Press the SET soft key to accept the change. ...or press the CANCEL soft key to cancel the change. The setting is underlined in the Sound screen display.
IPT2008-SDL Settings Configurations Headset Tx Volume Setting Screen ³ Select Configuration > Sound (screen 2) > Headset Tx Vol. The Headset Tx Volume screen displays. ³ To Change or Add Information on this screen 1. Enter the New field with the volume level. 2. Press the SET soft key to accept the change ...or press the CANCEL soft key to cancel the change and go to the Sound Setting screen 2. *GCFUGV 6Z 8QNWOG %WTTGPV 0GY /KP /CZ $CEMURCEG 8QN &QYP =5'6? =%#0%'.
IPT2008-SDL Settings Configurations Key Repeat ³ Select Configuration > Key Repeat. The Key Repeat screen displays. The general operation on the Key Repeat screens is as follows: • To view details of an item displayed on the screens above, press the soft key that corresponds to that item. • Press the SET soft key to rewrite the NV-RAM data if any setting of an item on this screen is changed. -G[ 4GRGCV 5GVVKPI 1(( 10 5GVVKPI 10 4GRGCV &GNC[ 6KOGT 4GRGCV 4CVG 6KOGT =5'6? =%#0%'.
IPT2008-SDL Settings Configurations Repeat Delay Timer and Repeat Rate Timer Important! The following steps apply to the above two items. ³ Select Configuration > Key Repeat > Repeat Delay Timer or Repeat Rate Timer. The appropriate screen displays (shown right). ³ To Change or Add Information on this screen 1. Enter the New Repeat Delay Timer to change the setting. Note Use the dial pad 1~5 and 9RO W to backspace. For Repeat Delay Timer: 1 (short) to 5 (long).
IPT2008-SDL Settings Configurations Other Setting ³ Select Configuration > Others. The Others screen displays. This screen contains Language, Input timer Mode and Input Timer Value settings. Notes The general operation on the Key Repeat screens is as follows: • To view details of an item displayed on the screens above, press the soft key that corresponds to that item. 1VJGT 5GVVKPI .CPIWCIG 'PINKUJ 75 %# +PRWV 6KOGT /QFG 1(( +PRWV 6KOGT 8CNWG =5'6? =%#0%'.
IPT2008-SDL Settings Configurations Input Timer Mode Setting Screen 1. Select Configuration > Others > Input Timer Mode. The Input Timer Mode Setting screen displays. 2. Press the ON or OFF soft keys to change the set value. 3. Press the SET soft key to accept the change. ...or press the CANCEL soft key to cancel the change. The setting is underlined in the Others Setting screen display. +PRWV 6KOGT /QFG 10 1(( =5'6? =%#0%'.
IPT2008-SDL Settings Configurations Initialize ³ Select Configuration > Initialize. The Initialize screen displays. The general operation on the Key Repeat screens is as follows: • To view details of an item displayed on the screens above, press the soft key that corresponds to that item. +PKVKCNK\G #NN &CVC .%& 0GVYQTM -G[ 4GRGCV 5QWPF 1VJGTU $TQYUGT (CEVQT[ =':'%? =%#0%'.? • You can toggle between all the items found on the Initialize screen, except All Data.
IPT2008-SDL Settings Configurations Table 6 IPT2008-SDL Default Settings Major items Network Diagnosis Network Setting (Basic) Network Setting (Advanced) Minor items Initial value 1 Ping address 0.0.0.0 1 DHCP server mode 2 IP address 127.0.0.1 3 Subnet mask 255.255.255.0 4 Default router address 0.0.0.
IPT2008-SDL Settings Configurations Table 6 IPT2008-SDL Default Settings Major items Sound Setting Minor items Initial value 1 Key beep ON 2 Room noise OFF 3 Handset BOV OFF 4 Carbon handset OFF 5 Carbon headset OFF 6 Headset Tx control Normal 7 Headset Tx volume <0:Min ñ 7:Max> 3 Handset Rx output OFF 8 Key Repeat Setting Other Setting Comfort noise 1 Key repeat ON 2 Repeat delay tim
IPT2008-SDL Settings Configurations Reset 1. Select Configuration > Reset. The Reset screen displays ...or if you press the SET soft key when a setting change is made on the Network, Advanced and Initialize subsidiary screens. 2. Press EXEC to reset the terminal. “Terminal is reset. (Restart)” displays on the screen. ...or press CANCEL to go back to the Configurations screen. 3. Select restart. 4GUGV GZGEWVG ! =':'%? =%#0%'.
IPT2008-SDL Settings Configurations ADM/DEBUG Mode Screen 1. Select Configuration > Factory > IADM/DEBUG Mode. The ADM/DEBUG Mode screen displays. 2. Press the DEBUG or ADM soft keys to change the set value. 3. Press the SET soft key to accept the change. ...or press the CANCEL soft key to cancel the change. The setting is underlined in the Factory Setting screen display. Display/Key Test 1. Select Configuration > Factory > Display/Key Test. The Display/Key Test Mode screen displays. 2.
IPT2008-SDL Settings Configurations 5- .%& ':+6 5- 5- 5- 5- 5- &+52.#; -'; 5- 5- 6'56 /1&' 5- 5- 5- 5- 5- 5- Select the EXIT and press the enter key (CEVQT[ 5GVVKPI #&/ &'$7) /QFG #&/ &KURNC[ -G[ 6GUV &KURNC[ /QFG +26 =5'6? =%#0%'.
IPT2008-SDL Settings Configurations Display Mode 1. Select Configuration > Factory > Display Mode. The Display Mode screen displays. 2. Press the IPT2008 or DKT3014 soft keys to change the set value. Press the SET soft key to accept the change. ...or press the CANCEL soft key to cancel the change. The setting is underlined in the Factory Setting screen display. 50 &KURNC[ /QFG +26 &-6 =5'6? =%#0%'.
Index A F about this book conventions, iv how to use this guide, iii organization, iii related documents, v feature button activation, 14 I IPT1020-SD, 21 M B microphone/speaker sensitivity adjustment, 11 busy override, 12 buttons extension, iv R redial, 14 C S camp-on ring tone, 12 speakerphone, 11 D T deactivation, 14 digital telephone upgrade EXV\ RYHUULGH FDPS RQ ULQJ WRQH RYHU KDQGVHW KHDGVHW, 12 PLFURSKRQH VSHDNHU sensitivity adjustment, 11 DKT2000 mode, 13 transmission levels, 15
Index T~T 52 Strata CIX and CTX Telephones Administrator 12/04