
User guide


uNAS/tNASUserGuideVersion1.0 Page47
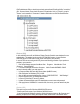
e. By clicking on the "Remote Selections" branch, and next on "Unix Agents", a NAS server
name will appear,
f. After clicking the server "NAS_server/logical volume", a window "Logon Account Selection"
will be displayed where you need to choose the same user name as in the point "1". In some
settings, the window "Logon Account Selection" will not appear automatically. In this case you
must right mouse click on the name "NAS_Server/share_volume", and then in the context
menu choose "Connect As...". Only then the "Logon Account Selection" window will appear.
g. After choosing a user, the "Logical Volume" and NAS server shares will appear. By
selecting the correct share and clicking the "Run Now" button, selected shares will be backed-
up.
Restore:
a. By choosing "Restore", a "Restore Job Properties" window will appear.
b. On the left side of the window, in Properties Source click "Selection", and the name of
the NAS server which shares were earlier backed-up will be displayed.
c. Choose a folder you want to be restored from the correct backup file.
d. From the Source Resource Credentials menu choose a user account for the NAS
(NAS_server/ share_volume) server and click the "Run Now" button. In order to use a
Incremental method, choose it from the Setting General Backup Method menu. Please
use method "Incremental - Using modified time" (Reset Archive bit - does not work on the XFS
partition types).
BrightStor:
Allow IP or Network IP:
Please enter the Backup server's IP address in order to grant access to the NAS. If you leave
this field empty, all BrightStor backup servers in the network will have access to the NAS
server.
User:
By providing a user name, only this BrightStor user will have access to the NAS. If left empty,
all users will be able to access the NAS server. Before you'll start to backup your data, you
have to configure device that backup will be made to and add your NAS server as source.
Please follow these steps in order to complete it.
a. From menu bar chose Configuration, then Device configuration. Device configuration
wizard will appear, it will help you to configure backup devices on your server.
b. Chose Windows Server and click button Next.
c. From options select File System Device and click Next.
d. Click on Add button, File System Device will be added to the list.
e. Click on Location field from newly created entry and select path that will be mapped to File
System Device.
f. Click on Finish button to complete Device configuration wizard.
g. Click Exit to quit Device configuration.
h. The last thing to do is to format your newly created File System Device. In order to do it
select Device from Quick start menu, select your newly created File System Device.
i. Click on Format button, format form will appear.
j. Enter media name and click OK to format media.
Configuration of NAS server: