
User manual


Installing the GameFinder software
1. Insert the PlotWatcher TLV camera CD into your computer.
2. If Windows does not auto-open the CD to reveal the “GameFinder_Setup” icon, then browse to
the CD drive using “My Computer.” Once you see “GameFinder_Setup” in the Explorer window,
proceed to the next step.
3. Double Click on “GameFinder_Setup” to start the setup program.
4. Click NEXT for each of the steps of the GameFinder Installer Wizard. Note: For Vista and
Windows 7, you may have to click “yes” or “allow” when asked if you wish to “allow an
unknown publisher to make changes to this computer.”
5. Installation is complete. The GameFinder video player software is installed under “All
Programs” in the “Day6” folder, and a shortcut is also placed on the desktop. You can now
proceed to setting the Time, Date, and Custom Settings.
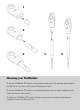
Setting the Time, Date, and Custom Settings on your
PlotWatcher TLV Camera
To set the time, date, and custom settings, the GameFinder software will write a settings file, based
on your preferences, to your USB flash drive. You will then move the flash drive to the PlotWatch-
er TLV camera, and power up the camera. The PlotWatcher then recognizes the setup file, loads
the values, and powers down, ready for use with the new settings. The following are the step by
step instructions:
1. Insert the 4 or 8GB USB drive you plan to use with your PlotWatcher camera into your PC.
Note the Drive letter assigned by Windows to the USB drive so that you can specify this drive
on step 4.
2. Run the GameFinder software.
(Use desktop shortcut, or select from “Start->All Programs -> Day6->GameFinder”)
3. Click on the Settings button
4. On the Settings form, Click on “Camera Settings”
5. On the Camera Settings form, set “USB Drive” to correspond to the drive letter for the USB
drive you noted in step 1. Set the Time and Date to the values you want programmed into
PlotWatcher. Make any changes to the Custom Settings that you prefer. Click “OK”. Note: the
remaining steps are the same as the ones outlined on the “Camera Settings” form.