AM-FM HD Receiver M4.
Welcome Thanks for purchasing the DaySequerra M4.2S AM-FM Digital Radio Receiver. We design and build all of our DaySequerra products to be completely reliable and easy to use, so you can concentrate on producing great sounding broadcasts, not struggling with complicated equipment or difficult to use product manuals. While the M4.
Table of Contents Important Safety Information 4 Service Information 4 Introduction 4 M4.2S Key Features 5 M4.2S Technical Specifications 6 Unpacking and Installing 7 Operating Description - Controls and Indicators 8 Front Panel 8 Rear Panel 9 LCD Display 10 System Menu 11 Alarm Configuration 11 WebServer 17 Restore Factory Settings 20 Three Year Warranty 21 M4.
Important Safety Information • • • • • • • • • • Indoor use only. Not for use in wet or damp environments. Maximum Relative Humidity: <80% Class I Equipment (grounded type) Electrical rating: 100-120/220-240V~50-60Hz 18W Fuse Rating: 2A 250V 20MM AC Mains supply voltage fluctuations are not to exceed +10% of the nominal voltage Operations temperature range -40°C to 70°C Maximum altitude: 3000m (9843ft) Equipment suitable for continuous operation Weight: 5.4kg (12lbs) equipment only; 8.
M4.
M4.2S Technical Specifications RF Tuning Range RF Usable Sensitivity RF Input F-Type 75 ohm IF Rejection AF Bandwidth FM De-emphasis Analog Audio Outputs – Left/Right Balanced XLR Digital Audio Output HD Radio Hybrid Acquisition HD Radio Split Mode Alarm Notification RBDS Data HD Radio PAD and SIS Data AC Power Environmental Dimensions Shipping Weight Warranty M4.2S Options 6 M4.2S User Manual AM: 520 kHz to 1720 kHz in 9 KHz or 10 kHz increments FM: 87.9 MHz to 108.
Unpacking and Installing the M4.2S Immediately upon receiving your M4.2S, please make a careful inspection for any shipping damage. If damage is found or suspected, please notify the carrier at once and then contact your dealer. The DaySequerra M4.2S is shipped in one carton, which contains: the M4.2S unit, an AC power cable, a TorxTM T-8 L-key and this User Manual. We strongly encourage you to save the shipping carton and shipping materials supplied with your M4.2S.
Navigation The M4.2S has a 3-button user interface. From the start ‘HomeScreen’ press the center button once. An arrow will appear next to the frequency. Use the UP/DN arrow button to toggle the Arrow on the LCD around the different fields on the HomeScreen. Press the Center button to select a field to change. The arrow will start to flash indicating that the UP/DN arrows are available to change the value of the field. Press the Center button to save and exit. M4.
mode Press ENTER again to change a value in any a field indicating a blinking arrow ready. Use the UP and DOWN arrows to navigate/toggle through the available choices or range. DOWN Arrow button tunes the frequency down one increment while tuning to a new station, when held for three seconds it tunes faster at 1.5x speed. Down selects next stored preset station in PRESETS mode (no faster mode, one push per preset). Selects next item in other menus and is used for other functions as described herein.
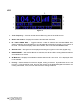
LCD Figure 3. 1. Tuner Frequency – Selects manual AM and FM tuning with UP and DN controls 2. Station Call Letters – Displays the station call letters with the Band 3. IP / PAD & RBDS Data – Toggles between a static IP address and decoded RBDS from analog broadcasts and PAD data from an HD RadioTM broadcasts for display on the bottom of the LCD. This field also displays active alarm details, which override IP/PAD/RBDS data. 4.
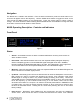
System Menu Press and hold the CENTER button for 3 seconds to enter the SYSTEM menu. Use the arrow buttons to navigate to the desired submenu. To EXIT this menu press the UP arrow to EXIT and press the CENTER button to exit to the Homescreen. Figure 4. Audio Muting - The M4.2’s audio output can be set to automatically mute for received signals with signal strength less than 45dBf. Forcing A-D Split - The FORCING control is used to select A-D SPLIT mode, functional with AM or FM HD RadioTM signals.
Figure 6. RF Carrier Loss Threshold: Navigate the arrow to Threshold and press ENTER to change the Threshold. A blinking arrow will indicate the Threshold can be changed. Low, Medium and High are available to choose from. Use the arrows to toggle through the choices. Press ENTER to make a selection and return to the RF Carrier Loss menu.
Multicast Loss Delay: Use the arrow buttons to select from 1 – 300 seconds of delay Status: Use the arrows to toggle between Enabled or disabled to turn the alarm ‘ON’ and ‘OFF’ Save: Saves all conditions and exits back to the Alarm menu. Figure 7. PAD/RBDS Loss Delay: Use the arrow buttons to select from 1 – 300 seconds of delay Alarm Type: Stagnant or Present. PAD Field: Select among Station Long and Short Name, Program Type, Song, Artist, Album, Genre, Comments field.
Alarm Buzzer “ON” or “OFF” option using UP and DN switches to toggle the setting. Select “ON” for audible alarm to beep during any active alarm condition and continue with alarm configuration menu; select “OFF” for audible alarm to be silent during any active alarm condition. Press ENTER to save and exit to the previous Alarm menu Exit Located at the top right corner of the Alarm menu is used to exit back to the previous SYSTEM menu.
Press ENTER after selecting AM or FM band or toggle the arrow to EXIT to exit to the previous menu. (Figure 10) AM band supports 9 KHz or 10 KHz tune spacing. AM default is factory set to 10 KHz. Press ENTER after making a selection to EXIT to the previous menu FM band supports 100 KHz or 200 KHz tune spacing. (Illustrated in figure 11.) FM default is factory set to 200 KHz. Press ENTER after making a selection to save and EXIT to the previous menu Figure 11.
Network A Read-Only menu that displays the current status of DHCP, the static IP address, Subnet and MAC address. Navigate up to the top right corner of the menu and Press ENTER next to EXIT to return to the SYSTEM menu. More NETWORK details can be viewed Figure 13. DHCP is set to ‘ON’ by default. Disabling DHCP allows the users to manually enter an IP address, subnet and gateway IP. Exiting this menu will save and reset the M4.2S.
WebServer Provides full access to the M4.2S remotely via web browser. A network connection or crossover cables is required for this feature. Crossover cables may be used when a Network connection is not available. Power ON the M4.2S and open a web browser. Type the IP address of the M4.2S in the URL to open the WebServer.
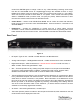
1. Tuner Frequency and band selection – AM and FM band selections are available. The frequency is displayed here in a large font. 2. Album art display window – Displays an the album image when available. 3. MPS/AUTO forcing and Multicast available – MPS forces the M4.2S into Analog Mode. AUTO is displayed in this box indicating that the M4.2S has been forced into Analog. Selecting Auto forces the M4.2S back to Digital – HD if available.
Settings Tab Figure 16. 1. Alarm configuration – sets the conditions for each alarm. Selecting ‘ENABLE’ will activate the alarm condition. Note: Enable/Disable does not represent the current state of the Alarm condition. Refreshing the web browser will display ‘DISABLE’ in place of ‘ENABLE’. 2. Email Settings window – configures the M4.2S for email alerts when Alarm conditions become active. Check ‘Enable Email Alarm Notification’ to Enable this feature. Click ‘Save’ when finished.
Figure 17. A reset button performs a soft reboot of the M4.2S. The most recent version of the M4.2S user manual is available at all times by clicking ‘Download’. 4. Network Settings window – Configures network connections. DHCP is enabled by default. Uncheck this box to disable DHCP. IP Address, IP Subnet, Gateway are set here. MAC is read only. Checking the ‘Display IP Address Periodically in the unit’ will rotate the IP address in with PAD/SIS/RBDS scrolling data.
DaySequerra – Three Year Limited Warranty DaySequerra warrants this product to be free from defects in materials and workmanship to its original owner for three (3) years from the date of purchase. DaySequerra will repair or replace such product or part thereof that upon inspection by DaySequerra, is found to be defective in materials or workmanship. A Return Authorization Number must be obtained from DaySequerra in advance of return.