
Owners manual


Jeep KJ Liberty 2002-2006
Front Coil Spring Spacers
www.DaystarWeb.com
Tech Support Contact Info
Tech@DaystarWeb.com
Phone: 623.907.0081
Fax: 623.907.0088
841 South 71
st
Avenue
Phoenix, AZ 85043
Bill of Materials 2 ½”
Part No.
Instruction Sheet P10527-09
© 2008 Daystar Products International Inc.
Description Qty
M03323 Coil Spacer Ft 2
M03441
Stem Cushions 4
S10578
Left Mount plate 1
S10579
Right Mount plate 1
S10138
Washer (for boots) 2
M00313
Boot 2
P01055 Cable tie 2
Bill of Materials 1½”
M03365
Coil Spacer Ft*
Note: The 2 ½” lift is not for 2002 and CRD models
2
*Does not include Strut Mounting Plate
NOTE: SEE WARNING AT BOTTOM OF PAGE.
DO NOT COMBINE WITH ANY OTHER SUSPENSION KIT
IMPORTANT NOTE: The advertised amount of lift that this kit provides and the thickness of the spacers
supplied will not be the same! For example, a 2-1/2” lift may only have 1-1/2” thick spacers. The reason for the
difference between the spacer thickness and the amount of lift has to do with suspension geometry. There is a
ratio involved, and it is this ratio that determines the thickness of the spacers. Rest assured, installing the spacer
supplied will result in the proper amount of lift out at the wheel.
NOTE: This kit should be installed by a professional mechanic.
1. Read all instructions and check Bill of Materials before beginning.
2. Disconnect the negative battery cable. Raise the front of vehicle and support with jack stands behind the
lower control arms so that the front tires are off of the ground. Remove the front wheels.
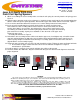
3. Remove the upper ball joint nut and separate the upper ball joint with a Ball Joint Separator, Powerbuilt Part
No. 648468 or equivalent. Be careful not too damage the ball joint dust boot. Figure 1.
4. Disconnect the lower strut fork at the lower control arm and at the lower portion of the strut assembly. Figure
1.
5. Remove the air box on the passenger’s side by removing the hose clamp on the intake and lifting it up and
out. Remove the upper 4 strut tower nuts from inside the engine compartment on both sides. (Label the struts
as to Left and Right so that they are reinstalled on the same side in which they were removed)
6. Separate the strut fork from the strut assembly and remove the strut assembly from the vehicle.
7. Compress the coil spring with a coil spring compressor, Branick Industries Inc. Model No. 7200 or equivalent
and remove the upper strut nut, washer and mounting plate, remove the strut from the spring. Remove the
strut dust cover by cutting it off the lower stem cushion washer. Remove the lower stem cushion washer. It
may take a hammer to loosen it up. Figure 3.
8. Remove the lower coil spring isolator from the strut and insert the coil spring spacer. (Make sure that the coil
spring spacer seats into the strut groove indentation) Figure 3.