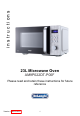
instructions 23L Microwave Oven AM9P022DT-P00F Please read and retain these instructions for future reference Version 1 20/12/2021 1
CONTENTS Safety Information……………………………………………….. Installation………………………………………………………… Parts and assembly……………………………………………… Control panel……………………………………………………... Setting the clock…………………………………………………. Stop cooking / Cancel…………………………………………… Control panel lock………………………………………………... Kitchen timer……………………………………………………... Selecting microwave power level………………………………. Express microwave mode………………………………………. Microwave cooking………………………………………………. Defrosting……………………………………………………........ Multistage cooking…………………………………………….....
ELECTRICAL AND MICROWAVE SAFETY WARNING: It is hazardous for anyone other than a competent person to carry out any service or repair operation that involves the removal of a cover that gives protection against exposure to microwave energy. Servicing of this appliance must only be carried out by a qualified electrician. WARNING: If the door or door seals are damaged, the oven must not be operated until it has been repaired by a competent person.
WARNING! This appliance is not intended to be used in: staff kitchen areas in shops, offices and other working environments; farm houses; by clients in hotels, motels and other residential type environments; bed and breakfast type environments. This appliance must not be operated by a timer or a separate remote control system. WARNING: Liquids and other foods must not be heated in sealed containers since they are liable to explode.
Always check for container and utensil suitability before using in the microwave oven - see page 15 for advice. FOOD SAFETY Do not cook raw meat or raw shellfish in a microwave, due to the possibility for uneven heating. Do not use microwave for home canning or bottling. Improperly canned or bottled foods may spoil and be dangerous to eat. Always check the temperature of food before serving. Food cooking times will vary with microwave wattage (MAFF rating).
PARTS & ASSEMBLY A E D C B G F A. B. C. D. E. F. G. Control panel Turntable roller Glass turntable Door with viewing panel Seal Interlocking catches Waveguide cover Ensure all packaging materials, protective film and adhesive tape are removed and check the oven and door for any damage. Do not remove the waveguide cover. Assemble as shown above and ensure that the glass turntable is correctly positioned on the roller.
CONTROL PANEL Display symbol Description Microwave High Microwave Power Weight Defrost Time Defrost Clock Kitchen Timer Auto Menu Keypad Locked Button symbol Description Microwave Defrost Clock Kitchen Timer Stop / Clear Start / +30SEC / Confirm Knob symbol Description Time Weight Auto Menu Version 1 20/12/2021 7
SETTING THE CLOCK 1. Fully unwind the cable, plug in and switch on. The microwave will emit a single bleepand the display will show 0:00. 2. Press CLOCK ( ) button once, the hour digit will flash and turn the FUNCTION knobuntil the correct hour is displayed. 3. Press CLOCK ( ) button again, the minute digits will flash and turn the FUNCTIONknob until the correct minute is displayed. 4. Press CLOCK ( ) button again to save the setting. Notes: • It is a 24-hour clock.
KITCHEN TIMER The clock can be used to set a countdown timer. 1. Press KITCHEN TIMER ( ) button once, the display will show 00:00. 2. Turn the FUNCTION knob until the set time is displayed. (note: the maximum time is 95minutes) 3. Press START/+30SEC/CONFIRM ( ) button to save. 4. The timer will now start to count down. When the set time has elapsed the oven will bleep five times. Notes: • The kitchen timer is different from clock system, it is just a timer.
EXPRESS MICROWAVE MODE This function allows the microwave to be set quickly at set increments. 1. Place the item to be cooked in a suitable microwave safe container. Open the doorand position the container in the centre of the glass turntable. Securely close the microwave door. 2. Press the START/+30SEC/CONFIRM ( ) button to program to cook on full power for30 seconds. Each successive press will increase the cooking time by 30 seconds. 3.
8. After the cooking time has finished, the display will show the clock, the microwave will turn off automatically and five bleeps will sound. 9. Allow food to stand for 30 seconds to one minute before stirring or serving. 10. The oven can be stopped at any time by pressing the STOP/CLEAR ( ) button or by opening the door. Pressing the STOP/CLEAR ( ) button once (with the door closed) will stop the cooking; pressing the button twice will clear the settings.
2.2 Press the DEFROST ( ) button twice (the display will show d02) and then enter the defrost time (maximum 95 minutes) by using the FUNCTION knob. 2.3 Press the START/+30SEC/CONFIRM ( ) button, the microwave will start to defrost and the timer will count down. 2.4 After the defrost time has finished the display will show the clock, the microwave will turn off automatically and five bleeps will sound.
• Other than weight defrosting, cooking time can be extended during oven operation by pressing the START/+30SEC/CONFIRM ( ) button. Each successive press will increase the cooking time by 30 seconds. AUTO MENU FUNCTION The oven has a pre-programmed cooking menu that can be used immediately fromstart up just by turning the FUNCTION knob clockwise. 1. After checking the cooking method used in the table following, place the food to be cooked in a suitable microwave safe container and cover when necessary.
Display Food A-1 Reheat A-2 Meat 250g 350g 450g Cooks by microwave (P80) For even cooking, cut meat into small equally sized pieces and place onto a microwave safe plate. Turn meat over half way through the cooking cycle. The cooking times are guidelines only – check that meat is cooked through before consuming. A-3 Vegetable 200g 300g 400g Cooks by microwave (P100) Boiled or steamed vegetables. Preparevegetables and place in bowl. If boiling – cover vegetables with boiling water.
CLEANING Clean the oven and seals to remove food debris on a weekly basis and more often if required. Failure to maintain the oven and seals in a clean condition could lead to deterioration of the surface or seals, adversely affect the life of the oven and possibly result in a hazardous situation (possible release of microwave energy). Clean the oven after each use, if food is cooked uncovered and especially if fatty foods are cooked. 1. Switch off, unplug the oven and allow the oven to cool completely. 2.
GENERAL MICROWAVE COOKING ADVICE Food cooking times will vary with microwave wattage (MAFF rating). When following recipes and on pack cooking instructions always check the MAFF rating / wattage of the appliance being used (marked on the front of the microwave) and follow the corresponding cooking advice. Beverages can result in delayed eruptive boiling; therefore caremust be taken when handling the container.
TROUBLESHOOTING Observation Potential cause / solution Plug not fully inserted into the mains socket or not Oven will not switched on start Door is open Incorrect operation Do you have a power cut? Unsuitable materials used when using microwave. Arcing or Oven is operated when empty sparking Spilled food remains in oven cavity Unsuitable materials used when using microwave.
TECHNICAL SPECIFICATION De'Longhi Geometric 23L 900W Solo Model Rated Voltage & Frequency Rated Power Input Microwave Rated Microwave Output MAFF rating Rated Microwave Frequency Overall Capacity Useable Class rating BS 1362 fuse Diameter of glass turntable Product dimensions (external) Product weight (net) AM9P022DT-P00F 230 - 240V~ 50Hz 1300 - 1400W 800 - 900W E 2450MHz 23 litres 14 litres 1 (earthed) 13A 288mm 469 x 377 x 280 mm 12.4 kg approx. This appliance complies with European regulation no.
PLUG / WIRING ADVICE The wires in this mains lead are coloured in accordance with the following UK electrical code: BLUE = NEUTRAL BROWN = LIVE GREEN + YELLOW = EARTH Non-rewireable plug This appliance may be fitted with a “non‐rewireable” plug. If you need to change the fuse in a “non‐rewireable” plug, the fuse cover must be refitted. If the fuse cover is lost or damaged, the appliance must not be used.
Version 1 20/12/2021 20