
Installation Guide
Installation Instructions
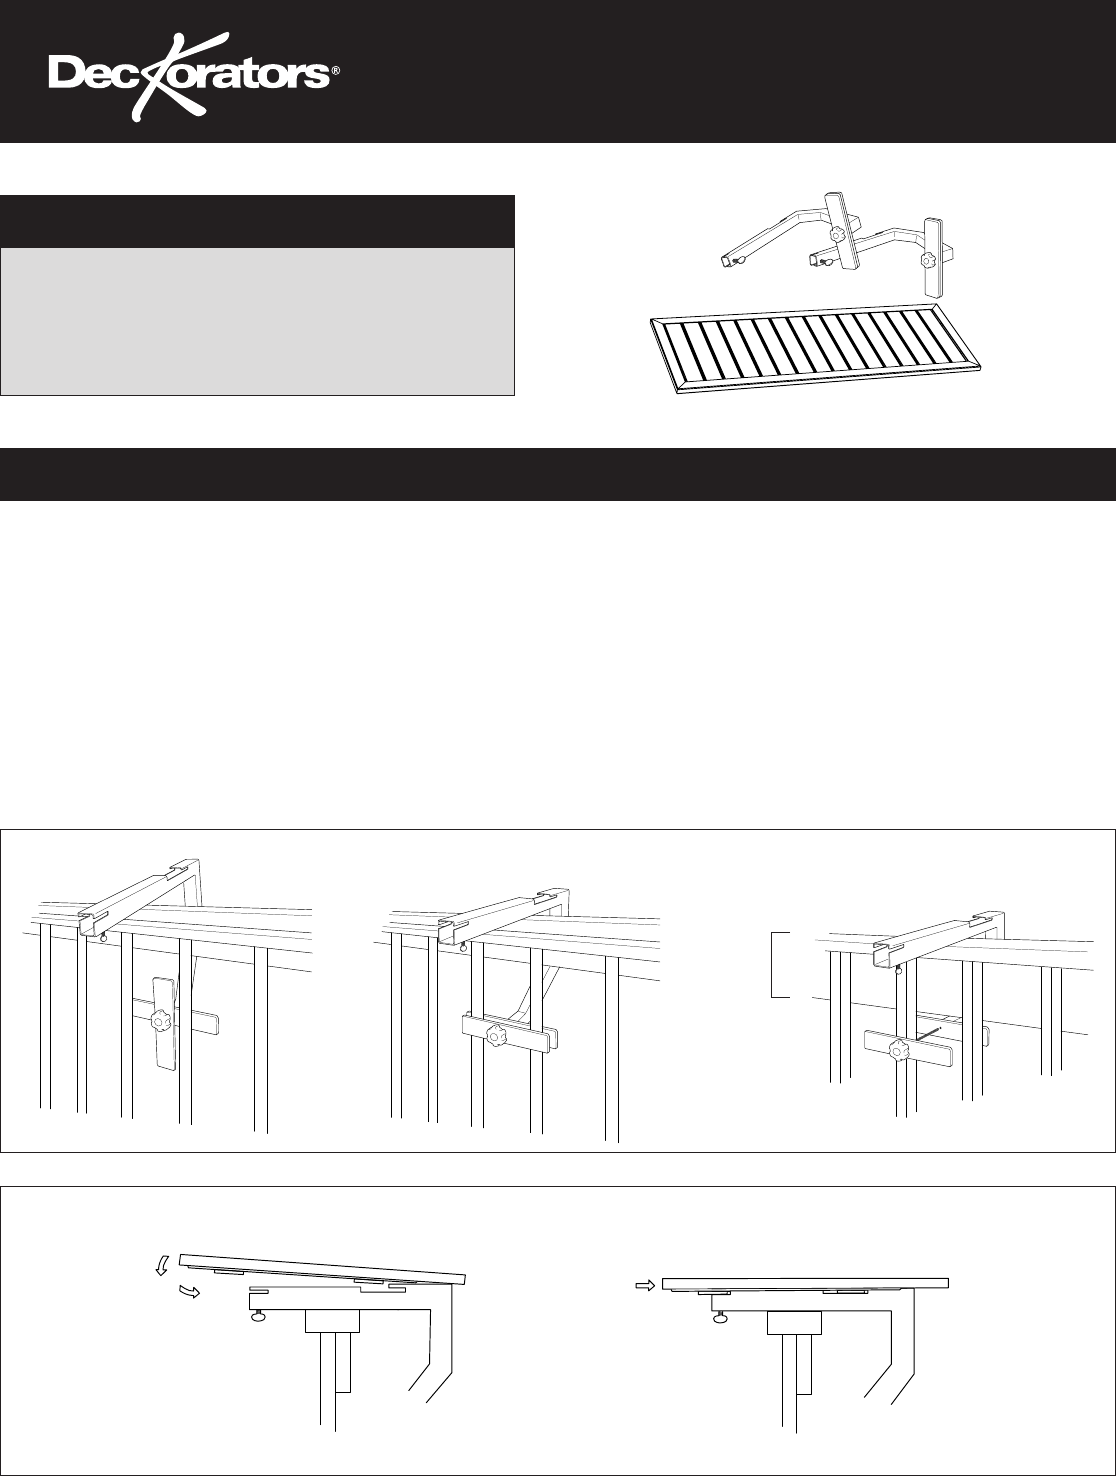
Step 1
Place the elbow over the top of the railing and allow it to rest on the railing. Position the clamp on two
balusters and tighten with the hand knob until firmly installed. Repeat for other elbow.
Note: For taller rails, the hand knob and half of the clamp nearest the deck may need to be removed to
clear the railing. Reinstall the clamp and knob, and tighten.
Step 2
Lift the table into position, and then slide it into the slots on the elbows. Tighten the thumb screw on the
bottom of each elbow to secure table in place.
Items Included
RAIL TABLE INSTALLATION INSTRUCTIONS
Items Included
(2) Metal elbows
(2) Thumb screws
(1) Rail Table
Step 1
Step3a.ai
Step3b.ai
Step3c.ai
Tall Rail
Step 2
Step4.ai
Step4.ai