
Operating instructions

Dedicated Micros ©2010
14
SD Advanced
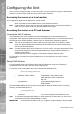
DHCP works by assigning an IP address at initial connection to the network. It is possible however
that this IP address can change without notication i.e. following power failure. It is therefore
recommended that the unit be allocated a xed IP address. A xed IP address can be assigned via
the Conguration Menu pages:Network Settings->Network->IP Address.
When the unit is powered up, the network address can be found by viewing on a local monitor and
navigating to Conguration Menu pages:System Settings->System->IP Address.
Refer to ‘Conguring The Unit’ for further guidance on locating the unit’s IP address and for details of
the default DNS (Domain Name Server) address.
DNS (Dynamic Name Servers) is supported and therefore the unit can be assigned a name. This
removes the need for the unit to have a xed IP address and makes it easier for a remote user to
locate.
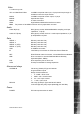
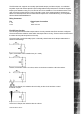
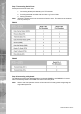
Step 5 Relays
The SD Advanced supports up to four 24V 200mA relays.
Relay Connector
Pins Connection
1 & 6 Relay 1 signal
2 & 7 Relay 2 signal
3 & 8 Relay 3 signal
4 & 9 Relay 4 signal
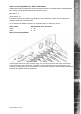
Step 6 Alarms