PosiTector DPM ® Dew Point Meter Instruction Manual v. 3.
Table of Contents Introduction ......................................................... Quick Start .......................................................... Operation Overview ............................................ Calibration ........................................................... Why is Measurement Important .......................... Probes ................................................................. Menu Operation .................................................. Alarm Mode ..........
Connect Menu ..................................................... Sync Now ....................................................... Auto Sync ....................................................... USB Drive ...................................................... Bluetooth ........................................................ Bluetooth Wireless Printer ............................. WiFi ................................................................ Updates ...............................................
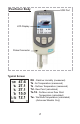
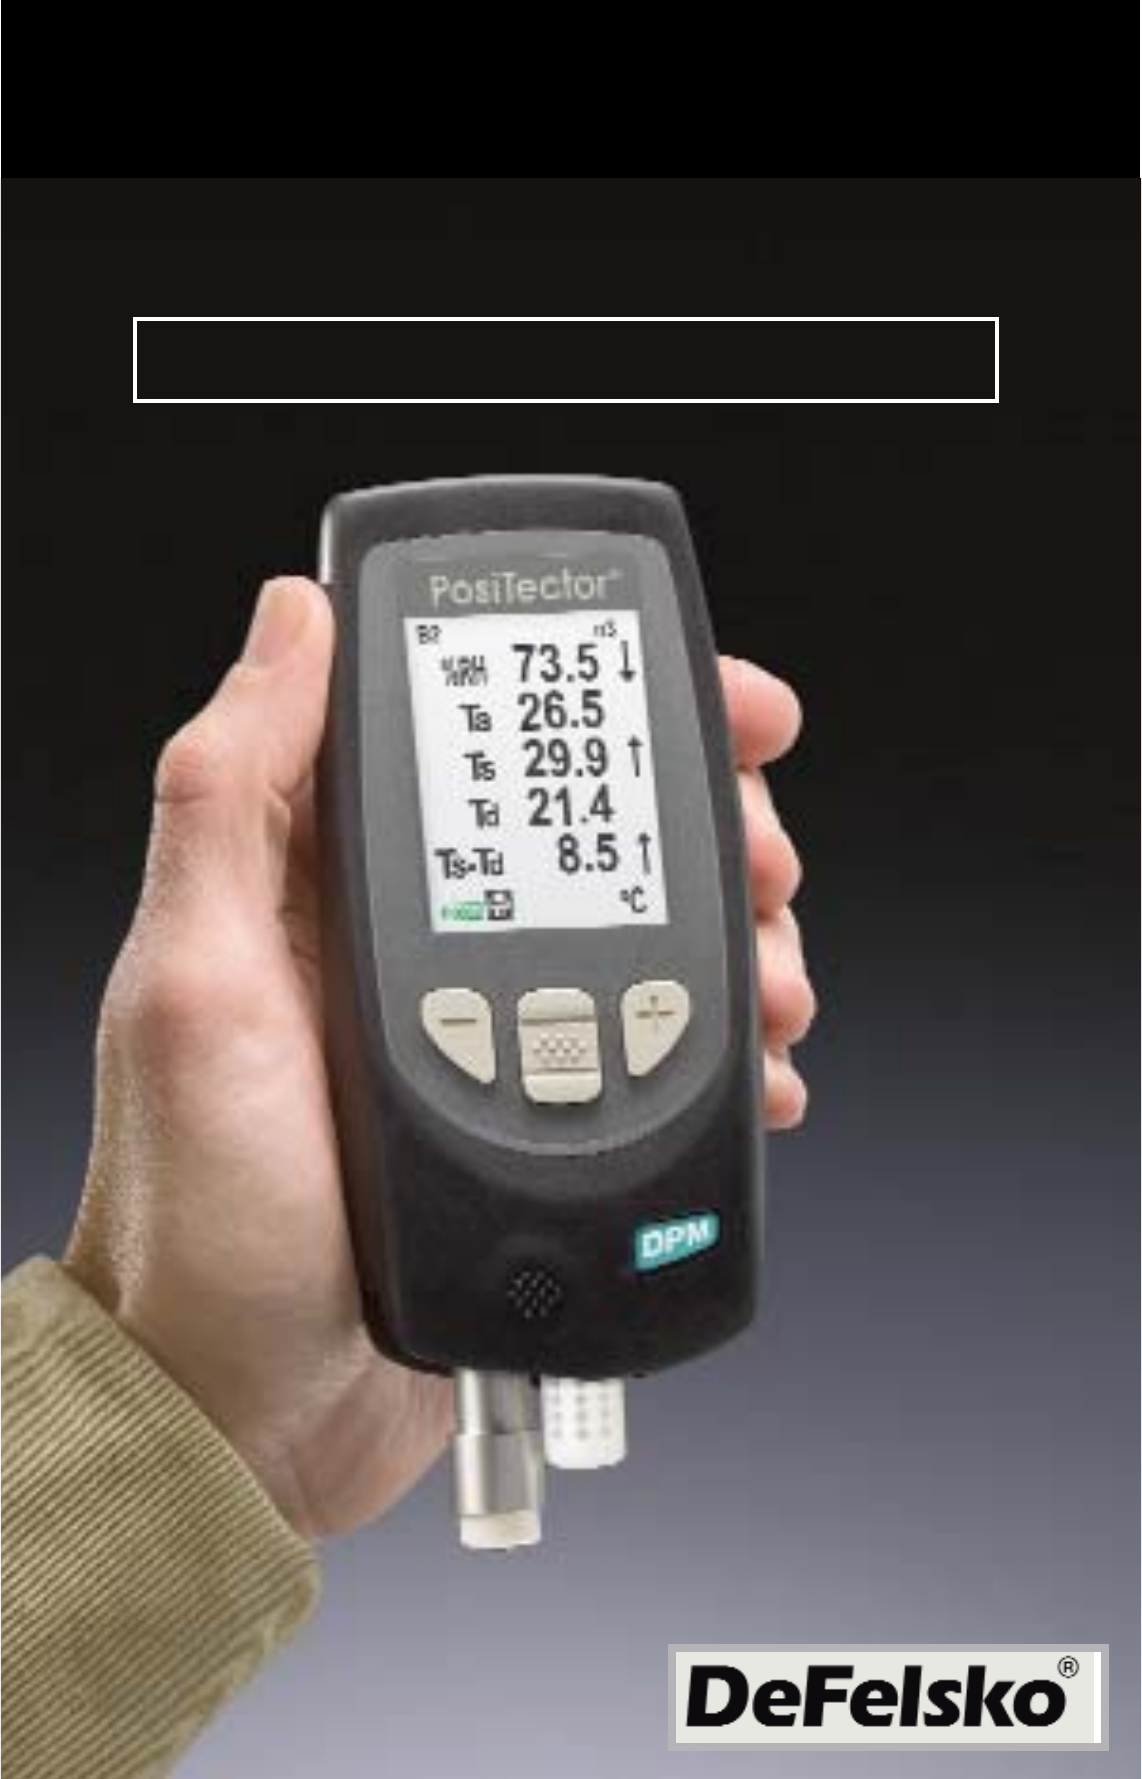
Introduction The PosiTector Dew Point Meter (DPM) is a hand-held, electronic Gage that continually measures, calculates and records climatic conditions, quickly and accurately. It consists of a body (Standard or Advanced) and probe (Built-In or Separate). A typical Gage screen is shown (pg. 2), consisting of RH, Ta, Ts, Td, and Ts-Td readings. This group of readings is referred to as a dataset.
PosiTector Body USB Port LCD Display Probe Connector Typical Screen RH - Relative Humidity (measured) Ta - Air Temperature (measured) Ts - Surface Temperature (measured) Td - Dew Point (calculated) Ts-Td - Surface minus Dew Point Temperature (calculated) Tw - Wet Bulb Temperature (calculated) (Advanced Models Only) 2
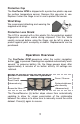
Protective Cap The PosiTector DPM is shipped with a protective plastic cap over the surface temperature sensor. Remove this cap prior to use. Replace it when the Gage is not in use to protect the sensor. Wrist Strap We recommend attaching and wearing the supplied wrist strap. 2 1 Protective Lens Shield The LCD is covered with a thin plastic film for protection against fingerprints and other marks during shipment.
RH - The relative humidity sensor is located inside the white plastic housing. The sensor may require a longer period to stabilize in the event of extreme humidity changes. Ta - The air temperature sensor is also located inside the white plastic housing. (Also known as Dry Bulb Temperature) Ts - A surface temperature thermocouple is located on the tip of the silver probe (built-in probe model). It is spring loaded and designed to quickly self-align on a surface.
The Gage may require a period of time before the above climatic readings stabilize. This is most noticeable when the Gage is relocated from one extreme environment to another (i.e. from a warm location to a cold location). A period of up to 30 minutes should provide adequate time for stabilization. Smart TrendTM Indicators - identify rising, falling or stable readings. The Gage compares each measurement with recent values to provide the current direction of change.
Why is Measurement Important? For industrial painters, the primary reason for measuring climatic conditions is to avoid rework and the premature failure of protective coatings. Recommendations and requirements are covered under various internationally recognized standards. Temperature – It is important to measure both surface and air temperatures as they are often different. Application at incorrect temperatures can cause defects including: blistering, pinholing, cratering, dry spray & mud cracking.
Probes The PosiTector DPM consists of a body and a probe. Two probe models (Built-In and Separate) are offered, as pictured below. All bodies accept all probes. See Gage Info (pg. 11) to find your body and probe type. More information is available at: www.defelsko.com/dewmeter.htm To disconnect a probe from a body, power-down the Gage and pull the plastic probe connector horizontally (in the direction of the arrow) away from the body. Reverse these steps to attach a new probe.
CAUTION: To ensure optimal performance of your PosiTector DPM, do not obstruct the airflow near the air temperature and humidity sensors. Keep fingers away from the sensor, as body heat can cause incorrect readings. Allow time for the Gage to acclimate and for the readings to stabilize when moving the Gage between different environments. When using the surface temperature probe, do not use excessive downward force, and do not drag it sideways.
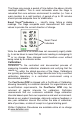
Menu Operation Gage functions are menu controlled. To access the Menu, power-up the Gage, then press the center navigation button. Below is a sample menu for a PosiTector DPM Advanced Model: Memory Auto Log Alarm Setup Connect Help Power Off Exit Current selection is displayed with darkened background Some buttons have a tick box to their right to indicate current status. An empty box indicates that feature is not active.
Alarm Mode The PosiTector DPM can automatically alert the user when current climatic conditions exceed pre-set values. When selected, the Alarm icon is displayed at the top of the screen. According to ISO 8502-4 and ASTM D3276, steel surfaces should generally be 3°C (5°F) above the dew point when painting. The Alarm mode can be used in conjunction with Memory and Auto Log modes. Standard models have one, fixed alarm.
Setup Menu Reset Reset (soft reset) restores factory settings and returns the Gage to a known condition. The following occurs: - All batches, stored datasets, images and batch names are erased. - Menu settings are returned to the following: Memory = OFF Bluetooth = OFF Auto Log = OFF Trend Chart = None Perform a more thorough Hard Reset by powering down the Gage, waiting several seconds, then simultaneously holding both the center and (+) buttons until the Reset symbol appears.
(Advanced models only) Wet Bulb Displays the wet bulb temperature (Tw) on the main screen. It is calculated from Ta and RH using an air pressure of 1.0 atmospheres (1013 mbar). Variations of Tw at other pressures could be greater than ±1°C (±2°F). NOTE: This menu item only appears when all memory functions are turned off. Wet Bulb readings cannot be stored in memory. Trend Chart (Advanced models only) Displays a real-time graph of the readings over the last three minutes.
Battery Type Selects the type of batteries used in the Gage from a choice of “Alkaline”, “Lithium” or “NiMH” (Nickel-metal hydride rechargeable). If NiMH is selected, the Gage will trickle charge the batteries while connected via USB to a PC or optional AC charger. The battery state indicator icon is calibrated for the selected battery type. No damage will occur if the wrong battery type is selected. NOTE: DeFelsko recommends the use of eneloop (NiMH) rechargeable batteries.
Standard models store up to 2,500 datasets in one batch. The following appears within the Memory menu: On: turns memory on Off: turns memory off (stored datasets remain in memory) Clear: removes all datasets from memory View: lists group statistics and all stored datasets on the display. It will begin by showing statistics based on all readings in memory. Use the Up and Down buttons to scroll through all datasets. Press to exit. Advanced models store 20,000 datasets in up to 1,000 batches (groups).
View Scroll using the Up or Down buttons through information, statistical summary, and a list of each dataset in the currently opened batch. Press to exit. x - Average ↑ - Maximum Value Annotate σ - Standard Deviation ↓ - Minimum Value (Advanced models only) Create meaningful batch names and enter notes directly on the Gage using a familiar onscreen QWERTY keyboard. Use the Gages navigation and (-)(+) buttons to enter annotations. Annotations can be synchronized with PosiSoft.
NOTES: - Remove the last dataset from the current open batch by pressing (-). - Batches can be renamed in the Gage using PosiSoft.net (Advanced models only) Summaries Displays a summary of all stored batches including the name, probe type, number of readings and type. In the following example, Batch 3 (B3) indicates an “F” 6000 coating thickness probe was used to record a total of “6” readings in “PA2” mode.
Auto Log Mode The PosiTector DPM can automatically record datasets into memory at user selected time intervals. When selected, the Auto Log icon will appear on the display with a timer counting down until the next dataset is stored. Readings on the display are only updated when a dataset is stored. Connect the Gage to a USB power source for long-term use using the included USB cable.
Accessing Stored Measurement Data PosiSoft solutions for viewing, analyzing and reporting data: PosiSoft USB Drive - connect the PosiTector to a PC/Mac using the supplied USB cable to access and print stored readings, graphs, photos, notes and screen captures. No software or internet connection required. USB Drive must be selected (See pg. 21). PosiSoft.net - a free web-based application offering secure centralized storage of PosiTector readings. Access your data from any web connected device. Go to: www.
PosiSoft.net: To enhance the operation of your Gage, all PosiTector users have access to the features provided by PosiSoft.net. It is a web-based application offering secure centralized management of readings.
PosiSoft Mobile: Is a Gage-based software application featured in all PosiTector Advanced instruments (serial numbers 730,000+).
Connect Menu Synchronizing (Sync) is the process whereby PosiTector stored measurement data uploads to PosiSoft.net (from both Standard and Advanced models) while images and batch notes are downloaded to the Gage (Advanced model only). This transfer occurs when the Gage is connected via USB, Bluetooth or directly through your WiFi router/hotspot via WiFi. It can be triggered either manually (USB, Bluetooth or WiFi) or automatically (USB only).
When checked, any computer can view readings stored in memory by navigating a virtual drive labeled “PosiTector” using the included USB cable. A formatted HTML report is viewed by selecting the "index.html" or “START_HERE.html” file found in the root directory. Optionally, text ".txt" files located in each batch folder provide access to measurement values. Stored readings and graphs can be viewed or copied using universal PC/Mac web browsers or file explorers.
Retrieving stored screen captures The last 10 screen captures (pg. 16) stored in memory can be accessed by navigating to the “screen_capture” directory within the “PosiTector” virtual drive. Bluetooth (Advanced models only) PosiTector Advanced models have Bluetooth functionality to: - Communicate with the PosiTector Desktop Manager (PDM) in lieu of a USB cable. - Stream individual datasets to a computer or Bluetooth wireless printer as they are taken.
Bluetooth Wireless Printer PosiTector Advanced models can output to the optional battery powered Bluetooth wireless printer one of two ways: • Stream individual readings as they are taken. • Print stored batch readings and summaries. Begin by entering the Connect > Bluetooth menu. Turn Bluetooth ON and “Pair” the PosiTector to the printer. See: www.defelsko.com/bluetooth Streaming: In the Connect > Bluetooth menu, select the Stream tick box.
Securing your Access Point To ensure the PosiTector is only accessible to authorized devices, it is important that you enter a passphrase (password) for the Access Point. The default Passphrase is password. In the Connect > WiFi > Setup menu, select AP Passphrase. Press button to display on-screen keyboard. Enter a Passphrase for the Access Point. The Passphrase will be required for all devices connecting to the PosiTector’s Access Point. The PosiTector is now visible to all WiFi enabled devices.
Accessing your PosiTector PosiSoft Mobile (pg. 20) For use on Apple iOS and Android devices: PosiSoft Mobile Manager apps exist for Apple iOS and Android users. Simply download the App from the Apple App Store or Google Play. Once your smart device/computer has been connected to the PosiTector Access Point, open the PosiSoft Mobile Manager app. Select your PosiTector from the list to open PosiSoft Mobile.
Setup: Allows user to setup a WiFi connection • IP Settings: enter the IP information as follows... IP Type (DHCP or Static), IP Address, Gateway, Netmask, DNS1, DNS2. • Server Enable: enables a connection between the network and the Gage. • Gage Name: enter a name for the Gage (up to 14 Characters). • WiFi Reset: erases all WiFi settings. Updates Determines if a software update is available for your Gage.
Power Supply / Battery Indicator Power Source: 3 AAA alkaline, Lithium or optional Nickel-metal hydride (NiMH) rechargeable batteries. For best battery indicator results, ensure the appropriate Battery Type is selected in the Setup > Battery Type menu (pg. 13). The battery indicator displays a full bar with fresh alkaline or fully charged batteries installed. As the batteries weaken, the bar will be reduced.
Use the USB cable alone to connect a PosiTector to your PC's built-in USB port that acts as a continuous power source. Or connect the cable to the included power adaptor which plugs into any AC wall electrical outlet, 110 or 220V. A selection of electrical plugs is included which are capable of dealing with most country’s outlets.The USB cable provided can also be used for Accessing Stored Measurement Data (pg. 18). USB Cable A USB Cable is provided with every PosiTector.
Troubleshooting Most conditions can be cleared with a Hard Reset (pg. 11). If not, visit our Service & Support page for information on sending your Gage to us for a no charge evaluation. See: http://www.defelsko.com/service When the surface temperature probe is not on a surface, Air Temperature and Surface Temperature appear to be different Under normal conditions with the surface probe in air Ta and Ts should be within the combined tolerance of each sensor (typically 1°C each).
the Gage was powered-on and the Gage was not able to self power-down. If this message appears it will be followed by a full reset. All datasets in memory will be erased and Gage settings will be reset to "out-of-the-box" settings. Gage will not print to the Bluetooth wireless printer: - Ensure the Gage has been paired for use with the printer and the Gage menu option Connect > Bluetooth > Stream box is ticked. - Check printer batteries. Switch it off and then on again.
Returning for Service Before returning the Gage for service: 1.Install new or newly recharged batteries in the proper alignment as shown within battery compartment. 2.Examine the surface temperature probe tip for dirt or damage. 3 Ensure the holes in the white humidity/air temperature sensor are clear. 4. Perform a Hard Reset (pg. 11). IMPORTANT: If you must return the Gage for service, please fill out and include the Service Form located at www.defelsko.com/support with the Gage.