
Use and Care Manual


18
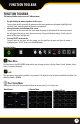
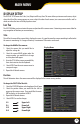
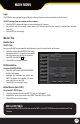
DISPLAY SETUP
The DISPLAY SETUP menu has 3 tabs; Live, Output and Privacy Zone. This menu allows you to name each camera, adjust
where the title of the camera appears on screen, adjust the color of each camera, turn cameras on and o as well as
decide on where the time will be displayed on screen.
liVe taB
The LIVE TAB allows you to customize the name and position of the camera name. Customizing camera names allow for
easy recognition of locations you are monitoring.
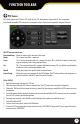
Title
This will be the name of the camera that is displayed on screen. It is good to name the camera something to reect what
the camera is monitoring. Ex. Garage or Driveway. A maximum of 8 characters can be used.
To change the NAME of the cameras:
1. Select the camera that you would like to
adjust the settings for.
2. Select the camera NAME option under the
camera number you would like to change
and a keyboard will appear.
3. Enter the TITLE of the camera you would like,
then select enter to close the keyboard.
4. Select APPLY from the main camera menu to
save your changes.
5. Repeat for all desired cameras.
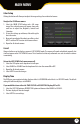
Position
This will determine where the camera name will be displayed in the camera viewing window.
To change the POSITION of the title:
1. Select the POSITION option and a drop down list will open.
2. Select the position where you would like the title to
appear on the camera screen. If you would like the name
NOT to display, set the position to CLOSE.
3. Repeat for all desired cameras.
4. Select APPLY to save the changes.
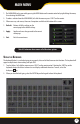
Display Menu
MAIN MENU
U-L
D-L
U-R
D-R
Upper-Left
Down-Left
Upper-Right
Down-Right