
Use and Care Manual


29
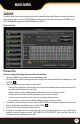
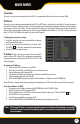
Client Port:
This port is used to transmit images from the DVR. It is recommended that this port remain on port 9000.
HTTP Port:
This port is used to initiate communication to the DVR. The HTTP port is entered at the end of the IP address to connect
to the DVR. If using the default port (80), your Internet browser will automatically add port 80 at the end of the address,
even though it may not be visible. If using a port other than 80, you will need to add that port to the end of the IP
address when typing it into the web browser. (Ex. If using port 2000 and the IP address is 192.168.1.103 you would type
http://192.168.1.103:2000 in the address bar of Internet Explorer).
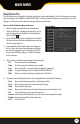
To Change the port you are using:
1. Select the box next to the port you would like to change
and a keyboard will appear.
2. Type the port number you would like to use then select
the ENTER key. The ports cannot be the same number
3. Select APPLY to save your changes.
IP Address: The numbers here represent the Internal IP
address of your DVR. If your DVR is not properly connected to
the router, the address will appear as 0.0.0.0. or 192.168.1.100
will be displayed.
To acquire an IP address:
1. Make sure the DVR’s IP mode is set to DHCP.
2. Once adjusted to DHCP, select APPLY to save and exit the menu.
3. Unplug the power cable from the DVR.
4. Connect the included network cable from the back of the DVR to your router.
5. Plug the power cable back into the DVR.
6. Enter the NETWORK tab menu to verify that the IP Address is displayed on the NETWORK tab.
If your IP address changes frequently, changing your network type to STATIC may help to prevent it from changing.
To set the IP address to STATIC:
1. Write down your IP address found on the NETWORK tab in the IP ADDRESS eld.
2. Click the box next to TYPE and select STATIC.
3. Click in the eld next to IP ADDRESS and enter your IP address from step 1. Select the ENTER key.
4. Select APPLY to save your changes.
5. Exit the menu completely to restart the DVR.
6. Go to the MAIN MENU, click NETWORK and conrm that your changes are saved.
Note: The internal IP address is the most important number on the Network Setup Menu screen and the
Ports will be used to set up Port Forwarding which is necessary for viewing the DVR outside of the
current network.
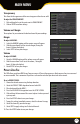
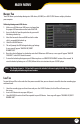
MAIN MENU