
Use and Care Manual


17
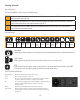
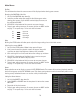
Main Menu
Show Time
Allows you to display the time while it is RECORDING and while it is in LIVE VIEW mode. The default setting has both
time displays set to ENABLE.
Changing how the TIME is displayed:
1. Left click the SHOW TIME and/or RECORD TIME drop down list.
2. Select ENABLE or DISABLE.
3. Click APPLY at the bottom of the screen to save your changes
4. To apply your settings to one or all cameras, please see COPY section
below or repeat steps 1-3 for each desired camera.
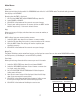
Copy
Allows you to copy all display selections from one camera to another, or
to all cameras.
COPY settings from one camera to other cameras:
1. Select the COPY drop down list and choose a camera number.
2. Select the TO drop down list to select a camera number or ALL cameras.
3. Click the COPY button. The settings will now be copied to your
specified camera(s).
4. Click APPLY at the bottom of the screen to save your changes.
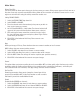
Output Tab
The Output Tab allows you to control how images are displayed on screen. You can also control VGA/HDMI Resolution
and Transparency. (Video Output is set to LIVE-OUT by default).
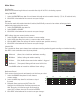
View Setup
Allows you to change the order of the cameras you see in live mode.
1. Select the VIEW SETUP drop down list and choose ENABLE.
2. Select the VIEW MODE drop down list and choose a camera view
i.e. single, quad, nine, sixteen.
3. Left click the DEFINE SEQ SETTING button. A Define Sequence
Setting menu will open.
4. Your current camera setup will be displayed. Select the CH drop
down list to rearrange the camera views.
5. Click APPLY at the bottom of the Define Sequence Setting screen
to save your changes, then EXIT to return to Display menu.
6. Click APPLY at the bottom of the Output screen to save
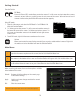
QUAD MODE-DEFAULT
CH1 CH2
CH3 CH4
QUAD MODE-NEW
CH4 CH3
CH2 CH1