
Instruction manual


17
PX301
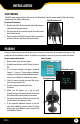
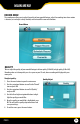
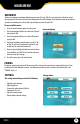
TRIGGER RECORD
Trigger record allows you to adjust how long your camera records after motion is detected. You have the option of 5
seconds, 15 seconds and 30 seconds.
To adjust trigger record:
1. Press the menu button to open the main menu.
2. Use the navigational buttons to scroll to the “Record”
icon and press OK.
3. Use the navigational buttons to scroll to “Trigger
Record” and press OK.
4. Use the navigational buttons to scroll to and highlight
the time you would like to set your trigger record
settings to, press OK. This will exit the trigger record
menu and save your settings.
5. To exit the menu, press the menu button.
Trigger Record
To set the schedule record:
1. Press the menu button to open the main menu.
2. Use the navigational buttons to scroll to the “Record”
icon and press OK.
3. Use the navigational buttons to scroll to “Schedule
Record” and press OK.
4. Adjust the start time and stop time to your liking.
• Use the left and right navigational buttons to
scroll to the time you would like to adjust and use
the up and down navigational buttons to adjust
the hour and/or minutes within that time.
5. Once your times are set to your liking, use the left
navigational button to scroll to the ON icon and press
OK.
6. You schedule will now be turned on to record during
your set times.
7. To turn the schedule o scroll to the OFF icon and select OK.
8. Once OK is selected (from turning schedule on or o), you will exit the schedule record menu and save your
settings.
9. To exit the menu, press the menu button.
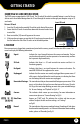
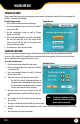
SCHEDULE RECORD
You can set your receiver to record during a scheduled time. You are able to adjust the schedule to record daily
based on a 24hr. schedule. This is good if you are away from home during a portion of the day and you don’t want
to miss anything that may happen while you are away.
Schedule Record
Note: In order for schedule recording
to take place, all other recording
modes must be turned o.
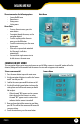
MAIN MENU