
Instruction manual

19
PX301
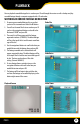
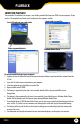
To adjust the date and time:
1. Press the menu button to open the main menu.
2. Use the navigational buttons to scroll to the
“Settings” icon and press OK.
3. Use the navigational buttons to scroll to “Date and
Time” and press OK.
4. The date is in the format of YYYY/MM/DD.
5. Use the left and right navigational buttons to scroll
to the date/time you would like to adjust and use
the up and down navigational buttons to adjust the
numbers within that time.
6. Once you have set the proper date and time press OK,
this will exit the date and time menu and save
your settings.
7. To exit the menu, press the menu button.
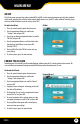
Set Date and Time
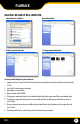
To adjust brightness:
1. Press the menu button to open the main menu.
2. Use the navigational buttons to scroll to the
“Settings” icon and press OK.
3. Use the navigational buttons to scroll to “Brightness”
and press OK.
4. There are six brightness levels, use the left and right
navigational buttons to turn the brightness up
or down.
5. Its best to turn the brightness up if the camera is
positioned in a dark area and turn the brightness down
if the camera is positioned in an area with a lot of light.
6. Once you have adjusted the brightness to your liking press OK, this will exit the brightness menu and save your
settings.
7. To exit the menu, press the menu button.
DATE AND TIME
You are able to adjust the date and time on your receiver. The years range from 2000-2099 and the clock is based
on a 24hr clock.
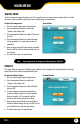
BRIGHTNESS
You are able to adjust the brightness of the video you are viewing. Brightness should be adjusted based on the
type of lighting around the camera.
Brightness Adjustment
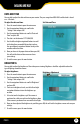
MAIN MENU