Owner’s Manual SLIMLINE MULTIFUNCTION BUILT-IN OVENS CONTENTS 600 UMS 600 EMBW 600 SMW 600STE 1 1 1 1 2 2 3 3 4 4 4 5 5 6 7 7 7 7 8 9 10 11 12 14 14 14 www.defy.co.
Introduction Congratulations on the purchase of this quality product. We trust that you will enjoy many years of trouble free use. Please read these instructions carefully before using the oven. This manual will provide you with information on how to operate and care for your product in order that you gain the maximum benefit from it. Unpacking • • • • Please ensure that packaging material is disposed of in a responsible manner.
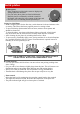
Eye level installation • • • models 600 STE, 600 EMBW, Insert the oven into the cupboard. Open the door to expose the fixing holes in the side trims. Secure the oven by 4 countersunk screws (fasteners are not supplied ).
Under-counter • • • • • • Installation for model 600 Note: The oven cavity must vent through the front only. Avoid gaps between the cavity sides and the underside of the worktop Insert the oven into the cupboard. Open the door to expose the fixing holes in the side trims. Secure the oven by 4 countersunk screws (fasteners are not supplied ). The hob should be installed in a ventilated cupboard fitted with a sturdy worktop . Secure the hob using the fixing brackets provided.
Multifunction oven FAN ONLY - NO HEAT 1 The fan blows ambient air over the frozen food to defrost it. STATIC OVEN 2 Top heat and bottom bake elements are used. The rear bake element is used in conjunction with the fan. 1 Fan only • 3 Top heat and bottom bake elements are used in conjunction with the fan. GRILL TURBO GRILL THERMOFAN OVEN 4 FAN ASSISTED OVEN 5 The top grill element is used in conjunction with 6 The top grill element only is used. the fan.
3 Conventional oven (fan assisted) Set the multifunction selector to conventional oven fan assisted and the oven thermostat to the required temperature. The indicator light will glow and remain on until the oven has reached the selected temperature. • No preheating is necessary and the food can be placed in the oven immediately. • During cooking the indicator light will cycle on and off as the oven thermostat maintains the selected temperature.
Recommended shelf positions 4 3 2 Position 4 = T/fan baking Position 2 = T/Fan roasting / baking Position 1 = T/Fan roasting ( large) 1 Baking guide • Thermofan baking is done with the oven trays in position. • For small items the entire area of each tray may be utilised. Larger items should be placed towards the front of each tray. • All ovens extract a certain amount of moisture from the food being cooked.
6 Conventional grilling • • • • • The oven door must remain closed when grilling. Use only a wire shelf when grilling as the intense heat could warp the baking tray. Set the multifunction knob to conventional grill. Set the oven thermostat to the grill position. Operating instructions are otherwise the same as those for turbo grilling mentioned previously. Ringer timer • • • • The ringer timer may be used for timing the cooking period.
Solid plates Red dot plates • Plates featuring a red dot in the centre are high speed, wattage plates for increased • For your safety these plates are fitted with thermal Should a plate be accidentally switched on and left the limiter will reduce the power output of the plate and mise the risk of overheating and the possibility of Caring for Solid Plates Before using the plates for the first time, switch them on for about 4 minutes at the est setting.
R Ceran smooth top WARNING In the unlikely event of sustaining accidental damage and cracking, switch off the appliance at the mains to avoid electric shock and have the panel replaced before further use. Plate controls • Select the heat level by turning the relevant plate control knob to the required setting. • The higher the number selected, the hotter the temperature of the plate will be. • The plate indicator light will glow.
Maintenance Lift-off oven door The oven door may be removed to improve oven access during cleaning Grasp the the open open door door on on Grasp both sides near the hinges both sides near the hinges Flip the retainer clasps up and over the hook on the upper hinge arm . Maintain upward pressure on the door to prevent the clasps from disengaging Removing the inner door glass. • The glass may be removed for cleaning purposes by removing the two screws which hold it in place.
Maintenance Oven light The oven light is switched on by the multifunction selector switch and switches off when the knob is returned to 0 . To replace a faulty light bulb, proceed as follows. • Switch off the power at the wall switch to avoid the possibility of electric shock. • Remove the light cover by unscrewing it in an anti-clockwise direction. • Unscrew the faulty bulb and fit a new 25 watt bulb rated for 300 °C. • Refit the light cover.
Care guide for stainless steel Stainless steel is not adversely affected by normal household use but because of it’s reputation for durability, it is sometimes assumed to be indestructible, and therefore subjected to misuse or even abuse. Care should be taken to avoid such ‘abnormal use’. Cleaning materials DO USE • A soft cloth or synthetic sponge. • Soap, or a mild household detergent. • Diluted ammonia in warm water. • A nylon bristle brush. • Cleaners labelled “Suitable for stainless steel”.
CONDITION ACTION NOTES AND COMMENTS If possible use warm to hand-hot water. A 5% addition of ammonia is beneficial. Requires routine cleaning Mild detergent solution applied with soft sponge or cloth. Rinse and wipe dry. Finger prints Pre-treat finger marks with alcohol or an organic solvent. Follow immediately with routine cleaning. Minimize re-occurrence by applying a wax or silicone based household polish to the clean dry surface. Wipe with a little baby oil and a soft lint free cloth.
Problem check Before calling a service technician to assist with a problem, PLEASE CHECK THE MAINS DISTRIBUTION BOARD THE WALL SWITCH DO NOT ATTEMPT REPAIRS YOURSELF Remember that you may be charged for a service call even during the warranty period if the fault is due to or caused by any of the above. Owner’s responsibility Since the following are not factory faults, they are the owner’s responsibility. • Damage to exterior • Breakage of glass and other components.
Defy Slimline Multifunction Ovens Multifunction 1 Defrost 2 Conventional cooking 3 Fan assisted cooking 4 Thermofan cooking 5 Turbo grill 6 Conventional grill Stainless steel cosmetics Models STE,UMS,SMW Removable door Removable inner door glass Ringer timer Warming drawer Models SMW, EMBW A choice of six cooking modes. Speeds up defrosting. Traditional top and bottom elements. Allows traditional baking on two shelves. Excellent for bulk baking. No flavour transfer and saves electricity.