OWNER’S MANUAL You can rely on Defy. To simplify GEMINI CORDON BLEU STATIC EYE LEVEL OVEN DBO 435 BLACK The Manufacturer strives for continuous improvements. For this reason, the text and illustrations in this book are subject to change without notice. NOTE The clock/ timer must be set to enable the oven to work. www.defy.co.
Introduction Cupboard design Congratulations on the purchase of this quality appliance. • We trust that you will enjoy many years of trouble free use. • Please read these instructions carefully before using the appliance. This manual will provide you with information on how to operate and care for your appliance in order that you gain the maximum benefit from it. • • Unpacking • • • Remove all packing from the oven cavity and position the accessories.
Safety advice This section contains safety instructions that will help you avoid risk of injury and damage. All warranties will become void if you do not follow these instructions. General safety • This appliance is not intended for use by persons (including children) with reduced physical, sensory or mental capabilities, or lack of experience and knowledge, unless they have been given supervision or instruction concerning the use of the appliance by a person responsible for their safety.
Electrical installation. Connection to the power supply This appliance must be earthed and the manufacturer and the seller do not accept responsibility for any damage due to incorrect installation or electrical connection. • • This appliance should not be connected through an earth leakage system. Refer to S.A.N.S.10142 Support the oven in front of the aperture and make the electrical connection before installing. This will ensure enough cable length for subsequent servicing.
Reversing the oven door to open from the other side ( optional) This task will require an assistant to hold and support the door during the changeover A 1 Open the oven door and using a suitable Allen key, remove the two hinge mounting cover plates (A) located at the top and bottom of the right hand oven flange. 2 While holding and supporting the door weighing 7.4kg, remove the hinges (B) at the left hand oven flange.
Automatic oven clock / timer When the power is first connected (or after a power failure), the clock display will flash 00.00. • • The display will again show the time of day. After 5 minutes the timer will emit an electronic tone which lasts for about one minute (2 beeps every 2 seconds). To cancel the tone, press any of the buttons.
Auto Bake. Automatically switching the oven on and off. Auto bake is intended for dishes such as roasts and casseroles. These are not affected by a waiting period in a cold oven. • • • • • • Prepare your meal and place it in the oven. Set the cooking period required by pressing buttons 2 and 6 until the desired period is displayed. Set the stop time by pushing buttons 3 and 6 until the desired stop time is displayed. Release the buttons and the clock will again display the time of day.
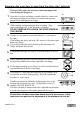
The control panel TOP OVEN CONTROLS 0 1 8 0 1 8 BOTTOM OVEN CONTROLS 1 2 :4 5 0 1 8 0 1 8 G EMIN I G O UR M ET STOP TOP OVEN SELECTOR AND OVEN THERMOSTAT MULTIFUNCTION - + AUTOMATIC OVEN TIMER AND CLOCK OVEN LIGHT TOP HEAT ELEMENT CONVENTIONAL BAKE BOTTOM ELEMENT BOTTOM OVEN SELECTOR AND OVEN THERMOSTAT OVEN LIGHT CONVENTIONAL BAKE BOTTOM ELEMENT GRILL & BOTTOM ELEMENTS GRILL Note: The Automatic Oven Timer / Clock only controls the Bottom oven.
Static oven operation (Top Oven) Baking • Note: The top oven is a baking oven only and does not feature a grill. The Selector switch allows the selection of the following oven functions. OVEN LAMP • • • TOP HEAT ELEMENT ONLY CONVENTIONAL BAKING • • BOTTOM ELEMENT ONLY Note: The bottom oven is a baking oven which does feature a grill. • The top oven is supplied with one chromed oven shelf . Set the selector knob to the desired baking mode.
Grilling • • • • • • • • • • • The oven door must remain partially open (approx. 80 mm) during grilling. Both the wire shelf and roast pan/shelf may be used for grilling. The roast pan/shelf may also be used as a drip tray under the wire shelf. Position the shelf in the desired position below the grill element. Set the selector switch and oven thermostat to their respective Grill positions. The thermostat indicator light will glow. Preheat the grill element for about 5 minutes.
The oven light. The oven light is switched on by the multi function knob or the oven thermostat knob (depending on model). (1st position on the dial) and switches off when the multi function knob or thermostat is returned to 0. To replace a faulty light bulb, proceed as follows. • Switch off the power at the wall switch. • Remove the light cover by unscrewing it in an anticlockwise direction. • Unscrew the faulty bulb and replace with an equivalent wattage bulb rated for 300°C. • Refit the light cover.
SERVICE CENTRES IF YOU HAVE FOLLOWED THE INSTRUCTIONS AND STILL HAVE A PROBLEM, CONTACT THE NEAREST DEFY SERVICE CENTRE. THEY WILL BE ABLE TO ADVISE YOU ON ANY ASPECT OF THE PRODUCT OR SEND A QUALIFIED TECHNICIAN TO REPAIR IT. BLOEMFONTEIN 160 Long Street, Hilton, Bloemfontein 9301. Tel. 051 400 3900 Bloemfontein.Service@defy.co.za EAST LONDON 16 Bowls Rd. Arcadia, East London 5201. Tel. 043 743 7100 EastLondon.Service@defy.co.za CAPE TOWN 5A Marconi Rd. Montague Gardens, 7441. Tel. 021-526 3000 CapeTown.