Copyright Information in this document is subject to change without notice. ©2010 Dell Inc. All rights reserved. Reproduction of these materials in any manner whatsoever without the written permission of Dell Inc. is strictly forbidden. Trademarks used in this text: Dell, the DELL logo, and Dell Toner Management System are trademarks of Dell Inc.
Multi-Functional Printer User’s Guide www.dell.com | support.dell.
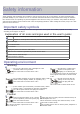
Safety information These warnings and precautions are included in order to prevent injury to you and others, as well as preventing any potential damage to your machine. Be sure to read and understand all of these instructions before using the machine. Use common sense for operating any electrical appliance and whenever using your machine. Also, follow all warnings and instructions marked on the machine and in the accompanying literature.
This could result in electric shock or fire and/or injury to your pet. If the machine has been dropped, or if the cabinet appears damaged, unplug the machine from all interface connections and request assistance from qualified service personnel. Otherwise, this could result in electric shock or fire. If the machine does not operate properly after these instructions have been followed, unplug the machine from all interface connections and request assistance from qualified service personnel.
Otherwise, it can cause damage to the machine. [a] 16 AWG or larger. Otherwise, it can cause damage to the machine, and could result in electric shock or fire. AWG: American Wire Gauge Maintenance / Checking Caution Unplug this product from the wall outlet before cleaning the inside of the machine. Do not clean the machine with benzene, paint thinner or alcohol; do not spray water directly into the machine. This could result in electric shock or fire. Keep cleaning supplies away from children.
Introduction This chapter gives you an overview of your machine: This chapter includes: Machine overview Control panel overview Understanding the Status LED Introducing the useful buttons Turning on the machine Machine overview Front view This illustration may differ from your machine depending on its model.
3 Document feeder input tray 8 Tray 1 13 Toner cartridge 4 Document feeder output tray 9 Manual tray 14 Manual tray paper width guides 5 Output support [a] 10 Front door 18 Scan unit close button [a] 15 Scanner lid This button is used when you close the scan unit. Rear view This illustration may differ from your machine depending on its model.
) Makes a copy smaller or larger than the original. 2 Reduce/Enlarge ( 3 Display 4 Status ( 5 Fax ( 6 Copy ( ) Activates copy mode. 7 Scan ( ) Activates scan mode. 8 Arrow 9 Menu ( Shows the current status and prompts during an operation. Shows the status of your machine (See Understanding the Status LED). ) ) Activates fax mode. Scroll through the options available in the selected menu, and increase or decrease values.
There is no paper in the tray. Load paper in the tray. The machine has stopped due to a major error. Check the display message (See Understanding display messages). [a] Estimated cartridge life means the expected or estimated toner cartridge life, which indicates the average capacity of print-outs and is designed pursuant to ISO/IEC 19752. The number of pages may be affected by operating environment, printing interval, media type, and media size.
About this user’s guide This user’s guide provides information about how to use the machine. Read the safety information before using the machine. If you have a problem using the machine, refer to the troubleshooting chapter (See Troubleshooting). Terms used in this user’s guide are explained in the glossary chapter (See Glossary). Illustrations in this user’s guide may differ from your machine depending on its options or models. The procedures in this user’s guide are mainly based on Windows XP.
Features of your new product Your new machine is equipped with a number of special features that improve the quality of the documents you print. Special Features Print with excellent quality and speed You can print with a resolution of up to 1200 x 1200 dpi effective output. Your machine prints A4-sized paper at up to 22 ppm and letter-sized paper at up to 23 ppm.
Scan in color and use the precise compressions of JPEG, TIFF, and PDF formats. Quickly scan and send files to multiple destinations using Networks scanning (See For network connected machine). Set a specific time to transmit a Fax You can specify a certain time to transmit the fax and also send the fax to several stored destinations. After the transmission, the machine may print out the fax reports according to the setting. IPv6 This machine supports IPv6.
Getting started This chapter gives you step-by-step instructions for setting up the USB connected machine and software. This chapter includes: Setting up the hardware Supplied software System requirements Installing USB connected machine’s driver Sharing your machine locally Supported optional devices and features may differ according to your model. Please check your model name. (See Features by Model).
5. 6. 7. Load paper (See Loading paper in the tray). Make sure that all cables are connected to the machine. Turn the machine on. This equipment will be inoperable when mains power fails. Supplied software After you have set up your machine and connected it to your computer, you must install the printer software using the supplied CD. The software CD provides you with the following software. OS Windows Contents Printer driver: Use this driver to take full advantage of your machine’s features.
Windows® 7 Intel® Pentium® IV 1 GHz 32-bit or 64-bit processor or higher 1 GB (2 GB) 16 GB Support for Direct® 9 graphics with 128 MB memory (to enable the Aero theme). DVD-R/W Drive Windows Server® 2008 R2 Intel® Pentium® IV 1 GHz (x86) or 1.4 GHz (x64) processors (2 GHz or faster) 512 MB (2048 10 GB MB) Internet Explorer® 5.0 or higher is the minimum requirement for all Windows operating systems. Administrator rights are required to install the software.
The software CD should automatically run and an installation window should appear. If the installation window does not appear, click Start and then Run. Type X:\Setup.exe, replacing “X” with the letter which represents your CD/DVD drive. Click OK. If you use Windows Vista, Windows 7, or Windows 2008 Server R2 click Start > All programs > Accessories > Run. Type X:\Setup.exe replacing “X” with the letter which represents your CD/DVD drive and click OK.
If your machine is not connected to the computer, the following window will appear. After connecting the machine, click Next. If you don’t want to connect the printer at this time, click Next, and No on the following screen. The installation starts and a test page will not print at the end of the installation. The installation window in this user guide may differ depending on the machine and interface in use. 5. After the installation is finished, a window asking you to print a test page appears.
3. driver name > Maintenance. Select the option as you wish, follow the instruction on the window. Macintosh The software CD provides the driver files that allow you to use the CUPS driver for printing on a Macintosh computer. Also, it provides you with the TWAIN driver for scanning on a Macintosh computer. 1. 2. 3. 4. 5. 6. 7. 8. 9. 10. Make sure that the machine is connected to your computer and powered on. 11. 12.
Linux computer easily in UI based management tool. 1. 2. Make sure that the machine is connected to your computer and powered on. When the Administrator Login window appears, type in root in the Login field and enter the system password. You must log in as a super user (root) to install the machine software. If you are not a super user, ask your system administrator. 3. Insert the supplied software CD into your CD/DVD drive. The software CD will run automatically.
4. 5. 6. [root@localhost Linux]#./uninstall.sh The installation program runs automatically if you have an autorun software package installed and configured. Click Uninstall. Click Next. Click Finish. Sharing your machine locally Follow the steps below to set up the computers to share your machine locally.
Macintosh The following steps are for Mac OS X 10.5 ~ 10.6. Refer to Mac Help for other OS versions. Setting up a host computer 1. 2. 3. 4. Install your printer driver (See Macintosh). Open the Applications folder > System Preferences and click Print & Fax. Select the printer to share in the Printers list. Select Share this printer. Setting up a client computer 1. 2. 3. Install your printer driver (See Macintosh). Open the Applications folder > System Preferences and click Print & Fax.
Basic setup After installation is complete, you may want to set the machine’s default settings. Refer to the next section if you would like to set or change values. This chapter gives you step-by-step instructions for setting up the machine.
3. 4. 5. 6. 7. Press the left/right arrow until Language appears and press OK. Press the left/right arrow to display the language you want. Press OK to save the selection. Press Stop/Clear ( ) to return to ready mode. Setting the date and time When you set the time and date, they are used in delay fax and delay print. They are printed on reports. If, however, they are not correct, you need to change it for the correct time being.
Ringer: Adjusts the ringer volume. For the ringer volume, you can select Off, Low, Mid, and High. Speaker, ringer, key sound, and alarm sound 1. Press Menu ( ) on the control panel. 2. 3. 4. 5. Press the left/right arrow until System Setup appears and press OK. 6. 7. If necessary, repeat steps 4 through 5 to set other sounds. Press the left/right arrow until Sound/Volume appears and press OK. Press the left/right arrow until the sound option you want appear and press OK.
# # Correcting numbers or names If you make a mistake while entering a number or name, press the left/right arrow button to delete the last digit or character. Then enter the correct number or character. Inserting a pause With some telephone systems, you must dial an access code (9, for example) and listen for a second dial tone. In such cases, you must insert a pause in the telephone number. You can insert a pause while you are setting up speed dial numbers.
Press the left/right arrow until Paper Setup appears and press OK. 3. 4. 5. 6. 7. 8. Press the left/right arrow until Paper Type appears and press OK. Press the left/right arrow to select the paper tray you want and press OK. Press the left/right arrow to select the paper type you want. Press OK to save the selection. Press Stop/Clear ( ) to return to ready mode. Setting the paper source 1. Press Menu ( ) on the control panel. 2. 3. 4. 5. 6. 7.
5. 6. Select tray (source) and its options, such as paper size and type. Press OK. Setting job timeout When there is no input for a certain period of time, the machine exits the current menu and goes in to the default settings. You can set the amount of time the machine will wait. 1. Press Menu ( ) on the control panel. 2. 3. 4. 5. 6. 7. Press the left/right arrow until System Setup appears and press OK. Press the left/right arrow until Machine Setup appears and press OK.
Printing This chapter explains common printing tasks. This chapter includes: Printer driver features Basic printing Opening printing preferences Using help Using special print features Changing the default print settings Setting your machine as a default machine Printing to a file (PRN) Macintosh printing Linux printing The procedures in this chapter are mainly based on Windows XP.
cannot select that option due to the machine’s setting or environment. The following procedure describes the general steps required for printing from various Windows applications. Macintosh basic printing (See Macintosh printing). Linux basic printing (See Linux printing). The following Printing Preferences window is for Notepad in Windows XP. Your Printing Preferences window may differ, depending on your operating system or the application you are using. 1. 2. 3. Open the document you want to print.
Opening printing preferences You can preview the settings you selected on the upper right of the Printing Preferences. 1. 2. 3. 4. Open the document you want to print. Select Print from the file menu. The Print window appears. Select your machine from the Select Printer. Click Properties or Preferences. Using a Presets setting The Presets option, which is visible on each preferences tab except for Dell tab, allows you to save the current preferences settings for future use. To save a Presets item: 1. 2.
added to the Presets you made. To use a saved setting, select it from the Presets drop down list. The machine is now set to print according to the setting you selected. To delete saved setting, select it from the Presets drop down list and click Delete. You can also restore the printer driver’s default settings by selecting Default Preset from the Presets drop down list. Using help Click the question mark from the upper-right corner of the window and click on any option you want to know about.
Poster 3x3: Document will be enlarged and be divided into 9 pages. Poster 4x4: Document will be enlarged and be divided into 16 pages. 4. Select the Poster Overlap value. Specify Poster Overlap in millimeters or inches by selecting the radio button on the upper right of Basic tab to make it easier to paste the sheets together. 5. 6. 7. Click the Paper tab, select the Size, Source, and Type. Click OK or Print until you exit the Print window. You can complete the poster by pasting the sheets together.
5. Click OK or Print until you exit the Print window. If your machine does not have a duplex unit, you should complete the printing job manually. The machine prints every alternate page of the document first. After that, an instruction message appears on your computer. Follow the on-screen instructions to complete the printing job. Change percentage of your document You can change the size of a document to appear larger or smaller on the printed page by typing in a percentage you want. 1.
2. From the Advanced tab, select Edit from the Watermark drop-down list. The Edit Watermarks window appears. 3. Enter a text message in the Watermark Message box. You can enter up to 256 characters. The message displays in the preview window. When the First Page Only box is checked, the watermark prints on the first page only. 4. Select watermark options.
document: 1. 2. Create or open the document you want to print. 3. 4. 5. Click the Advanced tab. To change the print settings from your software application, access Printing Preferences (See Opening printing preferences). Select the desired overlay from the Text drop-down list. If the overlay file you want does not appear in the Text drop-down list, select Edit from the list and click Load. Select the overlay file you want to use.
4. For Windows XP/2003/2008/Vista, press Printing Preferences. For Windows 7 and Windows Server 2008 R2, from context menus, select the Printing preferences. If Printing preferences item has ? mark, you can select other printer drivers connected with selected printer. 5. 6. Change the settings on each tab. Click OK. If you want to change the settings for each print job, change it in Printing Preferences. Setting your machine as a default machine 1. 2. Click the Windows Start menu.
Printing a document When you print with a Macintosh, you need to check the printer driver setting in each application you use. Follow the steps below to print from a Macintosh: 1. 2. 3. Open the document you want to print. 4. 5. 6. Open the File menu and click Print. Open the File menu and click Page Setup. Choose your paper size, orientation, scaling, other options, and make sure that your machine is selected. Click OK. Choose the number of copies you want and indicate which pages you want to print.
pages on one sheet of paper. Select Layout from the drop-down list under Orientation to access the following features. Pages per Sheet: This option determines how many pages to be printed on one page (See Printing multiple pages on one sheet of paper). Layout Direction: This option allows you to select the printing direction on a page similar to the examples on UI. Border: This option allows you to print a border around each page on the sheet.
3. In the LPR GUI window, select the model name of your machine from the printer list and click Properties. 4. Change the print job properties using the following four tabs displayed at the top of the window. General: This option allows you to change the paper size, the paper type, and the orientation of the documents. It enables the duplex feature, adds start and end banners, and changes the number of pages per sheet.
The following five tabs display at the top of the window: General: This option allows you to change the printer location and name. The name entered in this tab displays on the printer list in Printers configuration. Connection: This option allows you to view or select another port. If you change the machine port from USB to parallel or vice versa while in use, you must re-configure the machine port in this tab. Driver: This option allows you to view or select another machine driver.
Copying This chapter gives you step-by-step instructions for copying documents. This chapter includes: Basic copy Changing the settings for each copy Changing the default copy settings Using special copy features Deciding the form of copy output Setting copy timeout Supported optional devices and features may differ according to your printer model. (See Features by Model). Basic copy This is the normal and usual procedure for copying your originals. 1. Press Copy ( ) on the control panel. 2.
job. 1. 2. Press Copy ( ) on the control panel. Press Menu ( ) on the control panel. 3. 4. 5. Press the left/right arrow until Copy Feature appears and press OK. Press the left/right arrow until Original Type appears and press OK. Press the left/right arrow until the image mode you want appears and press OK. Text: Use for originals containing mostly text. Text/Photo: Use for originals with mixed text and photographs. Photo: Use when the originals are photographs. 6.
You can use the following copy features: ID card copying Your machine can print 2-sided originals on one sheet of A4-, Letter-, Legal-, Folio-, Executive-, B5, A5, or A6-sized paper. The machine prints one side of the original on the upper half of the paper and the other side on the lower half without reducing the size of the original. This feature is helpful for copying a small-sized item, such as a business card. This copy feature is available only when you place originals on the scanner glass.
You cannot adjust the copy size using Reduce/Enlarge for the N-Up feature. Poster copying Your original will be divided into 9 portions. You can paste the printed pages together to make one poster-sized document. This copy feature is available only when you place originals on the scanner glass. 1. 2. Press Copy ( ) on the control panel. Press Menu ( ) on the control panel. 3. 4. 5. 6. 7. Press the left/right arrow until Copy Feature appears and press OK.
Enhance Lev.1~2: The higher the number is, the more vivid the background is. Erase Lev.1~4: The higher the number is, the lighter the background is. 6. Press OK to save the selection. 7. Press Stop/Clear ( ) to return to ready mode. Deciding the form of copy output You can set the machine to sort the copy job. For example, if you make 2 copies of a 3 page original, one complete 3 page document will print followed by a second complete document. 1. Press Copy ( ) on the control panel. 2.
Scanning Scanning with your machine lets you turn pictures and text into digital files that can be stored on your computer.
7. Press the left/right arrow until the setting you want appears and press OK. Resolution: Sets the image resolution. Scan Color: Sets the color mode. Scan Format: Sets the file format in which the image is to be saved. Scan Size: Sets the image size. Scan Format appears only when you selected the Scan destination to My Documents. If you want to scan from the default setting, press Start. 8. Scanning begins. Scanned image is saved in computer’s My Documents > My Pictures > Dell folder.
4. The Set Scan Button tab allows you to change the saving destination and scan settings, add or delete application program, and format files. You can change the scanning machine by using the Change Port tab (Local or Network). 5. When setting is done, press OK. Set Scan Button tab Scan Destination Available Destination List: Shows the list of applications currently linked to scanned images in the PC’s registry.
2. Load originals face up into the document feeder, or place a single original face down on the scanner glass. (See Loading originals). 3. 4. 5. 6. 7. 8. 9. 10. 11. From the Start menu, select Control Panel, > Scanners and Cameras. Double click your scanner driver icon. The Scanner and Camera wizard appears. Click Next. Set the option in Choose scanning preferences window and click Preview to see how your options affect the picture. Click Next.
You can also scan using TWAIN-compliant softwares, such as Adobe Photoshop. Scanning using network can be performed via only TWAIN UI. Scanning with Twain-Enabled softwore If you want to scan documents using other software, you will need to use TWAIN-compliant software, such as Adobe Photoshop. Follow the steps below to scan with TWAIN-compliant software: 1. Make sure that your machine and computer are turned on and properly connected to each other. 2.
4. 5. Click Properties. Load originals face up into the document feeder, or place a single original face down on the scanner glass. (See Loading originals). 6. From the Scanner Properties window, click Preview. The document is scanned and the image preview appears in the Preview Pane. 7. 8. Drag the pointer to set the image area to be scanned in the Preview Pane. Change the scan options in the Image Quality and Scan Area sections.
4. Click OK. Your setting is added to the Saved Settings drop-down list. To save a Job Type setting for the next scan job: 1. 2. Select the setting you want to use from the Job Type drop-down list. The next time you open the Scanner Properties window, the saved setting is automatically selected for the scan job. To delete a Job Type setting 1. 2. Select the setting you want to delete from the Job Type drop-down list. Click Delete. The setting is deleted from the list.
Properties Shows the properties of the image. For further details about the Image Manager application, refer to the on screen help.
Faxing This chapter gives you information about using your machine as a fax machine. This chapter includes: Preparing to fax Using a fax in your computer Sending a fax in your machine Receiving a fax in your machine Adjusting the document settings Forwarding a fax to another destination Setting up address book Printing sent fax report automatically You cannot use this machine as a fax via the internet phone. For more information ask your internet service provider.
1. 2. Make sure that the machine is connected to your computer and powered on. Open Dell Scan and Fax Manager. From the Start menu, click Control Panel > Dell Scan and Fax Manager. 3. 4. Select the appropriate machine from Dell Scan and Fax Manager and click Properties. Move to the Set Fax Receiving tab and activate Enable Fax Receiving. This feature can be used by only one user at a time because the fax may have confidential or private information.
4. Press On Hook Dial ( ) on the control panel or lift the handset. 5. 6. Enter a fax number using the number keypad on the control panel. Press Start when you hear a high-pitched fax signal from the remote fax machine. When you want to cancel a fax job, press Stop/Clear ( ) at any time while sending. Confirming a transmission When the last page of your original has been sent successfully, the machine beeps and returns to ready mode.
2. 3. 4. Load originals face up into the document feeder, or place a single original face down on the scanner glass. 5. 6. 7. Press the left/right arrow until Fax Feature appears and press OK. Adjust the resolution and the darkness to suit your fax needs (See Adjusting the document settings). Press Menu ( ) on the control panel. Press the left/right arrow until Delay Send appears and press OK. Enter the number of the receiving fax machine and press OK.
5. 6. 7. Press the left/right arrow until Fax Feature appears and press OK. Press the left/right arrow until Priority Send appears and press OK. Enter the number of the receiving fax machine and press OK. You can press speed dial numbers or select group dial number using Address book button. For details, see Setting up address book. 8. Enter the job name you want and press OK. The original is scanned into memory before transmission. 9.
If you are in Tel mode when the answering machine is connected to your machine, you must switch off the answering machine. otherwise, the outgoing message from the answering machine will interrupt your phone conversation. Receiving faxes manually using an extension telephone This feature works best when you are using an extension telephone connected to the EXT socket on the back of your machine.
You can activate secure receiving mode without setting a password, but cannot protect your faxes. 7. Re-enter the password to confirm it and press OK. 8. Press Stop/Clear ( ) to return to ready mode. When a fax is received in secure receiving mode, your machine stores it in memory and shows Secure Receive to let you know that there is a fax received. Printing received faxes 1. 2. 3. Access the Secure Receive menu by following steps 1 through 4 in “Activating secure receiving mode.
Darkness You can select the degree of darkness of the original document. 1. 2. Press Fax ( 3. 4. 5. 6. Press the left/right arrow until Fax Feature appears and press OK. Press Menu ( ) on the control panel. ) on the control panel. Press the left/right arrow until Darkness appears and press OK. Press the left/right arrow until the option you want appears and press OK. Press Stop/Clear ( ) to return to ready mode. The darkness setting is applied to the current fax job.
Registering a speed dial number 1. Press Fax ( ) on the control panel. 2. 3. 4. 5. Press Address Book ( ) on the control panel. Press the left/right arrow until New & Edit appears and press OK. Press the left/right arrow until Speed Dial appears and press OK. Enter a speed dial number between 0 and 199 and press OK. If an entry is already stored in the number you choose, the display shows the message to allow you to change it. To start over with another speed dial number, press Back. 6.
Editing a group dial number 1. Press Fax ( ) on the control panel. 2. 3. 4. 5. 6. 7. 8. Press Address Book ( ) on the control panel. Press the left/right arrow until New & Edit appears and press OK. Press the left/right arrow until Group Dial appears and press OK. Enter the group dial number you want to edit and press OK. Enter the name you want to edit and press OK. Enter the first few letters of the speed dial’s name you want to add or delete.
Printing Address Book You can check your Address Book settings by printing a list. 1. Press Fax ( ) on the control panel. 2. 3. Press Address Book ( ) on the control panel. Press the left/right arrow until Print appears and press OK. The machine begins printing. Printing sent fax report automatically You can set the machine to print a report with detailed information about the previous 50 communication operations, including time and dates. 1. 2. Press Fax ( 3. 4. 5. 6.
Machine status and advanced feature This chapter explains how to browse the current status of your machine, and the method of setting for the advanced machine setup. Read this chapter carefully in order to use your machine's diverse features. This chapter includes: Fax setup Copy setup Printing a report Clearing memory Network Menu overview Fax setup Changing the fax setup options Your machine provides you with various user-selectable options for setting up the fax system.
Mode machine does not support this feature. You can set the dial mode for your machine to either tone dialling or pulse dialling. If you have a public telephone system or a private branch exchange (PBX) system, you may need to select Pulse. Contact your local telephone company if you are not sure which dial mode to use. If you select Pulse, some phone system features might not be available. It can also take longer to dial a fax or phone number.
memory transmission is not available. Darkness You can select the default contrast mode to fax your originals lighter or darker. Auto Report You can set the machine to print a report with detailed information about the previous 50 communication operations, including time and dates. For further details, see Printing sent fax report automatically. Copy setup Changing the copy setup options For copy output, you can set up several options in advance. 1. 2. Press Copy ( ) on the control panel.
Jobs type of each operation. JunkFax Report This list shows the fax numbers specified as junk fax numbers. To add or delete numbers to or from this list, access the Junk Fax Setup menu (See Receiving). Network Info. This list shows information on your machine’s network connection and configuration. You can also print the machine's status information and browse status with Embedded Web Service. Open the Web browser on your networked computer and type the IP address of your machine.
Setting Network Info This list shows information on your machine’s network connection and configuration. Menu overview The control panel provides access to various menus to set up the machine or use the machine’s functions. These menus can be accessed by pressing Menu ( ). Some menus may not appear in the display depending on options or models. If so, it is not applicable to your machine.
Date & Time Clock Mode Language Default Mode Power Save Timeout Job Timeout Altitude Adj. Toner Save Paper Setup Paper Size Paper Type Paper Source Sound/Volume Key Sound Alarm Sound Speaker Ringer Report All Report Configuration Phone Book Send Report Sent Report Fax RCV Report Schedule Jobs JunkFax Report Network Info.
Maintenance This chapter provides information for maintaining your machine and the toner cartridge. This chapter includes: Printing a machine report Monitoring the supplies life Using toner low alert Finding the serial number Cleaning the machine Storing the Toner cartridge Tips for moving & storing your machine Printing a machine report You can print the machine's information and job report. 1. PressMenu ( ) on the control panel. 2. 3. 4.
5. 6. Select the appropriate setting and then click OK. Press Stop/Clear ( ) to return to ready mode. In the computer 1. 2. 3. 4. Ensure that you have installed the printer driver with the provided software CD. You can launch Printer Settings Utility from the Start menu, select Programs or All Programs > Dell > Dell Printers > your printer driver name > Printer Settings Utility. Click Printer Setting. Click Setting > Toner Low Alert. Select the appropriate setting and then click Apply.
While cleaning the inside of the machine, be careful not to damage the transfer roller or any other inside parts. Do not use solvents such as benzene or thinner to clean. Printing quality problems can occur and cause damage to the machine. 4. Locate the long strip of glass (LSU) inside the top of the cartridge compartment and gently clean the glass with a swab. 5. 6. Reinsert the toner cartridge and close the front door. Plug in the power cord and turn the machine on.
4. 5. Wipe the underside of the scanner lid and white bar until it is clean and dry. Close the scanner lid. Storing the Toner cartridge Toner cartridges are sensitive to light, temperature, and humidity. It is recommended that users follow the these recommendations to ensure optimum performance, highest quality, and longest life from your new Dell toner cartridge.
Management tools This chapter introduces the different management tools provided. This chapter includes: Introducing useful management tools Using Embedded Web Service Using the Printer Status Monitor Smarthru Using the Linux Unified Driver Configurator Introducing useful management tools The programs below help you to use your machine conveniently. Using Embedded Web Service. Using the Printer Status Monitor. Smarthru. Using the Linux Unified Driver Configurator.
3. 4. 5. Enter the name of machine administrator, phone number, location or E-mail address. Click Apply. If the firewall is activated, the E-mail may not be sent successfully. In that case, contact the a network administrator. Using the Printer Status Monitor The Printer Status Monitor program can only be used on computers running Microsoft Windows operating system. The Printer Status Monitor program can only be used on computers running Microsoft Window operating system.
For more information, click the help icon button. Firmware update utility Firmware Update Utility allows you to maintain your machine by upgrading firmware. If you are a Windows user, you can launch Firmware Update Utility from the Start menu, select Programs or All Programs > Dell > Dell Printers > your printer driver name > Firmware Update Utility. Smarthru The supplied software CD provides you with SmarThru. SmarThru offers you convenient features to use with your machine.
Application: Scanning an image and placing it in an image editor application, such as Paint or Adobe Photoshop. E-mail: Scanning an image and emailing it. Allows you to scan an image, preview it, and email it. To send an image by e-mail, you must have a mail client program, like Outlook Express, which has been set up with your e-mail account. Folder: Scanning an image and saving it to a folder. Allows you to scan an image, preview it, and save it to the folder of your choice.
1. Double-click the Unified Driver Configurator on the desktop. You can also click the Startup Menu icon and select Dell Unified Driver > Unified Driver Configurator. 2. Click each button on the left to switch to the corresponding configuration window. 1. 2. 3. Printers Configuration Scanners Configuration Ports Configuration To use the on screen help, click Help. 3. After changing the configurations, click Exit to close the Unified Driver Configurator.
1 Switches to Printers configuration. 2 Shows all of the installed machine. 3 Shows the status, model name and URI of your machine. The printer control buttons are, as follows: Refresh: Renews the available machines list. Add Printer: Allows you to add a new machines. Remove Printer: Removes the selected machine. Set as Default: Sets the current selected machine as a default machine. Stop/Start: Stops/starts the machine. Test: Allows you to print a test page to ensure the machine is working properly.
1 Shows all of the machine classes. 2 Shows the status of the class and the number of machines in the class. Refresh: Renews the classes list. Add Class: Allows you to add a new machine class. Remove Class: Removes the selected machine class. Scanners configuration In this window, you can monitor the activity of scanner devices, view a list of installed Dell machine devices, change device properties, and scan images.
1 Switches to Scanners configuration. 2 Shows all of the installed scanners. 3 Shows the vendor, model name and type of your scanner. Properties: Allows you to change the scan properties and scan a document. Ports configuration In this window, you can view the list of available ports, check the status of each port and release a port that is stalled in a busy state when its users has terminated the job for any reason.
1 Switches to Ports configuration. 2 Shows all of the available ports. 3 Shows the port type, device connected to the port, and status. Refresh: Renews the available ports list. Release port: Releases the selected port. Sharing Ports Between Printers and Scanners Your machine may be connected to a host computer via a parallel port or USB port.
Media and tray This chapter provides information on how to load originals and print media into your machine. This chapter includes: Preparing originals Loading originals Selecting print media Changing the tray size Loading paper in the tray Printing on special media Setting the paper size and type Using the output support Supported optional devices and features may differ according to your model. Please check your model name. (See Features by Model).
2. Place the original face down on the scanner glass. And align it with the registration guide at the top left corner of the glass. 3. Close the scanner lid. Leaving the scanner lid open while copying may affect copy quality and toner consumption. Dust on the scanner glass may cause black spots on the printout. Always keep it clean (See Cleaning the scan unit). If you are copying a page from a book or magazine, lift the scanner lid until its hinges are caught by the stopper and then close the lid.
3. Adjust the document feeder width guides to the paper size. Dust on the document feeder glass may cause black lines on the printout. Always keep the glass clean (See Cleaning the scan unit). Selecting print media You can print on a variety of print media, such as plain paper, envelopes, labels, and transparencies. Always use print media that meet the guidelines for use with your machine.
Copy mode Letter, A4, Legal, Oficio, Folio, Executive, ISO B5, JIS B5, A5, A6 Tray 1 Manual tray Print mode All sizes supported by the machine. Tray 1 Manual tray Fax mode Letter, A4, Legal Tray 1 Changing the tray size The tray is preset to Letter or A4 size, depending on your country. To change the size, you need to adjust the paper guides. 1. 2. 3. 4. Support guide Paper length guide Guide lock Paper width guide 1.
Do not push the paper width guide too far causing the media to warp. If you do not adjust the paper width guide, it may cause paper jams. Do not use paper with more than 6 mm curl. Loading paper in the tray Tray 1 1. 2. Pull out the paper tray. And adjust the tray size to the media size you are loading (See Changing the tray size). 3. And place paper with the side you want to print facing down. 4. 5. Insert the tray back into the machine.
If you select Manual Feeder for Source from your software application, you need to press OK each time you print a page and load only one type, size and weight of print media at a time in the manual tray. To prevent paper jams, do not add paper while printing when there is still paper in the manual tray. This also applies to other types of print media. Print media should be loaded face up with the top edge going into the manual tray first and be placed in the center of the tray.
Transparency ? Envelope ? Preprinted ? Cotton ? Recycled ? ? Archive ? ? (?: supported, Blank: not supported) The media types are shown in the Printing Preferences. This paper type option allows you to set the type of paper to be loaded in the tray. This setting appears in the list, so that you can select it. This will let you get the best quality printout. If not, the desired print quality may not be achieved. Plain: Normal plain paper.
Weight: The weight of the envelope paper should not exceed 90 g/m 2 otherwise, jam may occur. Construction: Prior to printing, envelopes should lie flat with less than 6 mm curl, and should not contain air. Condition: Envelopes should not be wrinkled, nicked, nor damaged. Temperature: Use envelopes that are compatible with the heat and pressure of the machine during operation. Use only well-constructed envelopes with sharp-and well-creased folds. Do not use stamped envelopes.
°F). Arrangement: Only use labels with no exposed backing between them. Labels can peel off sheets that have spaces between the labels, causing serious jams. Curl: Prior to printing, labels must lie flat with no more than 13 mm of curl in any direction. Condition: Do not use labels with wrinkles, bubbles, or other indications of separation. Make sure that there is no exposed adhesive material between labels. Exposed areas can cause labels to peel off during printing, which can cause paper jams.
Setting the paper size and type After loading paper in the paper tray, set the paper size and type using the control panel. These settings will apply to copy and fax modes. For computer printing, select the paper size and type in the application program you use on your computer (See Opening printing preferences). The settings made from the machine driver override the settings on the control panel. Setting the paper size 1. Press Menu ( ) on the control panel. 2. 3. 4. 5. 6. 7. 8.
If you are using A5 paper, fold the output tray. Otherwise, printed pages might be mis-aligned or jammed. Stacking papers firmly If you use the machine in a humid area, or you are using the damp print media caused by a use a print media that is damp because of high humidity, the print-outs on the output tray may be curled and may not be stacked properly. In this case, you can set the machine to use the Paper Stacking function to let print-outs be stacked firmly.
Network setup This chapter gives you step-by-step instructions for setting up the network connected machine and software. This chapter includes: Network environment Introducing useful network programs Using a wired network Installing network connected machine’s driver IPv6 Configuration Network environment You need to set up the network protocols on the machine to use it as your network machine. You can set up the basic network settings through the machine's control panel.
Printing Network Configuration report You can print a Network Configuration Report from the machine’s control panel that will show the current machine’s network settings. This will help you to set up a network and troubleshoot problems. 1. Press Menu ( ) on the control panel. 2. 3. 4. Press the left/right arrow until Network appears and press OK. Press the left/right arrow until Network Info. appears and press OK. Press the left/right arrow until Yes appears and press OK.
1. Insert the Printer Software CD-ROM provided with your machine. When the driver CD runs automatically, close that window. 2. 3. 4. 5. 6. Start Windows Explorer and open the X drive (X represents your CD-ROM drive). Double-click Application > SetIP. Double-click Setup.exe to install this program. Select a language, then click Next. Follow the instructions in the window and complete the installation. Starting the program 1. 2. 3. Connect your machine to the network with a network cable. 4. 5.
The following instructions may vary for your model. 1. 2. Connect your machine to the network with a network cable. 3. Double click the file and Safari will automatically open, then select Trust. The browser will open the SetIPapplet.html page that shows the printer’s name and IP address information. 4. Highlight the printer information row and select the Setup icon, which is the second icon from the left in the application menu bar. A TCP/IP Configuration window will open.
Installing network connected machine’s driver Windows You can set up the machine driver, follow the steps below. This is recommended for most users. All components necessary for machine operations will be installed. 1. 2. Make sure that the machine is connected to the network and powered on. Insert the supplied software CD into your CD/DVD drive. The software CD should automatically run and an installation window appear. If the installation window does not appear, click Start and then Run. Type X:\Setup.
5. The list of printers available on the network appears. Select the printer you want to install from the list and then click Next. If you do not see your printer on the list, click Update to refresh the list, or select Add TCP/IP Port to add your printer to the network. To add the printer to the network, enter the port name and the IP address for the printer. To verify your printer’s IP address, print a Network Configuration page. (By pressing the Stop/Clear ( for about 5 seconds, then release.
7. If the test page prints out correctly, click Yes. If not, click No to reprint it. 8. Click Finish. After the driver setup, you may enable firewall. If the printer driver does not work properly, follow the steps below to repair or reinstall the driver. 1. 2. 3. Make sure that the machine is connected to your machine and powered on. From the Start menu, select Programs or All Programs > Dell > Dell Printers > your printer driver name > Maintenance.
8. 9. 10. Select Uninstall and click Uninstall. When the message which warns that all applications will close on your computer appears, Click Continue. When the uninstall is done, click Quit. Linux Install Linux Driver 1. 2. 3. 4. 5. 6. 7. 8. 9. 10. Make sure that the machine is connected to your network and powered on. Also, your machine’s IP address should have been set. Insert the supplied software CD into your CD/DVD drive. Double-click CD-ROM icon that appears on your Linux desktop.
5. 6. 7. Turn the machine off and turn it on again. Reinstall your printer driver. Setting IPv6 addresses Machine supports following IPv6 addresses for network printing and managements. Link-local Address: Self-configured local IPv6 address (Address starts with FE80). Stateless Address: Automatically configured IPv6 address by a network router. Stateful Address: IPv6 address configured by a DHCPv6 server. Manual Address: Manually configured IPv6 address by a user.
Specifications This chapter include: Hardware specifications Environmental specifications Electrical specifications Print media specifications The specification values are listed below, specification are subject to change without notice. See www.dell.com or support.dell.com/manuals for possible changes in information. Hardware specifications Item Dimensions Weight Description Height 318.9 mm (12.6 inches) Depth 415.4 mm (16.4 inches) Width 416 mm (16.4 inches) Machine with consumables 11.
Print media specifications Type Size Dimensions Print media weight [a] /Capacity[b] Tray1 Plain paper Manual tray Letter 216 x 279 mm (8.50 x 11.00 inches) Legal 216 x 356 mm (8.50 x 14.00 inches) US Folio 216 x 330 mm (8.50 x 13.00 inches) A4 210 x 297 mm (8.27 x 11.69 inches) Oficio 216 x 343 mm (8.50 x 13.50 inches) JIS B5 182 x 257 mm (7.17 x 10.12 inches) 60 to 90 g/m 2 (16 to 24 lb bond) ISO B5 176 x 250 mm (6.93 x 9.84 inches) 80 g/m 2 (20 lb bond) Executive 184 x 267 mm (7.
bond) 1 sheet stacking Labels [c] Letter, Legal, US Folio, A4, JIS B5, ISO B5, Executive, A5, Statement Refer to the Plain Not available in paper section tray1 120 to 150 g/m 2 (32 to 40 lb bond) 1 sheet stacking Card stock Letter, Legal, US Folio, A4, JIS B5, ISO B5, Executive, A5, Statement, PostCard 4x6 Refer to the Plain Not available in paper section tray1 105 to 163 g/m 2 (28 to 43 lb bond) 1 sheet stacking Minimum size (custom) 76 x 127 mm (3.00 x 5.
Supplies and accessories This chapter provides information on purchasing supplies, accessories and maintenance parts available for your machine. This chapter includes: How to purchase Available supplies Replacing the toner cartridge Checking replaceable’s lifespan Available accessories may differ from country to country. Contact your sales representatives to obtain the list of available accessories. How to purchase To order Dell-authorized supplies and accessories visit www.dell.
3. 4. Take a new toner cartridge out of its package. 5. Locate the sealing tape at the end of the toner cartridge. Carefully pull the tape completely out of the cartridge and discard it. Remove the paper protecting the toner cartridge by pulling the packing tape. The sealing tape should be longer than 60 cm (23.6 inches) when correctly removed. Holding the toner cartridge, pull the sealing tape straight to remove it from the cartridge. Be careful not to cut the tape.
8. Close the front door. Make sure that the cover is securely closed. Checking replaceable’s lifespan If you experience frequent paper jams or printing problems, check the number of pages the machine has printed. Replace the corresponding parts, if necessary. 1. Press Menu ( ) on the control panel. 2. 3. 4. 5. Press the left/right arrow until System Setup appears and press OK. Press the left/right arrow until Maintenance appears and press OK.
Troubleshooting This chapter gives you different troubleshooting steps. This chapter includes: Redistributing toner Clearing original document jams Tips for avoiding paper curls Tips for avoiding paper jams Clearing paper jams Understanding display messages Solving other problems Redistributing toner When the toner cartridge is near the end of its life: White streaks or light printing occurs. Prepare new cartridge appears on the display. The Status LED blinks red.
5. Close the front door. Ensure that the cover is securely closed. Clearing original document jams When an original jams while passing through the document feeder, a warning message appears on the display screen. To avoid tearing the document, remove the jammed document slowly and gently. To prevent document jams, use the scanner glass for thick, thin, or mixed paper-type originals. 1. 2. Remove any remaining pages from the document feeder. 3. Gently remove the jammed paper from the document feeder.
5. 6. Open the scanner lid. Seize the misfeed paper, and remove the paper from the feed area by carefully pulling it to the right using both hands. 1. 7. scanner lid Close the scanner lid. Load the removed pages back into the document feeder. Tips for avoiding paper curls 1. 2. Open the rear door. Pull down the pressure lever on each side. 1. Keep the rear cover opened during printing. Only use when the printout has more than 20 mm curl.
Tips for avoiding paper jams By selecting the correct media types, most paper jams can be avoided. When a paper jam occurs, refer to the next guidelines. Ensure that the adjustable guides are positioned correctly (See Loading paper in the tray). Do not overload the tray. Ensure that the paper level is below the paper capacity mark on the inside of the tray. Do not remove paper from the tray while your machine is printing. Flex, fan, and straighten paper before loading.
If the paper does not move when you pull, or if you do not see the paper in this area, check the fuser area around the toner cartridge (See Inside the machine). 4. Insert tray 1 back into the machine until it snaps into place. Printing automatically resumes. In the manual tray 1. If the paper is not feeding properly, pull the paper out of the machine. 2. Open and close the front door to resume printing. Inside the machine The fuser area is hot. Take care when removing paper from the machine. 1.
3. Replace the toner cartridge and close the front door. Printing automatically resumes. In exit area 1. Open and close the front door. The jammed paper is automatically ejected from the machine. If you do not see the jammed paper, go to next step. 2. Gently pull the paper out of the output tray. If you do not see the jammed paper or if there is any resistance when you pull, stop and go to the next step. 3. 4. Open the rear door. Pull the pressure levers down and remove the paper. 1.
The fuser area is hot. Take care when removing paper from the machine. 6. 7. 8. Return the pressure levers to their original position. Close the rear door. Open and close front door, printing automatically resumes. Understanding display messages Messages appear on the control panel display to indicate the machine’s status or errors. Refer to the tables below to understand the messages’ and their meaning, and correct the problem, if necessary.
DHCP The IP address assignment is failed. This Change the IP address assignment method to problemReconfigure happens, when Auto IP for DHCP is not BOOTP or Static. If you do not change this BOOTP set in Embedded Web Service. option, the DHCP server continually asks to assign the IP Address. Document Jam. Remove Jam The loaded original has jammed in the ADF. Clear the jam (See Clearing original document jams). Door Open. The front cover is not securely latched. Close the cover until it locks into place.
Paper Jam in exit area Special print media has jammed in the paper exit area. Clear the jam. See In exit area. See In the manual tray) Prepare new cartridge Small amount of toner is left in the indicated cartridge. The estimated cartridge life of toner is close. Prepare a new cartridge for a replacement. You may temporarily increase the printing quality by redistributing the toner (See Redistributing toner). Remove seal tape &Install Toner The machine cannot detect a toner cartridge.
The machine is experiencing problems that require service such as LSU error or fuser error. Power problems Click this link to open an animation about solving power problems. Condition The machine is not receiving power, or the connection cable between the computer and the machine is not connected properly. Suggested solutions Plug in the power cord and press Power ( the control panel. ) on Disconnect the machine cable and reconnect it.
require to be replaced. Contact a service representative. The paper keeps jamming. There is too much paper in the tray. Remove excess paper from the tray. If you are printing on special materials, use the manual tray. An incorrect type of paper is being used. Use only paper that meets the specifications required by the machine (See Print media specifications ). There may be debris inside the machine. Open the front door and remove any debris.
slow. complex. quality settings. Half the page is blank. The page orientation setting may be incorrect. Change the page orientation in your application. See the printer driver help screen. The paper size and the Ensure that the paper size in the printer driver settings paper size settings do not matches the paper in the tray.Or, ensure that the paper size match. in the printer driver settings matches the paper selection in the software application settings you use.
The transfer roller may be dirty. Clean the inside of your machine. Contact a service representative. The paper path may need cleaning. Contact a service representative. Dropouts If faded areas, generally rounded, occur randomly on the page: A single sheet of paper may be defective. Try reprinting the job. The moisture content of the paper is uneven or the paper has moist spots on its surface. Try a different brand of paper (See Print media specifications ). The paper lot is bad.
If background scatter covers the entire surface area of a printed page, adjust the print resolution through your software application or in Printing Preferences (See Opening printing preferences). Misformed characters If characters are improperly formed and producing hollow images, the paper stock may be too slick. Try different paper (See Print media specifications ). If characters are improperly formed and producing a wavy effect, the scanner unit may need service (See Cleaning the scan unit).
reinsert it. The toner cartridge may be defective. Remove the toner cartridge and install a new one (See Replacing the toner cartridge). If the problem persists, the machine may require repair. Contact a service representative. Curl If the printed paper is curled or paper does not feed into the machine: Turn the stack of paper over in the tray. Also try rotating the paper 180° in the tray. Change the printer option and try again.
Make sure that the machine cable is not defective. Switch the cable with a known good cable. If necessary, replace the cable. Check that the scanner is configured correctly. Check scan setting in the SmarThru or the application you want to use to make certain that the scanner job is being sent to the correct port (for example, USB001). The unit scans very slowly. Check if the machine is printing received data. If so, scan the document after the received data has been printed.
Some of the words on an incoming fax are stretched. The fax machine sending the fax had a temporary document jam. There are lines on the originals you sent. Check your scan unit for marks and clean it (See Cleaning the scan unit). The machine dials a number, but the connection with the other fax machine fails. The other fax machine may be turned off, out of paper, or cannot answer incoming calls. Speak with the other machine operator and ask her/him to solve out the problem.
The machine does not print whole pages, and output is printed on half the page. It is a known problem that occurs when a color machine is used on version 8.51 or earlier of Ghostscript, 64-bit Linux OS, and has been reported to bugs.ghostscript.com as Ghostscript Bug 688252.The problem is solved in AFPL Ghostscript v. 8.52 or above. Download the latest version of AFPL Ghostscript from http://sourceforge.net/projects/ghostscript/ and install it to solve this problem. I cannot scan via Gimp Front-end.
incorrectly. Refer to Macintosh User’s Guide that came with your computer for further information on Macintosh error messages.
Appendix Dell technical support policy Technician-assisted technical support requires the cooperation and participation of the customer in the troubleshooting process and provides for restoration of the Operating System, application software, and hardware drivers to the original default configuration as shipped from Dell, as well as the verification of appropriate functionality of the printer and all Dell-installed hardware.
Glossary The following glossary helps you get familiar with the product by understanding the terminologies commonly used with printing as well as mentioned in this user’s guide. 802.11 802.11 is a set of standards for wireless local area network (WLAN) communication, developed by the IEEE LAN/MAN Standards Committee (IEEE 802). 802.11b/g 802.11b/g can share the same hardware and use the 2.4 GHz band. 802.11b supports bandwidth up to 11 Mbps; 802.11g up to 54 Mbps. 802.
Coverage It is the printing term used for a toner usage measurement on printing. For example, 5% coverage means that an A4 sided paper has about 5% image or text on it. So, if the paper or original has complicated images or lots of text on it, the coverage will be higher and at the same time, a toner usage will be as much as the coverage. CSV Comma Separated Values (CSV). A type of file format, CSV is used to exchange data between disparate applications.
Emulation Emulation is a technique of one machine obtaining the same results as another. An emulator duplicates the functions of one system with a different system, so that the second system behaves like the first system. Emulation focuses on exact reproduction of external behavior, which is in contrast to simulation, which concerns an abstract model of the system being simulated, often considering its internal state.
system to securely share part of an organization's information or operations with its employees. Sometimes the term refers only to the most visible service, the internal website. IP address An Internet Protocol (IP) address is a unique number that devices use in order to identify and communicate with each other on a network utilizing the Internet Protocol standard. IPM The Images Per Minute (IPM) is a way of measuring the speed of a printer.
MFP Multi Function Peripheral (MFP) is an office machine that includes the following functionality in one physical body, so as to have a printer, a copier, a fax, a scanner and etc. MH Modified Huffman (MH) is a compression method for decreasing the amount of data that needs to be transmitted between the fax machines to transfer the image recommended by ITU-T T.4. MH is a codebook-based run-length encoding scheme optimized to efficiently compress white space.
PostScript PostScript (PS) is a page description language and programming language used primarily in the electronic and desktop publishing areas. - that is run in an interpreter to generate an image. Printer Driver A program used to send commands and transfer data from the computer to the printer. Print Media The media like paper, envelopes, labels, and transparencies which can be used on a printer, a scanner, a fax or, a copier.
network address and which part is the host address. TCP/IP The Transmission Control Protocol (TCP) and the Internet Protocol (IP); the set of communications protocols that implement the protocol stack on which the Internet and most commercial networks run. TCR Transmission Confirmation Report (TCR) provides details of each transmission such as job status, transmission result and number of pages sent. This report can be set to print after each job or only after failed transmissions.
WPA-PSK WPA-PSK (WPA Pre-Shared Key) is special mode of WPA for small business or home users. A shared key, or password, is configured in the wireless access point (WAP) and any wireless laptop or desktop devices. WPA-PSK generates a unique key for each session between a wireless client and the associated WAP for more advanced security.