Dell™ 2400MP Projector Owner’s Manual w w w. d e l l . c o m | s u p p o r t . d e l l .
Notes, Notices, and Cautions NOTE: A NOTE indicates important information that helps you make better use of your projector. NOTICE: A NOTICE indicates either potential damage to hardware or loss of data and tells you how to avoid the problem. CAUTION: A CAUTION indicates a potential for property damage, personal injury, or death. ____________________ Information in this document is subject to change without notice. © 2006 Dell Inc. All rights reserved.
Contents 1 Your Dell Projector . About Your Projector 2 . . . . . . . . . . . . . . . . . Connecting Your Projector . Connecting to a Computer 7 . . . . . . . . . . . 9 . . . . . . . . . . . . . . . . 10 Connecting to a DVD Player 3 5 . . . . . . . . . . . . . . . . . . . . . . . . . . . . . . . . 11 Connecting a DVD Player with an S-video Cable . . 11 Connecting a DVD Player with a Composite Cable .
Using the Remote Control . . . . . . . . . . . . . . . . . . . . . . . . . . . . . . 22 . . . . . . . . . . . . . . . . . . . . . 23 Using the On-Screen Display Main Menu Input Select . . . . . . . . . . . . . . . . . . . . . 23 . . . . . . . . . . . . . . . . . . . . . 23 . . . . . . . . . . . . . . . . . . . . . . . 23 Auto-Adjust Set Up . PICTURE (in PC Mode) . . . . . . . . . . . . . . . PICTURE (in Video Mode) DISPLAY (in PC Mode) . . . . . . . . . . . . . 25 26 . . . . . . . . . . .
1 Your Dell Projector Your projector comes with all the items shown below. Ensure that you have all the items, and contact Dell if anything is missing. Package Contents 1.8m power cord (3.0m in Americas) 1.8m VGA cable (D-sub to D-sub) 1.8m USB cable 1.8m D-sub to YPbPr cable 2.0m S-video cable 1.
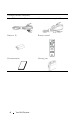
Package Contents (continued) 1.8m RCA to Audio cable 1.
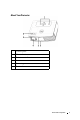
About Your Projector 1 Control panel 2 Elevator button 3 Remote control receiver 4 Lens 5 Focus ring 6 Zoom tab Your Dell Projector 7
Your Dell Projector
Connecting Your Projector 1 IR receiver 2 VGA in (D-sub) connector 3 VGA out (monitor loop-through) 4 USB remote connector 5 Audio output connector 6 RS232 connector 7 Power cord connector 8 Audio input connector 9 Composite video connector 10 S-video connector 11 Kensington lock hole Connecting Your Projector 2 9
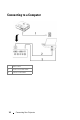
Connecting to a Computer 1 Power cord 2 D-sub to D-sub cable 3 USB to USB cable 10 Connecting Your Projector
Connecting to a DVD Player Connecting a DVD Player with an S-video Cable 1 Power cord 2 S-video cable Connecting Your Projector 11
Connecting a DVD Player with a Composite Cable 1 Power cord 2 Composite video cable 12 Connecting Your Projector
Connecting a DVD Player with a Component Cable 1 Power cord 2 D-sub to YPbPr cable Connecting Your Projector 13
Professional Installation Options: Connecting a Computer with a RS232 cable 1 Power cord 2 RS232 cable 14 Connecting Your Projector
3 Using Your Projector Turning Your Projector On NOTE: Turn on the projector before you turn on the source. The power button light blinks blue until pressed. 1 Remove the lens cap. 2 Connect the power cord and appropriate signal cables. For information about connecting the projector, see "Connecting Your Projector" on page 9. 3 Press the power button (see "Using the Control Panel" on page 19 to locate the power button). The Dell logo displays for 30 seconds.
Adjusting the Projected Image Raising the Projector Height 1 Press the elevator button. 2 Raise the projector to the desired display angle, and then release the button to lock the elevator foot into position. 3 Use the tilt adjustment wheel to fine-tune the display angle. Lowering the Projector Height 1 Press the elevator button. 2 Lower the projector, and then release the button to lock the elevator foot into position.
Adjusting the Projector Zoom and Focus CAUTION: To avoid damaging the projector, ensure that the zoom lens and elevator foot are fully retracted before moving the projector or placing the projector in its carrying case. 1 Rotate the zoom tab to zoom in and out. 2 Rotate the focus ring until the image is clear. The projector focuses at distances from 3.9 ft to 39.4 ft (1.2 m to 12 m).
Adjusting Projection Image Size 18 Using Your Projector
Screen (Diagonal) Screen Size Max. 29.3" (74.4cm) 82.9" (210.6cm) 134.1" (340.6cm) 187.7" (476.8cm) 238.9" (606.8cm) 292.5" (743.0cm) Min. 24.4" (62.0cm) 69.1" (175.5cm) 111.7" (283.7cm) 156.4" (397.3cm) 199.1" (505.7cm) 243.8" (619.3cm) Max. (WxH) 23.4"X17.6" 66.3" X49.7" 107.3" X 80.4" 150.2" X112.6" 191.1" X 143.3" 234.0" X 175.5" (59.4cm X 44.7cm) (168.4cm X 126.2cm) (272.5cm X 204.2cm) (381.5cm X 286.0cm) (485.4cm X 364.0cm) (594.4cmX 445.8cm) 19.5" X 14.6" 55.3" X 41.
3 Keystone adjustment Press to adjust image distortion caused by tilting the projector. (±40 degrees) 4 Resync Press to synchronize the projector to the input source. Resync does not operate if the on-screen display (OSD) is displayed. 5 Menu Press to activate the OSD. Use the directional keys and Menu button to navigate through the OSD. 6 TEMP warning light • A solid orange TEMP light indicates that the projector has overheated. The display automatically shuts down.
Using the Remote Control 1 Power 2 Turn the projector on and off. For more information, see "Turning Your Projector On" on page 15 and "Turning Your Projector Off" on page 15. Press to adjust the OSD setting. 3 Down button Press to select OSD items. 4 Mute Press to mute or un-mute the projector speaker. 5 Volume Press to increase the volume. 6 Page Press to move to previous page. 7 Page Press to move to next page.
8 Video mode The Dell 2400MP Micro-projector has preset configurations that are optimized for displaying data (PC Graphics) or video (movies, games, etc.). Press Video Mode button to toggle between PC mode, Movie mode, Game Mode, sRGB, or CUSTOM mode (for user to setup and save preferred settings). Pressing the Video Mode button once will show the current display mode. Pressing the Video Mode button again will switch between modes.
control to make adjustments to a setting. To go back to Main Menu, go to BACK tab and press Enter button on the control panel or the remote control. To exit the OSD, go to Exit tab and press Enter button on the control panel or the remote control. Main Menu Input Select AUTO SOURCE—Select ON (the default) to autodetect the available input signals. When the projector is on and you press SOURCE, it automatically finds the next available input signal. Select OFF to lock the current input signal.
V. KEYSTONE—Adjust image distortion caused by tilting the projector. AUTO KEYSTONE—Auto adjust the image distortion by tilting the projector. PROJECTOR MODE—Select how the image appears: • • Front Projection-Desktop (the default). Front Projection-Ceiling Mount — The projector turns the image upside down for ceiling-mounted projection. • Rear Projection-Desktop — The projector reverses the image so you can project from behind a translucent screen.
PICTURE (in PC Mode) BRIGHTNESS—Use and to adjust the brightness of the image. and CONTRAST—Use to control the degree of difference between the brightest and darkest parts of the picture. Adjusting the contrast changes the amount of black and white in the image. COLOR TEMP—Adjust the color temperature. The higher the temperature, the screen appears bluer; the lower the temperature, the screen appears redder. User mode activates the values in the "color setting" menu.
SATURATION—Adjust a video source from black and white to fully saturated color. Press to decrease the amount of color in the image and to increase the amount of color in the image. SHARPNESS—Press sharpness. to decrease the sharpness and to increase the to increase the amount of green in the image and increase the amount of red in the image.
TRACKING—Synchronize the phase of the display signal with the graphic card. If you experience an unstable or flickering image, use Tracking to correct it. This is a fine adjustment. DISPLAY (in Video Mode) automatically switches to CUSTOM. VIDEO MODE—Select a mode to optimize the display on how the projector is being used: PC, MOVIE, sRGB (provides more accurate color representation), GAME , and CUSTOM (set your preferred settings).
ECO MODE—Select ON to use the projector at a lower power level (230 Watts), which may provide longer lamp life, quieter operation, and dimmer luminance output on the screen. Select OFF to operate at normal power level (260 Watts). LAMP RESET—After you install a new lamp, select Yes to reset the lamp timer.
Preferences VOLUME—Press to decrease the volume and to increase the volume. MUTE—Allows to mute the sound. CUSTOMIZED SCREEN—Press Enter will pop-up a menu, then select "YES". The projector will capture the screen image as a "My Customized logo". This screen will replace all the original screens which contains Dell logo. User can recover the default screen by selecting "Dell Logo" on the pop-up screen. MENU LOCK—Select ON to enable Menu Lock for hiding the OSD menu. Select OFF to disable the Menu Lock.
using the Password menu. This password security feature will be activated on the next time you turn on the projector. If you enable this feature, you will be asked to enter the projector's password after you turn on the projector: 1 30 1st time password input request: a Go to Preferences menu, press Enter and then select Password to ENABLE the password setting. b Enable the Password function will pop-up a character screen, key in a 4-digit number from the screen and press the ENTER button.
2 If you have entered incorrect password, you will be given another 2 chances. After the three invalid attempts, the projector will automatically turn off. NOTE: If you forget your password, contact your dealer or qualified service personnel. 3 To cancel the password function, select OFF and enter the password to disable the function. CHANGE PASSWORD—Key in the original password, then enter the new password and confirm the new password again.
Using Your Projector
Troubleshooting Your Projector 4 If you experience problems with your projector, see the following troubleshooting tips. If the problem persists, contact Dell. Problem Possible Solution No image appears on the screen • Ensure that the lens cap is removed and the projector is turned on. • Ensure the external graphics port is enabled. If you are using a Dell portable computer, press (Fn+F8). For other computers, see your respective documentation. • Ensure that all the cables are securely connected.
Problem (continued) Partial, scrolling, or incorrectly displayed image Possible Solution (continued) 1 Press the Resync button on the remote control or the control panel. 2 If you are using a Dell portable computer, set the resolution of the computer to XGA (1024 x 768): a Right-lick the unused portion of your Windows desktop, click Properties and then select Settings tab. b Verify the setting is 1024 x 768 pixels for the external monitor port. c Press (Fn+F8).
Problem (continued) Possible Solution (continued) The image is stretched when displaying a 16:9 DVD The projector automatically detects a 16:9 DVD and adjusts the aspect ratio to full screen with a 4:3 (letter-box) default setting. If the image is still stretched, adjust the aspect ratio as follows: • If you are playing a 16:9 DVD, select 4:3 aspect ratio type on your DVD player. • If you cannot select 4:3 aspect ratio type on your DVD player, select 4:3 aspect ratio in the Set Up menu in the OSD.
Problem (continued) Possible Solution (continued) TEMP light and Power light are solid orange The lamp driver has overheated. The display automatically shuts down. Turn the display on again after the projector cools down. If the problem persists, contact Dell. TEMP light is blinking orange A projector fan has failed and the projector will automatically shut down. If the problem persists, contact Dell.
Self-diagnostic for Video Dell 2400MP Projector provides a self-diagnostic test of the projector video display (for Video, S-video, Component-i). Use this advanced feature for preliminary selfdiagnostic on your projector when you encounter a display problem for video. 1 After turning on the projector, press "+" and "-" buttons on the control panel simultaneously for 3 seconds and release the buttons when screen goes blank. 2 Press "+" and "-" buttons again to exit the diagnostic mode.
5 Pull up the lamp by its metal handle. NOTE: Dell may require that lamps replaced under warranty be returned to Dell. Otherwise, contact your local waste disposal agency for the address of the nearest deposit site. 6 Replace with the new lamp. 7 Tighten the 2 screws that secure the lamp. 8 Replace the lamp cover and tighten the 2 screws. 9 Reset the lamp usage time by selecting "Yes" for Lamp Reset in the OSD Lamp tab.
5 Specifications 5 Light Valve Single-chip 0.7" XGA LVDS (lowvoltage differential signaling) technology Brightness 3000 ANSI Lumens (Max.) Contrast Ratio 2100:1 Typical (Full On/Full Off) Uniformity 80% Typical (Japan Standard - JBMA) Lamp 260-watt user-replaceable 2000-hour lamp (up to 2500 hours in eco mode) Number of Pixels 1024 x 768 (XGA) Displayable Color 16.7M colors Color Wheel Speed 100~127.5Hz (2X) Projection Lens F/2.4~2.7, f=28.0~33.6 mm with 1.
Audio 1 speaker, 2 watt RMS Noise Level 36 dB(A) Full-on mode, 33 dB(A) Ecomode Weight <5.5 lbs (2.4 kg) Dimensions (W x H x D) External 10.8 x 8.3 x 4 ± 0.04 inches (273.
RS232 Pin Assignment RS232 Protocol • Communication Settings Connection settings Value Baud Rate: 19200 Data Bits: 8 Parity None Stop Bits 1 • Command types To pop up the OSD menu and adjust the settings.
Note: When the projector is in the standby mode, no acknowledgement (NACK) response is sent by the projector. • Projector Response Lamp Hour: Byte0, Byte1, Byte2, Byte3 Byte0: 0x00 (Success) Byte1: 0x2F (the header of lamp hour) Byte2: LSB (Hex) Byte3: MSB (Hex) Ex: 800 (3x256+2x16=800) hours --> 0x00, 0x2F, 0x20, 0x03 • Firmware version Response: Firmware version: 4 Bytes ASCII Code: "V*.*" V: Version *: 0-9 • 42 Example: Version 1.5 --> "V1.
Control Commands List Header (WORD) Address Code (BYTE) Size of the payload (WORD) CRC16 for the entire packet (WORD) MsG ID (WORD) MsG size (WORD) Command code (BYTE) Command Description 0xefbe 0x10 0x0005 0xffc6 0xbfc7 0x7e07 0x3fc5 0xfe05 0xbe04 0x7fc4 0x3fc0 0xfe00 0xbe01 0x7fc1 0x3e03 0xffc3 0x7e02 0x3fca 0xfe0a 0xbe0b 0x7fcb 0x3e09 0x7e08 0x3e0c 0xffcc 0xbe1f 0x7fdf 0xbfd9 0x7e19 0x3fdb 0xfe1b 0xbe1a 0x7fda 0x3e12 0x3ff6 0x7e46 0x1111 0x0001 0x01 0x02 0x03 0x04 0x05 0x06 0x07 0x08 0x09 0
Compatibility Modes Mode Resolution VGA (ANALOG) V. Frequency (Hz) H. Frequency (KHz) 640X350 70 31.5 VGA 640X350 85 37.9 VGA 640X400 85 37.9 VGA 640X480 60 31.5 VGA 640X480 72 37.9 VGA 640X480 75 37.5 VGA 640X480 85 43.3 VGA 720X400 70 31.5 VGA 720X400 85 37.9 SVGA 800X600 56 35.2 SVGA 800X600 60 37.9 SVGA 800X600 72 48.1 SVGA 800X600 75 46.9 SVGA 800X600 85 53.7 XGA 1024X768 60 48.4 XGA 1024X768 70 56.5 XGA 1024X768 75 60.
Contacting Dell To contact Dell electronically, you can access the following websites: • www.dell.com • support.dell.com (support) For specific web addresses for your country, find the appropriate country section in the table below. NOTE: Toll-free numbers are for use within the country for which they are listed. NOTE: In certain countries, support specific to Dell XPS™ portable computers is available at a separate telephone number listed for participating countries.
Country (City) International Access Code Country Code City Code Department Name or Service Area, Website and E-Mail Address Area Codes, Local Numbers, and Toll-Free Numbers Argentina (Buenos Aires) Website: www.dell.com.ar International Access Code: 00 E-mail: us_latin_services@dell.com Country Code: 54 E-mail for desktop and portable computers: la-techsupport@dell.com City Code: 11 E-mail for servers and EMC® storage products: la_enterprise@dell.
Country (City) International Access Code Country Code City Code Department Name or Service Area, Website and E-Mail Address Austria (Vienna) Website: support.euro.dell.com International Access Code: 900 E-mail: tech_support_central_europe@ dell.
Country (City) International Access Code Country Code City Code Department Name or Service Area, Website and E-Mail Address Area Codes, Local Numbers, and Toll-Free Numbers Belgium (Brussels) Website: support.euro.dell.
Country (City) International Access Code Country Code City Code Brunei Country Code: 673 Department Name or Service Area, Website and E-Mail Address Area Codes, Local Numbers, and Toll-Free Numbers Hardware and Warranty Support (Penang, Malaysia) 604 633 4966 Customer Care (Penang, Malaysia) 604 633 4888 Transaction Sales (Penang, Malaysia) 604 633 4955 Canada (North York, Ontario) Online Order Status: www.dell.
Country (City) International Access Code Country Code City Code Department Name or Service Area, Website and E-Mail Address Cayman Islands General Support Chile (Santiago) Sales and Customer Support Country Code: 56 Area Codes, Local Numbers, and Toll-Free Numbers 1-800-805-7541 toll-free: 1230-0204823 City Code: 2 China (Xiamen) Country Code: 86 City Code: 592 Hardware and Warranty Support website: support.dell.com.cn Hardware and Warranty Support E-mail: cn_support@dell.
Country (City) International Access Code Country Code City Code Department Name or Service Area, Website and E-Mail Address Area Codes, Local Numbers, and Toll-Free Numbers Home and Small Business tollfree: 800 858 2222 Preferred Accounts Division tollfree: 800 858 2557 Large Corporate Accounts GCP tollfree: 800 858 2055 Large Corporate Accounts Key Accounts tollfree: 800 858 2628 Large Corporate Accounts North tollfree: 800 858 2999 Large Corporate Accounts North Government and Education toll
Country (City) International Access Code Country Code City Code Department Name or Service Area, Website and E-Mail Address Area Codes, Local Numbers, and Toll-Free Numbers Czech Republic (Prague) Website: support.euro.dell.com International Access Code: 00 Country Code: 420 E-mail: czech_dell@dell.com Hardware and Warranty Support 22537 2727 Customer Care 22537 2707 Fax 22537 2714 Hardware and Warranty Fax 22537 2728 Switchboard 22537 2711 Denmark (Copenhagen) Website: support.euro.dell.
Country (City) International Access Code Country Code City Code Department Name or Service Area, Website and E-Mail Address Area Codes, Local Numbers, and Toll-Free Numbers Finland (Helsinki) Website: support.euro.dell.com International Access Code: 990 Hardware and Warranty Support 09 253 313 60 Country Code: 358 Customer Care 09 253 313 38 City Code: 9 Fax 09 253 313 99 Switchboard 09 253 313 00 France (Paris) (Montpellier) Website: support.euro.dell.
Country (City) International Access Code Country Code City Code Department Name or Service Area, Website and E-Mail Address Germany (Langen) Website: support.euro.dell.com International Access Code: 00 E-mail: tech_support_central_europe@ dell.
Country (City) International Access Code Country Code City Code Department Name or Service Area, Website and E-Mail Address Guyana General Support Hong Kong Website: support.ap.dell.com International Access Code: 001 Hardware and Warranty Support E-mail: apsupport@dell.
Country (City) International Access Code Country Code City Code Department Name or Service Area, Website and E-Mail Address Sales (Home and Small Business) Area Codes, Local Numbers, and Toll-Free Numbers 1600 33 8046 Ireland (Cherrywood) Website: support.euro.dell.com International Access Code: 00 E-mail: dell_direct_support@dell.
Country (City) International Access Code Country Code City Code Department Name or Service Area, Website and E-Mail Address Italy (Milan) Website: support.euro.dell.
Country (City) International Access Code Country Code City Code Department Name or Service Area, Website and E-Mail Address Area Codes, Local Numbers, and Toll-Free Numbers Hardware And Warranty Support outside of Japan (Dell Precision, OptiPlex, and Latitude) 81-44-556-3894 Hardware And Warranty Support (PDAs, projectors, printers, routers) toll-free: 0120-981690 Hardware And Warranty Support outside of Japan (PDAs, projectors, printers, routers) 81-44-556-3468 Faxbox Service 044-556-3490 24-Hou
Country (City) International Access Code Country Code City Code Department Name or Service Area, Website and E-Mail Address Area Codes, Local Numbers, and Toll-Free Numbers Korea (Seoul) E-mail: krsupport@dell.
Country (City) International Access Code Country Code City Code Macao Country Code: 853 Department Name or Service Area, Website and E-Mail Address Hardware and Warranty Support Area Codes, Local Numbers, and Toll-Free Numbers toll-free: 0800 105 Customer Service (Xiamen, China) 34 160 910 Transaction Sales (Xiamen, China) 29 693 115 Malaysia (Penang) Website: support.ap.dell.
Country (City) International Access Code Country Code City Code Mexico International Access Code: 00 Country Code: 52 Department Name or Service Area, Website and E-Mail Address Area Codes, Local Numbers, and Toll-Free Numbers 001-877-384-8979 Customer Hardware And Warranty Support or 001-877-2693383 Sales 50-81-8800 or 01-800-888-3355 Customer Service 001-877-384-8979 or 001-877-2693383 Main 50-81-8800 or 01-800-888-3355 Montserrat General Support toll-free: 1-866-2786822 Netherlands Antilles
Country (City) International Access Code Country Code City Code Department Name or Service Area, Website and E-Mail Address Area Codes, Local Numbers, and Toll-Free Numbers New Zealand Website: support.ap.dell.com International Access Code: 00 E-mail: support.ap.dell.com/contactus Country Code: 64 General Support 0800 441 567 Nicaragua General Support 001-800-220-1006 Norway (Lysaker) Website: support.euro.dell.
Country (City) International Access Code Country Code City Code Department Name or Service Area, Website and E-Mail Address Portugal Website: support.euro.dell.com International Access Code: 00 Hardware and Warranty Support Country Code: 351 Customer Care Sales Fax Area Codes, Local Numbers, and Toll-Free Numbers 707200149 800 300 413 800 300 410 or 800 300 411 or 800 300 412 or 21 422 07 10 21 424 01 12 Puerto Rico General Support 1-800-805-7545 St.
Country (City) International Access Code Country Code City Code Department Name or Service Area, Website and E-Mail Address Area Codes, Local Numbers, and Toll-Free Numbers Singapore (Singapore) Website: support.ap.dell.
Country (City) International Access Code Country Code City Code South Africa (Johannesburg) International Access Code: Department Name or Service Area, Website and E-Mail Address Area Codes, Local Numbers, and Toll-Free Numbers Website: support.euro.dell.com E-mail: dell_za_support@dell.
Country (City) International Access Code Country Code City Code Sweden (Upplands Vasby) International Access Code: 00 Country Code: 46 City Code: 8 Department Name or Service Area, Website and E-Mail Address Website: support.euro.dell.
Country (City) International Access Code Country Code City Code Department Name or Service Area, Website and E-Mail Address Switzerland (Geneva) Website: support.euro.dell.com International Access Code: 00 E-mail: Tech_support_central_Europe @dell.
Country (City) International Access Code Country Code City Code Department Name or Service Area, Website and E-Mail Address Taiwan Website: support.ap.dell.com International Access Code: 002 E-mail: ap_support@dell.
Country (City) International Access Code Country Code City Code Trinidad/Tobago Department Name or Service Area, Website and E-Mail Address Area Codes, Local Numbers, and Toll-Free Numbers General Support 1-800-805-8035 Turks and Caicos Islands General Support toll-free: 1-866-5403355 U.K. (Bracknell) Website: support.euro.dell.com International Access Code: 00 Customer Care website: support.euro.dell.com/uk/en/ECare/Form/Home.asp Country Code: 44 E-mail: dell_direct_support@dell.
Country (City) International Access Code Country Code City Code Department Name or Service Area, Website and E-Mail Address Area Codes, Local Numbers, and Toll-Free Numbers Preferred Accounts (500–5000 employees) Customer Care 0870 906 0010 Central Government Customer Care 01344 373 193 Local Government & Education Customer Care 01344 373 199 Health Customer Care 01344 373 194 Home and Small Business Sales 0870 907 4000 Corporate/Public Sector Sales 01344 860 456 Home and Small Business Fax
Country (City) International Access Code Country Code City Code Department Name or Service Area, Website and E-Mail Address Financial Services (Dell Preferred Accounts [DPA]) Area Codes, Local Numbers, and Toll-Free Numbers toll-free: 1-800-2832210 Business Customer Service and Support toll-free: 1-800-4563355 Employee Purchase Program (EPP) Customers toll-free: 1-800-6958133 Printers and Projectors Support toll-free: 1-877-4597298 Public (government, education, and healthcare) Customer Service and
Country (City) International Access Code Country Code City Code Department Name or Service Area, Website and E-Mail Address Area Codes, Local Numbers, and Toll-Free Numbers U.S.
Appendix: Regulatory Notices FCC Notices (U.S. Only) Most Dell computer systems are classified by the Federal Communications Commission (FCC) as Class B digital devices. To determine which classification applies to your computer system, examine all FCC registration labels located on the bottom, side, or back panel of your computer, on card-mounting brackets, and on the cards themselves. If any one of the labels carries a Class A rating, your entire system is considered to be a Class A digital device.
• Reorient or relocate the receiving antenna. • Increase the separation between the equipment and the receiver. • Connect the equipment into an outlet on a circuit different from that to which the receiver is connected. • Consult the dealer or an experienced radio/television technician for help.
Glossary ANSI LUMENS —A standard for measuring light output, used for comparing projectors. ASPECT RATIO —The most popular aspect ratio is 4:3 (4 by 3). Early television and computer video formats are in a 4:3 aspect ratio, which means that the width of the image is 4/3 times the height. BACKLIT (BACKLIGHT) —Refers to a remote control, or a projector control panel, that has buttons and controls that are illuminated.
Contrast Ratio— Range of light and dark values in a picture, or the ratio between their maximum and minimum values. There are two methods used by the projection industry to measure the ratio: 1 Full On/Off — measures the ratio of the light output of an all white image (full on) and the light output of an all black (full off) image. 2 ANSI — measures a pattern of 16 alternating black and white rectangles.
Maximum Distance— The distance from a screen the projector can be to cast an image that is useable (bright enough) in a fully darkened room. Maximum Image Size— The largest image a projector can throw in a darkened room. This is usually limited by focal range of the optics. Metal Halide Lamp— The type of lamp used in many medium and all high end portable projectors. These lamps typically have a "half-life" of 1000-2000 hours.
Zoom Lens— Lens with a variable focal length that allows operator to move the view in or out making the image smaller or larger. Zoom Lens Ratio— Is the ratio between the smallest and largest image a lens can projector from a fixed distance. For example, a 1.4:1 zoom lens ratio means that a 10 foot image without zoom would be a 14 foot image with full zoom.
Index A RS232 cable 14 S-video cable 11 To Computer 10 USB to USB cable 10 Adjusting Projection Image Size 37 Adjusting the Projected Image 16 Adjusting the Projector Height 16 lower the projector Elevator button 16 Elevator foot 16 Tilt adjustment wheel 16 C Connection Ports Audio input connector 9 Audio output connector 9 Composite video connector 9 IR receiver 9 Kensington lock hole 9 Power cord connector 9 RS232 connector 9 S-video connector 9 USB remote connector 9 VGA in (D-sub) connector 9 VGA ou
Focus ring 7 Lens 7 Remote control receiver 7 Zoom tab 7 Brightness 39 Color Wheel Speed 39 Compatibility Modes 44 Contrast Ratio 39 Dimensions 40 Displayable Color 39 Environmental 40 H. Frequency 39 I/O Connectors 40 Lamp 39 Light Valve 39 Noise Level 40 Number of Pixels 39 Power Consumption 39 Power Supply 39 Projection Distance 39 Projection Lens 39 Projection Screen Size 39 Regulatory 40 RS232 Protocol 41 Uniformity 39 V.
Projecteur Dell™ 2400MP Manuel de l'utilisateur w w w. d e l l . c o m | s u p p o r t . d e l l .
Remarques, Notices, et Avertissements REMARQUE : Une REMARQUE indique une information importante qui vous permettra de mieux utiliser votre projecteur. REMARQUE : Une NOTICE indique soit une détérioration potentielle du matériel ou une perte de données et vous indique comment éviter le problème. ATTENTION : Un AVERTISSEMENT indique des risques potentiels de détérioration de propriétés, de blessures corporelles ou de mort.
Table des matières 1 Votre projecteur Dell A propos de votre projecteur 2 . . . . . . . . . . . . . Connexion de votre projecteur 7 . . . . . . . . 9 Connexion à un ordinateur . . . . . . . . . . . . . . . . 10 Connexion à un lecteur DVD . . . . . . . . . . . . . . . 11 Connexion d'un lecteur DVD à l'aide d'un câble S-vidéo . . . . . . . . . . . . . . . . . . . . 11 Connexion d'un lecteur DVD à l'aide d'un câble composite . . . . . . . . . . . . . . . . . .
Utilisation du panneau de contrôle Utilisation de la télécommande . . . . . . . . . . . . 19 . . . . . . . . . . . . 21 Utilisation de l'affichage à l'écran Menu Principal . . . . . . . . . . . 23 . . . . . . . . . . . . . . . . . . . 23 Sélection d'entrée . . . . . . . . . . . . . . . . . 23 . . . . . . . . . . . . . . . . . . . . 24 . . . . . . . . . . . . . . . . . . . . . . . 24 Réglage auto Régler . IMAGE (en Mode PC) . . . . . . . . . . . . . . . . IMAGE (en Mode Vidéo) . . . . .
1 Votre projecteur Dell Votre projecteur est livré avec tous les éléments présentés ci-dessous. Assurez-vous que votre appareil est complet, et contactez Dell s'il manquait un des composants.
Contenu de l'emballage (suite) Câble audio vers RCA de 1,8 m Câble mini broche vers mini broche de 1,8 m Piles (2) Télécommande Documentation Mallette de transport 6 Votre projecteur Dell
A propos de votre projecteur 1 Panneau de contrôle 2 Bouton élévateur 3 Récepteur de télécommande 4 Objectif 5 Bague de mise au point 6 Ergot du zoom Votre projecteur Dell 7
8 Votre projecteur Dell
Connexion de votre projecteur 1 Récepteur IR 2 Connecteur d'entrée VGA (D-sub) 3 Sortie VGA (prise en boucle du moniteur) 4 Connecteur distant USB 5 Connecteur de sortie audio 6 Connecteur RS232 7 Connecteur de cordon d'alimentation 8 Connecteur d'entrée audio 9 Connecteur vidéo composite 10 Connecteur S-vidéo 11 Encoche de sécurité Kensington Connexion de votre projecteur 2 9
Connexion à un ordinateur 1 Cordon d'alimentation 2 Câble D-sub vers D-sub 3 Câble USB vers USB 10 Connexion de votre projecteur
Connexion à un lecteur DVD Connexion d'un lecteur DVD à l'aide d'un câble S-vidéo 1 Cordon d'alimentation 2 Câble S-vidéo Connexion de votre projecteur 11
Connexion d'un lecteur DVD à l'aide d'un câble composite 1 Cordon d'alimentation 2 Câble vidéo composite 12 Connexion de votre projecteur
Connexion d’un lecteur DVD à l'aide d'un câble composant 1 Cordon d'alimentation 2 Câble D-sub vers YPbPr Connexion de votre projecteur 13
Options d'installation professionnelles : Connexion d'un ordinateur avec un câble RS232 1 Cordon d'alimentation 2 Câble RS232 14 Connexion de votre projecteur
Utilisation de votre projecteur 3 Allumer votre projecteur REMARQUE : Allumez le projecteur avant d'allumer la source. Le témoin du bouton d'alimentation clignote en bleu jusqu'à ce qu'il soit enfoncé. 1 Retirez le cache de l'objectif. 2 Connectez le cordon d'alimentation et les câbles de signal appropriés. Pour plus d'informations sur la connexion du projecteur, voir "Connexion de votre projecteur" à la page 9.
REMARQUE : si vous appuyez sur le bouton d'alimentation quand le projecteur fonctionne, le message « Eteindre la lampe? » apparaît à l'écran. Pour effacer ce message, appuyez sur un bouton du panneau de contrôle ou ignorez le message; celui-ci disparaît au bout de 5 secondes. Réglage de l'image projetée Réglage de la hauteur du projecteur 1 Appuyez sur le bouton élévateur.
Réglage du zoom et de la mise au point du projecteur ATTENTION : pour éviter d'endommager le projecteur, assurez-vous que le zoom de l'objectif et le pied élévateur sont entièrement rétractés avant de déplacer le projecteur ou de le ranger dans son étui de transport. 1 Tournez l'ergot du zoom pour rapprocher et éloigner l'image. 2 Faites tourner la bague de mise au point jusqu'à ce que l'image soit nette.
Réglage de la taille de l'image projetée 18 Utilisation de votre projecteur
Ecran (Diagonale) Taille de l'écran Distance Max. 29,3 pouces (74,4cm) 82,9 pouces (210,6cm) 134,1 pouces (340,6cm) 187,7 pouces (476,8cm) 238,9 pouces (606,8cm) 292,5 pouces (743cm) Min. 24.4" (62cm) 69,1 pouces (175,5cm) 111,7 pouces (283,7cm) 156,4 pouces (397,3cm) 199,1 pouces (505,7cm) 243,8 pouces (619,3cm) Max.
2 Source Appuyez pour sélectionner la source (RVB, analogique, composite, Composant-i, S-vidéo et YPbPr analogique) quand plusieurs sources sont connectées au projecteur. 3 Réglage de la déformation Appuyez pour ajuster la déformation de l'image provoquée par l'inclinaison du projecteur. (± 40 degrés) 4 Resync Appuyez pour synchroniser le projecteur sur la source d'entrée. Resync ne fonctionne pas si l'affichage à l'écran (OSD) est affiché. 5 Menu Appuyez pour activer l'OSD.
Utilisation de la télécommande 1 Alimentation 2 Appuyez pour allumer et éteindre le projecteur. Pour plus d'informations, voir "Allumer votre projecteur" à la page 15 et "Extinction de votre projecteur" à la page 15. Appuyez pour ajuster le paramètre de l'OSD. 3 Bouton Bas Appuyez sur pour sélectionner les éléments de l'OSD. 4 Muet Appuyez pour activer ou désactiver le hautparleur du projecteur. 5 Volume Appuyez pour augmenter le volume. 6 Page Appuyez pour aller à la page précédente.
7 Page Appuyez pour aller à la page suivante. 8 Mode Vidéo Le Microprojecteur Dell 2400MP dispose de configurations préréglées optimisées pour afficher des données (Graphismes PC) ou vidéo (films, jeux, etc.). Appuyez sur le bouton mode Vidéo pour permuter entre le mode PC, le mode Film, le mode Jeu, le mode sRVB ou le mode PERSO (permettant à l'utilisateur d'enregistrer ses propres paramètres). Appuyez une fois sur le bouton mode Vidéo pour afficher le mode d'affichage actuel.
Utilisation de l'affichage à l'écran Le projecteur possède un affichage à l'écran (OSD) multilingue qui peut être affiché avec ou sans source d'entrée présente. Dans le menu principal, appuyez sur ou pour naviguer parmi les onglets. Appuyez sur le bouton Entrée du panneau de contrôle ou de la télécommande pour sélectionner un sous-menu. Dans le sous-menu, appuyez sur ou pour effectuer une sélection. Quand un élément est sélectionné, sa couleur passe au gris foncé.
VGA—Appuyez sur ENTREE pour détecter le signal VGA. S-VIDÉO—Appuyez sur ENTREE pour détecter le signal S-Vidéo. VIDÉO COMPOSITE—Appuyez sur ENTREE pour détecter le signal Vidéo Composite. Réglage auto Sélectionnez pour afficher l'information "Réglage automatique en cours...". Régler DÉFORMATION H.—Permet de régler la déformation de l'image due au décalage horizontal de l'orientation du projecteur. DÉFORMATION V.—Permet de régler la déformation de l'image due à l'inclinaison du projecteur.
– Câble composant (576p/480i/480p) – Câble S-Vidéo – Câble composite • 16:9 — La source d'entrée est mise à l’échelle pour s’adapter à la largeur de l’écran. • 4:3 — La source d'entrée est mise à l'échelle pour s'adapter à l'écran.
IMAGE (en Mode Vidéo) LUMINOSITÉ—Utilisez et pour régler la luminosité de l'image. et CONTRASTE—Utilisez pour contrôler la différence entre les parties les plus lumineuses et les parties les plus sombres de l'image. Le réglage du contraste modifie la quantité de noir et de blanc dans l'image. TEMP COULEURS—Permet de régler la température de couleur. Plus la température de couleur est élevée, plus l'écran paraît bleu, moins la température est élevée, plus l'écran apparaît rouge.
AFFICHAGE (en Mode PC) MODE VIDÉO—Sélectionnez un mode pour optimiser l'affichage en fonction de l'utilisation du projecteur : PC, FILM, sRVB (offre une représentation plus fidèle des couleurs) JEU et PERSO (définissez vos préférences). Lorsque vous réglez les paramètres Intensité des blancs ou Degamma, le projecteur passe automatiquement sur PERSO. le type de signal RVB, YCbCr, YPbPr.
AFFICHAGE (en Mode Vidéo) MODE VIDÉO—Sélectionnez un mode pour optimiser l'affichage en fonction de l'utilisation du projecteur : PC, FILM, sRVB (offre une représentation plus fidèle des couleurs) JEU et PERSO (définissez vos préférences). Lorsque vous réglez les paramètres Intensité des blancs ou Degamma, le projecteur passe automatiquement sur PERSO. TYPE DE SIGNAL—Permet de sélectionner manuellement le type de signal RVB, YCbCr, YPbPr.
MODE ECO—Sélectionnez ON pour utiliser le projecteur à un niveau d'intensité plus faible (230 Watts), ce qui peut offrir une plus grande longévité de la lampe, un fonctionnement plus silencieux et une luminance plus faible à l'écran. Sélectionnez OFF pour une utilisation à un niveau d'intensité normal (260 Watts). RÉINIT LAMPE—Après avoir installé une lampe neuve, sélectionnez Oui pour réinitialiser la minuterie de la lampe.
Préférences VOLUME—Appuyez sur pour diminuer le volume et sur pour augmenter le volume. MUET—Permet de couper le son. ECRAN PERSONNALISÉ— Appuyez sur Entrée pour faire apparaître un menu, puis sélectionnez "OUI". Le projecteur capturera l'image d'écran en tant que "Mon logo personnalisé". Cet écran remplacera tous les écrans d'origine contenant le logo Dell. L'utilisateur peut récupérer l'écran par défaut en sélectionnant "Logo Dell" sur l'écran contextuel.
Lorsqu'une protection par mot de passe est activée (On), un écran de Protection par mot de passe vous invitant à entrer un mot de passe s'affiche quand la prise d'alimentation est insérée dans la prise de courant et quand l'alimentation pour le projecteur est tout d'abord allumée. Par défaut, cette fonction est désactivée. Vous pouvez activer cette fonctionnalité à l'aide du menu Mot de passe. Cette fonctionnalité de sécurité sera activée la prochaine fois que vous utiliserez le projecteur.
2 c Pour confirmer, entrez à nouveau le mot de passe. d Si la vérification du mot de passe réussit, vous pouvez continuer à accéder aux fonctions et aux utilitaires du projecteur. Si vous avez entré un mot de passe erroné, vous pourrez encore faire 2 autres tentatives. Après trois tentatives infructueuses, le projecteur s'éteint automatiquement. REMARQUE : Si vous oubliez votre mot de passe, contactez votre vendeur ou un technicien agréé.
SÉQUENCE TESTS—Sélectionnez ON pour activer la Séquence tests intégrée afin de tester la mise au point et la résolution. Sélectionnez OFF pour désactiver la fonction. RÉGLAGE USINE—Sélectionnez ON pour rétablir les paramètres d'usine par défaut du projecteur. Les éléments de réinitialisation comprennent à la fois les paramètres sources de l'ordinateur et les paramètres de source vidéo.
34 Utilisation de votre projecteur
Dépanner votre projecteur 4 Si vous rencontrez des problèmes avec le projecteur, reportez-vous aux conseils de dépannage suivants. Si le problème persiste, contactez Dell. Problème Solution possible Aucune image n'apparaît à l'écran. • Assurez-vous que le cache de l'objectif est retiré et que le projecteur est allumé. • Assurez-vous que le port graphique externe est activé. Si vous utilisez un ordinateur portable Dell, appuyez sur (Fn+F8).
Problème (suite) Image partielle, qui défile ou affichée de façon incorrecte. Solution possible (suite) 1 Appuyez sur le bouton Resync sur la télécommande ou sur le panneau de contrôle. 2 Si vous utilisez un ordinateur portable Dell, paramétrez la résolution de l'ordinateur sur XGA (1024 x 768): a Faites un clic droit sur une portion non utilisée de votre bureau de Windows, cliquez sur Propriétés et sélectionnez ensuite l'onglet Paramètres.
Problème (suite) L'image a une mauvaise mise au point Solution possible (suite) 1 Ajustez la bague de mise au point située sur l'objectif du projecteur. 2 Assurez-vous que l'écran de projection se trouve à la bonne distance du projecteur (3,9 pieds [1,2 m] à 39,4 pieds [12 m]). L'image est allongée en affichage DVD de 16:9 Le projecteur détecte automatiquement un DVD de 16:9 et ajuste le format de l'image en plein écran avec un paramètre par défaut de 4:3 (boîte à lettres).
Problème (suite) Solution possible (suite) Le témoin LAMP clignote en orange et le témoin Power est allumé en bleu fixe Si le témoin LAMP clignote en orange et que et le témoin Power est allumé en bleu fixe, cela signifie que le système est en panne et que le projecteur s'éteindra automatiquement. Débranchez le cordon d'alimentation, patientez 3 minutes, puis rallumez l'affichage. Si le problème persiste, contactez Dell.
Auto-diagnostic pour vidéo Le projecteur Dell 2400MP offre un test d’auto-diagnostic de l’affichage vidéo du projecteur (pour Vidéo, S-vidéo, Composant-i). Utilisez cette fonctionnalité avancée pour l'auto-diagnostic préliminaire sur votre projecteur quand vous rencontrez des problèmes d'affichage pour la vidéo. 1 Après avoir allumé le projecteur, appuyez simultanément sur les boutons "+" et "" sur le panneau de commande pendant 3 secondes, puis relâchez les boutons quand l'écran se vide.
5 Soulevez la lampe en la tenant par sa partie métallique. REMARQUE : Dell peut demander que les lampes remplacées durant la période de garantie lui soient renvoyées. Sinon, contactez votre agence de recyclage des déchets pour obtenir l'adresse du dépôt le plus proche. 6 Remplacez par une lampe neuve. 7 Serrez les 2 vis de fixation de la lampe. 8 Replacez le couvercle de lampe et serrez les 2 vis.
5 Spécifications 5 Valve légère Technologie simple circuit 0,7" XGA LVDS (signal différentiel basse tension) Luminosité 3000 Lumens ANSI (max.
Audio 1 haut-parleur, 2 watts RMS Niveau de bruit 36 dB(A) mode Full-on, 33 dB(A) mode Eco Poids <5,5 lbs (2,4 kg) Dimensions (l x H x P) Externe 10,8 x 8,3 x 4 ± 0,04 pouce (273,7 x 212 x 101 ± 1 mm) Environnement Température de fonctionnement: 5oC - 35oC (41oF- 95oF) Humidité: 80% maximum Température de stockage: -20oC à 60oC (-4oF à 140oF) Humidité: 80% maximum Réglementation FCC, CE, VCCI, UL, cUL, NemkoGS, ICES-003, MIC, C-Tick, GOST, CCC, PSB, NOM, IRAM, SABS Connecteurs d'E/S Alimentatio
Affectation des broches RS232 Protocole RS232 • Paramètres de communication Paramètres de connexion Valeur Débit en bauds: 19200 Bits de données: 8 Parité Aucune Bits d'arrêt 1 • Types de commandes Pour faire apparaître le menu OSD et ajuster les paramètres.
0x03: Etat du système - Projecteur allumé (Mode Normal). NACK: Etat du système - Projecteur éteint (Mode Veille). Remarque : Quand le projecteur est en mode veille, aucune réponse d'accusé de nonréception (NACK) est envoyée par le projecteur.
Liste de commandes de contrôle En-tête (MOT) Code d'adresse (OCTET) Taille de la charge utile (MOT) CRC16 pour le paquet complet (MOT) ID MsG (MOT) Taille MsG (MOT) Code de commande (MOT) Description des commandes 0xefbe 0x10 0x0005 0xffc6 0xbfc7 0x7e07 0x3fc5 0xfe05 0xbe04 0x7fc4 0x3fc0 0xfe00 0xbe01 0x7fc1 0x3e03 0xffc3 0x7e02 0x3fca 0xfe0a 0xbe0b 0x7fcb 0x3e09 0x7e08 0x3e0c 0xffcc 0xbe1f 0x7fdf 0xbfd9 0x7e19 0x3fdb 0xfe1b 0xbe1a 0x7fda 0x3e12 0x3ff6 0x7e46 0x1111 0x0001 0x01 0x02 0x03 0x04
Modes de compatibilité Mode Résolution VGA (ANALOGIQUE) Fréquence V. (Hz) Fréquence H. (KHz) 640X350 70 31.5 VGA 640X350 85 37.9 VGA 640X400 85 37.9 VGA 640X480 60 31.5 VGA 640X480 72 37.9 VGA 640X480 75 37.5 VGA 640X480 85 43.3 VGA 720X400 70 31.5 VGA 720X400 85 37.9 SVGA 800X600 56 35.2 SVGA 800X600 60 37.9 SVGA 800X600 72 48.1 SVGA 800X600 75 46.9 SVGA 800X600 85 53.7 XGA 1024X768 60 48.4 XGA 1024X768 70 56.5 XGA 1024X768 75 60.
Contacter Dell Pour contacter Dell par ordinateur, rendez-vous sur les sites web suivants: • www.dell.com • support.dell.com (assistance) Pour obtenir les adresses Web spécifiques à votre pays, reportez-vous à la section du pays appropriée dans le tableau ci-dessous. REMARQUE : Numéros de téléphone gratuits à utiliser à l'intérieur du pays auxquels ils correspondent.
Pays (Ville) Nom du département ou zone du Code d'accès service, site web et adresse einternational Code du pays mail Indicatif de la ville Codes de zone, Numéro local, et Numéros gratuits Argentine (Buenos Aires) Site Web : www.dell.com.ar Code d'accès international: 00 E-mail: us_latin_services@dell.com Code du pays : 54 E-mail pour ordinateurs de bureau et portables: la-techsupport@dell.com Code de la ville : 11 E-mail pour les serveurs et produits de stockage EMC®: la_enterprise@dell.
Pays (Ville) Nom du département ou zone du Code d'accès service, site web et adresse einternational Code du pays mail Indicatif de la ville Autriche (Vienne) Code d'accès international: 900 Code du pays: 43 Code de la ville: 1 Codes de zone, Numéro local, et Numéros gratuits Site Web: support.euro.dell.com E-mail: tech_support_central_europe@ dell.
Pays (Ville) Nom du département ou zone du Code d'accès service, site web et adresse einternational Code du pays mail Indicatif de la ville Belgique (Bruxelles) Code d'accès international: 00 Code du pays: 32 Code de la ville: 2 Codes de zone, Numéro local, et Numéros gratuits Site Web: support.euro.dell.
Pays (Ville) Nom du département ou zone du Code d'accès service, site web et adresse einternational Code du pays mail Indicatif de la ville Brunei Code du pays: 673 Codes de zone, Numéro local, et Numéros gratuits Assistance matérielle et garantie (Penang, Malaisie) 604 633 4966 Soin à la clientèle (Penang, Malaisie) 604 633 4888 Transaction ventes (Penang, Malaisie) 604 633 4955 Contacter Dell 51
Pays (Ville) Nom du département ou zone du Code d'accès service, site web et adresse einternational Code du pays mail Indicatif de la ville Codes de zone, Numéro local, et Numéros gratuits Canada (North York, Ontario) Etat de la commande en ligne : www.dell.
Pays (Ville) Nom du département ou zone du Code d'accès service, site web et adresse einternational Code du pays mail Indicatif de la ville Chili (Santiago) numéro gratuit :1230-0204823 Ventes et assistance clientèle Code du pays: 56 Code de la ville: 2 Chine (Xiamen) Code du pays: 86 Code de la ville: 592 Codes de zone, Numéro local, et Numéros gratuits Site web d'assistance matérielle et garantie support.dell.com.cn E-mail d'assistance matérielle et garantie: cn_support@dell.
Pays (Ville) Nom du département ou zone du Code d'accès service, site web et adresse einternational Code du pays mail Indicatif de la ville 54 Contacter Dell Codes de zone, Numéro local, et Numéros gratuits Particulier et petite entreprise numéro gratuit: 800 858 222 2 Division des comptes préférés numéro gratuit: 800 858 255 7 Comptes Grande entreprise GCP numéro gratuit: 800 858 205 5 Comptes grandes entreprises Comptes clé numéro gratuit: 800 858 262 8 Comptes grande entreprise Nord numéro g
Pays (Ville) Nom du département ou zone du Code d'accès service, site web et adresse einternational Code du pays mail Indicatif de la ville Codes de zone, Numéro local, et Numéros gratuits Colombie Assistance générale 980-9-15-3978 Costa Rica Assistance générale 0800-012-0435 République Tchèque (Prague) Site Web: support.euro.dell.com Code d'accès international: 00 E-mail: czech_dell@dell.
Pays (Ville) Nom du département ou zone du Code d'accès service, site web et adresse einternational Code du pays mail Indicatif de la ville Dominique Assistance générale République Dominicaine Assistance générale Codes de zone, Numéro local, et Numéros gratuits numéro gratuit: 1866-278-6821 1-800-148-0530 Équateur Assistance générale numéro gratuit: 999 -119 Salvador Assistance générale 01-899-753-0777 Finlande (Helsinki) Site Web: support.euro.dell.
Pays (Ville) Nom du département ou zone du Code d'accès service, site web et adresse einternational Code du pays mail Indicatif de la ville France (Paris) (Montpellier) Site Web: support.euro.dell.
Pays (Ville) Nom du département ou zone du Code d'accès service, site web et adresse einternational Code du pays mail Indicatif de la ville Allemagne (Langen) Code d'accès international: 00 Code du pays: 49 Code de la ville: 6103 Site Web: support.euro.dell.com E-mail: tech_support_central_europe@ dell.
Pays (Ville) Nom du département ou zone du Code d'accès service, site web et adresse einternational Code du pays mail Indicatif de la ville Codes de zone, Numéro local, et Numéros gratuits Grenade Assistance générale numéro gratuit: 1866-540-3355 Guatémala Assistance générale 1-800-999-0136 Guyane Assistance générale numéro gratuit: 1877-270-4609 Hong Kong Site Web: support.ap.dell.com Code d'accès international: 001 E-mail d'assistance matérielle et garantie: apsupport@dell.
Pays (Ville) Nom du département ou zone du Code d'accès service, site web et adresse einternational Code du pays mail Indicatif de la ville Inde Codes de zone, Numéro local, et Numéros gratuits E-mail: india_support_desktop@dell.co m india_support_notebook@dell.c om india_support_Server@dell.
Pays (Ville) Nom du département ou zone du Code d'accès service, site web et adresse einternational Code du pays mail Indicatif de la ville Irlande (Cherrywood) Code d'accès international: 00 Code du pays: 353 Code de la ville: 1 Codes de zone, Numéro local, et Numéros gratuits Site Web: support.euro.dell.com E-mail: dell_direct_support@dell.
Pays (Ville) Nom du département ou zone du Code d'accès service, site web et adresse einternational Code du pays mail Indicatif de la ville Italie (Milan) Code d'accès international: 00 Codes de zone, Numéro local, et Numéros gratuits Site Web: support.euro.dell.
Pays (Ville) Nom du département ou zone du Code d'accès service, site web et adresse einternational Code du pays mail Indicatif de la ville Codes de zone, Numéro local, et Numéros gratuits Assistance matérielle et garantie à l'extérieur du Japon (Dell Precision, OptiPlex et Latitude) 81-44-556-3894 Assistance matérielle et garantie (PDA, projecteurs, imprimantes, routeurs) numéro gratuit : 0120-981-690 Assistance matérielle et garantie à l'extérieur du Japon (PDA, projecteurs, imprimantes, routeurs)
Pays (Ville) Nom du département ou zone du Code d'accès service, site web et adresse einternational Code du pays mail Indicatif de la ville Codes de zone, Numéro local, et Numéros gratuits Corée (Séoul) E-mail: krsupport@dell.
Pays (Ville) Nom du département ou zone du Code d'accès service, site web et adresse einternational Code du pays mail Indicatif de la ville Codes de zone, Numéro local, et Numéros gratuits Macao numéro gratuit: 0800 105 Code du pays: 853 Assistance matérielle et garantie Service Clientèle (Xiamen, Chine) 34 160 910 Ventes Transaction (Xiamen, Chine) 29 693 115 Malaisie (Penang) Site Web: support.ap.dell.
Pays (Ville) Nom du département ou zone du Code d'accès service, site web et adresse einternational Code du pays mail Indicatif de la ville Mexique Code d'accès international: 00 Code du pays: 52 Assistance matérielle et garantie clientèle Ventes Codes de zone, Numéro local, et Numéros gratuits 001-877-384-8979 ou 001-877-2693383 50-81-8800 ou 01-800-888-3355 Service clientèle 001-877-384-8979 ou 001-877-2693383 Principal 50-81-8800 ou 01-800-888-3355 Montserrat Assistance générale numéro gratuit:
Pays (Ville) Nom du département ou zone du Code d'accès service, site web et adresse einternational Code du pays mail Indicatif de la ville Pays-Bas (Amsterdam) Code d'accès international: 00 Code du pays: 31 Code de la ville: 20 Codes de zone, Numéro local, et Numéros gratuits Site Web: support.euro.dell.
Pays (Ville) Nom du département ou zone du Code d'accès service, site web et adresse einternational Code du pays mail Indicatif de la ville Norvège (Lysaker) Code d'accès international: 00 Code du pays: 47 Codes de zone, Numéro local, et Numéros gratuits Site Web: support.euro.dell.
Pays (Ville) Nom du département ou zone du Code d'accès service, site web et adresse einternational Code du pays mail Indicatif de la ville Portugal Code d'accès international: 00 Code du pays: 351 Codes de zone, Numéro local, et Numéros gratuits Site Web: support.euro.dell.com Assistance matérielle et garantie Soin à la clientèle Ventes Télécopie 707200149 800 300 413 800 300 410 ou 800 300 411 ou 800 300 412 ou 21 422 07 10 21 424 01 12 Porto Rico Assistance générale 1-800-805-7545 St.
Pays (Ville) Nom du département ou zone du Code d'accès service, site web et adresse einternational Code du pays mail Indicatif de la ville Codes de zone, Numéro local, et Numéros gratuits Singapour (Singapour) Site Web: support.ap.dell.
Pays (Ville) Nom du département ou zone du Code d'accès service, site web et adresse einternational Code du pays mail Indicatif de la ville Codes de zone, Numéro local, et Numéros gratuits Afrique du Sud (Johannesburg) Site Web: support.euro.dell.com Code d'accès international: E-mail: dell_za_support@dell.
Pays (Ville) Nom du département ou zone du Code d'accès service, site web et adresse einternational Code du pays mail Indicatif de la ville Suède (Upplands Vasby) Site Web: support.euro.dell.
Pays (Ville) Nom du département ou zone du Code d'accès service, site web et adresse einternational Code du pays mail Indicatif de la ville Suisse (Genève)) Code d'accès international: 00 Code du pays: 41 Code de la ville: 22 Codes de zone, Numéro local, et Numéros gratuits Site Web: support.euro.dell.com E-mail: Tech_support_central_Europe @dell.
Pays (Ville) Nom du département ou zone du Code d'accès service, site web et adresse einternational Code du pays mail Indicatif de la ville Taïwan Site Web: support.ap.dell.com Code d'accès international: 002 E-mail: ap_support@dell.
Pays (Ville) Nom du département ou zone du Code d'accès service, site web et adresse einternational Code du pays mail Indicatif de la ville Codes de zone, Numéro local, et Numéros gratuits Thaïlande Site Web: support.ap.dell.
Pays (Ville) Nom du département ou zone du Code d'accès service, site web et adresse einternational Code du pays mail Indicatif de la ville R.U. (Bracknell) Code d'accès international: 00 Code du pays: 44 Code de la ville: 1344 76 Contacter Dell Codes de zone, Numéro local, et Numéros gratuits Site Web: support.euro.dell.com Site web de Soin à la clientèle : support.euro.dell.com/uk/en/ECare/Form/Home.asp E-mail: dell_direct_support@dell.
Pays (Ville) Nom du département ou zone du Code d'accès service, site web et adresse einternational Code du pays mail Indicatif de la ville Uruguay Codes de zone, Numéro local, et Numéros gratuits Soin à la clientèle comptes préférés (500–5000 employés) 0870 906 0010 Soin à la clientèle gouvernement central 01344 373 193 Soin à la clientèle de gouvernement local et éducation 01344 373 199 Soin à la clientèle de santé 01344 373 194 Ventes Particulier et petite entreprise 0870 907 4000 Ventes du
Pays (Ville) Nom du département ou zone du Code d'accès service, site web et adresse einternational Code du pays mail Indicatif de la ville U.S.A.
Pays (Ville) Nom du département ou zone du Code d'accès service, site web et adresse einternational Code du pays mail Indicatif de la ville Services Financiers (Comptes préférés de Dell [DPA]) Codes de zone, Numéro local, et Numéros gratuits numéro gratuit :1800-283-2210 Commerce Service clientèle et assistance numéro gratuit :1800-456-3355 Clients du programme d'achat des employés (EPP) numéro gratuit :1800-695-8133 Assistance pour imprimantes et projecteurs numéro gratuit :1877-459-7298 Publique (
Pays (Ville) Nom du département ou zone du Code d'accès service, site web et adresse einternational Code du pays mail Indicatif de la ville Codes de zone, Numéro local, et Numéros gratuits U.S.
Appendice : notices de réglementation Notices de la FCC (U.S. uniquement) La plupart des systèmes informatiques de Dell sont classés par la FCC (Federal Communications Commission [Commission fédérale des communications]) en appareils numériques de Classe B.
www.dell.com | support.dell.com interférences ne se produiront pas dans une installation particulière. S'il s'avérait que cet équipement génère des interférences nuisibles aux réceptions de radio ou de télévision, ce qui peut être vérifié en allumant et en éteignant l'équipement, vous êtes encouragé à essayer de corriger les interférences à l'aide de l'une ou de plusieurs des mesures suivantes : • Réorientez ou déplacez l'antenne de réception. • Eloignez le matériel du récepteur.
Glossaire Lumens ANSI — Un standard pour mesurer la sortie de lumière, utilisé pour comparer les projecteurs. Format de l'image—Le format d'image le plus populaire est 4:3 (4 par 3). Les premiers formats vidéo de télévisions et d'ordinateur étaient un format d'image de 4:3, ce qui signifie que la largeur de l'image est de 4/3 de fois la hauteur. Rétroéclairage (Backlight)—Se rapporte à la télécommande ou au panneau de contrôle du projecteur, qui a des boutons et des contrôles illuminés.
www.dell.com | support.dell.com XGA compressé — Se trouve sur les projecteurs SVGA, la gestion de XGA compressé permet à ces projecteurs de gérer jusqu'à la résolution de 1024x768 XGA. Apport de contraste— Plage des valeurs claires et foncées dans une image, ou le rapport entre leurs valeurs maximum et minimum.
Correction trapézoïdale — Dispositif qui corrigera une image par rapport à la déformations (habituellement un effet de sommet large et de base étroite) d'une image projetée causé par l'angle incorrect du projecteur par rapport à l'écran. Pointeur laser — Un petit pointeur de la taille d'un stylo ou d'un cigare contenant une petit laser alimenté par pile, pouvant projeter un petit rayon de lumière de haute intensité, rouge (habituellement) qui est immédiatement très visible à l'écran.
www.dell.com | support.dell.com SECAM— Un standard français et international d'émission pour la vidéo et la projection. Résolution supérieure à NTSC. SVGA— Super Video Graphics Array— Comptage de pixels de 800 x 600. SXGA— Super Ultra Graphics Array,—Comptage de pixels de 1280 x 1024. UXGA— Ultra Extended Graphics Array—Comptage de pixels de 1600 x 1200. VGA— Video Graphics Array—Comptage de pixels de 640 x 480. XGA— Extra Video Graphics Array— Comptage de pixels de 1024 x 768.
Index A Affichage à l'écran 23 AFFICHAGE (en Mode PC) 27 AFFICHAGE (en Mode Vidéo) 28 IMAGE (en Mode PC) 25 IMAGE (en Mode Vidéo) 26 LAMPE 28 LANGUE 29 Menu Principal 23 Réglage 24 Réglage auto 24 Sélection d’entrée 23 Affichage à l’écran Préférences 30 Allumer/éteindre le projecteur Allumer le projecteur 15 Extinction du projecteur 15 Connexion à l'aide d'un câble composant 13 Connexion à l'aide d'un câble composite 12 Connexion à l'aide d'un câble S-video 11 Cordon d'alimentation 10, 11, 12, 13, 14 Conta
Connecteur RS232 9 Connecteur S-vidéo 9 Connecteur vidéo composite 9 Encoche de sécurité Kensington 9 Sortie VGA (prise en boucle du moniteur) 9 Dimensions 42 Distance de projection 41 Environnement 42 Fréquence H. 41 Fréquence V.
Proyector Dell™ 2400MP Manual del propietario w w w. d e l l . c o m | s u p p o r t . d e l l .
Notas, avisos y precauciones NOTA:Una NOTA indica información importante que le ayuda a hacer un mejor uso de su proyector. AVISO: Un AVISO indica un daño potencial para el hardware o la pérdida de datos y ofrece información acerca de cómo evitar el problema. PRECAUCIÓN:Una PRECAUCIÓN indica posibles daños para el dispositivo, lesiones personales o muerte. ____________________ La información de este documento está sujeta a cambios sin previo aviso. © 2006 Dell Inc. Todos los derechos reservados.
Tabla de contenidos 1 Su proyector Dell Acerca de su proyector . 2 Conexión del proyector Conexión a la computadora . . . . . . . . . . . . . . . 7 . . . . . . . . . . . . . . 9 . . . . . . . . . . . . . . . 10 Conexión a un reproductor de DVD . . . . . . . . . . . Conexión de un reproductor de DVD con un cable S-video . . . . . . . . . . . . . . . . 11 . . . . 11 Conexión de un reproductor con un cable compuesto . . . . . . . . . . . . . . . . . . . . .
Uso del panel de control Uso del control remoto . . . . . . . . . . . . . . . . 19 . . . . . . . . . . . . . . . . . 21 Uso del menú en pantalla Menú principal . . . . . . . . . . . . . . . . 23 . . . . . . . . . . . . . . . . . . . 23 Selecc. entrada . . . . . . . . . . . . . . . . . . . Ajuste Automático Configurar . . . . . . . . . . . . . . . . . 24 . . . . . . . . . . . . . . . . . . . . . 24 IMAGEN (en Modo PC) . . . . . . . . . . . . . . . . . . . . . . . . . . . .
1 Su proyector Dell El proyector incluye todos los elementos que se muestran a continuación. Asegúrese de tenerlos todos y comuníquese con Dell en caso de que algo falte.
Contenido del paquete (continuación) Cable RCA a Audio de 1,8 m Cable de 1,8 m de mini pin a mini pin Pilas (2) Control remoto Documentación Maletín de transporte 6 Su proyector Dell
Acerca de su proyector 1 Panel de control 2 Botón del elevador 3 Receptor del control remoto 4 Lente 5 Anillo de enfoque 6 Lengüeta de zoom Su proyector Dell 7
8 Su proyector Dell
Conexión del proyector 1 Receptor IR 2 Conector de entrada VGA (D-sub) 3 Salida VGA (ciclo monitor) 4 Conector remoto USB 5 Conector de salida de audio 6 Conector RS232 7 Conector del cable de alimentación 8 Conector de entrada de audio 9 Conector de video compuesto 10 Conector para S-video 11 Agujero de bloqueo Kensington Conexión del proyector 2 9
Conexión a la computadora 1 Cable de alimentación 2 Cable D-sub a D-sub 3 Cable USB a USB 10 Conexión del proyector
Conexión a un reproductor de DVD Conexión de un reproductor de DVD con un cable S-video 1 Cable de alimentación 2 Cable S-video Conexión del proyector 11
Conexión de un reproductor con un cable compuesto 1 Cable de alimentación 2 Cable de video compuesto 12 Conexión del proyector
Conexión de un reproductor con un cable componente 1 Cable de alimentación 2 Cable D-sub a YPbPr Conexión del proyector 13
Opciones de instalación profesional: Conectar una computadora con un cable RS232 1 Cable de alimentación 2 Cable RS232 14 Conexión del proyector
3 Uso del proyector Encendido del proyector NOTA:Encienda el proyector antes de activar el dispositivo fuente. La luz del botón de alimentación parpadea de color azul hasta que lo pulsa. 1 Retire la tapa de la lente. 2 Conecte el cable de alimentación y los cables de señal correspondientes. Para obtener información acerca de la conexión del proyector, consulte "Conexión del proyector" en la página 9.
NOTA:Si pulsa el botón de alimentación mientras el proyector está funcionando, en la pantalla aparece el mensaje "Power Off the Lamp?" (¿Apagar lámpara?). Para borrar el mensaje, pulse cualquier botón del panel de control o simplemente ignórelo y desaparecerá después de 5 segundos. Ajuste de la imagen proyectada Aumento de la altura del proyector 1 Mantenga pulsado el botón del elevador.
Ajuste del enfoque y zoom del proyector PRECAUCIÓN:Para evitar daños en el proyector, asegúrese de que la lente de zoom y el pie elevador estén completamente retraídos antes de trasladar o colocar el proyector en su maleta de transporte. 1 Gire la lengüeta de zoom para alejar o acercar la imagen. 2 Gire el anillo de enfoque hasta que la imagen se vea claramente. El proyector enfoca a distancias desde 3,9 a 39,4 pies (1,2 a 12 m).
Ajuste del tamaño de la imagen de proyección 18 Uso del proyector
Pantalla (Diagonal) Tamaño de pantalla Máx. 29.3" (74.4cm) 82.9" (210.6cm) 134.1" (340.6cm) 187.7" (476.8cm) 238.9" (606.8cm) 292.5" (743.0cm) Mín. 24.4" (62.0cm) 69.1" (175.5cm) 111.7" (283.7cm) 156.4" (397.3cm) 199.1" (505.7cm) 243.8" (619.3cm) Máx. (ancho x alto) 23,4"X17,6" 66,3"X49,7" 107.3" X 80.4" 150,2"X112,6" 191.1" X 143.3" 234.0" X 175.5" (59.4cm X 44.7cm) (168.4cm X 126.2cm) (272.5cm X 204.2cm) (381.5cm X 286.0cm) (485.4cm X 364.0cm) (594.4cmX 445.8cm) 19.5" X 14.
3 Ajuste de clave Pulse para ajustar la distorsión de la imagen causada al inclinar el proyector (±40 grados). 4 Resinc Pulse para sincronizar el proyector con la fuente de entrada. La función de Resinc no funciona mientras se muestra el menú en pantalla. 5 Menú Pulse para activar el menú en pantalla (OSD, Onscreen display). Use las teclas de dirección y el botón Menú para navegar a través del menú en pantalla.
Uso del control remoto 1 Alimentación 2 Enciende y apaga el proyector. Para obtener más información, consulte "Encendido del proyector" en la página 15 y "Apagado del proyector" en la página 15. Pulse para ajustar los valores del menú en pantalla. 3 Botón Abajo Pulse para seleccionar elementos en el menú en pantalla. 4 Silencio Pulse para silenciar o activar el sonido del altavoz del proyector. 5 Volumen Pulse para aumentar el volumen.
6 Página Pulse para ir a la página anterior. 7 Página Pulse para ir a la página siguiente. 8 Modo Video El Microproyector Dell 2400MP cuenta con configuraciones predefinidas optimizadas para la visualización de datos (gráficos de PC) o de video (películas, juegos, etc.). Pulse el botón Modo Video para alternar entre Modo PC, Modo Pelíc, Modo Juego, sRGB o Modo PERSONAL (donde el usuario puede configurar y guardar sus ajustes preferidos).
Uso del menú en pantalla El proyector tiene un menú en pantalla multilingüe que puede mostrarse con o sin una fuente de entrada. En el Menú principal, pulse o para navegar a través de las fichas. Pulse el botón Aceptar del panel de control o del control remoto para seleccionar un submenú. En el submenú, pulse o para seleccionar un elemento. Al seleccionarlo, el elemento cambia de color a gris oscuro. Use o del panel de control o del control remoto para realizar ajustes a un valor.
S-VIDEO—Pulse ACEPTAR para detectar la señal S-Video. VIDEO COM.—Pulse ACEPTAR para detectar la señal de video compuesto. Ajuste Automático Seleccione para mostrar la información "Ajuste automático en curso...". Configurar CORREGIR DIST. H.—Ajuste la distorsión de la imagen causada al cambiar la orientación horizontal del proyector. CORREGIR DIST. V.—Ajuste la distorsión de la imagen causada por la inclinación del proyector. CORREGIR DIST.
– Cable compuesto • 16:9 — La fuente de escala se modifica para ajustarse al ancho de la pantalla. • 4:3 — La fuente de entrada se modifica para ajustarse a la pantalla Use la relación de aspecto 16:9 ó 4:3 si está usando uno de los siguientes elementos: – Computadora con resolución superior a XGA – Cable componente (1080i o 720p) INFORM. PROYECTOR—Pulse para mostrar el nombre del modelo, la resolución actual y el número de serie del proyector (PPID#).
IMAGEN (en Modo Video) BRILLO—Use y para ajustar el brillo de la imagen. y CONTRASTE—Use para controlar el grado de diferencia entre las partes más brillantes y más oscuras de la imagen. Al ajustar el contraste, se modifica la cantidad de blanco y negro de la imagen. TEMP. COLOR—Ajuste la temperatura del color. Mientras más alta es la temperatura, más azul aparece la imagen; mientras más baja es la temperatura, más roja aparece la imagen. El modo de usuario activa los valores en el menú “Config. Color”.
PANTALLA (en Modo PC) MODO VIDEO—Seleccione un modo para optimizar cómo se usará el proyector: PC, MOVIE, sRGB (ofrece una representación del color más precisa), JUEGO , y PERSONAL (ajusta su configuración preferida). Si ajusta la configuración de Intensidad blanco o Degamma, el proyector cambiará automáticamente a PERSONAL. TIPO DE SEÑAL—Selecciona manualmente el tipo de señal RGB, YCbCr, YPbPr.
PANTALLA (en Modo Video) cambiará automáticamente a PERSONAL. MODO VIDEO—Seleccione un modo para optimizar cómo se usará el proyector: PC, MOVIE, sRGB (ofrece una representación del color más precisa), JUEGO , y PERSONAL (ajusta su configuración preferida). Si ajusta la configuración de Intensidad blanco o Degamma, el proyector TIPO DE SEÑAL—Selecciona manualmente el tipo de señal RGB, YCbCr, YPbPr.
funcionamiento más silencioso y una luminancia menor de salida en la pantalla. Seleccione DES para utilizar el proyector al nivel de consumo normal (260 vatios). REINICIAR LÁMP.—Luego de instalar una lámpara nueva, seleccione Sí para restablecer el temporizador de la lámpara.
Preferencias para disminuir el volumen y para aumentarlo. VOLUMEN—Pulse SILENCIO—Le permite silenciar el sonido. PANTALLA PERSONAL.— Presione Entrar y aparecerá un menú, luego seleccione "SÍ". El proyector capturará la imagen en pantalla como "Mi logotipo personalizado". Esta pantalla reemplazará a todas las pantallas originales que contengan el logotipo de Dell en la pantalla emergente. BLOQUEAR MENÚ—Seleccione ACT para activar Bloquear menú y ocultar el menú OSD.
desactivada por defecto. Puede activarla usando el menú Clave. Esta clave de seguridad estará activada la próxima vez que encienda el proyector. Si activa esta característica, se le pedirá que escriba la clave del proyector tras encenderlo: 1 petición de introducción de clave la 1ª vez: a Vaya al menú Preferencias, presione Aceptar y luego seleccione Clave para ACTIVAR la configuración de la contraseña.
2 c Para confirmar, escriba de nuevo la clave. d Si la verificación de la clave tiene éxito, puede continuar accediendo a las funciones del proyector y sus utilidades. Si la clave introducida es incorrecta, tendrá otras 2 oportunidades. Tras tres intentos fallidos, el proyector se apagará automáticamente. NOTA:Si ha olvidado su clave, contacte con su distribuidor o personal de servicio cualificado. 3 Para cancelar la función de clave, seleccione DES e introduzca la clave para desactivar la función.
Solución de problemas del proyector 4 Si experimenta problemas con el proyector, consulte las siguientes sugerencias para solucionarlos. Si el problema persiste, comuníquese con Dell. Problema Solución posible No aparece la imagen en la pantalla • Compruebe que haya quitado la tapa de la lente y que el proyector esté encendido. • Asegúrese de que el puerto de gráficos externos esté activado. Si está usando una computadora portátil Dell, pulse (Fn+F8).
Problema (continuación) Imagen parcial, desplazada o incorrecta Solución posible (continuación) 1 Pulse el botón Resinc del control remoto o del panel de control. 2 Si está usando una computadora portátil Dell, ajuste la resolución de la computadora en XGA (1024 x 768): a Haga clic con el botón derecho en la parte no utilizada del escritorio de Windows, haga clic en Propiedades y luego seleccione la ficha Configuración.
Problema (continuación) La imagen está desenfocada Solución posible (continuación) 1 Ajuste el anillo de enfoque en las lentes del proyector. 2 Asegúrese de que la pantalla de proyección esté dentro de la distancia del proyector requerida (3,9 pies [1,2 m] a 39,4 pies [12 m]). La imagen aparece estirada en el modo DVD 16:9 El mismo proyector detectará automáticamente el DVD 16:9 y ajustará la relación de aspecto para pantalla completa con la configuración por defecto de 4:3 (buzón).
Problema (continuación) Solución posible (continuación) La luz de LAMP parpadea en naranja y la luz de Power está fija en azul Si la luz de LAMP parpadea en naranja y la luz de Power está fija en azul, el sistema ha fallado y el proyector se apagará automáticamente. Desenchufe el cable de alimentación tras 3 minutos y luego vuelva a encender la pantalla. Si el problema persiste, contacte con Dell. La luz de TEMP está fija en naranja y la luz de Power está fija en azul La lámpara se ha sobrecalentado.
Autodiagnóstico de video El Proyector Dell 2400MP incluye una prueba de autodiagnóstico de la pantalla de video del proyector (para Video, S-video, Componente-i). Use esta avanzada función para realizar pruebas de autodiagnóstico preliminares de su proyector cuando experimente problemas de visualización de video. 1 Luego de encender el proyector, pulse simultáneamente los botones "+" y "-" en el panel de control y suéltelos cuando la pantalla se ponga en blanco.
5 Tome la lámpara por su asa de metal. NOTA:Es posible que Dell requiera que las lámparas reemplazadas bajo garantía sean devueltas a Dell. De lo contrario, comuníquese con su agencia local de eliminación de desperdicios para conocer el lugar de depósito más cercano. 6 Coloque la nueva lámpara. 7 Apriete los 2 tornillos que sujetan la lámpara. 8 Vuelva a colocar la tapa de la lámpara y apriete los 2 tornillos.
5 Especificaciones 5 Válvula de luz Tecnología de un solo chip de 0.7" XGA LVDS (señalización diferencial de bajo voltaje) Brillo 3000 ANSI lúmenes (máx.
Consumo de energía 325 vatios típica, 285 vatios en modo económico Audio 1 altavoz, 2 vatios RMS Nivel de ruido 36 dB(A) en modo Completo, 33 dB(A) en modo económico Peso <5,5 libras (2,4 kg) Dimensiones (Ancho x Alto x Fondo) Externas 10,8 x 8,3 x 4 ± 0,04 pulgadas (273,7 x 212 x 101 ± 1 mm) Ambiente Temperatura de funcionamiento: 5oC - 35oC (41oF- 95oF) Humedad: 80% máximo Temperatura de almacenamiento: -20oC to 60oC (-4oF a 140oF) Humedad: 80% máximo Regulación FCC, CE, VCCI, UL, cUL, NemkoG
Asignación de contactos RS232 Protocolo RS232 • Configuración de la comunicación Configuración de la conexión Valor Tasa de baudios: 19200 Bits de datos: 8 Paridad Ninguno Bits de parada 1 • Tipos de comandos Para abrir el menú OSD y ajustar la configuración.
Nota: Cuando el proyector está en el modo suspendido, el proyector no envía respuesta de reconocimiento (NACK). • Respuesta del proyector de horas de lámpara: Byte0, Byte1, Byte2, Byte3 Byte0: 0x00 (Éxito) Byte1: 0x2F (la cabecera de las horas de lámpara) Byte2: LSB (Hex) Byte3: MSB (Hex) Ejemplo: 800 (3x256+2x16=800) horas --> 0x00, 0x2F, 0x20, 0x03 • Respuesta de la versión del firmware: Versión del firmware: Código ASCII de 4 Bytes: "V*.*" V: Versión *: 0-9 • 42 Ejemplo: Version 1.5 --> "V1.
Lista de comandos de control Cabeza (WORD) Código de dirección (BYTE) Tamaño del payload (WORD) CRC16 para todo el paquete (WORD) Identificad or MsG (WORD) Tamaño MsG (WORD) Código del comando (BYTE) Descripción del comando 0xefbe 0x10 0x0005 0xffc6 0xbfc7 0x7e07 0x3fc5 0xfe05 0xbe04 0x7fc4 0x3fc0 0xfe00 0xbe01 0x7fc1 0x3e03 0xffc3 0x7e02 0x3fca 0xfe0a 0xbe0b 0x7fcb 0x3e09 0x7e08 0x3e0c 0xffcc 0xbe1f 0x7fdf 0xbfd9 0x7e19 0x3fdb 0xfe1b 0xbe1a 0x7fda 0x3e12 0x3ff6 0x7e46 0x1111 0x0001 0x01 0x02
Modos de compatibilidad Modo Resolución VGA (ANALÓGICO) Frecuencia V. (Hz) Frecuencia H. (KHz) 640X350 70 31.5 VGA 640X350 85 37.9 VGA 640X400 85 37.9 VGA 640X480 60 31.5 VGA 640X480 72 37.9 VGA 640X480 75 37.5 VGA 640X480 85 43.3 VGA 720X400 70 31.5 VGA 720X400 85 37.9 SVGA 800X600 56 35.2 SVGA 800X600 60 37.9 SVGA 800X600 72 48.1 SVGA 800X600 75 46.9 SVGA 800X600 85 53.7 XGA 1024X768 60 48.4 XGA 1024X768 70 56.5 XGA 1024X768 75 60.
Cómo ponerse en contacto con Dell Para contactar con Dell electrónicamente, puede acceder a las siguientes páginas web: • www.dell.com • support.dell.com (soporte) Para direcciones web específicas en su país, encuentre la sección del país apropiado en la siguiente tabla. NOTA:Los números gratuitos son para uso dentro del país en el que aparecen listados.
País (Ciudad) Código de acceso internacional Código del país Código del país Nombre del departamento o área del servicio, Sitio web y dirección e-mail Códigos de área, Números locales y Números sin cargo Argentina (Buenos Aires) Sitio web: www.dell.com.ar Código de acceso internacional: 00 E-mail: us_latin_services@dell.com Código del país: 54 E-mail para computadoras de escritorio y portátiles: la-techsupport@dell.
País (Ciudad) Código de acceso internacional Código del país Código del país Nombre del departamento o área del servicio, Sitio web y dirección e-mail Austria (Viena) Sitio web: support.euro.dell.com Código de acceso internacional: 900 Código del país: 43 Código de la ciudad: 1 Códigos de área, Números locales y Números sin cargo E-mail: tech_support_central_europe@ dell.
País (Ciudad) Código de acceso internacional Código del país Código del país Nombre del departamento o área del servicio, Sitio web y dirección e-mail Bélgica (Bruselas) Sitio web: support.euro.dell.
País (Ciudad) Código de acceso internacional Código del país Código del país Nombre del departamento o área del servicio, Sitio web y dirección e-mail Brunei Soporte de hardware y garantía (Penang, Malasia) 604 633 4966 Servicio al cliente (Penang, Malasia) 604 633 4888 Ventas de transacción (Penang, Malasia) 604 633 4955 Código del país: 673 Códigos de área, Números locales y Números sin cargo Cómo ponerse en contacto con Dell 49
País (Ciudad) Código de acceso internacional Código del país Código del país Nombre del departamento o área del servicio, Sitio web y dirección e-mail Canadá (North York, Ontario) Estado de su orden online: www.dell.
País (Ciudad) Código de acceso internacional Código del país Código del país Nombre del departamento o área del servicio, Sitio web y dirección e-mail Chile (Santiago) Soporte de ventas y al cliente Código del país:56 Códigos de área, Números locales y Números sin cargo sin cargo: 1230-0204823 Código de la ciudad: 2 China (Xiamen) Código del país: 86 Código de la ciudad: 592 Sitio web para soporte de hardware y garantía: support.dell.com.
País (Ciudad) Código de acceso internacional Código del país Código del país Nombre del departamento o área del servicio, Sitio web y dirección e-mail Códigos de área, Números locales y Números sin cargo Pequeñas y micro empresas sin cargo: 800 858 2222 División de cuentas preferentes sin cargo: 800 858 2557 Grandes cuentas corporativas GCP sin cargo: 800 858 2055 Grandes cuentas corporativas cuentas claves sin cargo: 800 858 2628 Grandes cuentas corporativas Norte sin cargo: 800 858 2999 Grand
País (Ciudad) Código de acceso internacional Código del país Código del país Nombre del departamento o área del servicio, Sitio web y dirección e-mail Códigos de área, Números locales y Números sin cargo República Checa (Praga) Sitio web: support.euro.dell.com Código de acceso internacional: 00 E-mail: czech_dell@dell.
País (Ciudad) Código de acceso internacional Código del país Código del país Nombre del departamento o área del servicio, Sitio web y dirección e-mail República Dominicana Soporte general 1-800-148-0530 Ecuador Soporte general sin cargo: 999 -119 El Salvador Soporte general 01-899-753-0777 Finlandia (Helsinki) Sitio web: support.euro.dell.
País (Ciudad) Código de acceso internacional Código del país Código del país Nombre del departamento o área del servicio, Sitio web y dirección e-mail Francia (Paris) (Montpellier) Sitio web: support.euro.dell.
País (Ciudad) Código de acceso internacional Código del país Código del país Nombre del departamento o área del servicio, Sitio web y dirección e-mail Alemania (Langen) Sitio web: support.euro.dell.com Código de acceso internacional: 00 Código del país: 49 Código de la ciudad: 6103 E-mail: tech_support_central_europe@ dell.
País (Ciudad) Código de acceso internacional Código del país Código del país Nombre del departamento o área del servicio, Sitio web y dirección e-mail Grecia Sitio web: support.euro.dell.
País (Ciudad) Código de acceso internacional Código del país Código del país Nombre del departamento o área del servicio, Sitio web y dirección e-mail Hong Kong Sitio web: support.ap.dell.com Código de acceso internacional: 001 E-mail para soporte de hardware y garantía: apsupport@dell.
País (Ciudad) Código de acceso internacional Código del país Código del país Nombre del departamento o área del servicio, Sitio web y dirección e-mail Irlanda (Cherrywood) Sitio web: support.euro.dell.com Código de acceso internacional: 00 Código del país: 353 Código de la ciudad: 1 Códigos de área, Números locales y Números sin cargo E-mail: dell_direct_support@dell.
País (Ciudad) Código de acceso internacional Código del país Código del país Nombre del departamento o área del servicio, Sitio web y dirección e-mail Italia (Milán) Sitio web: support.euro.dell.
País (Ciudad) Código de acceso internacional Código del país Código del país Nombre del departamento o área del servicio, Sitio web y dirección e-mail Soporte de hardware y garantía fuera de Japón (Dell Precision, OptiPlex, y Latitude) Códigos de área, Números locales y Números sin cargo 81-44-556-3894 Soporte de hardware y garantía (PDAs, proyectores, impresoras, routers) sin cargo: 0120-981690 Soporte de hardware y garantía fuera de Japón (PDAs, proyectores, impresoras, routers) 81-44-556-3468 Se
País (Ciudad) Código de acceso internacional Código del país Código del país Nombre del departamento o área del servicio, Sitio web y dirección e-mail Corea (Seúl) E-mail: ap_support@dell.
País (Ciudad) Código de acceso internacional Código del país Código del país Nombre del departamento o área del servicio, Sitio web y dirección e-mail Códigos de área, Números locales y Números sin cargo Macao Soporte para hardware y garantía sin cargo: 0800 105 Código del país: 853 Servicio al cliente (Xiamen, China) 34 160 910 Ventas de transacción (Xiamen, China) 29 693 115 Malasia (Penang) Sitio web: support.ap.dell.
País (Ciudad) Código de acceso internacional Código del país Código del país Nombre del departamento o área del servicio, Sitio web y dirección e-mail Códigos de área, Números locales y Números sin cargo México Soporte de hardware y garantía al cliente 001-877-384-8979 Código de acceso internacional: 00 Código del país: 52 Ventas o 001-877-269-3383 50-81-8800 o 01-800-888-3355 Servicio al cliente 001-877-384-8979 o 001-877-269-3383 Principal 50-81-8800 o 01-800-888-3355 Montserrat Soporte gene
País (Ciudad) Código de acceso internacional Código del país Código del país Nombre del departamento o área del servicio, Sitio web y dirección e-mail Holanda (Amsterdam) Sitio web: support.euro.dell.
País (Ciudad) Código de acceso internacional Código del país Código del país Nombre del departamento o área del servicio, Sitio web y dirección e-mail Noruega (Lysaker) Sitio web: support.euro.dell.
País (Ciudad) Código de acceso internacional Código del país Código del país Nombre del departamento o área del servicio, Sitio web y dirección e-mail Portugal Sitio web: support.euro.dell.
País (Ciudad) Código de acceso internacional Código del país Código del país Nombre del departamento o área del servicio, Sitio web y dirección e-mail Singapur (Singapur) Sitio web: support.ap.dell.
País (Ciudad) Código de acceso internacional Código del país Código del país Nombre del departamento o área del servicio, Sitio web y dirección e-mail Sud Africa (Johannesburgo) Sitio web: support.euro.dell.com Código de acceso internacional: E-mail: dell_za_support@dell.
País (Ciudad) Código de acceso internacional Código del país Código del país Nombre del departamento o área del servicio, Sitio web y dirección e-mail España (Madrid) Sitio web: support.euro.dell.
País (Ciudad) Código de acceso internacional Código del país Código del país Nombre del departamento o área del servicio, Sitio web y dirección e-mail Suecia (Upplands Vasby) Sitio web: support.euro.dell.
País (Ciudad) Código de acceso internacional Código del país Código del país Nombre del departamento o área del servicio, Sitio web y dirección e-mail Suiza (Ginebra) Sitio web: support.euro.dell.com Código de acceso internacional: 00 Código del país: 41 Código de la ciudad: 22 72 Códigos de área, Números locales y Números sin cargo E-mail: Tech_support_central_Europe @dell.
País (Ciudad) Código de acceso internacional Código del país Código del país Nombre del departamento o área del servicio, Sitio web y dirección e-mail Taiwán Sitio web: support.ap.dell.com Código de acceso internacional: 002 E-mail: ap_support@dell.
País (Ciudad) Código de acceso internacional Código del país Código del país Nombre del departamento o área del servicio, Sitio web y dirección e-mail Tailandia Sitio web: support.ap.dell.
País (Ciudad) Código de acceso internacional Código del país Código del país Nombre del departamento o área del servicio, Sitio web y dirección e-mail R.U. (Bracknell) Sitio web: support.euro.dell.com Código de acceso internacional: 00 Código del país: 44 Códigos de área, Números locales y Números sin cargo Sitio web para servicio al cliente: support.euro.dell.com/uk/en/ECare/Form/Home.asp Código de la ciudad: 1344 E-mail: dell_direct_support@dell.
País (Ciudad) Código de acceso internacional Código del país Código del país Uruguay 76 Nombre del departamento o área del servicio, Sitio web y dirección e-mail Códigos de área, Números locales y Números sin cargo Servicio al cliente de cuentas preferentes (de 500 a 5000 empleados) 0870 906 0010 Servicio al cliente del gobierno central 01344 373 193 Servicio al cliente del gobierno local y educación 01344 373 199 Servicio al cliente de salud 01344 373 194 Ventas (pequeñas y micro empresas) 08
País (Ciudad) Código de acceso internacional Código del país Código del país Nombre del departamento o área del servicio, Sitio web y dirección e-mail EE.UU.
País (Ciudad) Código de acceso internacional Código del país Código del país Nombre del departamento o área del servicio, Sitio web y dirección e-mail Servicios financieros (cuentas preferentes Dell [DPA]) Códigos de área, Números locales y Números sin cargo sin cargo: 1-800283-2210 Negocios Servicio y soporte al cliente sin cargo: 1-800456-3355 Clientes del programa de compras de empleados (EPP) sin cargo: 1-800695-8133 Soporte de impresoras y proyectores sin cargo: 1-877459-7298 Público (gobier
País (Ciudad) Código de acceso internacional Código del país Código del país Nombre del departamento o área del servicio, Sitio web y dirección e-mail Códigos de área, Números locales y Números sin cargo Fax sin cargo: 1-800727-8320 Servicios Dell para sordos, impedidos auditivos o del habla sin cargo: 1-877DELLTTY (1-877-335-5889) Islas Vírgenes de EE.UU.
80 Cómo ponerse en contacto con Dell
Apéndice: Avisos reguladores Información de la FCC (sólo para EE.UU.) La mayoría de los sistemas computacionales Dell poseen la clasificación de dispositivo digital de Clase B de la Federal Communications Commission (FCC). Para determinar la clasificación que se aplica a su sistema computacional, examine todas las etiquetas de registro de la FCC que se encuentran en los paneles inferior, lateral o posterior de su computadora, en los soportes de las tarjetas o en las tarjetas mismas.
www.dell.com | support.dell.com equipo causa una interferencia dañina a la recepción de radio o televisión, lo cual se puede determinar encendiendo y apagando el equipo, se le recomienda intentar corregir la interferencia mediante una o más de las siguientes medidas: • Cambiar la orientación o la ubicación de la antena de recepción. • Aumentar la distancia entre el equipo y el receptor. • Conectar el equipo a un tomacorriente de un circuito distinto del que está enchufado el receptor.
Glosario ANSI Lumens— Un estándar para medir la salida de luz, usada para comparar proyectores. Aspect Ratio (relación de aspecto)—La relación de aspecto más popular es 4:3 (4 por 3). Los primeros formatos de televisión y de computadoras eran en una relación de aspecto 4:3, lo que significa que el ancho de la imagen es 4/3 veces la altura. Backlit (Backlight) o luz posterior—Se refiere a un control remoto o panel de control de un proyector, que tiene botones y controles iluminados.
www.dell.com | support.dell.com manejo del XGA comprimido permite a estos proyectores manejar hasta una resolución de 1024x768 XGA. Contrast Ratio o relación de contraste— Rango de valores de luz y oscuridad en una imagen, o la relación entre sus valores máximo y mínimo. Hay dos métodos usados en la industria de proyectores para medir la relación: 1 Full On/Off — mide la relación de la salida de la luz de todas las imágenes blancas (full on) y la salida de la luz de todas las imagenes negras (full off).
una imagen proyectada causada por un ángulo inapropiado del proyector a la pantalla. Laser Pointer o apuntador láser— Un pequeño puntero del tamaño de una lapicera que contiene un láser alimentado por una pequeña batería, que puede proyectar un haz láser pequeño y típicamente rojo de gran intensidad que es muy visible inmediatamente sobre la pantalla.
www.dell.com | support.dell.com SECAM— Un estándar francés e internacional para transmisión de video y broadcasting. Mayor resolución que el NTSC. SVGA— Super Video Graphics Array— 800 x 600 pixels. SXGA— Super Ultra Graphics Array— 1280 x 1024 pixels. UXGA— Ultra Extended Graphics Array—1600 x 1200 pixels. VGA— Video Graphics Array—640 x 480 pixels. XGA— Extra Video Graphics Array— 1024 x 768 pixels.
Índice A Ajuste de la imagen proyectada 16 Ajuste de la altura del proyector 16 bajar el proyector Botón del elevador 16 Pie elevador 16 Rueda de ajuste de la inclinación 16 Ajuste del enfoque y zoom del proyector 17 Anillo de enfoque 17 Lengüeta de zoom 17 Ajuste del tamaño de la imagen de proyección 37 C Cambio de la lámpara 37 Conectar una computadora con un cable RS232 14 Conexión del proyector A la computadora 10 Cable de alimentación 10, 11, 12, 13, 14 Cable de video compuesto 12 Cable D-sub a D-sub
Lámpara 39 Lente de proyección 39 Modos de compatibilidad 44 Nivel de ruido 40 Número de píxeles 39 Peso 40 Protocolo RS232 41 Regulación 40 Tamaño de la pantalla de proyección 39 Tasa de contraste 39 Uniformidad 39 Válvula de luz 39 Velocidad de la rueda del color 39 Puertos de conexión Agujero de bloqueo Kensington 9 Conector de entrada de audio 9 Conector de entrada VGA (D-sub) 9 Conector de salida de audio 9 Conector de video compuesto 9 Conector del cable de alimentación 9 Conector para S-video 9 Cone
Projetor Dell™ 2400MP Manual do Proprietário w w w. d e l l . c o m | s u p p o r t . d e l l .
Notas, avisos e precauções NOTA: Uma NOTA indica informações importantes que o ajudam a usar melhor o seu projetor. AVISO: Um AVISO indica risco de dano ao hardware ou perda de dados, e o informa sobre como evitar o problema. CUIDADO: Uma PRECAUÇÃO indica o risco de danos à propriedade, danos pessoais ou morte. ____________________ As informações contidas neste documento estão sujeitas a alteração sem prévio aviso. © 2006 Dell Inc. Todos os direitos reservados.
Conteúdo 1 O projetor Dell Sobre seu projetor 2 . . . . . . . . . . . . . . . . . . Como conectar o projetor Conexão com computador 7 . . . . . . . . . . . . 9 . . . . . . . . . . . . . . . . 10 Conexão com aparelho de DVD . . . . . . . . . . . . . 11 . 11 Conexão de aparelho de DVD com cabo composto 12 Conexão do aparelho de DVD com um cabo de componente . . . . . . . . . . . . . . . . . . . . 13 . . . . . . . . . 14 . . . . . . . . . . . . . . 15 . . . . . . . . . . . . . . . . .
Como utilizar o controle remoto . Como utilizar a OSD . . . . . . . . . . . . 21 . . . . . . . . . . . . . . . . . . . 22 Main Menu (Menu principal) . . . . . . . . . . . . 23 Input Select (Inserir seleção) . . . . . . . . . . . 23 . . . . . . . . . . . . . 24 . . . . . . . . . . . . . . . . . 24 Auto-Adjust (Auto-ajuste) Set Up (Configurar) PICTURE (IMAGEM) - no Modo PC . . . . . . . . . 25 PICTURE (IMAGEM) - no Modo PC . . . . . . . . . 26 DISPLAY (EXIBIÇÃO) - no Modo PC . . . . . .
1 O projetor Dell O projetor é fornecido com todos os itens indicados abaixo. Verifique se todos os itens estão presentes e entre em contato com a Dell se algum estiver faltando.
Conteúdo da embalagem (continua) Cabo RCA para áudio de 1,8 m Cabo mini pin para mini pin de 1,8 m Pilhas (2) Controle remoto Documentação Caixa para transporte 6 O projetor Dell
Sobre seu projetor 1 Painel de controle 2 Botão de elevação 3 Receptor do controle remoto 4 Lente 5 Anel de foco 6 Seletor do zoom O projetor Dell 7
8 O projetor Dell
Como conectar o projetor 1 Receptor IR 2 Conector de entrada VGA (D-sub) 3 Saída VGA (monitor tipo loop-through conexão alternativa) 4 Conector remoto USB 5 Conector de saída de áudio 6 Conector RS232 7 Conector do cabo de alimentação 8 Conector de entrada de áudio 9 Conector de vídeo composto 10 Conector S-video 11 Bloqueio Kensington (antifurto) Como conectar o projetor 2 9
Conexão com computador 1 Cabo de alimentação 2 Cabo D-sub para D-sub 3 Cabo USB para USB 10 Como conectar o projetor
Conexão com aparelho de DVD Conexão de aparelho de DVD com cabo S-video 1 Cabo de alimentação 2 Cabo S-video Como conectar o projetor 11
Conexão de aparelho de DVD com cabo composto 1 Cabo de alimentação 2 Cabo de vídeo composto 12 Como conectar o projetor
Conexão do aparelho de DVD com um cabo de componente 1 Cabo de alimentação 2 Cabo D-sub para YPbPr Como conectar o projetor 13
Opções de instalação profissional: Conexão com um computador com um cabo RS232 1 Cabo de alimentação 2 Cabo RS232 14 Como conectar o projetor
Como utilizar o projetor 3 Como ligar o projetor NOTE: Ligue o projetor antes de ligar a fonte. A luz do botão Power (Liga/Desliga) pisca em azul até ser pressionada. 1 Remova a tampa da lente. 2 Conecte o cabo de alimentação e os cabos de sinal apropriados. Para obter informações sobre como conectar o projetor, consulte "Como conectar o projetor" on page 9. 3 Pressione o botão Power (Liga/Desliga) (consulte "Como utilizar o painel de controle" on page 19 para localizar esse botão).
Como ajustar da imagem projetada Como aumentar a altura do projetor 1 Pressione o botão de elevação. 2 Eleve o projetor até o ângulo de exibição desejado e solte o botão para travar o pé de elevação na posição. 3 Use a roda de ajuste da inclinação para posicionar o ângulo de exibição. Como diminuir a altura do projetor 1 Pressione o botão de elevação. 2 Abaixe o projetor e solte o botão para travar o pé de elevação na posição.
1 Gire o seletor do zoom para aumentar e diminuir o zoom. 2 Gire o anel de foco até que a imagem fique nítida. O projetor focaliza distâncias de 1,2 a 12 m (3,9 a 39,4 pés).
Como ajustar o tamanho da imagem na projeção 18 Como utilizar o projetor
Tela (diagonal) Tamanho da tela Distância Máx. 74,4 cm (29,3 pol.) 210,6 cm (82,9 pol.) 340,6 cm (134,1 pol.) 476,8 cm (187,7 pol.) 606,8 cm (238,9 pol.) 743,0 cm (292,5 pol.) Mín. 24.4" (62,0 cm) 175,5 cm (69,1 pol.) 283,7 cm (111,7 pol.) 397,3 cm (156,4 pol.) 505,7 cm (199,1 pol.) 619,3 cm (243,8 pol.) Máx.
3 Keystone (Distorção) Pressione para ajustar a distorção da imagem causada pela inclinação do projetor (±40 graus) 4 Resync (Sincronizar) Pressione para sincronizar o projetor com a fonte de entrada. Resync (Sincronizar) não funciona se a OSD (exibição na tela) estiver ativada. 5 Menu Pressione para ativar a OSD. Use a teclas direcionais e o botão Menu para navegar na OSD. 6 Luz de aviso TEMP • A luz TEMP fixa em laranja indica que o projetor está superaquecido.
Como utilizar o controle remoto 1 Power (Liga/Desliga) Liga e desliga o projetor. Para obter mais informações, consulte "Como ligar o projetor" on page 15 e "Como desligar o projetor" on page 15. 3 Botão para baixo Pressione para selecionar os itens da OSD. 4 Mute (Sem som) Pressione para ativar ou desativar o modo Sem som do alto-falante do projetor. 5 Volume Pressione para aumentar o volume. 6 Page (Página) Pressione para voltar à página anterior.
8 Video mode (Modo de vídeo) O Micro-projetor Dell 2400MP tem configurações predefinidas otimizadas para mostrar dados (Gráficos de PC) ou vídeos (filmes, jogos, etc.). Pressione o botão Video Mode (Modo de vídeo) para alternar entre PC mode (Modo de PC), Movie mode (Modo de filme), Game Mode (Modo de jogo), sRGB ou CUSTOM mode (Modo personalizado). Este último é para que o usuário possa configurar e salvar suas configurações preferidas.
No menu principal, pressione ou para navegar entre as guias. Pressione o botão Enter no painel de controle ou no controle remoto para selecionar um submenu. No submenu, pressione ou para fazer uma seleção. Quando um item é selecionado, sua cor muda para cinza-escuro. Use ou no painel de controle ou no controle remoto para fazer ajustes em uma configuração. Para voltar ao menu principal, vá até a guia Back (Voltar) e pressione o botão Enter no painel de controle ou no controle remoto.
Auto-Adjust (Auto-ajuste) Selecione para mostrar a informação "Auto Adjustment in Progress... (Auto-ajuste em curso...)" Set Up (Configurar) H. KEYSTONE (DISTORÇÃO HORIZ.)—Ajuste a distorção da imagem causada pelo deslocamento horizontal do projetor. V. KEYSTONE (DISTORÇÃO VERT.)—Ajuste a distorção da imagem causada pela inclinação do projetor. AUTO KEYSTONE (AUTOAJUSTE DISTORÇÃO)—Ajuste automático da distorção de imagem causada pela inclinação do projetor.
• 4:3 — A escala da fonte de entrada se ajusta à tela. Aplique a proporção 16:9 ou 4:3 se você estiver usando um dos seguintes itens: – Computador com resolução maior que XGA – Cabo componente (1080i ou 720p) INFORMAÇÕES DO PROJETOR—Pressione para exibir o nome do modelo do projetor, a resolução atual e o número de série do projetor (PPID#). PICTURE (IMAGEM) - no Modo PC BRIGHTNESS (BRILHO)—Use e para ajustar o brilho da imagem.
PICTURE (IMAGEM) - no Modo PC BRIGHTNESS (BRILHO)—Use e para ajustar o brilho da imagem. CONTRAST (CONTRASTE)— e para Use controlar a diferença entre as partes mais claras e mais escuras da imagem. O ajuste do contraste altera a quantidade de preto e branco na imagem. COLOR TEMP (TEMP. DA COR)—Ajuste a temperatura da cor. Quanto mais alta a temperatura, mais azul ficará a tela; quanto mais baixa a temperatura, mais vermelha ficará a tela.
DISPLAY (EXIBIÇÃO) - no Modo PC VIDEO MODE (MODO DE VÍDEO)—Selecione um modo para otimizar a exibição de acordo com a maneira como o projetor está sendo usado: PC, MOVIE (FILME), sRGB (garante uma representação de cores mais precisa), GAME (JOGO) e CUSTOM (PERSON.) (define suas configurações preferidas). Se você ajustar as configurações White Intensity (Intensidade de branco) ou Degamma, o projetor mudará automaticamente para CUSTOM (PERSON.).
DISPLAY (EXIBIÇÃO) - no Video Modo (Modo de vídeo) VIDEO MODE (MODO DE VÍDEO)—Selecione um modo para otimizar a exibição de acordo com a maneira como o projetor está sendo usado: PC, MOVIE (FILME), sRGB (garante uma representação de cores mais precisa), GAME (JOGO) e CUSTOM (PERSON.) (define suas configurações preferidas). Se você ajustar as configurações White Intensity (Intensidade de branco) ou Degamma, o projetor mudará automaticamente para CUSTOM (PERSON.).
ECO MODE (MODO ECON)—Selecione ON para usar o projetor com um nível de energia mais baixo (230 watts), o que pode proporcionar maior vida útil à lâmpada, operação mais silenciosa e menor luminosidade na tela. Selecione OFF para operar com nível de energia normal (260 watts). LAMP RESET (REDEFINIR LÂMPADA)—Depois de instalar uma nova lâmpada, selecione Yes (Sim) para redefinir o contador da lâmpada.
Preferences (Preferências) VOLUME—Pressione diminuir o volume e para aumentar. para MUTE (SEM SOM)—Permite tirar o som. CUSTOMIZED SCREEN (TELA PERSONALIZADA)—Ao pressionar Enter irá aparecer um menu, selecione então "YES". O projetor irá capturar a imagem da tela como um "Meu Logotipo Personalizado". Essa tela irá substituir todas as telas originais que contém o logotipo Dell. O usuário pode recuperar a tela padrão selecionando "Dell Logo" na tela de seleção.
Quando a Password Protect (Proteção por Senha) está ativada (ON), a tela Password Protect (Proteção por Senha), solicitando que seja inserida uma senha, será exibida quando o plugue for conectado à tomada elétrica e o projetor for ligado. Por padrão, essa função está desativada. Você pode ativar esse recurso usando o menu Password (Senha). Esse recurso de segurança por senha será ativado da próxima vez que o projetor for ligado.
2 c Para confirmar, insira a senha novamente. d Se a verificação da senha for bem-sucedida, você poderá retomar o acesso às funções e aos utilitários do projetor. Se tiver inserido a senha errada, você terá ainda mais duas chances. Após a terceira tentativa inválida, o projetor será desligado automaticamente. NOTE: Se esquecer sua senha, entre em contato com o fornecedor ou a assistência técnica qualificada. 3 Para cancelar a função senha, selecione OFF e insira a senha para desativar a função.
TEST PATTERN (PADRÃO DE TESTE)—Selecione ON para ativar o Test Pattern (Padrão de teste) interno para autoteste de foco e resolução. Selecione OFF para desativar a função. FACTORY RESET (DEFINIÇÃO DE FÁBRICA)—Selecione ON para redefinir o projetor com as configurações padrão de fábrica. Isso inclui as configurações das fontes de computador e das fontes de vídeo.
34 Como utilizar o projetor
4 Solução de problemas do projetor Se ocorrerem problemas com o projetor, consulte as dicas para solução de problemas abaixo. Se o problema persistir, entre em contato com a Dell. Problema Possível solução Nenhuma imagem aparece na tela • Verifique se o protetor da lente foi removido e se o projetor está ligado. • Verifique se a porta gráfica externa está ativada. Se você está usando um computador portátil Dell, pressione (Fn+F8). No caso de outros computadores, consulte a documentação respectiva.
Problema (continua) Imagem parcial, girando ou exibida incorretamente Possível solução (continua) 1 Pressione o botão Resync (Sincronizar novamente) no controle remoto ou no painel de controle. 2 Se você está usando um computador portátil Dell, defina a resolução do computador como XGA (1024 x 768): a Clique com o botão direito do mouse em uma parte livre da área de trabalho do Windows, clique em Propriedades e selecione a guia Configurações.
Problema (continua) A imagem está fora de foco. Possível solução (continua) 1 Ajuste o anel de foco na lente do projetor. 2 Verifique se a tela de projeção está dentro da distância exigida pelo projetor (3,9 pés [1,2 m] a 39,4 pés [12 m]). A imagem fica distendida durante exibição de um DVD de 16:9 O projetor automaticamente detecta um DVD de 16:9 e ajusta a proporção para tela inteira com uma configuração padrão de 4:3 (caixa de correio).
Problema (continua) Possível solução (continua) A luz LAMP está piscando em laranja e a luz Power está fixa em azul. Se a luz LAMP estiver piscando em laranja e a luz Power estiver fixa em azul, houve falha no sistema e o projetor será desligado automaticamente. Desconecte o cabo de energia após 3 minutos e então ligue o monitor novamente. Se o problema persistir, entre em contato com a Dell. A luz TEMP está fixa em laranja e a luz Power está fixa em azul. A lâmpada está superaquecida.
Auto-diagnóstico para Vídeo O Projetor Dell 2400MP possui um teste de autodiagnóstico da exibição de vídeo do projetor (para Vídeo, S-vídeo, Componente-i). Use essa função avançada para fazer um autodiagnóstico preliminar do projetor se ocorrer problema de exibição no vídeo. 1 Depois de ligar o projetor, pressione os botões "+" e "-" no painel de controle simultaneamente por 3 segundos, e libere-os quando a tela ficar branca. 2 Pressione os botões "+" e "-" novamente para sair do modo de diagnóstico.
5 Puxe a lâmpada pelo punho de metal. NOTA: A Dell pode exigir que as lâmpadas trocadas que ainda estejam dentro da garantia sejam retornadas à Dell. Caso contrário, entre em contato com a agência local responsável pelo descarte de resíduos e informe-se sobre o depósito mais próximo. 6 Substitua pela nova lâmpada. 7 Aperte os 2 parafusos que fixam a lâmpada. 8 Recoloque a tampa da lâmpada e aperte os 2 parafusos.
5 Especificações 5 Válvula da Luz Tecnologia de chipe único de 0,7 pol. XGA LVDS (low-voltage differential signaling) Brilho 3000 ANSI Lúmens (máximo) Proporção do contraste 2100:1 Típico (totalmente ligado/totalmente desligado) Uniformidade 80% Típico (padrão japonês - JBMA) Lâmpada lâmpada de 260 watts substituível pelo usuário com 2000 horas (até 2500 horas em modo de economia) Número de Pixels 1024 x 768 (XGA) Cor Exibível 16.
Energia Universal 100 - 240V AC 50 - 60Hz com entrada PFC Consumo de energia 325 watts normal, 285 watts em modo econômico Áudio 1 alto-falante, 2 watt RMS Nível de ruído 36 dB(A) Mdo totalmente ligado, 33 dB(A) Modo econômico Peso <5,5 lbs (2,4 kg) Dimensões (L x A x P) Externas 10,8 x 8,3 x 4 ± 0,04 polegadas (273,7 x 212 x 101 ± 1 mm) Ambiental Temperatura operacional: 5oC - 35oC (41oF- 95oF) Umidade: Máximo de 80% Temperatura de armazenamento: -20oC a 60oC (-4oF a140oF) Umidade: Máximo de 8
Designação dos pinos RS232 Protocolo RS232 • Configurações de comunicação Configurações de conexão Valor Taxa de transmissão: 19200 Bits de dados: 8 Paridade Nenhum Bits de parada 1 • Tipos de Comando Para fazer aparecer o menu OSD e ajustar as configurações.
0x03: Estado do sistema - Projector ON - Ligado (Modo Normal). NACK: Estado do sistema - Projector OFF - Desligado (Modo de Espera). NOTA: Quando o projector estiver em modo de espera, nenhuma resposta de reconhecimento (NACK) será enviada pelo projector.
Lista dos comandos de controle Cabeçalho (PALAVRA) Código de Endereço (BYTE) Tamanho da carga paga (PALAVRA) CRC16 para o pacote inteiro (WORD) Identidade da MsG (PALAVRA) Tamanho da MsG (PALAVRA) Comando de Endereço (BYTE) Descrição do comando 0xefbe 0x10 0x0005 0xffc6 0xbfc7 0x7e07 0x3fc5 0xfe05 0xbe04 0x7fc4 0x3fc0 0xfe00 0xbe01 0x7fc1 0x3e03 0xffc3 0x7e02 0x3fca 0xfe0a 0xbe0b 0x7fcb 0x3e09 0x7e08 0x3e0c 0xffcc 0xbe1f 0x7fdf 0xbfd9 0x7e19 0x3fdb 0xfe1b 0xbe1a 0x7fda 0x3e12 0x3ff6 0x7e46 0x111
Modos de compatibilidade Modo Resolução VGA (ANALÓGICO) Freqüência V. (Hz) Freqüência H. (KHz) 640X350 70 31.5 VGA 640X350 85 37.9 VGA 640X400 85 37.9 VGA 640X480 60 31.5 VGA 640X480 72 37.9 VGA 640X480 75 37.5 VGA 640X480 85 43.3 VGA 720X400 70 31.5 VGA 720X400 85 37.9 SVGA 800X600 56 35.2 SVGA 800X600 60 37.9 SVGA 800X600 72 48.1 SVGA 800X600 75 46.9 SVGA 800X600 85 53.7 XGA 1024X768 60 48.4 XGA 1024X768 70 56.5 XGA 1024X768 75 60.
Entre em contato com a Dell Para entrar em contato com a Dell através do seu computador acesse os seguintes websites: • www.dell.com • support.dell.com(suporte técnico) Para endereços de internet específicos do seu país, ache a seção apropriada do seu país na tabela abaixo. NOTA: Os números para ligaçao grátis são para uso interno no país para o qual estão listados.
País (Cidade) Código de Acesso Internacional Código do País Código da Cidade Nome do Departamento ou Área de Serviço,Site e Endereço de Email Códigos de Área, Números Locais, e Números para Ligação Grátis Argentina (Buenos Aires) Website: www.dell.com Código Internacional: 00 E-mail: us_latin_services@dell.com Código do País: 54 Código da Cidade: 11 E-mail para computadores de mesa ou portáteis: la-techsupport@dell.com E-mail para servidores e EMC® armazenamento de produtos: la_enterprise@dell.
País (Cidade) Código de Acesso Internacional Código do País Código da Cidade Nome do Departamento ou Área de Serviço,Site e Endereço de Email Áustria (Viena) Website: support.euro.dell.com Código Internacional: 900 E-mail: tech_support_central_europe@ Código do País: 43 dell.
País (Cidade) Código de Acesso Internacional Código do País Código da Cidade Nome do Departamento ou Área de Serviço,Site e Endereço de Email Bélgica (Bruxelas) Website: support.euro.dell.
País (Cidade) Código de Acesso Internacional Código do País Código da Cidade Nome do Departamento ou Área de Serviço,Site e Endereço de Email Códigos de Área, Números Locais, e Números para Ligação Grátis Brunei Suporte de Hardware e Garantia (Penang, Malásia) 604 633 4966 Atendimento aos Clientes (Penang, Malásia) 604 633 4888 Transações de Vendas (Penang, Malásia) 604 633 4955 Código do País: 673 Entre em contato com a Dell 51
País (Cidade) Código de Acesso Internacional Código do País Código da Cidade Nome do Departamento ou Área de Serviço,Site e Endereço de Email Canadá (North York, Ontário) Status do Pedido Online: www.dell.
País (Cidade) Código de Acesso Internacional Código do País Código da Cidade Nome do Departamento ou Área de Serviço,Site e Endereço de Email Códigos de Área, Números Locais, e Números para Ligação Grátis Chile (Santiago) Suporte de Vendas e ao Cliente ligaçoes grátis: 1230-0204823 Código do País: 56 Código da Cidade: 2 China (Xiamen) Código do País: 86 Código da Cidade: 592 Website de Suporte de Hardware e Garantia: support.dell.com.cn E-mail de Suporte de Hardware e Garantia: cn_support@dell.
País (Cidade) Código de Acesso Internacional Código do País Código da Cidade Nome do Departamento ou Área de Serviço,Site e Endereço de Email Códigos de Área, Números Locais, e Números para Ligação Grátis Empresas Domésticas e Pequenas Empresas ligações grátis: 800 858 2222 Divisao de Clientes Preferenciais ligações grátis: 800 858 2557 Contas de Grandes Corporações ligações GCP grátis: 800 858 2055 Contas Chave de Grandes Corporações ligações grátis: 800 858 2628 Contas de Grandes Corporações liga
País (Cidade) Código de Acesso Internacional Código do País Código da Cidade Nome do Departamento ou Área de Serviço,Site e Endereço de Email Códigos de Área, Números Locais, e Números para Ligação Grátis República Tcheca (Praga) Website: support.euro.dell.com Código Internacional: 00 E-mail: czech_dell@dell.
País (Cidade) Código de Acesso Internacional Código do País Código da Cidade Nome do Departamento ou Área de Serviço,Site e Endereço de Email Códigos de Área, Números Locais, e Números para Ligação Grátis República Dominicana Assistência Geral 1-800-148-0530 Equador Assistência Geral ligações grátis: 999119 El Salvador Assistência Geral 01-899-753-0777 Finlândia (Helsinki) Website: support.euro.dell.
País (Cidade) Código de Acesso Internacional Código do País Código da Cidade Nome do Departamento ou Área de Serviço,Site e Endereço de Email França (Paris) (Montpellier) Website: support.euro.dell.
País (Cidade) Código de Acesso Internacional Código do País Código da Cidade Nome do Departamento ou Área de Serviço,Site e Endereço de Email Alemanha (Langen) Website: support.euro.dell.com Código Internacional: 00 E-mail: tech_support_central_europe@ Código do País: 49 dell.
País (Cidade) Código de Acesso Internacional Código do País Código da Cidade Nome do Departamento ou Área de Serviço,Site e Endereço de Email Códigos de Área, Números Locais, e Números para Ligação Grátis Granada Assistência Geral ligações grátis: 1866-540-3355 Guatemala Assistência Geral 1-800-999-0136 Guiana Assistência Geral ligações grátis: 1877-270-4609 Hong Kong Website: support.ap.dell.
País (Cidade) Código de Acesso Internacional Código do País Código da Cidade Nome do Departamento ou Área de Serviço,Site e Endereço de Email Índia E-mail: india_support_desktop@dell.co m india_support_notebook@dell.c om india_support_Server@dell.
País (Cidade) Código de Acesso Internacional Código do País Código da Cidade Nome do Departamento ou Área de Serviço,Site e Endereço de Email Irlanda (Cherrywood) Website: support.euro.dell.com Código Internacional: 00 E-mail: dell_direct_support@dell.
País (Cidade) Código de Acesso Internacional Código do País Código da Cidade Nome do Departamento ou Área de Serviço,Site e Endereço de Email Itália (Milão) Website: support.euro.dell.
País (Cidade) Código de Acesso Internacional Código do País Código da Cidade Nome do Departamento ou Área de Serviço,Site e Endereço de Email Códigos de Área, Números Locais, e Números para Ligação Grátis Suporte de Hardware e Garantia fora do Japao (Dell Precision, OptiPlex e Latitude) 81-44-556-3894 Suporte de Hardware e Garantia (PDAs, projetores, impressoras e roteadores) ligação grátis: 0120981-690 Suporte de Hardware e Garantia fora do Japão (PDAs, projetores, impressoras, roteadores) 81-44-55
País (Cidade) Código de Acesso Internacional Código do País Código da Cidade Nome do Departamento ou Área de Serviço,Site e Endereço de Email Coréia (Seul) E-mail: krsupport@dell.
País (Cidade) Código de Acesso Internacional Código do País Código da Cidade Nome do Departamento ou Área de Serviço,Site e Endereço de Email Códigos de Área, Números Locais, e Números para Ligação Grátis Macau Suporte de Hardware e Garantia ligaçoes grátis: 0800 105 Código do País: 853 Malásia (Penang) Serviços a Clientes (Xiamen, China) 34 160 910 Transaçao de Vendas (Xiamen, China) 29 693 115 Website: support.ap.dell.
País (Cidade) Código de Acesso Internacional Código do País Código da Cidade Nome do Departamento ou Área de Serviço,Site e Endereço de Email Códigos de Área, Números Locais, e Números para Ligação Grátis Suporte ao Cliente de Hardware Código Internacional: 00 e Garantia 001-877-384-8979 México Código do País: 52 Vendas ou 001-877-2693383 50-81-8800 ou 01-800-888-3355 Serviços a Clientes 001-877-384-8979 ou 001-877-2693383 Unidade principal 50-81-8800 ou 01-800-888-3355 Montserrat Assistência
País (Cidade) Código de Acesso Internacional Código do País Código da Cidade Nome do Departamento ou Área de Serviço,Site e Endereço de Email Holanda (Amsterda) Website: support.euro.dell.
País (Cidade) Código de Acesso Internacional Código do País Código da Cidade Nome do Departamento ou Área de Serviço,Site e Endereço de Email Noruega (Lysaker) Website: support.euro.dell.
País (Cidade) Código de Acesso Internacional Código do País Código da Cidade Nome do Departamento ou Área de Serviço,Site e Endereço de Email Portugal Website: support.euro.dell.com Código Internacional: 00 Suporte de Hardware e Garantia Código do País: 351 Atendimento ao Cliente Vendas Fax Códigos de Área, Números Locais, e Números para Ligação Grátis 707200149 800 300 413 800 300 410 ou 800 300 411 ou 800 300 412 ou 21 422 07 10 21 424 01 12 Porto Rico Assistência Geral 1-800-805-7545 St.
País (Cidade) Código de Acesso Internacional Código do País Código da Cidade Nome do Departamento ou Área de Serviço,Site e Endereço de Email Cingapura (Cingapura) Website: support.ap.dell.
País (Cidade) Código de Acesso Internacional Código do País Código da Cidade Nome do Departamento ou Área de Serviço,Site e Endereço de Email África do Sul (Joanesburgo) Website: support.euro.dell.com Códigos de Área, Números Locais, e Números para Ligação Grátis Código Internacional: E-mail: dell_za_support@dell.
País (Cidade) Código de Acesso Internacional Código do País Código da Cidade Nome do Departamento ou Área de Serviço,Site e Endereço de Email Códigos de Área, Números Locais, e Números para Ligação Grátis Suécia (Upplands Vasby) Website: support.euro.dell.
País (Cidade) Código de Acesso Internacional Código do País Código da Cidade Nome do Departamento ou Área de Serviço,Site e Endereço de Email Suíça (Genebra) Website: support.euro.dell.com Código Internacional: 00 E-mail: Tech_support_central_Europe Código do País: 41 @dell.
País (Cidade) Código de Acesso Internacional Código do País Código da Cidade Nome do Departamento ou Área de Serviço,Site e Endereço de Email Taiwan Website: support.ap.dell.com Códigos de Área, Números Locais, e Números para Ligação Grátis Código Internacional: 002 E-mail: ap_support@dell.
País (Cidade) Código de Acesso Internacional Código do País Código da Cidade Nome do Departamento ou Área de Serviço,Site e Endereço de Email Tailândia Website: support.ap.dell.
País (Cidade) Código de Acesso Internacional Código do País Código da Cidade Nome do Departamento ou Área de Serviço,Site e Endereço de Email Códigos de Área, Números Locais, e Números para Ligação Grátis (Bracknell) Reino Unido Website: support.euro.dell.com Código Internacional: 00 Site de Atendimento ao Cliente: support.euro.dell.com/uk/en/ECare/Form/Home.asp Código do País: 44 Código da Cidade: 1344 76 E-mail: dell_direct_support@dell.
País (Cidade) Código de Acesso Internacional Código do País Código da Cidade Uruguai Nome do Departamento ou Área de Serviço,Site e Endereço de Email Códigos de Área, Números Locais, e Números para Ligação Grátis Atendimento ao Cliente para Clientes Preferenciais (500 a 5000 empregados) 0870 906 0010 Atendimento ao Cliente do Governo Central 01344 373 193 Atendimento ao Cliente da Administraçao Local e Educação 01344 373 199 Atendimento ao Cliente do Setor de Saúde 01344 373 194 Vendas para Empr
País (Cidade) Código de Acesso Internacional Código do País Código da Cidade Nome do Departamento ou Área de Serviço,Site e Endereço de Email EUA (Austin, Texas) Servço de Pedido-Status Código Internacional: 011 Automatizado AutoTech (computadores Código do País: 1 portáteis e de mesa) Códigos de Área, Números Locais, e Números para Ligação Grátis ligações grátis: 1800-433-9014 ligações grátis: 1800-247-9362 Suporte de Hardware e Garantia (Dell TV, Impressoras e Projetores) para clientes de Relacioname
País (Cidade) Código de Acesso Internacional Código do País Código da Cidade Nome do Departamento ou Área de Serviço,Site e Endereço de Email Serviços Financeiros (Contas Preferenciais da Dell [DPA]) Códigos de Área, Números Locais, e Números para Ligação Grátis ligações grátis: 1800-283-2210 Negócios Serviço e Suporte ao Cliente ligações grátis: 1800-456-3355 Clientes do Programa de Compras dos Empregados (EPP) ligações grátis: 1800-695-8133 Suporte Técnico para Impressoras e Projetores ligações g
País (Cidade) Código de Acesso Internacional Código do País Código da Cidade Nome do Departamento ou Área de Serviço,Site e Endereço de Email Códigos de Área, Números Locais, e Números para Ligação Grátis Serviços Dell para Deficientes Auditivos totais ou parciais e Portadores de Distúrbios da Fala ligações grátis: 1877-DELLTTY (1-877-335-5889) Ilhas Virgens EUA Assistência Geral 1-877-673-3355 Venezuela Assistência Geral 8001-3605 80 Entre em contato com a Dell
Apêndice: Avisos regulamentares Avisos da FCC (apenas para os Estados Unidos) A maioria dos sistemas de computador Dell são classificados pela Federal Communications Commission (FCC) como aparelhos digitais Classe B. Para determinar qual classificação se aplica ao seu sistema de computador, examine todos os selos de registro da FCC localizados na parte inferior, lateral ou traseira do seu computador ou nos suportes de instalação das placas e nas próprias placas.
www.dell.com | support.dell.com • Redirecione ou mude a antena receptora de lugar. • Aumente o espaço entre o equipamento e o receptor. • Conecte o equipamento a uma tomada em um circuito diferente daquele ao qual o receptor está conectado. • Consulte o representante ou um técnico experiente em rádio e televisão para obter ajuda.
Glossário ANSI Lumens— Um padrao para medir a emissao de luz, usado para comparar projetores. Relaçao de aspecto—A mais popular relaçao entre altura e largura é 4:3 (4 por 3). Os formatos da tela de televisores e computadores tem relaçao de 4:3, o que significa que a largura da imagem é 4/3 vezes a altura. Backlit (Backlight)—Refere-se ao controle remoto ou ao painel de controle do projetor, que tem botoes e controles que são iluminados.
www.dell.com | support.dell.com Relaçao de Contraste— Faixa de valores de luz e de claro e escuro em uma imagem, ou a relaçao entre seus valores máximo e mínimo. Existem dois métodos usados pela indústria da projeçao para medir esta relaçao: 1 Full On/Off — Mede a relaçao da produçao de luz de uma imagem toda branca (Full on) e a proudçao de luz de uma toda preta (Full of).
Distância Máxima— A distância da tela que o projetor deve estar para lançar uma imagem que seja utilizável (brilhante o suficiente) em uma sala completamente escura. Tamanho Máximo da Imagem—A maior imagem que um projetor pode enviar em uma sala escura. Esta é geralmente limitada pela variaçao focal das lentes. Lâmpada de Metal Halide —O tipo de lâmpada usada em muitos projetores médios e em todos os projetores portáteis de alta definiçao. Estas lâmpadas geralmente têm uma meia-vida de 1000 a 2000 horas.
www.dell.com | support.dell.com Lentes de Zoom— Lentes com uma distância focal variável que permite ao operador mover a ista para dentro ou para fora, aumentando ou diminuindo a imagem. Relaçao das Lentes de Zoom —Relaçao entre a maior e a menor imagem que uma lente pode projetar de uma distância fixa. Por exemplo, uma relaçao de 1.4:1 significa que uma imagem de 3,4m sem zoom poderia ser uma imagem de 4,2m com zoom total.
Índice A Cabo RS232 14 Cabo S-video 11 Cabo USB para USB 10 Com o computador 10 Conexão com um cabo composto 12 Conexão com um cabo de componente 13 Conexão com um cabo S-video 11 Ajuste do tamanho da imagem projetada 39 C Como ajustar a imagem projetada 16 abaixar o projetor Botão de elevação 16 Pé de elevação 16 Roda de ajuste da inclinação 16 Como ajustar a altura do projetor 16 Como ajustar o zoom e o foco do projetor 16 Anel de foco 17 Seletor de zoom 17 Como ligar e desligar o projetor Como desliga
Distância de projeção 41 Energia 42 Freqüência Hor. 41 Freqüência Vert.
U Unidade Principal 7 Anel de foco 7 Botão de elevação 7 Lente 7 Painel de controle 7 Receptor do controle remoto 7 Seletor do zoom 7 Índice 89
90 Índice