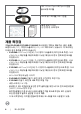
Dell C2422HE Dell C2722DE Dell C3422WE Curved 비디오 컨퍼런스 모니터 사용 설명서 모델: C2422HE/C2722DE/C3422WE 규정 모델: C2422HEt/C2722DEt/C3422WEt
참고: 참고는 컴퓨터를 더 효율적으로 활용하는 데 도움이 되는 중요한 정보를 가리킵니다. 주의: 주의는 지침을 따르지 않을 경우 하드웨어 손상 또는 데이터 손실이 발생할 수 있는 상황을 가리킵니다. 경고: 경고는 재산 손해, 인체 부상 또는 사망에까지 이를 수 있는 상황을 가리킵니다. Copyright © 2020 Dell Inc. 또는 그 자회사. All rights reserved. Dell, EMC 및 기타 상표는 Dell Inc. 또는 그 자회사의 상표입니다. 기타 상표는 해당하는 각 소유주의 상표일 수 있습니다. Dell Inc.의 서면 승인 없이 어떠한 방식으로든 이 자료를 재생산하는 것은 엄격히 금지됩니다. 이 문서에 사용된 상표: Dell 및 DELL 로고는 Dell Inc.의 상표입니다. Microsoft 및 Windows는 미국 및/또는 기타 국가에서 Microsoft Corporation의 상표 또는 등록 상표입니다. ENERGY STAR는 U.S.
목차 안전 지침. . . . . . . . . . . . . . . . . . . . . . . . . . . . . . . . . . . . . . 6 모니터 정보 . . . . . . . . . . . . . . . . . . . . . . . . . . . . . . . . . . . . 7 패키지 내용물. . . . . . . . . . . . . . . . . . . . . . . . . . . . 7 제품 특장점 . . . . . . . . . . . . . . . . . . . . . . . . . . . . . 8 부품 및 컨트롤 확인. . . . . . . . . . . . . . . . . . . . . . . . 10 전면 보기 . . . . . . . . . . . . . . . . . . . . . . . . . . . . . . . . . . . 10 뒷면 보기 . . . . . . . . . . . . . . . . . . . . . . . . . . . . . . . . .
기울기, 회전 및 세로 확장 . . . . . . . . . . . . . . . . . . . . . . . . . . .40 디스플레이 회전 (C2422HE/C2722DE만) . . . . . . . . . . . 회전 후 컴퓨터 디스플레이 설정 구성(C2422HE/C2722DE만). 모니터 웹캠 작동하기 . . . . . . . . . . . . . . . . . . . . . . 모니터 연결하기 . . . . . . . . . . . . . . . . . . . . . . . . Dell 전원 버튼 동기화(DPBS) . . . . . . . . . . . . . . . . . . . . . . 41 42 43 44 48 모니터 DPBS 처음 연결하기 . . . . . . . . . . . . . . . . . . . . . . . . .50 DPBS 기능 사용 . . . . . . . . . . . . . . . . . . . . . . . . . . . . . . . .
문제 해결. . . . . . . . . . . . . . . . . . . . . . . . . . . . . . . . . . . . 102 자체 테스트 . . . . . . . . . . 기본 제공 진단 . . . . . . . . 일반 문제 . . . . . . . . . . . 제품별 문제 . . . . . . . . . . 범용 직렬 버스(USB)별 문제 . . . . . . . . . . . . . . . . . . . . . . . . . . . . . . . . . . . . . . . . . . . . . . . . . . . . . . . . . . . . . . . . . . . . . . . . . . . . . . . . . . . . . . . 102 . 103 . 104 . 107 . 112 부록. . . . . . . . . . . . . . . . . . . . . . . . . . . . . . . . . . . . . . . .
안전 지침 경고: 이 문서에서 명시되지 않은 컨트롤, 조정, 절차를 사용할 경우 충격, 전기 위험 및/또는 기계 위험에 노출될 수 있습니다. • 모니터를 단단한 표면에 놓고 주의하여 다루십시오. 화면은 깨지지 쉬우며 떨어뜨리거나 심하게 부딪힐 시 손상될 수 있습니다. • 모니터는 항상 해당 지역에서 사용 가능한 AC 전원으로 작동하도록 전기 등급이 지정되어야 합니다. • 모니터를 실온에 보관하십시오. 과도한 냉온 조건은 디스플레이 액정에 악영향을 미칠 수 있습니다. • 모니터를 심한 진동이나 강한 충격 조건에 노출시키지 마십시오. 예컨대 자동차 트렁크 안에 모니터를 두지 마십시오. • 장시간 사용하지 않을 경우 모니터 플러그를 뽑으십시오. • 감전을 방지하기 위해 덮개를 제거하거나 모니터 내부를 만지지 마십시오. 안전 지침에 대한 정보는 안전, 환경 및 규정 정보(SERI)를 참조하십시오.
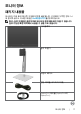
모니터 정보 패키지 내용물 모니터는 다음 표에 제시된 구성품이 함께 배송됩니다. 구성품이 누락된 경우 Dell 에 문의하십시오. 자세한 내용은 Dell에 문의하기를 참조하십시오. 참고: 일부 구성품은 옵션이므로 모니터와 함께 배송되지 않을 수 있습니다. 일부 기능은 특정 지역에서 사용할 수 없을 수도 있습니다.
USB 3.2 Gen1 Type-A와 Type-B 연결 업스트림 케이블 USB 타입 C 케이블(C와 C 연결) • 빠른 설치 가이드 • 안전, 환경, 규제 정보 제품 특장점 이Dell C2422HE/C2722DE/C3422WE 모니터에는 액티브 매트릭스, 얇은-필름 트랜지스터 (TFT), 액정디스플레이 (LCD), LED 백라이트가 있습니다. 이 모니터는 다음과 같은 특징을 갖추고 있습니다. • C2422HE: 60.47 cm(23.8인치) 가시 영역 디스플레이(대각선으로 측정). 1920 x 1080 (16:9) 해상도를 제공하며 좀 더 낮은 해상도의 경우 전체 화면 모드를 지원합니다. • C2722DE: 68.47 cm(27.0인치) 가시 영역 디스플레이(대각선으로 측정). 2560 x 1440 (16:9) 해상도를 제공하며 좀 더 낮은 해상도의 경우 전체 화면 모드를 지원합니다. • C3422WE: 86.71 cm(34.14인치) 가시 영역 디스플레이(대각선으로 측정).
• 동영상 및 데이터 신호를 수신하면서 호환 가능한 노트북에 전원을 공급할 수 있는 단일 USB 타입 C. • USB-C 및 RJ45 포트를 사용하면 단일 케이블에 의한 네트워크 연결이 가능합니다. • 시스템에서 지원될 경우 플러그 앤 플레이 기능 사용 가능. • 쉬운 설정과 화면 최적화를 위한 화면 표시(OSD) 조정 기능. • 전원 및 OSD 버튼 잠금. • 보안 잠금 슬롯. • C2422HE/C2722DE:대기 모드에서 ≤ 0.3W. • C3422WE:대기 모드에서 ≤ 0.5W. • C3422WE에서 PBP(Picture by Picture) 선택 모드를 지원합니다. • C3422WE에서 PBP 모드의 USB KVM 기능을 전환할 수 있습니다. • 이 모니터는 모니터 전원 버튼으로 PC 시스템 전원 상태를 제어할 수 있게 하는 DPBS(Dell Power Button Sync) 기능으로 설계되었습니다.* • 안심할 수 있는 프리미엄 패널 교환.
부품 및 컨트롤 확인 전면 보기 1 2 3 45 6 7 8 9 10 11 12 라벨 1,6 설명 마이크 3 웹캠 렌즈 2,4 5 IR LED 웹캠 LED 표시등 7 내장 스피커 10 | 모니터 정보 7 13 사용 모니터 마이크(Mic)입니다. 웹캡 및 마이크 모듈이 팝업으로 나타나면 마이크가 활성화됩니다. 모듈이 축소되면 마이크가 비활성화됩니다. 비디오 컨퍼런스에서 이미지를 전송합니다. 웹캡 및 마이크 모듈이 팝업으로 나타나면 웹캠이 활성화됩니다. 모듈이 축소되면 웹캠이 비활성화됩니다. 적외선 표시등(IR)입니다. 웹캠 표시등입니다. 웹캠이 사용 중이면 흰색으로 켜집니다. 오디오 입력의 사운드를 출력합니다.
8 Teams 버튼 및 LED 9 후크스위치 및 LED 10 볼륨 감소 및 LED 11 볼륨 증가 및 LED 12 마이크 음소거 및 LED 13 전원 LED 표시등 Microsoft Teams®가 로그인되어 실행 중이면 LED 가 흰색으로 켜집니다. Teams 알림이 있으면 LED가 깜박입니다. 버튼을 짧게 누르면 Teams로 전환되고 알림이 열립니다. Teams/Skype for Business(SfB) 통화가 걸려오면 LED가 녹색으로 깜박입니다. Teams/Skype for Business(SfB) 통화 중에는 LED가 녹색으로 켜집니다. 통화를 받고 종료하려면 짧게 누릅니다. 들어오는 통화를 거절하려면 길게 누릅니다. 짧게 누르면 2칸씩 볼륨이 줄어듭니다. 길게 누르면 볼륨이 연속적으로 줄어듭니다. 짧게 누르면 2칸씩 볼륨이 높아집니다. 길게 누르면 볼륨이 연속적으로 높아집니다. 마이크를 음소거 및 음소거 해제하려면 누릅니다.
뒷면 보기 1 2 3 4 5 7 6 라벨 설명 사용 1 VESA 장착 구멍 (100mm x 100mm- 뒤에 부착된 VESA 커버 ) VESA 호환 벽면 마운트 키트를 사용하는 벽면 장착 모니터 (100mm x 100mm). 2 규정 라벨 규정 승인이 나열되어 있습니다 . 3 스탠드 해제 버튼 모니터에서 스탠드를 해제합니다 . 4 5 전원 켜기/끄기 버튼 조이스틱 모니터를 켜거나 끌 수 있습니다. OSD 메뉴를 컨트롤할 때 사용합니다 . 6 Mac 주소 , 바코드 , 일련 번호 및 서비스 태그 라벨 7 케이블 관리 슬롯 12 | 모니터 정보 자세한 내용은모니터 작동하기을 참조하십시오. 기술 지원을 받기 위해 Dell 에 문의해야 하는 경우 이 라벨을 참조하십시오 . 서비스 태그는 고유한 영숫자 식별자로 Dell 서비스 기술자가 이를 통해 사용자 컴퓨터의 하드웨어 구성품을 식별하고 보증 정보에 액세스할 수 있습니다 .
하단 보기 9 14 1 2 3 4 5 6 7 8 9 10 11 12 13 라벨 설명 사용 1 보안 잠금 슬롯 보안 케이블 잠금으로 모니터를 안전하게 보호합니다 ( 별도 판매 ). 2 전원 커넥터 전원 케이블을 연결합니 . 3 HDMI 포트 HDMI 케이블로 컴퓨터를 연결합니다 . 4 DisplayPort in DisplayPort 케이블로 컴퓨터를 연결합니다 . 5 USB Type-C 업스트림 / DisplayPort USB Type-C 케이블을 사용하여 컴퓨터에 연결합니다 . USB Type-C 포트는 가장 빠른 전송 속도 (USB 3.2 Gen 1) 를 제공하며 DP 1.2(C2422HE/C3422WE)/DP 1.4(C2722DE) 의 대체 모드는 다음 , 그리고 PD 20V/4.5A, 15V/3A, 9V/3A, 5V/3A 를 지원합니다 .
USB-B 업스트림 포트 7 모니터와 함께 제공되는 USB 케이블을 컴퓨터에 연결합니다 . 케이블을 연결하여 모니터의 USB 다운스트림 커넥터를 사용할 수 있습니다 . 8,9,11 SuperSpeed USB 5 USB 장치를 연결할 수 있습니다 . USB 케이블 (A Gbps(USB 3.2 Gen 1) 타입과 B 타입 연결 또는 C 타입 간 연결 케이블 ) 을 (3) 사용하여 컴퓨터와 모니터를 연결한 후에만 이 포트들을 사용할 수 있습니다 . 배터리 아이콘이 표시된 포트는 Battery Charging Rev. 1.2 를 지원합니다 . 10 RJ-45 커넥터 인터넷을 연결합니다 . USB 케이블 (A 타입과 B 타입 연결 또는 C 타입 간 연결 케이블 ) 을 사용하여 컴퓨터와 모니터를 연결한 경우에만 RJ45 를 통해 인터넷을 서핑할 수 있습니다 . 12 헤드폰 잭 헤드폰 또는 헤드셋을 연결하여 HDMI, DisplayPort 또는 USB Type-C 오디오 채널로 오디오를 재생합니다 .
모니터 사양 모델 C2422HE 화면 유형 액티브 매트릭스 - TFT LCD 패널 유형 인프레인 스위칭 기술 종횡비 16:9 16:9 21:9 60.47 cm (23.8 in.) 68.47 cm (27 in.) 86.71 cm (34.14 in.) 가로 527.04 mm (20.75 in.) 596.74 mm (23.49 in.) 799.8 mm (31.49 in.) 세로 296.46 mm (11.67 in.) 335.66 mm (13.22 in.) 334.80 mm (13.18 in.) 156246.28 mm2 (242.18 in.2) 200301.75 mm2 (310.47 in.2) 267773.04 mm2 (415.05 in.2) 픽셀 피치 0.2745(H) mm x 0.2745 (V) mm 0.2331 (H) mm x 0.2331 (V) mm 0.2325(H) mm x 0.2325(V) mm 인치당 픽셀 (PPI) 92.56 108.
연결성 • 1 x DP 1.2 (HDCP1.4) • 1 x HDMI1 .4 (HDCP1.4) • 1 x DP 1.4 (HDCP1.4) • 1 x HDMI1 .4 (HDCP1.4) • 1 x DP 1.2 (HDCP2.2) • 1 x HDMI2.0 (HDCP2.2) • USB Type-B 1 개 (USB 3.2 Gen 1 업스트림 포트 ) • 1 x USB C 타입 (DisplayPort 1.4, USB 3.2 Gen 1 업스트림 포트 , 최대 90 W 의 Power Delivery PD 가 있는 대체 모드 ) • 1 x USB C 타입 다운스트림 (15 W), USB 3.2 Gen1(5 Gbps) • 1 x MST 를 사용한 DP( 출력 ) (C2422HE/C2722DE 전용 ) • 2 x super speed USB 5 Gbps(USB 3.2 Gen 1) • 1 x 충전 용량이 2 A 에서 DC 1.2 V( 최대 ) 인 super speed USB 5 Gbps(USB 3.2 Gen 1) • 3.
해상도 사양 모델 C2422HE C2722DE C3422WE 가로 스캔 범위 30kHz ~ 83 kHz 30kHz ~ 90 kHz 30kHz ~ 90 kHz 세로 스캔 범위 56 Hz ~ 76 Hz 최대 사전 설정 해상도 1920 x 1080 @ 60 Hz 2560 x 1440 @ 60 Hz 3440 x 1440 @ 60 Hz 비디오 디스플레이 기능 (HDMI 및 DP 및 USB C 타입 1개 대체 모드) 480i, 480p, 576i, 560p, 720p, 1080i, 1080p 사전 설정 디스플레이 모드 C2422HE 디스플레이 모드 VESA, 720 x 400 VESA, 640 x 480 VESA, 640 x 480 VESA, 800 x 600 VESA, 800 x 600 VESA, 1024 x 768 VESA, 1024 x 768 VESA, 1152 x 864 VESA, 1280 x 1024 VESA, 1280 x 1024 VESA, 1600 x 900 VESA, 19
VESA, 800 x 600 VESA, 1024 x 768 VESA, 1024 x 768 VESA, 1152 x 864 VESA, 1280 x 1024 VESA, 1280 x 1024 VESA, 1600 x 1200 VESA, 1920 x 1080 VESA, 2048 x 1080 VESA, 2048 x 1080 VESA, 2560 x 1440 46.90 48.40 60.0 67.50 64.0 80.0 75.0 67.50 58.23 66.58 88.80 75.0 60.0 75.0 75.0 60.0 75.0 60.0 60.0 26.37 60.0 60.0 49.50 65.0 78.80 108.0 108.0 135.0 162.0 148.5 23.99 147.16 241.50 +/+ -/+/+ +/+ +/+ +/+ +/+ +/+ +/+/+/- 수평 주파수 (kHz) 31.50 31.50 37.50 37.90 46.90 48.40 60.0 67.50 64.0 80.0 75.0 67.50 66.58 88.
DP MST(Multi-Stream Transport) 모드 C2422HE MST 소스 모니터 지원할 수 있는 외부 모니터의 최대 수 1920 x 1080@ 60 Hz 1920 x 1080@ 60 Hz 3 참고:지원되는 외부 모니터 최대 해상도는 1920 x 1080@ 60 Hz뿐입니다. C2722DE MST 소스 모니터 지원할 수 있는 외부 모니터의 최대 수 2560 x 1440@ 60 Hz 2560 x 1440@ 60 Hz 1 참고:지원되는 외부 모니터 최대 해상도는 2560 x 1440@ 60 Hz뿐입니다. 참고: USB 3.2 Gen1이 USB2.0로 줄어듦 USB 3.2 Gen1 대역폭을 유지하려면 USB 3.2 Gen2 케이블(1m)로 변경하십시오.
통합 커뮤니케이션(UC) 플랫폼 호환성 목록 아래 표에는 Dell 비디오 컴퍼런싱 모니터(C2422HE, C2722DE 및 C3422WE)에서 다음 UC 플랫폼#을 사용할 때 작동되는 통화 기능이 강조 표시되어 있습니다.
전기 사양 모델 C2422HE 비디오 입력 신호 • 100ohm 임피던스에서 차동 회선별 각 차동 회선에 대한 디지털 비디오 신호 • DP/HDMI/USB C 타입 신호 입력 지원 100-240 VAC/50 100-240 VAC/50 또는 60Hz ± 또는 60Hz ± 3Hz/2.3 A(최대) 3Hz/2.5 A(최대) 120 V: 42 A(최대) 240 V: 80 A(최대) 0.2 W (끄기 모드)1 0.2 W (끄기 모드)1 1 0.2 W (대기 모드) 0.3 W (대기 모드)1 18 W (켜기 모드)1 26.50 W (켜기 모드)1 195 W (최대)2 210 W (최대)2 3 13.81 W (Pon) 19.45 W (Pon)3 48.60 kWh (TEC)3 64.64 kWh (TEC)3 입력 전압/ 주파수/전류 돌입 전류 전력 소비량 C2722DE C3422WE 100-240 VAC/50 또는 60Hz ± 3Hz/2.8 A(최대) 0.3 W (끄기 모드)1 0.
웹캠 – 마이크 사양 렌즈 시야각 75.4°(2560 x 1920의 경우) 이미지 센서 비디오 사양 초점 모드 초점 영역 초점 거리(일반 모드) 활성 어레이 크기 비디오 프레임 속도 오디오 사양 마이크 유형 고정 초점 35cm~1.5m 70 cm 5메가 픽셀 1920 x 1080(Full HD)- 최대 초당 30프레임 디지털 마이크 2개 인터페이스 전원 공급 장치 USB 2.0 고속 3.3V +/- 5%(USB 및 마이크의 경우) 5V +/- 5%(IR 카메라의 경우) 스피커 사양 모델 C2422HE 스피커 정격 전력 5W2개 주파수 응답 200 Hz~16 kHz 임피던스 8 ohm C2722DE C3422WE 물리적 특징 모델 C2422HE 커넥터 유형 • DP 커넥터(C2422HE/C2722DE에서 DP 입력 및 DP 출력.
높이 ( 축소 ) 404.08 mm (15.90 in.) 445.57 mm (17.54 in.) 456.20 mm (17.96 in.) 너비 538.64 mm (21.21 in.) 612.34 mm (24.11 in.) 815.85 mm (32.10 in.) 깊이 185.00 mm (7.30 in.) 230.00 mm (9.10 in.) 234.95 mm (9.30 in.) 높이 383.15 mm (13.90 in.) 425.43 mm (16.75 in.) 434.43 mm (17.08 in.) 너비 538.64 mm (21.21 in.) 612.34 mm (24.11 in.) 815.85 mm (32.10 in.) 깊이 51.24 mm (2 in.) 53.93 mm (2.10 in.) 81.08 mm (3.20 in.) 높이 ( 확장 ) 428.30 mm (16.90 in.) 428.30 mm (16.90 in.) 433.32 mm (17.10 in.
환경적 특징 규정 준수 표준 • ENERGY STAR 인증 모니터 해당할 경우 EPEAT가 등록되어 있습니다. EPEAT 등록은 국가마다 다릅니다. 국가별 등록 상태에 대해 확인하려면 https://www.epeat.net 을 참고하십시오. • TCO 및 TCO Edge 인증 디스플레이. • RoHS 준수 • BFR/PVC-Free 모니터(외부 케이블 제외) • NFPA 99 누설 전류 요구 사항 충족 • 패널 전용 무비소 유리 및 무수은 소재 온도 작동 0°C~40°C(32°F~104°F) 미작동 -20°C~60°C(-4°F~140°F) 습도 작동 10%~80%(비응축) 미작동 5%~90%(비응축) 고도 작동 5,000m(16,404ft)(최대) 미작동 12,192 m(40,000 ft)(최대) 열 분산 C2422HE 665.37 BTU/시간(최대) 61.42 BTU/시간(켜기 모드) C2722DE 716.55 BTU/시간(최대) 90.42 BTU/시간(켜기 모드) C3422WE 750.
핀 지정 DP 커넥터 (in) 핀 번호 20핀 연결된 신호 케이블의 측면 1 ML3(n) 2 GND 3 ML3(p) 4 ML2(n) 5 GND 6 ML2(p) 7 ML1(n) 8 GND 9 ML1(p) 10 ML0(n) 11 GND 12 ML0(p) 13 CONFIG1 14 CONFIG2 15 AUX CH (p) 16 GND 17 AUX CH (n) 18 핫 플러그 감지 19 리턴 20 DP_PWR 모니터 정보 | 25
DP 커넥터 (out) 핀 번호 20핀 연결된 신호 케이블의 측면 1 ML0(p) 2 GND 3 ML0(n) 4 ML1(p) 5 GND 6 ML1(n) 7 ML2(p) 8 GND 9 ML2(n) 10 ML3(p) 11 GND 12 ML3(n) 13 CONFIG1 14 CONFIG2 15 AUX CH (p) 16 GND 17 AUX CH (n) 18 핫 플러그 감지 19 리턴 20 DP_PWR 26 | 모니터 정보
HDMI 커넥터 핀 번호 19핀 연결된 신호 케이블의 측면 1 TMDS 데이터 2+ 2 TMDS 데이터 2 쉴드 3 TMDS 데이터 2- 4 TMDS 데이터 1+ 5 TMDS 데이터 1 쉴드 6 TMDS 데이터 1- 7 TMDS 데이터 0+ 8 TMDS 데이터 0 쉴드 9 TMDS 데이터 0- 10 TMDS 클록 + 11 TMDS 클록 쉴드 12 TMDS 클록- 13 CEC 14 보류됨(장치에 N.C.
USB 타입 C 커넥터 핀 신호 할당 핀 신호 할당 A1 GND B12 GND A2 SSTXp1 B11 SSRXp1 A3 SSTXn1 B10 SSRXn1 A4 VBUS B9 VBUS A5 CC1 B8 SBU2 A6 Dp1 B7 Dn1 A7 Dn1 B6 Dp1 A8 SBU1 B5 CC2 A9 VBUS B4 VBUS A10 SSRXn2 B3 SSTXn2 A11 SSRXp2 B2 SSTXp2 A12 GND B1 GND 28 | 모니터 정보
범용 직렬 버스(USB) 인터페이스 이 절에서는 모니터에서 사용할 수 있는 USB 포트에 대해서 설명합니다. 참고: Battery Charging Rev. 1.2 준수 장치에서 USB 다운스트림 포트( 배터리 아이콘이 표시된 포트)의 경우 최대 2 A, 기타 USB 다운스트림 포트의 경우 최대 0.9 A. 3 A 규정 준수 장치의 USB C 타입 다운스트림 포트( 아이콘이 있는 포트)는 최대 5 V/3 A를 지원합니다. 컴퓨터에는 다음과 같은 USB 포트가 있습니다. • 업스트림 2개 - 후면. • 다운스트림 4개 - 하단에 2개, 후면에 2개. 전원 충전 포트 배터리 아이콘을 사용하는 포트는 기기가 BC 1.2 와 호환될 경우 급속 충전 기능을 지원합니다. 아이콘이 있는 USB C 타입 다운스트림 포트는 장치가 5 V/3 A와 호환될 경우 급속 충전 기능을 지원합니다. 참고: 모니터의 USB 포트는 모니터가 켜져 있거나 대기 모드일 때만 작동합니다.
USB 업스트림 포트 USB 다운스트림 포트 핀 번호 신호명 핀 번호 신호명 1 VBUS 1 VBUS 2 D- 2 D- 3 D+ 3 D+ 4 GND 4 GND 5 StdB_SSTX- 5 StdA_SSRX- 6 StdB_SSTX+ 6 StdA_SSRX+ 7 GND_DRAIN 7 GND_DRAIN 8 StdB_SSRX- 8 StdA_SSTX- 9 StdB_SSRX+ 9 StdA_SSTX+ 셸 쉴드 셸 쉴드 30 | 모니터 정보
RJ45 포트(커넥터 측) 핀 핀 신호 이름 1 신호 이름 TD1 + 8 TD3 - 2 TD1 - 9 TD4 + 3 TD2 + 10 TD4 - 4 TD2 - 11 5 CT 12 6 CT 13 GREEN_ORANGE GREEN_ORANGE GREEN 7 TD3 + 14 GREEN GREEN RJ45 CABLE SIDE PHY SIDE GREEN ORANGE 2kV, 1000pF SHIELD GROUND 드라이버 설치 사용 중인 시스템에서 사용할 수 용 Realtek USB GBE 이더넷 컨트롤러 드라이버를 설치하십시오. 이 드라이버는 https://www.dell.com/support 의 “드라이버 및 다운로드” 섹션에서 다운로드할 수 있습니다. 다음 설정에서 USB-C을 통한 네트워크(RJ45) 데이터 속도: 1000 Mbps.
RJ45 커넥터 LED 상태: Right LED Left LED 컬러 LED 설명 오른쪽 LED 주황색 또는 녹색 "속도 표시: • 주황색 켜짐 - 1000Mbps • 녹색 켜짐 - 100Mbps • 꺼짐 - 10Mbps" 왼쪽 LED "연결 / 활성 표시: • 깜박임 - 포트에서 활성화됨. • 녹색으로 켜짐 - 연결이 설정됨. • 꺼짐- 연결이 끊김." 녹색 참고: RJ45 케이블은 기본으로 제공되는 표준 액세서리가 아닙니다.
플러그 앤 플레이 플러그 앤 플레이 호환 시스템에 모니터를 설치할 수 있습니다. 모니터는 컴퓨터가 자체적으로 모니터 설정을 구성하고 최적화할 수 있도록 디스플레이 데이터 채널 (DDC)을 사용하여 확장 디스플레이 식별 데이터(EDID)가 있는 컴퓨터 시스템을 자동으로 제공합니다. 대부분의 모니터 설치는 자동으로 이루어집니다. 원하는 경우 다른 설정을 선택할 수 있습니다. 모니터 설정을 변경하는 방법에 대한 자세한 내용은 모니터 작동하기을 참조하십시오. LCD 모니터 품질 및 픽셀 정책 LCD 모니터 제조 프로세스 중에 변경되지 않는 상태에서 하나 이상의 픽셀이 고정되는 것은 비교적 흔한 일입니다. 이는 눈에 잘 보이지도 않고 디스플레이 품질이나 사용하는 데에 영향을 주지 않습니다. LCD 모니터 픽셀 정책에 대한 자세한 내용은 Dell 지원 사이트 참조: https://www.dell.com/pixelguidelines.
• 모니터 화면의 반사와 눈부심을 최소화하기 위해 주변 조명(천장 조명, 책상 램프, 주변 창문의 커튼이나 블라인드 등)을 조정하십시오. • 등받이가 좋은 의자를 사용하십시오. • 키보드 또는 마우스를 사용하는 동안 편안한 중립 자세로 앉아 팔꿈치 아래부터 손목을 수평으로 유지하십시오. • 키보드나 마우스를 사용하는 동안 항상 손을 놓을 공간을 남겨 두십시오. • 두 팔은 양쪽에 자연스럽게 놓으십시오. • 발이 바닥에 놓여 있는지 확인하십시오. • 앉을 때 다리의 무게가 좌석 앞부분이 아닌 발에 있는지 확인하십시오. 올바른 자세를 유지하기 위해 의자의 높이를 조정하거나 발판을 사용하십시오. • 작업 활동에 변화를 주십시오. 장시간 앉아서 작업할 필요가 없도록 작업을 정리하십시오. 주기적으로 일어나거나 걸어 다니십시오. • 책상 아래 공간에 편안한 좌석을 방해하거나 걸려 넘어질 수 있는 장애물과 케이블이나 전원 코드가 없도록 하십시오.
디스플레이 취급 및 운반 모니터를 들어올리거나 옮길 때 안전하게 취급하려면 다음 지침을 따르십시오. • 모니터를 들어올리거나 옮기기 전 컴퓨터와 모니터를 끄십시오. • 모든 케이블을 모니터에서 분리하십시오. • 원래 포장재를 사용하여 모니터를 원래 상자에 넣으십시오. • 모니터를 들어올리거나 옮길 때 과도한 압력을 가하지 않고 모니터 하단 가장자리와 측면을 단단히 잡으십시오. • 모니터를 들어올리거나 옮길 때 화면이 반대쪽을 보도록 하고 긁히거나 손상되지 않도록 디스플레이 부분을 누르지 마십시오. • 모니터 운반 시 모니터에 갑작스러운 충격이나 진동이 가해지지 않도록 하십시오.
• 모니터를 들어올리거나 옮길 때 스탠드 베이스나 높이 조절기를 잡은 채 모니터를 거꾸로 돌리지 마십시오. 이로 인해 모니터가 우발적으로 손상되거나 부상을 입을 수 있습니다. 유지관리 지침 모니터 청소하기 경고: 모니터를 청소하기 전에 모니터 전원 케이블을 전기 콘센트에서 뽑으십시오. 주의: 모니터를 청소하기 전에 안전 지침을 읽고 따르십시오. 최고 실천 방법은 포장을 풀거나 청소를 하거나 모니터를 취급할 때 아래 나열된 지침을 따르는 것입니다. • 정전기 방지 화면을 청소하려면 부드럽고 깨끗한 천을 물로 살짝 적시십시오. 가능할 경우 정전기 방지 코팅에 적합한 특수 화면 청소 티슈 또는 용액을 사용하십시오. 벤젠, 시너, 암모니아, 부식성 청소 세제 또는 압축 공기를 사용해서는 안 됩니다. • 가볍게 적신 부드러운 천을 사용하여 모니터를 청소하십시오. 모니터에 뿌연 막을 남기는 세제와 같은 종류의 세제는 사용을 피하십시오. • 모니터의 포장을 풀 때 하얀 분말이 발견될 경우 천으로 닦아내십시오.
모니터 설치하기 스탠드 연결 참고: 높이 조절기와 스탠드 베이스는 모니터가 공장에서 배송될 때는 분리된 상태입니다. 참고: 다음 지침은 모니터와 함께 배송된 스탠드에만 적용됩니다. 다른 곳에서 구입한 스탠드를 연결하는 경우 스탠드에 포함된 설치 지침을 따르십시오. 모니터 스탠드를 부착하려면: 1. 높이 조절기를 정렬하여 스탠드 베이스에 놓으십시오. 2. 스탠드 베이스 하단의 나사 손잡이를 열고 시계 방향으로 돌려 스탠드 조립을 고정하십시오. 3. 나사 손잡이를 닫으십시오.
4. 모니터의 보호 덮개를 열어 모니터에 있는 VESA 슬롯에 액세스하십시오. 5. 높이 조절기의 탭을 디스플레이 후면 덮개의 슬롯에 밀어 넣고 스탠드를 아래로 눌러 조립을 고정하십시오.
6. 높이 조절기를 잡고 모니터를 조심스럽게 들어올린 다음 평평한 표면에 놓으십시오. 참고: 우발적인 손상을 방지하기 위해 모니터를 들어올릴 때 높이 조절기를 단단히 잡으십시오. 7. 보호 덮개를 모니터에서 들어올리십시오.
기울기, 회전 및 세로 확장 사용 참고: 다음 지침은 모니터와 함께 배송된 스탠드에만 적용됩니다. 다른 곳에서 구입한 스탠드를 연결하는 경우 스탠드에 포함된 설치 지침을 따르십시오. 기울기, 회전 및 세로 확장 모니터에 스탠드가 부착된 상태에서 가장 편안한 시야각을 위해 모니터를 기울일 수 있습니다.
C3422WE 5° 120 mm 30° 30° 21° 참고: 스탠드는 모니터가 공장에서 배송될 때는 분리된 상태입니다. 디스플레이 회전 (C2422HE/C2722DE만) 디스플레이를 회전하기 전에 높이 조절기를 끝까지 올리고 디스플레이를 최대한 뒤로 기울여서 하단 가장자리가 바닥에 닿지 않게 하십시오. 1 90° 90° 2 참고: 디스플레이를 회전하려면, Dell 컴퓨터의 경우 최신 그래픽 드라이버를 다운로드하여 설치한 후 디스플레이 설정을 가로와 세로 사이에서 전환하십시오. 다운로드를 하려면 https://www.dell.com/support/drivers에 들어가 적합한 드라이버를 검색하십시오. 참고: 디스플레이가 세로 모드일 때 3D 게임과 같이 그래픽을 많이 사용하는 애플리케이션을 사용할 경우 성능 저하가 발생할 수 있습니다.
회전 후 컴퓨터 디스플레이 설정 구성(C2422HE/ C2722DE만) 디스플레이를 회전한 후 다음 절차를 완료하여 컴퓨터 디스플레이 설정을 구성합니다. 참고: Dell 컴퓨터가 아닌 컴퓨터에서 모니터를 사용하는 경우 그래픽 카드 제조업체의 웹사이트나 컴퓨터 제조업체 웹사이트를 방문하여 디스플레이 내용을 회전하는 방법을 확인하십시오. 디스플레이 설정을구성하려면: 1. Desktop (바탕화면)에서 마우스 오른쪽 버튼을 클릭하고 Properties (속성) 을 클릭하십시오. 2. Settings (설정) 탭을 선택하고 Advanced (고급)을 클릭하십시오. 3. AMD 그래픽 카드가 있는 경우 Rotation (회전) 탭을 선택하고 원하는 회전을 설정하십시오. 4. nVidia 그래픽 카드가 있는 경우 nVidia 탭을 클릭하십시오. 왼쪽 열에서 NVRotate를 선택한 다음 원하는 회전을 선택하십시오. 5. Intel® 그래픽 카드가 있는 경우 Intel 그래픽 탭을 선택하십시오.
모니터 웹캠 작동하기 모니터 내장 웹캠 및 마이크를 사용하려면 웹캠 모듈을 눌렀다가 떼십시오. 웹캠 모듈이 팝업으로 나타납니다.
모니터 연결하기 경고: 이 섹션의 어떤 절차든 시작하기 전에 안전 지침을 따르십시오. 모니터를 컴퓨터에 연결하려면: 1. 컴퓨터를 끕니다. 2. DisplayPort 또는 USB 케이블과 모니터의 USB Type-C 케이블을 컴퓨터에 연결합니다. 3. 모니터를 켭니다. 4. 모니터 OSD 메뉴에서 올바른 입력 소스를 선택하고 컴퓨터를 켭니다. 참고: C2422HE/C3422WE 기본 설정은 DisplayPort 1.2, C2722DE 기본 설정은 DisplayPort 1.4입니다. DisplayPort 1.1 그래픽 카드는 정상적으로 표시되지 않을 수 있습니다. 기본 설정을 변경하려면 “제품별 문제 – PC에 DP 연결을 사용할 경우 이미지 없음”을 참조하십시오.
DP 케이블 연결 DP DP DP 멀티스트림 전송(MST) 기능용 모니터 연결 (C2422HE/C2722DE만) DP DP DP out DP 참고: 은 DP MST 기능을 지원합니다.이 기능을 사용하려면 PC 그래픽 카드가 MST 옵션으로 DP1.2 인증을 받아야 합니다. 참고: DP 출력 커넥터를 사용할 때 고무 플러그를 제거하십시오.
USB 케이블 연결 USB USB USB C 타입 USB 케이블 연결하기 USB Type-C USB Type-C 모니터의 C 타입 USB 포트: • 그 대신 USB Type-C, DisplayPort 1.4(C2722DE) 또는 DisplayPort 1.2(C2422HE/ C3422WE)로 사용할 수 있습니다. • 최대 90 W까지의 프로필에서 USB Power Delivery(PD)를 지원합니다. 참고: 랩톱의 전원 요구사항/실제 전력 소비량 또는 배터리를 사용할 수 있는 잔여 작동 간과 관계없이 Dell C2422HE/C2722DE/C3422WE 모니터는 최대 90 W의 전력을 랩톱에 달할 수 있도록 설계되었습니다.
USB-C MST(Multi-Stream Transport) 기능에 대해 모니터 연결 중 (C2422HE/ C2722DE만) DP in USB Type-C DP out USB Type-C 참고: MST를 통해 지원되는C2422HE/C2722DE의 최대 수는 USB-C 소스 대역폭에 따라 다릅니다. “제품별 문제 – USB-C MST 사용 시 이미지가 나타나지 않음”을 참조하십시오. 참고: DP 출력 커넥터를 사용할 때 고무 플러그를 제거하십시오.
Dell 전원 버튼 동기화(DPBS) • C2422HE/C2722DE/C3422WE 모니터는 Dell 전원 버튼 동기화(DPBS) 기능과 함께 설계되어 모니터 전원 버튼에서 PC 시스템 전원 상태를 제어할 수 있습니다. 이 기능은 Dell OptiPlex 7090/3090 Ultra 플랫폼과 호환되며 USB-C 인터페이스에서 지원됩니다. USB Type-C OptiPlex 7090/3090 Ultra USB Type-C • 처음에 DPBS 기능을 작동하도록 하기 위해서는 먼저 Control Panel(제어판) 에서 Dell OptiPlex 7090/3090 Ultra 플랫폼에 대해 다음 단계를 따라야 합니다. Control Panel(제어판)으로 이동합니다. Hardware and Sound(하드웨어 및 소리)와 Power Options(전원 옵션)을 차례로 선택합니다.
System Settings(시스템 설정)으로 이동합니다. When I press the power button(전원 단추를 누를 때)의 드롭다운 메뉴에 Do nothing/Sleep/Hibernate/Shut down(아무 것도 안 함/절전 모드/최대 절전 모드/시스템 종료) 중에 선택할 수 있는 몇 가지 옵션이 있으며 Sleep/Hibernate/ Shut down(절전 모드/최대 절전 모드/시스템 종료)를 선택할 수 있습니다.
참고: Do nothing(아무 것도 안 함)을 선택하지 마십시오. 그럴 경우 모니터 전원 버튼이 PC 시스템 전원 상태를 동기화할 수 없습니다. 모니터 DPBS 처음 연결하기 USB Type-C 최초 모니터 전원 상태(OFF) 최초 시스템 전원 상태(OFF) USB Type-C 처음 DPBS 기능을 설정하려면 아래 단계를 따르십시오. 1. PC 및 모니터가 모두 꺼졌는지 확인합니다. 2. PC에서 모니터로 USB Type-C 케이블을 연결합니다. 3. 모니터를 전원 버튼을 눌러 모니터를 켭니다. 4. 모니터 및 PC가 모두 잠깐 켜집니다. 잠깐 기다리면(약 6초) PC 및 모니터가 모두 꺼집니다. 5. 모니터 전원 버튼 또는 PC 전원 버튼을 누릅니다. PC 및 모니터가 둘 다 켜집니다. PC 시스템 전원 상태가 모니터 전원 버튼과 동기화되었습니다.
DPBS 기능 사용 모니터 전원 버튼 또는 PC 전원 버튼을 누를 때 모니터/PC 상태는 다음과 같습니다. 1 USB Type-C 2 최초 모니터 전원 상태(ON) 새 모니터 전원 상태(OFF) PC/모니터 전원 버튼을 누릅니다. 최초 시스템 전원 상태(ON) 새 시스템 전원 상태(OFF) USB Type-C 1 USB Type-C USB Type-C 2 최초 모니터 전원 상태(OFF) 새 모니터 전원 상태(ON) PC/모니터 전원 버튼을 누릅니다. 최초 시스템 전원 상태(OFF) USB Type-C 새 시스템 전원 상태(ON) USB Type-C 모니터 및 PC 전원 상태가 둘다 켜기 일 경우 모니터 전원 버튼을 4초간 길게 누르면 화면에 PC를 종료할지 묻는 메시지가 표시됩니다. USB Type-C 4초간 길게 누릅니다.
Slide to shut down your PC 모니터 및 PC 전원 상태가 둘다 켜기 일 경우 모니터 전원 버튼을 10초간 길게 누르면 PC가 종료됩니다. USB Type-C 10초간 길게 누릅니다. 52 | 모니터 설치하기 PC가 종료됩니다.
USB-C 멀티 스트림 전송(MST) 기능에 모니터 연결하기 (C2422HE/C2722DE 전용) 처음 OFF(끄기) 전원 상태에서 PC가 두 모니터에 연결되고 PC 시스템 전원 상태가 모니터 1 전원 버튼과 동기화됩니다. 모니터 1 또는 PC 전원 버튼을 누르면 모니터 1 및 PC가 둘 다 켜집니다. 한편 모니터 2는 OFF(끄기)로 유지됩니다. 모니터 2는 전원 버튼을 수동으로 눌러 켜야 합니다. DP 입력 USB Type-C DP 출력 USB Type-C 시스템 전원 상태(ON) 모니터 2 모니터 1 이와 비슷하게 처음 ON(켜기) 전원 상태에서 PC가 두 모니터에 연결되고 PC 시스템 전원 상태가 모니터 1 전원 버튼과 동기화됩니다. 모니터 1 또는 PC 전원 버튼을 누르면 모니터 1 및 PC가 둘 다 꺼집니다. 한편 모니터 2는 Standby(대기) 모드가 됩니다. 모니터 2는 전원 버튼을 수동으로 눌러 꺼야 합니다.
USB-C에 모니터 연결하기 Dell OptiPlex 7090 Ultra 플랫폼에는 USB-C 포트가 2개 있습니다. 따라서 모니터 1 및 모니터 2 전원 상태가 PC와 동기화될 수 있습니다. PC 및 두 모니터가 처음 ON(켜기) 전원 상태 일 때 모니터 1 또는 모니터 2의 전원 버튼을 누르면 PC, 모니터 1 및 모니터 2가 OFF(끄기) 상태가 됩니다.
Off(끄기) 모드에서 USB-C Charging(USB-C 충전)을 On(켜기)으로 설정했는지 확인하십시오. PC 및 두 모니터가 처음 OFF(켜기) 전원 상태 일 때 모니터 1 또는 모니터 2의 전원 버튼을 누르면 PC, 모니터 1 및 모니터 2가 ON(끄기) 상태가 됩니다.
케이블 정리하기 모든 필수 케이블을 모니터 및 컴퓨터에 연결한 후(케이블 연결은 모니터 연결하기 참조) 위에 표시된 대로 모든 케이블을 정리하십시오. Kensington 잠금 장치를 사용한 모니터 보안(옵션) 보안 잠금 슬롯은 모니터 하단에 있습니다. (보안 잠금 슬롯보기) Kensington 잠금 장치(별도 판매) 사용에 대한 자세한 정보는 잠금 장치와 함께 제공되는 설명서를 참조하십시오. Kensington 보안 잠금을 사용하여 모니터를 테이블에 고정하십시오. 참고: 이 이미지는 설명을 위한 것입니다. 잠금 장치의 모양은 다를 수 있습니다.
모니터 스탠드 제거하기 주의: 스탠드를 제거하는 동안 LCD 화면의 긁힘을 방지하려면 모니터를 부드럽고 깨끗한 표면에 놓도록 하십시오. 참고: 다음 지침은 모니터와 함께 배송된 스탠드에만 적용됩니다. 다른 곳에서 구입한 스탠드를 연결하는 경우 스탠드에 포함된 설치 지침을 따르십시오. 스탠드를 제거하려면: 1. 모니터를 부드러운 천 또는 쿠션 위에 놓습니다. 2. 스탠드 해제 버튼을 길게 누릅니다. 3. 스탠드를 위로 들어올리고 모니터와 분리합니다.
벽 장착(옵션) 참고: M4 x 11mm 나사를 사용하여 모니터를 벽면 마운팅 키트에 연결하십시오. VESA 호환 벽면 마운팅 키트와 함께 제공되는 지침을 참조하십시오. 1. 안정적이고 평평한 테이블 위에 부드러운 천 또는 쿠션을 깔고 그 위에 모니터를 놓습니다. 2. 스탠드를 분리합니다. 3. Phillips 십자 드라이버를 사용하여 플라스틱 커버에 고정된 4개 나사를 분리합니다. 4. 벽면 마운팅 키트의 마운팅 브래킷을 모니터에 부착합니다. 5. 벽면 마운팅 키트와 함께 제공되는 지침을 따라 모니터를 벽면에 장착합니다. 참고: 최소 중량/부하 용량이 17.32kg(38.40lb)(C2422HE)/22.96kg(50.80lb) (C2722DE)/29.20kg(64.24lb)(C3422WE)인 UL, CSA 또는 GS 등재 벽면 마운트 브래킷만 사용하십시오.
모니터 작동하기 모니터의 전원을 켜십시오. 모니터를 켜려면 버튼을 누르십시오. 조이스틱 컨트롤 사용하기 모니터 뒷면의 조이스틱 컨트롤을 사용하여 OSD를 조정하십시오. 1. 조이스틱 버튼을 눌러 OSD 메인 메뉴를 시작하십시오. 2. 옵션에서 이동하려면 조이스틱을 위/아래/왼쪽/오른쪽으로 움직이십시오. 3. 설정을 확인하고 종료하려면 조이스틱 버튼을 다시 누르십시오. 조이스틱 설명 • OSD 메뉴가 나타나면 버튼을 눌러 선택을 확인하거나 설정을 저장합니다. • OSD 메뉴가 사라지면 버튼을 눌러 OSD 메인 메뉴를 시작합니다. 메뉴 시스템에 액세스하기를 참조하십시오. • 양방향(오른쪽과 왼쪽) 탐색용. • 하위 메뉴에 들어가려면 오른쪽으로 움직이십시오. • 하위 메뉴를 종료하려면 왼쪽으로 움직이십시오. • 선택한 메뉴 항목의 매개변수를 늘리거나(오른쪽) 줄입니다(왼쪽). • 양방향(위 및 아래) 방향 탐색용. • 메뉴 항목 사이를 이동합니다.
후면 패널 제어 버튼 사용하기 모니터 후면의 조이스틱 컨트롤을 사용하여 디스플레이 설정을 조정하십시오. 이 버튼을 사용하여 설정을 조정하면 설정이 변경되는 대로 OSD에 각 속성의 숫자 값이 표시됩니다. Display Info 다음 표에는 후면-패널 버튼에 대한 설명이 나와있습니다. 후면 패널 버튼 1 Menu (메뉴) 설명 이 Menu (메뉴) 버튼을 사용하여 화면 표시(OSD)를 시작하겨 OSD 메뉴를 선택합니다. 메뉴 시스템에 액세스하기를 참조하십시오. 이 버튼을 사용하여 Display Info(디스플레이 정보) 목록에서 선택합니다. 2 Display Info (디스플레이 정보) 이 버튼을 사용하여 Input Source (입력 소스) 목록에서 선택합니다. 3 Input Source (입력 소스) 이 버튼을 사용하여 사전 설정 색상 모드 목록에서 선택합니다.
후면 패널 버튼 7 설명 이 버튼을 사용하여 메인 메뉴로 돌아가거나 OSD 메인 메뉴를 종료합니다. Exit (종료) OSD 잠금 기능 사용 OSD 메뉴 및/또는 전원 버튼에 액세스하는 것을 방지하기 위해 전면 패널 컨트롤 버튼을 잠글 수 있습니다. 잠금 메뉴를 사용하여 버튼을 잠급니다. 1. 다음 옵션 중 한 개를 선택하십시오. 24/27/34 Monitor Brightness/Contrast Language Input Source Rotation Color Transparency Display Timer PIP/PBP Lock Menu Buttons USB Reset Menu Power Button Audio Menu + Power Buttons Menu Disable Personalize Others Exit 2. 다음 메시지가 표시됩니다.
조이스틱을 사용하여 버튼을 잠급니다. 조이스틱의 왼쪽 방향 탐색을 4초 동안 누르면 화면에 메뉴가 표시됩니다. Select Option: 다음 옵션 중 한 개를 선택하십시오 옵션 1 설명 이 옵션을 선택하여 OSD 메뉴 기능을 잠급니다. 메뉴 버튼 잠금 2 전원 버튼 잠금 이 옵션을 사용하여 전원 버튼을 잠급니다. 이렇게 하면 사용자가 전원 버튼을 사용하여 모니터를 끄는 것을 방지할 수 있습니다. 이 옵션을 사용하여 OSD 메뉴와 전원 버튼을 잠가 모니터를 끕니다. 3 메뉴 및 전원 버튼 잠금 이 옵션을 사용하여 기본 제공 진단을 실행합니다. 기본 제공 진단을 참조하십시오.
버튼을 잠금 해제하려면 화면에 메뉴가 표시될 때까지 조이스틱의 왼쪽 방향 탐색을 4초 동안 누릅니다. 다음 표에서는 전면 패널의 컨트롤 버튼을 잠금 해제하는 옵션을 설명합니다. Select Option: 옵션 1 설명 이 옵션을 사용하여 OSD 메뉴 기능을 잠금 해제합니다. 메뉴 버튼 잠금 해제 이 옵션을 사용하여 전원 버튼을 잠금 해제하여 모니터를 끕니다. 2 전원 버튼 잠금 해제 이 옵션을 사용하여 OSD 메뉴와 전원 버튼을 잠금 해제하여 모니터를 끕니다.
전면-패널 버튼 모니터 전면의 버튼을 사용하여 이미지 설정을 조정합니다. 패널-앞쪽 버튼 설명 위로(증가) 및 아래(감소) 버튼을 사용하여 OSD 메뉴의 항목을 조정합니다. 1 아래 위로 이전 버튼을 사용하여 이전 메뉴로 돌아갑니다. 2 이전 다음 버튼을 사용하여 다음 레벨로 이동하거나 옵션을 선택합니다. 3 다음 선택 버튼을 사용하여 선택을 확인합니다.
화면 표시(OSD) 메뉴 사용하기 메뉴 시스템에 액세스하기 아이콘 메뉴 및 하위 메뉴 설명 Brightness/ 이 메뉴를 사용하여 Brightness/Contrast (밝기/명암) Contrast 조정을 활성화합니다. (밝기/명암) 24/27/34 Monitor Brightness/Contrast Input Source Color Display PIP/PBP USB Audio Menu Personalize Others 75% 75% Exit Brightness(밝기)는 백라이트의 밝기를 조정합니다. ( 최소 0, 최대 100) 밝기를 높이려면 조이스틱을 위로 올리십시오. 밝기를 낮추려면 조이스틱을 아래로 내리십시오. Contrast (명암) 먼저 Brightness (밝기)를 조정한 후 조정이 추가로 필요할 경우에만 Contrast (명암)을 조정합니다. 조이스틱을 위로 올려 명암을 늘리고 아래로 내려 명암을 줄입니다(0~100).
아이콘 메뉴 및 하위 메뉴 설명 Input Source Input Source (입력 소스) 메뉴를 사용하여 모니터에 (입력 소스) 연결된 다양한 비디오 입력 간에 선택합니다. 24/27/34 Monitor Brightness/Contrast USB-C Input Source DP Color HDMI 90W Display Auto Select PIP/PBP Auto Select for USB-C USB Rename Inputs Audio Reset Input Source On 90W Prompt for Multiple Inputs USB-C 90W Menu Personalize Others Exit 90 W USB-C 90 W 커넥터를 사용하고 있을 때는 USB-C 90 W 입력을 선택합니다. 조이스틱 버튼을 눌러 선택을 확인합니다. DP DP (DisplayPort) 커넥터를 사용하는 경우 DP 입력을 선택합니다. 조이스틱 버튼을 눌러 선택을 확인합니다.
아이콘 메뉴 및 하위 메뉴 Reset Input Source (입력 소스 초기화) Color (컬러) 설명 Input Source(입력 소스) 메뉴에서 모든 설정을 공장 기본값으로 초기화합니다. 컬러 메뉴를 사용하여 컬러 설정 모드를 조정할 수 있습니다. 24/27/34 Monitor Brightness/Contrast Preset Modes Standard Input Source Input Color Format RGB Color Reset Color Display PIP/PBP USB Audio Menu Personalize Others Exit Preset Modes 프리셋 모드(Preset Modes)를 선택하면 목록에서 표준 (사전 설정 모드) (Standard), 영화(Movie), 게임(Game), Warm ( 따뜻함), Cool (차가움), 사용자 지정 색상(Custom Color)을 선택할 수 있습니다.
아이콘 메뉴 및 하위 메뉴 설명 • Movie (영화): 영화용으로 이상적입니다. • Game (게임): 대부분의 게이밍 애플리케이션용으로 이상적입니다. • Warm (따뜻함): 낮은 색온도에서 색상을 나타냅니다. 화면이 빨간색/노란색 색조로 더 따뜻하게 보입니다. • Cool (차가움): 높은 색온도에서 색상을 나타냅니다. 화면이 파란색 색조로 더 차갑게 보입니다. • Custom Color(사용자 지정색): 수동으로 색상 설정을 조정할 수 있습니다. 조이스틱의 왼쪽 및 오른쪽 버튼을 눌러 빨간색, 녹색 및 파란색 값을 조정하고 나만의 사전 설정 색상 모드를 만듭니다. Input Color 비디오 입력 모드를 다음 값으로 설정할 수 있습니다. Format (입력 • RGB: 모니터가 C 타입 USB, DP, HDMI 케이블을 색상 형식) 사용하여 컴퓨터(또는 DVD 플레이어)에 연결되어 있는 경우 이 옵션을 선택합니다.
아이콘 메뉴 및 하위 메뉴 Reset Color (컬러 설정 초기화) Display (디스플레이) 설명 모니터의 컬러 설정을 기본값으로 초기화할 수 있습니다. 디스플레이 메뉴를 사용하여 이미지를 조정합니다. 24/27/34 Monitor Brightness/Contrast Aspect Ratio Input Source Sharpness 50 Color Response Time Normal Display MST PIP/PBP USB-C Prioritization USB Reset Display 16:10 High Resolution Audio Menu Personalize Others Exit Aspect Ratio (화면 비율) Sharpness (선명도) Response Time (응답 시간) MST (C2422HE/ C2722DE만) C2422HE:이미지 비율을 Wide 16:9 (와이드 16:9), 4:3, 5:4으로 조정합니다.
아이콘 메뉴 및 하위 메뉴 USB-C Prioritization (USB-C 우선순위 지정) (C2722DE만) Reset Display (디스플레이 초기화) PIP/PBP (C3422WE 전용) 설명 USB Type-C 포트/DisplayPort를 사용하라 때 고해상도 (High Resolution) 또는 고속(High Data Speed) 데이터 전송에 우선순위를 지정할 수 있습니다. 참고: PC에 내장 배터리 팩이 없고 모니터 USB Type-C 포트(예: Dell OptiPlex Ultra 데스크톱)에서 직접 전원이 공급될 경우 그때 그때 USB-C 우선순위 지정 변경 시 모니터에서 PC로의 전원이 차단됩니다. 전원 끄기 중 켜짐으로 USB-C 충전을 설정하십시오. Display (디스플레이) 메뉴에서 모든 설정을 공장 기본값으로 초기화합니다. 이 기능으로 다른 입력 소스의 이미지를 표시하는 창이 나타납니다.
아이콘 메뉴 및 하위 메뉴 설명 PIP/PBP Mode PIP 또는 PBP(Picture by Picture) 모드를 조정합니다. (PIP/PBP 끄기를 선택하여 이 기능을 비활성화할 수 있습니다.
아이콘 메뉴 및 하위 메뉴 PIP/PBP (Sub) (PIP/PBP (하위)) 설명 PBP 하위 창을 위해 모니터에 연결되었을 수 있는 다른 비디오 신호 간에 선택합니다. 버튼을 눌러 PBP 하위 창 소스 신호를 선택합니다. 24/27/34 Monitor Brightness/Contrast PIP/PBP Mode USB-C Input Source PIP/PBP (Sub) DP Color USB Switch HDMI Display Video Swap PIP/PBP Audio USB Contrast (Sub) 90 W Audio Menu Personalize Others Exit 선택하여 PBP 모드에서 USB 업스트림 소스 간을 전환합니다. 조이스틱을 움직여 PBP 모드에서 USB 업스트림 소스 간에 전원합니다. Video Swap 선택하여 PBP 모드에서 주 창과 하위 창 간의 비디오를 (비디오 전환) 전환합니다. 조이스틱을 움직여 주 창과 하위 창을 전환합니다.
아이콘 메뉴 및 하위 메뉴 설명 USB DP 입력 신호에 대한 USB 업스트림 포트를 설정할 수 있습니다. 따라서 컴퓨터를 업스트림 포트 중 하나에 연결할 때 현재 입력 신호에서 모니터의 USB 다운스트림 포트(예: 키보드 및 마우스)를 사용할 수 있습니다. 하나의 업스트림 포트만 사용할 경우 연결된 업스트림 포트가 활성화됩니다. 24/27/34 Monitor Brightness/Contrast DP assign to USB-B Input Source HDMI assign to USB-B Color Display PIP/PBP USB Audio Menu Personalize Others Exit 참고: 데이터 손상 또는 손실을 방지하기 위해 USB 업스트림 포트를 충전하기 전에 모니터 USB 업스트림 포트에 연결된 컴퓨터에서 사용 중인 USB 스토리지 장치가 없는지 확인하십시오.
아이콘 메뉴 및 하위 메뉴 설명 Audio(오디오) 오디오 설정 메뉴를 사용하여 오디오 설정을 조정합니다. 24/27/34 Monitor Brightness/Contrast Volume 100 Input Source Speaker On Color Reset Audio Display PIP/PBP USB Audio Menu Personalize Others Exit Volume(볼륨) 스피커 볼륨을 높일 수 있습니다 . 조이스틱을 위 , 아래로 움직여 ‘0’~‘100’으로 볼륨을 조정합니다 . Speaker (스피커) 스피커 기능 켜기 또는 끄기 를 선택합니다 . Reset Audio (오디오 초기화) Audio( 오디오 ) 메뉴에서 모든 설정을 공장 기본값으로 초기화합니다 . 참고 :USB 케이블로 오디오 볼륨을 기본값이 아닌 Windows 볼륨과 동기화합니다 .
아이콘 메뉴 및 하위 메뉴 설명 Menu (메뉴) 이 옵션을 선택하여 OSD 언어, 메뉴가 화면에 남아 있는 시간 등의 OSD 설정을 조정합니다. 24/27/34 Monitor Brightness/Contrast Language Input Source Rotation Select √ Color Transparency 20 Display Timer 20s PIP/PBP Lock Disable USB Reset Menu English Audio Menu Personalize Others Exit Language (언어) OSD 디스플레이를 8개 언어 중 하나로 설정합니다. (영어, 스페인어, 프랑스어, 독일어, 브라질 포르투갈어, 러시아어, 중국어(간체) 또는 일본어). Rotation OSD by 0/90/270도로 OSD를 회전합니다. (회전) 디스플레이 회전에 따라 메뉴를 조정할 수 있습니다.
아이콘 메뉴 및 하위 메뉴 설명 Lock (잠금) 잠긴 모니터에서 제어 버튼으로 사람들이 컨트롤에 액세스하지 못하게 할 수 있습니다. 또한 다중 모니터를 나란히 설치한 상태에서 의도치 않게 활성화되지 않게 방지할 수도 있습니다. 24/27/34 Monitor Brightness/Contrast Language Input Source Rotation Color Transparency Display Timer PIP/PBP Lock Menu Buttons USB Reset Menu Power Button Audio Menu + Power Buttons Menu Disable Personalize Others Exit Reset Menu (메뉴 초기화) 76 | • 메뉴 버튼: OSD를 통해 메뉴 버튼을 잠급니다. • 전원 버튼: OSD를 통해 전원 버튼을 잠급니다. • 메뉴 + 전원 버튼: OSD를 통해 메뉴 및 전원 버튼을 모두 잠급니다.
아이콘 메뉴 및 하위 메뉴 설명 Personalize 24/27/34 Monitor (개인화) Aspect Ratio Brightness/Contrast Shortcut Key 1 Input Source Shortcut Key 2 Input Source Color Shortcut Key 3 Preset Modes Display Shortcut Key 4 Brightness/Contrast PIP/PBP Shortcut Key 5 Display Info USB Power Button LED Audio USB-C Charging Menu Other USB Charging Off in Standby Mode Personalize Fast Wakeup Off Others Reset Personalization On in On Mode 90W Off in Off Mode Exit Shortcut key 1 (바로가기 키 1) Shortcut key 2 (바로가
아이콘 메뉴 및 하위 메뉴 설명 Others (기타) 이 옵션을 선택하여 DDC/CI, LCD conditioning (LCD 컨디셔닝)등 OSD 설정을 조정합니다. 24/27/34 Monitor Brightness/Contrast Display Info Select √ Input Source DDC/CI On Color LCD Conditioning Off Display Firmware M2T101 PIP/PBP Service Tag ABCDEFG USB Reset Others Audio Factory Reset ENERGY STAR® Menu Personalize Others Exit Display Info (정보 표시) DDC/CI 모니터의 현재 설정을 표시합니다. DDC/CI (디스플레이 데이터 채널/명령 인터페이스) 는 컴퓨터의 소프트웨어로 모니터 매개변수(밝기, 색상 밸런스 등)를 조정할 수 있습니다.
아이콘 메뉴 및 하위 메뉴 LCD Conditioning (LCD 컨디셔닝) 설명 사소한 잔상이 발생하는 경우를 줄이는 데 도움이 됩니다. 잔상의 정도에 따라 프로그램을 실행하는 데 시간이 조금 걸릴 수 있습니다. On (켜기)를 선택하여 이 기능을 비활성화할 수 있습니다. 24/27/34 Monitor Brightness/Contrast Display Info Input Source DDC/CI Color LCD Conditioning On Display Firmware Off PIP/PBP Service Tag USB Reset Others Audio Factory Reset Menu Personalize Others Exit Firmware (펌웨어) Service Tag (서비스 태그) Reset Others (기타 초기화) Factory Reset (공장 기본값으로 초기화하기) 모니터의 펌웨어 버전을 표시합니다. 서비스 태그를 표시합니다.
OSD 경고 메시지 모니터가 특정 해상도 모드를 지원하지 않으면 다음 메시지가 표시됩니다. The current input timing is not supported by the monitor display. Please change your input timing to 1920x1080/2560x1440/3440x1440, 60Hz or any other monitor listed timing as per monitor specifications. 이는 모니터가 컴퓨터에서 수신된 신호를 공기화할 수 없음을 의미합니다. 이 모니터에서 주소 지정 가능한 수평 및 수직 주파수 범위를 확인하려면 모니터 사양을 참조하십시오. 권장 모드는 1920 x 1080 (C2422HE) / 2560 x 1440 (C2722DE) / 3440 x 1440 (C3422WE)입니다. DDC/CI 기능이 비활성화되기 전에 다음 메시지를 확인할 수 있습니다.
DP 대체 모드 지원 케이블이 다음 조건 하에 모니터에 연결되면 메시지가 표시됩니다. • USB-C 충전 90W에 대한 자동 선택이 여러 입력에 대한 프롬프트 메시지로 설정된 경우. • USB-C에 대한 케이블이 모니터에 연결된 경우. Switch to USB-C Video Input: Yes No 기타 기능의 공장 설정 초기화에서 OSD 항목을 선택한 경우 다음과 같은 메시지가 나타납니다. Are you sure you want to reset to default settings? Yes No "예"를 선택하여 기본 설정으로 초기화한 경우 다음과 같은 메시지가 나타납니다. 24/27/34 Monitor Select ‘Yes’ to enable the following function(s): . Always on USB-C Charging . Other USB Charging Yes No When ‘Yes’ is selected, power consumption will increase.
개인 설정 속성에서 On in Standby Mode (대기 모드 "X"에서 켜짐)의 OSD 항목들을 선택할 경우 다음 메시지가 표시됩니다. Changing to this setting ( without symbol) will increase power consumption. Do you want to continue? Yes No 밝기 레벨을 기본 레벨인 75% 이상으로 조정할 경우 다음 메시지가 표시됩니다. Adjusting to this value will increase power consumpiton above the default level. Do you want to continue? Yes No • “예”를 선택할 경우 전원 메시지가 한 번만 표시됩니다. • ‘아니요’를 선택할 경우 전원 경고 메시지가 다시 팝업됩니다. • 사용자가 OSD 메뉴에서 공장 초기화를 시도할 때만 전원 경고 메시지가 다시 나타납니다.
USB 타입 C, DP, HDMI 입력이 선택되었는데 해당하는 케이블이 연결되지 않은 경우 아래와 같은 대화 상자가 표시됩니다. No DP Cable The display will go into Standby Mode in 4 minutes. www.dell.com/C24/27/3422XE 또는 No USB-C Cable The display will go into Standby Mode in 4 minutes. www.dell.com/C24/27/3422XE 또는 No HDMI Cable The display will go into Standby Mode in 4 minutes. www.dell.com/C24/27/3422XE 웹캠 모듈이 나오면 다음 메시지가 표시됩니다. Webcam + Mic: Enable 웹캠 모듈이 들어가면(오므려짐) 다음 메시지가 표시됩니다.
웹캠이 들어간(오므려짐) 상태에서 Mute (음소거) 버튼을 누르면 다음 메시지가 표시됩니다. Please pop up webcam + mic module to enable your mic USB 업스트림 케이블이 연결되지 않은 상태에서 Teams/ Hookswitch/ Mute ( 음소거) 버튼을 누르면 다음 메시지가 표시됩니다. This function is inactive. To enable it, you need to connect USB upstream to the monitor. 참고: Teams/Hookswitch/음량 감소/음량 증가/음소거 버튼을 작동하려면 USB 업스트림 케이블(Type-A - Type-B 또는 Type-C - Type-C)로 PC와 모니터를 연결해야 합니다. 자세한 내용은 문제 해결을 참조하십시오.
최대 해상도 설정 모니터의 최대 해상도를 설정하려면: Windows 7, Windows 8 또는 Windows 8.1에서: 1. Windows 8 또는 Windows 8.1에서만 바탕화면 타일을 선택하여 클래식 바탕화면으로 전환합니다. Windows Vista 및 Windows 7의 경우에는 이 단계를 건너뜁니다. 2. 바탕화면에서 마우스 오른쪽 버튼을 클릭하고 Screen Resolution (화면 해상도)를 클릭합니다. 3. Screen Resolution (화면 해상도)의 드롭다운 목록을 클릭하고 1920 x 1080 (C2422HE) / 2560 x 1440 (C2722DE) / 3440 x 1440 (C3422WE)을 선택합니다. 4. OK (확인)을 클릭합니다. Windows 10에서: 1. 바탕화면에서 마우스 오른쪽 버튼을 클릭하고 Display Settings(디스플레이 설정)를 클릭합니다. 2. Advanced display settings(고급 디스플레이 설정)를 클릭합니다. 3.
KVM USB 스위치 설정하기 KVM USB 스위치를 모니터용 바로가기 키로 설정하려면 1. 조이스틱 버튼을 눌러 OSD 메인 메뉴를 시작하십시오. 2. 조이스틱을 움직여 Personalize(사용자 맞춤)를 선택합니다.
다음은 해당 색상 프레임에서 설명된 것과 같이 여러 연결 시나리오 및 해당 USB 선택 메뉴 설정의 그림입니다. 1. HDMI + USB-B를 컴퓨터 1에, 그리고 DP + USB A - C를 컴퓨터 2에 연결할 때: 1 1 HDMI 2 4 3 2 DP USB-B USB A - C 3 4 참고: USB Type-C 연결은 현재 데이터 전송만 지원합니다. USB 선택이 HDMI의 경우 USB-B로 설정되고 DP는 USB-C 설정되도록 하십시오.
2. HDMI + USB-B를 컴퓨터 1에, 그리고 USB Type-C를 컴퓨터 2에 연결할 때: 1 HDMI 1 2 3 2 USB-B USB Type-C 3 참고: USB Type-C 연결은 현재 비디오 및 데이터 전송만 지원합니다. USB 선택을 HDMI는 USB-B로 설정하도록 하십시오. 24/27/34 Monitor Brightness/Contrast DP assign to USB-B Input Source HDMI assign to USB-B Color Display PIP/PBP USB Audio Menu Personalize Others Exit 참고: USB Type-C 포트가 DisplayPort 대체 모드를 지원하기 때문에 USB 설정을 USB Type-C로 설정하지 않아도 됩니다. 참고: 위에서 예로 들지 않은 다른 비디오 입력 소스에 연결할 때도 동일한 방법으로 USB 선택에 대해 올바른 설정을 하여 포트를 페어링하십시오.
자동 KVM 설정하기 다음 지침을 따라 모니터에 대한 자동 KVM을 설정할 수 있습니다. 1. PIP/PBP Mode(PIP/PBP 모드)가 Off(끄기)로 설정되었는지 확인합니다. 24/27/34 Monitor Brightness/Contrast PIP/PBP Mode Off Input Source PIP/PBP (Sub) USB-C Color USB Switch Display Video Swap PIP/PBP Audio Main USB Contrast (Sub) 75 90 W Audio Menu Personalize Others Exit 참고: 이 PIP/PBP 기능은 C3422WE 전용입니다. 2. Auto Select(자동 선택)가 On(켜기)으로 설정되고 Auto Select for USBC(USB-C에 대한 자동 선택)가 예 로 설정되었는지 확인합니다.
24/27/34 Monitor Brightness/Contrast USB-C Input Source DP Color HDMI Display Auto Select Prompt for Multiple Inputs PIP/PBP Auto Select for USB-C Yes USB Rename Inputs No Audio Reset Input Source 90W Menu Personalize Others Exit 3. USB 포트와 비디오 입력이 위의 조건에 따라 제대로 페어링되었는지 확인합니다. 24/27/34 Monitor Brightness/Contrast DP assign to USB-B Input Source HDMI assign to USB-B Color Display PIP/PBP USB Audio Menu Personalize Others Exit 참고: USB Type-C 연결의 경우 추가적인 설정이 필요 없습니다.
Windows Hello 설정 Windows® 10: Windows 시작 메뉴를 클릭하고 Settings(설정)를 클릭합니다. Accounts(계정)를 클릭합니다. Sign-in options(로그인 옵션)를 클릭합니다. 먼저 PIN을 설정해야 Windows Hello 에 등록할 수 있습니다.
PIN에서 Add(추가)를 클릭하고 Set up a PIN(PIN 설정)으로 들어갑니다. 새 PIN 과 PIN 확인 을 입력하고 OK(확인)를 클릭합니다. 완료햇으면 Windows Hello를 설정하기 위한 옵션이 잠금 해제됩니다. Windows Hello에서 Set up(설정)을 클릭하고 Windows Hello setup(Windows Hello 설정) 으로 들어갑니다.
다음 메시지가 표시됩니다. Get started(시작하기)를 클릭합니다. 화면을 계속해서 주시하고 얼굴이 화면에 나타나는 프레임 가운데에 위치하도록 합니다. 그러면 웹캠이 귀하의 얼굴을 등록합니다.
다음 메시지가 표시되면 Close(닫기)를 클릭하여 Windows Hello setup(Windows Hello 설정)을 종료합니다. 설정을 완료했으면 인식 기능을 향상할 다른 옵션이 생깁니다. 필요할 경우 Improve recognition(인식 기능 향상)을 클릭합니다.
모니터 웹캠을 기본 설정으로 설정하기 내장 웹캠이 있는 노트북을 사용하여 이 모니터를 연결할 때 장치 관리자 인터페이스에서 노트북 내장 웹캠 및 모니터 웹캠을 찾을 수 있습니다. 일반적으로 이들은 활성화 상태이며 기본 설정은 노트북 내장 웹캡을 사용합니다. 모니터 웹캠을 기본 설정으로 설정하려면 노트북 내장 웹캠을 비활성화해야 합니다. 노트북 내장 웹캠을 식별하고 비활성화하려면 아래 지침을 따르십시오. Dell Monitor IR Webcam(Dell 모니터 IR 웹캠)을 마우스 오른쪽 버튼으로 클릭하고 Properties(속성)를 클릭하여 Dell Monitor IR Webcam Properties(Dell 모니터 IR 웹캠 속성)를 엽니다.
Details > Property(세부 정보 > 속성)를 클릭하고 Hardware Ids(하드웨어 ID)를 선택합니다.
Value(값)에 이 Dell 모니터 IR 웹캠의 세부 하드웨어 ID가 표시됩니다. 노트북 내장 웹캠 및 모니터 웹캠의 하드웨어 ID는 다릅니다. C2422HE/C2722DE/C3422WE의 경우 모니터 웹캠 하드웨어 ID가 아래와 같이 표시됩니다. 하드웨어 ID가 다른 PC/Notebook(PC/노트북) 웹캡을 마우스 오른쪽 버튼으로 클릭한 후 Disable(비활성화)을 클릭합니다.
다음 메시지가 표시됩니다. Yes(예)를 클릭합니다. 이제 노트북 웹캠이 비활성화되고 모니터 웹캠이 기본 설정으로 사용됩니다. 노트북을 다시 시작합니다.
모니터 스피커를 기본 설정으로 설정하기 컴퓨터가 여러 스피커에 연결될 때 모니터 스피커를 기본 설정으로 설정하려는 경우 아래 지침을 따르십시오. Windows 작업 표시줄 알림 영역의 볼륨을 마우스 오른쪽 버튼으로 클릭합니다. Playback devices(재생 장치)를 클릭하면 Sound(소리) 설정 인터페이스로 들어갑니다. HDMI 또는 DP 케이블만 모니터에서 컴퓨터로 연결된 경우 모니터에서 DELL C2422HE/C2722DE/C3422WE라는 이름의 스피커 1대만 Sound(소리) 설정 인터페이스에 표시됩니다.
DELL C2422HE/C2722DE/C3422WE를 클릭한 후 Set Default(기본값 설정)를 클릭하면 모니터 스피커가 기본 설정으로 사용됩니다. OK(확인)를 클릭하면 Sound(소리) 설정이 종료됩니다.
USB 케이블 및 HDMI 또는 DP 케이블이 모니터에서 컴퓨터로 연결된 경우 DELL C2422HE/C2722DE/C3422WE 및 Echo Cancelling Speakerphone (C2422HE/ C2722DE/C3422WE)라는 이름의 스피커 2대가 각각 모니터에서 소리 설정 인터페이스에 표시됩니다. DELL C2422HE/C2722DE/C3422WE 및 Echo Cancelling Speakerphone (C2422HE/C2722DE/C3422WE)은 입력 신호만 다릅니다. 모니터에 대해 기본 스피커로 하나를 선택해 설정할 수 있습니다.
문제 해결 경고: 이 섹션의 어떤 절차든 시작하기 전에 안전 지침을 따르십시오. 자체 테스트 이 모니터는 모니터가 올바르게 작동하는지 여부를 확인할 수 있는 자체 테스트 기능을 제공합니다. 모니터 및 컴퓨터가 올바르게 연결되었지만 모니터 화면이 계속 어두운 상태일 경우 다음 단계를 수행하여 모니터 자체 테스트를 실행하십시오. 1. 컴퓨터 및 모니터를 모두 끕니다. 2. 비디오 케이블을 컴퓨터 뒷면에서 뽑습니다. 자체 테스트가 올바르게 작동하게 하려면 모든 디지털 및 아날로그 케이블을 컴퓨터 뒷면에서 분리합니다. 3. 모니터를 켭니다. 모니터가 비디오 신호를 감지할 수 없고 올바르게 작동하고 있을 경우 검정 배경에 대화 상자가 표시됩니다. 자체 테스트 모드에서는 전원 LED가 흰색으로 유지됩니다. 또한 선택한 입력에 따라 아래 대화 상자 중 하나가 화면 전체를 계속해서 스크롤합니다. No DP Cable The display will go into Standby Mode in 4 minutes.
기본 제공 진단 이 모니터에는 기본 제공 진단이 있습니다. 이를 통해 화면의 비정상적인 작동이 모니터 또는 컴퓨터와 비디오 카드에 문제가 있음을 나타내는지 확인할 수 있습니다. Display Info 기본 제공 진단을 실행하려면: 1. 화면이 깨끗한지 확인하십시오(화면 표면에 먼지 입자가 없는지 확인). 2. 버튼 5를 4초 동안 누르면 화면에 메뉴가 표시됩니다. 옵션을 하이라이트 표시하고 조이스틱 3. 조이스틱 컨트롤을 사용하여 진단 버튼을 눌러 진단을 시작합니다. 회색 화면이 표시됩니다. 4. 화면에 결함이나 이상이 없는지 확인합니다. 5. 빨간색 화면이 표시될 때까지 조이스틱을 다시 한 번 움직입니다. 6. 화면에 결함 또는 이상이 없는지 확인합니다. 7. 화면이 녹색, 파란색, 검은색, 흰색으로 표시될 때까지 5, 6 단계를 반복하십시오. 이상이나 결함이 있는지 확인하십시오. 테스트 화면이 나타나면 테스트가 완료된 것입니다. 종료하려면 조이스틱 컨트롤을 다시 움직입니다.
일반 문제 다음 표에는 발생할 수 있는 일반적인 모니터 문제 및 가능한 해결책에 대한 전반적인 정보가 나와 있습니다. 일반 증상 상태 가능한 해결책 비디오 없음/ 전원 LED 꺼짐 이미지 없음 • 모니터와 컴퓨터를 연결하는 비디오 케이블이 올바르게 연결되어 고정되어 있는지 확인하십시오. • 다른 전기 장치를 사용하여 전원 콘센트가 올바르게 작동하는지 확인하십시오. • 전원 버튼이 완전히 눌러졌는지 확인하십시오. • 입력 소스 메뉴에서 올바른 입력 소스가 선택되었는지 확인하십시오. 비디오 없음/ 전원 LED 켜짐 이미지 없음 • OSD를 통해 밝기 및 명암 컨트롤을 높입니다. 또는 밝기 없음 • 모니터 자체 테스트 특장점 검사를 수행합니다. • 비디오 케이블 커넥터에서 핀이 구부러졌거나 손상되었는지 확인하십시오. • 기본 제공 진단을 실행하십시오. • 입력 소스 메뉴에서 올바른 입력 소스가 선택되었는지 확인하십시오. 픽셀 누락 LCD 화면에 점이 표시됨 • 전원을 껐다가 켜십시오.
일반 증상 상태 간헐적으로 발생하는 문제 모니터 오작동 • 모니터와 컴퓨터를 연결하는 비디오 켜짐 또는 꺼짐 케이블이 올바르게 연결되어 고정되어 있는지 확인하십시오. • 모니터를 공장 설정으로 초기화합니다. • 모니터 자체 테스트 기능 점검을 수행하여 자체 테스트 모드에서 간헐적인 문제가 발생하는지 확인하십시오. 가능한 해결책 색상 누락 이미지에 색상이 누락됨 • 모니터 자체 테스트를 수행합니다. • 모니터와 컴퓨터를 연결하는 비디오 케이블이 올바르게 연결되어 고정되어 있는지 확인하십시오. • 비디오 케이블 커넥터에서 핀이 구부러졌거나 손상되었는지 확인하십시오. 잘못된 색상 이미지 색상이 양호하지 않음 • 애플리케이션에 따라 Color (색상)메뉴 OSD 에서 Preset Modes (사전 설정 모드)의 설정을 변경하십시오. • Color (색상)메뉴 OSD의 Custom Color (사용자 지정 색상) 아래에서 R/G/B 값을 조정합니다.
일반 증상 상태 가능한 해결책 • 웹캠 모듈이 팝업됩니다. 마이크/웹캠이 • 웹캠 모듈이 • USB 케이블(Type-A - Type-B 또는 Type-C 작동하지 않음 팝업되지 Type-C)을 연결하고 USB-B 포트 및 USB-C 않음 • USB 케이블이 포트를 모두 연결한 경우 OSD 메뉴에서 USB 소스를 전환하십시오. 연결되지 • PC 쪽에서 모니터 마이크/웹캠을 기본값으로 않았거나 선택합니다.
제품별 문제 문제점 상태 가능한 해결책 화면 이미지가 너무 작음 이미지가 화면 가운데에 잇지만 전체 보기 영역을 채우지 않음 • Display (디스플레이) 메뉴 OSD에서 Aspect Ratio (화면 비율) 설정을 확인하십시오. • 모니터를 공장 설정으로 초기화합니다. 전면 패널의 OSD가 화면에 버튼으로 표시되지 않음 모니터를 조정할 수 없음 • 모니터를 끄고 모니터 전원 케이블을 뽑았다가 다시 꽂은 후 모니터를 켜십시오. 사용자 컨트롤을 누를 때 입력 신호 없음 이미지 없음, LED 표시등이 흰색임 • 신호 소스를 확인하십시오. 마우스를 움직이거나 키보드의 아무 키나 눌러 컴퓨터가 절전 모드에서 벗어나도록 합니다. • 신호 케이블이 올바르게 꽂혀 있는지 확인하십시오. 필요할 경우 신호 케이블을 다시 연결하십시오. • 컴퓨터 또는 비디오 플레이어를 초기화하십시오.
문제점 상태 가능한 해결책 C 타입 USB 를 사용하여 컴퓨터, 랩톱 등에 연결해도 이미지가 표시되지 않음 검은색 화면 USB 타입 C를 컴퓨터, 랩톱 등에 연결할 경우 충전되지 않음 충전되지 않음 USB 타입 C 를 컴퓨터, 랩톱 등에 연결할 경우 간헐적으로 충전됨 C 타입 USB MST 사용 시 이미지가 나타나지 않음 간헐적인 충전 • 장치의 C 타입 USB 인터페이스가 DP 대체 모드를 지원할 수 있는지 확인합니다. • 장치에 90 W 이상의 전력 충전이 필요했는지 확인합니다. • 장치의 C 타입 USB 인터페이스가 DP 대체 모드를 지원할 수 없습니다. • Windows를 투사 모드로 설정합니다. • C 타입 USB가 손상되지 않았는지 확인합니다. • 장치가 5V/9V/15V/20V 충전 프로필 중 하나를 지원하는지 확인하십시오. • 노트북이 90 W를 초과하는 전력 어댑터가 필요한지 확인하십시오.
문제점 상태 가능한 해결책 LAN 포트가 작동하지 않습니다. OS 설정 또는 케이블 연결 문제 • 컴퓨터에 최신 BIOS 및 드라이버가 설치되어 있는지 확인하십시오. • RealTek Gigabit 이더넷 컨트롤러가 Windows 장치 관리자에 설치되어 있는지 확인하십시오. • BIOS 설정에 LAN/GBE 활성/비활성 옵션이 있는 경우 활성으로 설정되어 있는지 확인하십시오. • 이더넷 케이블이 모니터 및 허브/라우터/ 방화벽에 올바르게 연결되어 있는지 확인하십시오. • 이더넷 케이블의 상태 LED를 살펴보고 연결이 되어 있는지 확인하십시오. LED가 켜져 있지 않으면 이더넷 케이블 양 끝을 다시 연결하십시오. • 먼저 컴퓨터의 전원을 끄고 C 타입 케이블과 모니터의 전원 코드를 뽑습니다. 그런 다음 컴퓨터의 전원을 켜고 모니터 전원 코드와 C 타입 케이블을 꽂습니다.
문제점 상태 마이크가 있는 헤드셋 (3.5mm 콤보 잭)에서 모니터 음소거/음소거 해제 버튼이 작동하지 않음 카메라 모듈이 • UC 앱(예: Microsoft Teams, Skype for Business, 팝인되어 Zoom 등) 마이크 아이콘을 사용하여 음소거/ 있을 때(축소) 음소거 해제하십시오. 마이크가 있는 헤드셋 (3.5mm 콤보 잭)에서 모니터 음소거/음소거 해제 버튼이 작동하지 않습니다. 볼륨 감소/ 볼륨 증가 또는 음소거 버튼을 누르면 LED가 깜박이지 않음 HDMI 또는 DP USB A – B 케이블을 연결하십시오. 만 연결할 때 볼륨 감소/ 볼륨 증가 또는 음소거 버튼을 누르면 LED 가 깜박이지 않습니다. 카메라 또는 마이크가 작동하지 않음 HDMI 또는 DP 만 연결할 때 카메라 또는 마이크가 작동하지 않습니다. USB A – B 케이블을 연결하십시오.
문제점 상태 가능한 해결책 마이크가 작동하지 않거나 감지되지 않음 Intel Gen 11th CPU (Tiger Lake) 플랫폼의 음성 녹음기 앱에서 마이크가 작동하지 않거나 감지되지 않습니다. 장치 관리자에서 USB 오디오 드라이버에 대한 Intel 스마트 사운드 기술을 비활성화하고 PC를 재부팅하십시오. 녹화된 비디오에서 소리가 들리지 않음 Intel Gen 11th CPU (Tiger Lake) 플랫폼에서 녹화된 비디오에서 소리가 들리지 않습니다. 장치 관리자에서 USB 오디오 드라이버에 대한 Intel 스마트 사운드 기술을 비활성화하고 PC를 재부팅하십시오. 볼륨 감소/볼륨 증가를 누르면 OSD 볼륨 막대 응답이 지연됨 볼륨 감소/볼륨 장치 관리자에서 USB 오디오 드라이버에 대한 증가를 누르면 Intel 스마트 사운드 기술을 비활성화하고 PC를 Intel Gen 11th 재부팅하십시오.
범용 직렬 버스(USB)별 문제 특정 증상 상태 가능한 해결책 USB 인터페이스가 작동하지 않습니다. USB 주변장치가 작동하지 않습니다. • 디스플레이가 켜져 있는지 확인합니다. • 업스트림 케이블을 컴퓨터에 다시 연결합니다. • USB 주변장치(다운스트림 커넥터)를 다시 연결합니다. • 모니터를 껐다가 다시 켭니다. • 컴퓨터를 재부팅합니다. • 휴대용 하드 드라이브와 같은 특정 USB 장치는 더 높은 전원이 필요하므로 드라이브를 컴퓨터에 직접 연결합니다. SuperSpeed USB 3.2 인터페이스가 느립니다. SuperSpeed USB 3.2 주변장치 작동이 느리거나 전혀 작동하지 않습니다. • 컴퓨터가 USB 3.0을 지원하는지 확인합니다. • 일부 컴퓨터에는 USB 3.0, USB 2.0, USB 1.1 포트가 있습니다. 올바른 USB 포트를 사용했는지 확인합니다. • 업스트림 케이블을 컴퓨터에 다시 연결합니다. • USB 주변장치(다운스트림 커넥터)를 다시 연결합니다.
부록 FCC 고지사항(미국만) 및 기타 규정 정보 FCC 고지사항 및 기타 규정 정보는 http://www.dell.com/regulatory_compliance 에 있는 규정 준수 웹사이트를 참조하십시오. Dell에 문의하기 미국 고객의 경우 800-WWW-DELL(800-999-3355)로 전화하십시오. 참고: 활성화된 인터넷 연결이 없을 경우 구매 송장, 패킹 슬립, 영수증 또는 Dell 제품 카탈로그에서 문의처 정보를 확인할 수 있습니다. Dell에서는 몇 가지 온라인과 전화 기반 지원 및 서비스 옵션을 제공합니다. 국가 및 제품마다 제공 여부가 달라지며 일부 서비스는 해당 지역에서 제공되지 않을 수 있습니다. 온라인 모니터 지원 콘텐츠를 받으려면: https://www.dell.com/support/monitors를 참조하십시오. 영업, 기술 지원 또는 고객 서비스 문제에 대해 Dell에 문의하려면: 1. https://www.dell.com/support로 이동합니다. 2.