
Users Guide


10
Using vRealize Orchestrator
By using vRO with ASM integration, you can perform the following actions:
• Add a new ASM Appliance object to the vRO inventory
• Deploy a new service to vRA
• Add a server to an existing service
• Teardown a service with selected resource types
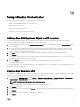
Adding a New ASM Appliance Object to vRO Inventory
For using ASM vRO plugin, the best way is to utilize the vRO workflows which are packaged with the plugin. The following
instruction explains how to add an ASM Appliance object to the vRO inventory:
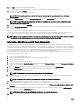
1. Add ASM Appliance workflow from the Configuration Workflows folder on the left pane, then click the Start workflow button
on the right pane.
2. Enter the values for the name and the server URL under Common Parameter. Either enable or disable the setting to trust all
SSL certificates from the server. If an unverified certificate is installed in the ASM server, this setting must be set to true in
order for the vRO to communicate with the ASM.
3. Click Next, and set the values for the authentication domain (ASMLOCAL by default), username and password.
4. Click Submit.
The workflow should run successfully. To validate whether the configuration has been added or not, go to the Resources view,
expand the folders and locate the new resource item.
5. Select the Viewer tab to cross-check the values that were used as input parameters for the workflow.
The password is encrypted.
The user should be able to see the inventory objects for this ASM appliance server. Any templates or services already present in the
ASM environment are also displayed.
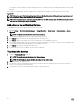
Deploy a New Service to vRO
After adding the ASMAppliance object as a vRO resource, you can start running the workflow to deploy and update Services. In this
example, the following steps describe how to deploy a new Service using vRO.
1. In run mode, click Workflows view, navigate Library → Dell Acive System Manager → Sample Workflow → Synchronous →
Deploy Service → Start Workflow (which allow vRO workflows to call ASM for infrastructure).
NOTE: The Synchronous workflow is used for demonstration.
The default ASMAppliance object should already be set as the input parameter
2. Click Submit to proceed.
3. Click the selection box. A message stating Not set is displayed. Select the template to deploy in the window that is displayed.
4. Click Submit.
5. Provide the service name and modify the description of the service.
6. Click Submit.
23