
Install Guide


5. Ensure that DNS is configured for dellasm to resolve. Creating an entry in DNS with forward and lookup pointers enables you
to pull and resource your ASM appliance instance.
6. Ensure that the file on the system with the guest operating puppet.conf system is updated to include dellasm as the server for
each of the entries.
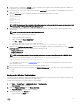
7. Open the puppet.conf file in a text editor with administrator privileges and include the following:
[main]
server=dellasm
[master]
server=dellasm
agent]
server=dellasm
NOTE: The puppet.conf file is available at the following location on the system with the guest operating system that
you preparing: C:\ProgramData\PuppetLabs\puppet\etc.
8. Update the etc host file on the system with the guest operating system to ensure that the guest operating system is able to
resolve dellasm.
NOTE: The etc file is at C:\Window\System32\drivers\etc.
To edit the etc host file, perform the following steps:
a. Open Notepad using the Start menu.
b. Right-click and click Run as administrator.
c.
Click File → Open.
d. Navigate to the location of the etc host file and open the file.
e. Add the following to the host file: <Your ASM IP> dellASM # Dell ASM Virtual Appliance
9. Navigate to the /opt/asm-deployer/scripts folder on your ASM appliance and move the following files or scripts to /var/lib/
razor/repo-store location on the system with the guest operating system:
• Puppet_certname.bat
• Puppet_certname.rb
NOTE: On a systems running Windows operating system, you can access these files using ssh or WinSCP client.
You can also use the following command to move the files: $sudo mv puppet_certname.bat
puppet_certname.rb /var/lib/razor/repo-store
This command moves the files to the \\dellasm\razor folder. You can access the files using CIFS from the system with the
guest operating system.
10. Move the files to the C: drive on the system with your guest operating system.
11. Download the latest version of the following files from https://rubygems.org to the C: drive on your guest operating system.
• hashie
• inifile
Setting up the Windows Task Scheduler
This topic provides information on setting up the Windows task scheduler to run a script that generates a unique certificate for the
system with the guest operating system and run the puppet agent.
Perform the following steps to set up the Windows Task Scheduler:
1. Click Start → Control Panel → Administrative Tools → Task Scheduler.
The Task Scheduler window is displayed.
2. Right-click Puppet CertName and click Create New Task.
The Puppet CertName properties window is displayed.
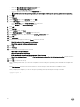
3. Update the following on the General tab:
• Type the Name in the Name field.
25