Alienware 17 R4 サービスマニュアル 規制モデル: P31E 規制タイプ: P31E001
メモ、注意、警告 メモ: 製品を使いやすくするための重要な情報を説明しています。 注意: ハードウェアの損傷やデータの損失の可能性を示し、その危険を回避するための方法を説明しています。 警告: 物的損害、けが、または死亡の原因となる可能性があることを示しています。 © 2018 - 2019 Dell Inc.その関連会社。All rights reserved.Dell、EMC、およびその他の商標は、Dell Inc. またはその子会社の商 標です。その他の商標は、それぞれの所有者の商標である場合があります。 2016 - 12 Rev.
目次 1 コンピュータ内部の作業を始める前に...................................................................................................9 作業を開始する前に ............................................................................................................................................................9 安全にお使いいただくために............................................................................................................................................. 9 推奨ツール..........................................................
12 メモリモジュールの取り付け............................................................................................................. 23 手順..................................................................................................................................................................................... 23 作業を終えた後に.............................................................................................................................................................. 23 13 背面 I/O カバーの取り外し.......
前提条件............................................................................................................................................................................. 36 手順..................................................................................................................................................................................... 36 24 サブウーハーの取り付け.................................................................................................................... 37 手順......
35 バッテリーの取り外し........................................................................................................................51 前提条件..............................................................................................................................................................................51 手順......................................................................................................................................................................................
手順.....................................................................................................................................................................................66 作業を終えた後に.............................................................................................................................................................. 66 47 ロゴボードの取り外し....................................................................................................................... 67 前提条件...............
BIOS(システム セットアップ)パスワードおよびシステムパスワードのクリア...................................................... 84 CMOS 設定のクリア......................................................................................................................................................... 84 BIOS のフラッシュ............................................................................................................................................................ 85 ブートメニュー......................................................................
コンピュータ内部の作業を始める前に メモ: 本書の画像は、ご注文の構成によってお使いのコンピュータと異なる場合があります。 作業を開始する前に 1. 開いているファイルはすべて保存して閉じ、実行中のアプリケーションはすべて終了します。 2. コンピュータをシャットダウンします。スタート > 電源 > シャットダウン の順にクリックします。 メモ: 他のオペレーティングシステムを使用している場合は、お使いのオペレーティングシステムのシャットダウン方法に 関するマニュアルを参照してください。 3. コンピュータおよび取り付けられているすべてのデバイスをコンセントから外します。 4. キーボード、マウス、モニタなど取り付けられているすべてのネットワークデバイスや周辺機器をコンピュータから外します。 5.
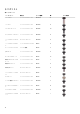
ネジのリスト 表 1. ネジのリスト コンポーネント 固定先 ネジの種類 数 ベースカバー パームレストアセンブリ M2.5x13 6 バッテリー パームレストアセンブリ M2.5x5 4 コンピュータベース パームレストアセンブリ M2.5x8 14 ディスプレイアセンブリ パームレストアセンブリ M2.5x5 6 ハードドライブアセンブ リ コンピュータベース M2.5x5 4 ハードドライブブラケッ ト ハードドライブアセンブリ M3x3 4 ヒートシンクアセンブリ システム基板 M2x3 7 I/O ボード パームレストアセンブリ M2.5x5 2 キーボードブラケット パームレストアセンブリ M2x3 17 電源アダプタポートブラ ケット パームレストアセンブリ M2x3 1 電源ボタンボード パームレストアセンブリ M2x3 2 背面 I/O カバー コンピュータベース M2.
コンピュータ内部の作業を終えた後に 注意: コンピュータ内部にネジが残っていたり、緩んでいたりすると、コンピュータに深刻な損傷を与える恐れがあります。 1. すべてのネジを取り付けて、コンピュータ内部に外れたネジが残っていないことを確認します。 2. コンピュータでの作業を始める前に、取り外したすべての外付けデバイス、周辺機器、ケーブルを接続します。 3. コンピュータでの作業を始める前に、取り外したすべてのメディアカード、ディスク、その他のパーツを取り付けます。 4. コンピュータ、および取り付けられているすべてのデバイスをコンセントに接続します。 5.
ベースカバーの取り外し メモ: コンピュータ内部の作業を始める前に、お使いのコンピュータに付属している「安全にお使いいただくための注意事項」を 読んで、「コンピュータ内部の作業を始める前に」の手順を実行してください。コンピュータ内部の作業を終えた後は、「コンピ ュータ内部の作業を終えた後に」の指示に従ってください。安全にお使いいただくためのベストプラクティスの詳細について は、規制順守ホームページ(www.dell.com/regulatory_compliance)をご覧ください。 手順 1. ベースカバーをコンピュータベースに固定している 6 本のネジ(M2.5x13)を取り外します。 2. ベース カバーをコンピューター ベースに固定している固定ネジを緩め、2 個のパーツ間の隙間を開きます。 3. プラスチックス クライブを使用して、固定ネジ周囲の隙間からベース カバーをこじあけて、コンピューター ベースからベース カ バーのクリップを外します。 4. ベースカバーを持ち上げて、コンピュータベースから取り外します。 5.
6.
ベースカバーの取り付け メモ: コンピュータ内部の作業を始める前に、お使いのコンピュータに付属している「安全にお使いいただくための注意事項」を 読んで、「コンピュータ内部の作業を始める前に」の手順を実行してください。コンピュータ内部の作業を終えた後は、「コンピ ュータ内部の作業を終えた後に」の指示に従ってください。安全にお使いいただくためのベストプラクティスの詳細について は、規制順守ホームページ(www.dell.com/regulatory_compliance)をご覧ください。 手順 1. バッテリーケーブルをシステム基板に接続します。 2. ベースカバーをコンピュータベースに固定する固定ネジを締めます。 3. ベースカバーをコンピュータベースに固定する 6 本のネジ(M2.
ハードドライブの取り外し メモ: コンピュータ内部の作業を始める前に、お使いのコンピュータに付属している「安全にお使いいただくための注意事項」を 読んで、「コンピュータ内部の作業を始める前に」の手順を実行してください。コンピュータ内部の作業を終えた後は、「コンピ ュータ内部の作業を終えた後に」の指示に従ってください。安全にお使いいただくためのベストプラクティスの詳細について は、規制順守ホームページ(www.dell.com/regulatory_compliance)をご覧ください。 注意: ハードドライブは壊れやすい部品です。ハードディスクドライブの取り扱いには注意してください。 注意: データの損失を防ぐため、コンピュータの電源が入っている状態、またはスリープ状態のときにハードドライブを取り外 さないでください。 前提条件 ベースカバーを取り外します。 手順 1. プルタブを使用して、ハードドライブケーブルをシステム基板から外します。 2. ハードドライブケーブルをコンピュータベースの配線ガイドから外します。 3. ハードドライブアセンブリをコンピュータベースに固定しているとネジ(M2.
7.
ハードドライブの取り付け メモ: コンピュータ内部の作業を始める前に、お使いのコンピュータに付属している「安全にお使いいただくための注意事項」を 読んで、「コンピュータ内部の作業を始める前に」の手順を実行してください。コンピュータ内部の作業を終えた後は、「コンピ ュータ内部の作業を終えた後に」の指示に従ってください。安全にお使いいただくためのベストプラクティスの詳細について は、規制順守ホームページ(www.dell.com/regulatory_compliance)をご覧ください。 注意: ハードドライブは壊れやすい部品です。ハードディスクドライブの取り扱いには注意してください。 手順 1. インタポーザをハードドライブに接続します。 2. ハードドライブブラケットのネジ穴をハードドライブアセンブリのネジ穴の位置に合わせます。 3. ハードドライブブラケットをハードドライブアセンブリに固定する 4 本のネジ(M3x3)を取り付けます。 4. ハードドライブアセンブリのネジ穴をコンピュータベースのネジ穴の位置に合わせます。 5. ハードドライブアセンブリをコンピュータベースに固定するとネジ(M2.
ワイヤレスカードの取り外し メモ: コンピュータ内部の作業を始める前に、お使いのコンピュータに付属している「安全にお使いいただくための注意事項」を 読んで、「コンピュータ内部の作業を始める前に」の手順を実行してください。コンピュータ内部の作業を終えた後は、「コンピ ュータ内部の作業を終えた後に」の指示に従ってください。安全にお使いいただくためのベストプラクティスの詳細について は、規制順守ホームページ(www.dell.com/regulatory_compliance)をご覧ください。 前提条件 ベースカバーを取り外します。 手順 1. ワイヤレスカードブラケットをコンピュータベースに固定しているネジ(M2x3)を取り外します。 2. ワイヤレスカードブラケットをスライドさせてワイヤレスカードから取り外します。 3.
ワイヤレスカードの取り付け メモ: コンピュータ内部の作業を始める前に、お使いのコンピュータに付属している「安全にお使いいただくための注意事項」を 読んで、「コンピュータ内部の作業を始める前に」の手順を実行してください。コンピュータ内部の作業を終えた後は、「コンピ ュータ内部の作業を終えた後に」の指示に従ってください。安全にお使いいただくためのベストプラクティスの詳細について は、規制順守ホームページ(www.dell.com/regulatory_compliance)をご覧ください。 手順 注意: ワイヤレスカードへの損傷を避けるため、カードの下にケーブルを置かないでください。 1. ワイヤレスカードの切り込みをワイヤレスカードスロットのタブに合わせます。 2. ワイヤレスカードブラケットをワイヤレスカードにスライドさせ、ワイヤレスカードブラケットのネジ穴をワイヤレスカードと コンピュータベースのネジ穴に合わせます。 3. ワイヤレスカードを斜めにしてミニカードスロットに差し込みます。 4.
ソリッドステートドライブの取り外し メモ: コンピュータ内部の作業を始める前に、お使いのコンピュータに付属している「安全にお使いいただくための注意事項」を 読んで、「コンピュータ内部の作業を始める前に」の手順を実行してください。コンピュータ内部の作業を終えた後は、「コンピ ュータ内部の作業を終えた後に」の指示に従ってください。安全にお使いいただくためのベストプラクティスの詳細について は、規制順守ホームページ(www.dell.com/regulatory_compliance)をご覧ください。 注意: ソリッドステートドライブは非常に壊れやすいものです。取り扱う場合は細心の注意を払ってください。 注意: データの損失を防ぐため、コンピュータの電源が入っている状態、またはスリープ状態のときに SSD を取り外さないで ください。 前提条件 ベースカバーを取り外します。 手順 1. ソリッドステートドライブシールドとソリッドステートドライブをコンピュータベースに固定しているネジを ( M2x3 ) を取り外 します。 2.
ソリッドステートドライブの取り付け メモ: コンピュータ内部の作業を始める前に、お使いのコンピュータに付属している「安全にお使いいただくための注意事項」を 読んで、「コンピュータ内部の作業を始める前に」の手順を実行してください。コンピュータ内部の作業を終えた後は、「コンピ ュータ内部の作業を終えた後に」の指示に従ってください。安全にお使いいただくためのベストプラクティスの詳細について は、規制順守ホームページ(www.dell.com/regulatory_compliance)をご覧ください。 注意: ソリッドステートドライブは非常に壊れやすいものです。取り扱う場合は細心の注意を払ってください。 手順 1. ソリッドステートドライブの切り込みをソリッドステートドライブスロットのタブの位置に合わせます。 2. ソリッドステートドライブをソリッドステートドライブスロットに差し込みます。 3. ソリッドステートドライブシールドをスライドさせて、ソリッドステートドライブに取り付けます。 4. ソリッドステートドライブとソリッドステートドライブシールドのネジ穴を、コンピュータベースのネジ穴に合わせます。 5.
メモリモジュールの取り外し メモ: コンピュータ内部の作業を始める前に、お使いのコンピュータに付属している「安全にお使いいただくための注意事項」を 読んで、「コンピュータ内部の作業を始める前に」の手順を実行してください。コンピュータ内部の作業を終えた後は、「コンピ ュータ内部の作業を終えた後に」の指示に従ってください。安全にお使いいただくためのベストプラクティスの詳細について は、規制順守ホームページ(www.dell.com/regulatory_compliance)をご覧ください。 前提条件 ベースカバーを取り外します。 手順 1. メモリモジュールスロットの両端にある固定クリップを、メモリモジュールが持ち上がるまで指先で慎重に広げます。 2.
メモリモジュールの取り付け メモ: コンピュータ内部の作業を始める前に、お使いのコンピュータに付属している「安全にお使いいただくための注意事項」を 読んで、「コンピュータ内部の作業を始める前に」の手順を実行してください。コンピュータ内部の作業を終えた後は、「コンピ ュータ内部の作業を終えた後に」の指示に従ってください。安全にお使いいただくためのベストプラクティスの詳細について は、規制順守ホームページ(www.dell.com/regulatory_compliance)をご覧ください。 手順 1. メモリモジュールの切り込みをメモリモジュールスロットのタブに合わせ、メモリモジュールを傾けてしっかりとスロットに差 し込みます。 2.
背面 I/O カバーの取り外し メモ: コンピュータ内部の作業を始める前に、お使いのコンピュータに付属している「安全にお使いいただくための注意事項」を 読んで、「コンピュータ内部の作業を始める前に」の手順を実行してください。コンピュータ内部の作業を終えた後は、「コンピ ュータ内部の作業を終えた後に」の指示に従ってください。安全にお使いいただくためのベストプラクティスの詳細について は、規制順守ホームページ(www.dell.com/regulatory_compliance)をご覧ください。 前提条件 ベースカバーを取り外します。 手順 1. 背面 I/O カバーをパームレストアセンブリに固定している 2 本のネジ(M2.5x7)を外します。 2. プラスチックスクライブを使用して、背面 I/O カバーをコンピュータベースに固定しているタブをゆっくりと外します。 3.
背面 I/O カバーの取り付け メモ: コンピュータ内部の作業を始める前に、お使いのコンピュータに付属している「安全にお使いいただくための注意事項」を 読んで、「コンピュータ内部の作業を始める前に」の手順を実行してください。コンピュータ内部の作業を終えた後は、「コンピ ュータ内部の作業を終えた後に」の指示に従ってください。安全にお使いいただくためのベストプラクティスの詳細について は、規制順守ホームページ(www.dell.com/regulatory_compliance)をご覧ください。 手順 1. 背面 I/O カバーのタブをコンピューター ベースのスロットに合わせ、背面 I/O カバーを所定の位置にはめ込みます。 2. 背面 I/O カバーをパームレストアセンブリに固定する 2 本のネジ(M2.
コンピュータベースの取り外し メモ: コンピュータ内部の作業を始める前に、お使いのコンピュータに付属している「安全にお使いいただくための注意事項」を 読んで、「コンピュータ内部の作業を始める前に」の手順を実行してください。コンピュータ内部の作業を終えた後は、「コンピ ュータ内部の作業を終えた後に」の指示に従ってください。安全にお使いいただくためのベストプラクティスの詳細について は、規制順守ホームページ(www.dell.com/regulatory_compliance)をご覧ください。 前提条件 1. ベースカバーを取り外します。 2. ワイヤレスカードを取り外します。 3. ソリッドステートドライブを取り外します。 4. 背面 I/O カバーを取り外します。 手順 1. ケーブルの配線をメモして、アンテナケーブルをコンピュータベースの配線ガイドから外します。 2. トロンライトケーブルをシステム基板から外します。 3. トロンライトケーブルをシステム基板から外します。 4. コンピュータベースをパームレストアセンブリに固定している 2 本のネジ (M2.5x5) を取り外します。 5.
6. プラスチックスクライブを使用して、コンピュータベースのタブをパームレストアセンブリのスロットからゆっくりと外しま す。 7.
コンピュータベースの取り付け メモ: コンピュータ内部の作業を始める前に、お使いのコンピュータに付属している「安全にお使いいただくための注意事項」を 読んで、「コンピュータ内部の作業を始める前に」の手順を実行してください。コンピュータ内部の作業を終えた後は、「コンピ ュータ内部の作業を終えた後に」の指示に従ってください。安全にお使いいただくためのベストプラクティスの詳細について は、規制順守ホームページ(www.dell.com/regulatory_compliance)をご覧ください。 手順 1. コンピュータベースのネジ穴をパームレストアセンブリのネジ穴に合わせます。 2. コンピュータベースをパームレストアセンブリに固定するまたは 14 本のネジ(M2.5x8)を取り付けます。 3. コンピュータベースをパームレストアセンブリに固定する 2 本のネジ (M2.5x5)を取り付けます。 4. トロンライトケーブルをシステム基板に接続します。 5. アンテナケーブルをコンピュータベースの配線ガイドに沿って配線します。 作業を終えた後に 1. 背面 I/O カバーを取り付けます。 2.
コイン型電池の取り外し メモ: コンピュータ内部の作業を始める前に、お使いのコンピュータに付属している「安全にお使いいただくための注意事項」を 読んで、「コンピュータ内部の作業を始める前に」の手順を実行してください。コンピュータ内部の作業を終えた後は、「コンピ ュータ内部の作業を終えた後に」の指示に従ってください。安全にお使いいただくためのベストプラクティスの詳細について は、規制順守ホームページ(www.dell.com/regulatory_compliance)をご覧ください。 注意: コイン型電池を取り外すと、BIOS セットアッププログラムの設定がデフォルト状態にリセットされます。コイン型電池 を取り外す前に、BIOS セットアッププログラムの設定を書き留めておくことをお勧めします。 前提条件 1. ベースカバーを取り外します。 2. ワイヤレスカードを取り外します。 3. ソリッドステートドライブを取り外します。 4. 背面 I/O カバーを取り外します。 5. コンピュータベースを取り外します。 手順 1. コイン型電池ケーブルをシステム基板から外します。 2.
コイン型電池の取り付け メモ: コンピュータ内部の作業を始める前に、お使いのコンピュータに付属している「安全にお使いいただくための注意事項」を 読んで、「コンピュータ内部の作業を始める前に」の手順を実行してください。コンピュータ内部の作業を終えた後は、「コンピ ュータ内部の作業を終えた後に」の指示に従ってください。安全にお使いいただくためのベストプラクティスの詳細について は、規制順守ホームページ(www.dell.com/regulatory_compliance)をご覧ください。 手順 1. コイン型電池をパームレストアセンブリに取り付けます。 2. コイン型電池をパームレストアセンブリに固定するテープを貼り付けます。 3. コイン型電池ケーブルをシステム基板に接続します。 4. コイン型電池ケーブルを配線ガイドに沿って配線し、コイン型電池ケーブルをシステム基板に固定するテープを貼り付けます。 作業を終えた後に 1. コンピュータベースを取り付けます。 2. 背面 I/O カバーを取り付けます。 3. ソリッドステートドライブを取り付けます。 4. ワイヤレスカードを取り付けます。 5.
スピーカーの取り外し メモ: コンピュータ内部の作業を始める前に、お使いのコンピュータに付属している「安全にお使いいただくための注意事項」を 読んで、「コンピュータ内部の作業を始める前に」の手順を実行してください。コンピュータ内部の作業を終えた後は、「コンピ ュータ内部の作業を終えた後に」の指示に従ってください。安全にお使いいただくためのベストプラクティスの詳細について は、規制順守ホームページ(www.dell.com/regulatory_compliance)をご覧ください。 前提条件 1. ベースカバーを取り外します。 2. ワイヤレスカードを取り外します。 3. ソリッドステートドライブを取り外します。 4. 背面 I/O カバーを取り外します。 5. コンピュータベースを取り外します。 手順 1. スピーカーケーブルをシステム基板から外します。 2. スピーカーケーブルをパームレストアセンブリの配線ガイドから外します。 3.
スピーカーの取り付け メモ: コンピュータ内部の作業を始める前に、お使いのコンピュータに付属している「安全にお使いいただくための注意事項」を 読んで、「コンピュータ内部の作業を始める前に」の手順を実行してください。コンピュータ内部の作業を終えた後は、「コンピ ュータ内部の作業を終えた後に」の指示に従ってください。安全にお使いいただくためのベストプラクティスの詳細について は、規制順守ホームページ(www.dell.com/regulatory_compliance)をご覧ください。 手順 1. 位置合わせポストを使用して、スピーカーをパームレストアセンブリにセットします。 2. スピーカーケーブルをパームレストアセンブリの配線ガイドに沿って配線します。 3. システム基板にスピーカーケーブルを接続します。 作業を終えた後に 1. コンピュータベースを取り付けます。 2. 背面 I/O カバーを取り付けます。 3. ソリッドステートドライブを取り付けます。 4. ワイヤレスカードを取り付けます。 5.
I/O ボードの取り外し メモ: コンピュータ内部の作業を始める前に、お使いのコンピュータに付属している「安全にお使いいただくための注意事項」を 読んで、「コンピュータ内部の作業を始める前に」の手順を実行してください。コンピュータ内部の作業を終えた後は、「コンピ ュータ内部の作業を終えた後に」の指示に従ってください。安全にお使いいただくためのベストプラクティスの詳細について は、規制順守ホームページ(www.dell.com/regulatory_compliance)をご覧ください。 前提条件 1. ベースカバーを取り外します。 2. ワイヤレスカードを取り外します。 3. ソリッドステートドライブを取り外します。 4. 背面 I/O カバーを取り外します。 5. コンピュータベースを取り外します。 手順 1. I/O ボードケーブルを I/O ボードに固定しているテープを剥がします。 2. ラッチを開き、I/O ボードケーブルを I/O ボードから外します。 3. I/O ボードをパームレストアセンブリに固定している 2 本のネジ(M2.5x5)を外します。 4. I/O ボードを裏返します。 5.
I/O ボードの取り付け メモ: コンピュータ内部の作業を始める前に、お使いのコンピュータに付属している「安全にお使いいただくための注意事項」を 読んで、「コンピュータ内部の作業を始める前に」の手順を実行してください。コンピュータ内部の作業を終えた後は、「コンピ ュータ内部の作業を終えた後に」の指示に従ってください。安全にお使いいただくためのベストプラクティスの詳細について は、規制順守ホームページ(www.dell.com/regulatory_compliance)をご覧ください。 手順 1. サブウーハーケーブルを I/O ボードに接続します。 2. I/O ボードを裏返します。 3. 位置合わせポストを使用して、I/O ボードをパームレストアセンブリにセットして、 I/O ボードのネジ穴をパームレストアセン ブリのネジ穴に合わせます。 4. I/O ボードをパームレストアセンブリに固定する 2 本のネジ(M2.5x5)を取り付けます。 5. I/O ボードケーブルを I/O ボードのコネクタに差し込み、ラッチを閉じてケーブルを固定します。 6.
サブウーハーの取り外し メモ: コンピュータ内部の作業を始める前に、お使いのコンピュータに付属している「安全にお使いいただくための注意事項」を 読んで、「コンピュータ内部の作業を始める前に」の手順を実行してください。コンピュータ内部の作業を終えた後は、「コンピ ュータ内部の作業を終えた後に」の指示に従ってください。安全にお使いいただくためのベストプラクティスの詳細について は、規制順守ホームページ(www.dell.com/regulatory_compliance)をご覧ください。 前提条件 1. ベースカバーを取り外します。 2. ワイヤレスカードを取り外します。 3. ソリッドステートドライブを取り外します。 4. 背面 I/O カバーを取り外します。 5. コンピュータベースを取り外します。 6. I/O ボードを取り外します。 手順 1. サブウーハーをパームレストアセンブリに固定している 2 本のネジ(M2x2)を取り外します。 2.
サブウーハーの取り付け メモ: コンピュータ内部の作業を始める前に、お使いのコンピュータに付属している「安全にお使いいただくための注意事項」を 読んで、「コンピュータ内部の作業を始める前に」の手順を実行してください。コンピュータ内部の作業を終えた後は、「コンピ ュータ内部の作業を終えた後に」の指示に従ってください。安全にお使いいただくためのベストプラクティスの詳細について は、規制順守ホームページ(www.dell.com/regulatory_compliance)をご覧ください。 手順 1. サブウーハーのネジ穴をパームレストアセンブリのネジ穴に合わせます。 2. サブウーハーをパームレストアセンブリに固定する 2 本のネジ(M2x2)を取り付けます。 作業を終えた後に 1. I/O ボードを取り付けます。 2. コンピュータベースを取り付けます。 3. 背面 I/O カバーを取り付けます。 4. ソリッドステートドライブを取り付けます。 5. ワイヤレスカードを取り付けます。 6.
システム基板アセンブリの取り外し メモ: コンピュータ内部の作業を始める前に、お使いのコンピュータに付属している「安全にお使いいただくための注意事項」を 読んで、「コンピュータ内部の作業を始める前に」の手順を実行してください。コンピュータ内部の作業を終えた後は、「コンピ ュータ内部の作業を終えた後に」の指示に従ってください。安全にお使いいただくためのベストプラクティスの詳細について は、規制順守ホームページ(www.dell.
8. コイン型電池ケーブルをシステム基板から外します。 9. コイン型電池ケーブルをシステム基板に固定しているテープをはがします。 10. 電源アダプタポートケーブルをシステム基板から外します。 11. スピーカーケーブルをシステム基板から外します。 12. ラッチを持ち上げて、マクロキーバックライトケーブルをシステム基板から外します。 13. ラッチを持ち上げて、キーボードバックライトケーブルをシステム基板から外します。 14. ラッチを持ち上げて、マクロキーケーブルをシステム基板から外します。 15. I/O ボードケーブルを I/O ボードに固定しているテープを剥がします。 16. ラッチを開き、I/O ボードケーブルを I/O ボードから外します。 17. ラッチを開き、システム基板からキーボードケーブルを外します。 18. ラッチを開いて、タッチパッドケーブルをシステム基板から外します。 19. USB Type-C ポートブラケットをシステム基板に固定しているネジ(M2.5x5)を外し、USB Type-C ポートブラケットを持ち上 げてシステム基板から取り外します。 20.
22.ヒートシンクアセンブリを取り外します。 23.
システム基板の取り付け メモ: コンピュータ内部の作業を始める前に、お使いのコンピュータに付属している「安全にお使いいただくための注意事項」を 読んで、「コンピュータ内部の作業を始める前に」の手順を実行してください。コンピュータ内部の作業を終えた後は、「コンピ ュータ内部の作業を終えた後に」の指示に従ってください。安全にお使いいただくためのベストプラクティスの詳細について は、規制順守ホームページ(www.dell.com/regulatory_compliance)をご覧ください。 メモ: システム基板には、コンピューターのサービスタグが保存されています。システム基板を取り付けた後、BIOS セットア ッププログラムでこのサービスタグを入力する必要があります。 メモ: システム基板を取り付けると、BIOS セットアッププログラムで行った BIOS への変更はすべて削除されます。システム 基板を取り付けた後に、再度適切な変更を行う必要があります。 手順 注意: システム基板の下にケーブルがないことを確認します。 1. ヒートシンクアセンブリを取り付けます。 2.
ヒートシンクアセンブリの取り外し メモ: コンピュータ内部の作業を始める前に、お使いのコンピュータに付属している「安全にお使いいただくための注意事項」を 読んで、「コンピュータ内部の作業を始める前に」の手順を実行してください。コンピュータ内部の作業を終えた後は、「コンピ ュータ内部の作業を終えた後に」の指示に従ってください。安全にお使いいただくためのベストプラクティスの詳細について は、規制順守ホームページ(www.dell.com/regulatory_compliance)をご覧ください。 メモ: 通常の動作中、ヒートシンクが高温になる場合があります。温度が十分に下がりヒートシンクが冷えるのを待って、触っ てください。 注意: プロセッサの冷却効果を最大にするために、ヒートシンクの放熱部分には触れないでください。皮脂が付着すると、サー マルグリースの放熱能力が低下する場合があります。 前提条件 1. ベースカバーを取り外します。 2. ワイヤレスカードを取り外します。 3. ソリッドステートドライブを取り外します。 4. メモリモジュールを取り外します。 5. 背面 I/O カバーを取り外します。 6.
ヒートシンクアセンブリの取り付け メモ: コンピュータ内部の作業を始める前に、お使いのコンピュータに付属している「安全にお使いいただくための注意事項」を 読んで、「コンピュータ内部の作業を始める前に」の手順を実行してください。コンピュータ内部の作業を終えた後は、「コンピ ュータ内部の作業を終えた後に」の指示に従ってください。安全にお使いいただくためのベストプラクティスの詳細について は、規制順守ホームページ(www.dell.com/regulatory_compliance)をご覧ください。 注意: ヒートシンクの位置が正しく合っていないと、システム基板とプロセッサを損傷する可能性があります。 メモ: システム基板またはファン ヒートシンク アセンブリーのいずれかを取り付ける場合は、熱伝導性を確保するために、キ ット内のサーマルパッド/ペーストを使用してください。 手順 1. ヒートシンクのネジ穴とシステム基板のネジ穴の位置を合わせます。 2. ヒートシンクアセンブリをシステム基板に固定する 7 本のネジ(M2x3)を取り付けます。 3.
電源アダプタポートの取り外し メモ: コンピュータ内部の作業を始める前に、お使いのコンピュータに付属している「安全にお使いいただくための注意事項」を 読んで、「コンピュータ内部の作業を始める前に」の手順を実行してください。コンピュータ内部の作業を終えた後は、「コンピ ュータ内部の作業を終えた後に」の指示に従ってください。安全にお使いいただくためのベストプラクティスの詳細について は、規制順守ホームページ(www.dell.com/regulatory_compliance)をご覧ください。 前提条件 1. ベースカバーを取り外します。 2. ワイヤレスカードを取り外します。 3. ソリッドステートドライブを取り外します。 4. メモリモジュールを取り外します。 5. 背面 I/O カバーを取り外します。 6. コンピュータベースを取り外します。 手順 1. 電源アダプタポートブラケットをパームレストアセンブリに固定しているネジ(M2x3)を外します。 2. 電源アダプタポートブラケットを持ち上げて電源アダプタポートから取り外します。 3.
電源アダプタポートの取り付け メモ: コンピュータ内部の作業を始める前に、お使いのコンピュータに付属している「安全にお使いいただくための注意事項」を 読んで、「コンピュータ内部の作業を始める前に」の手順を実行してください。コンピュータ内部の作業を終えた後は、「コンピ ュータ内部の作業を終えた後に」の指示に従ってください。安全にお使いいただくためのベストプラクティスの詳細について は、規制順守ホームページ(www.dell.com/regulatory_compliance)をご覧ください。 手順 1. 電源アダプタ ポートをパーム レスト アセンブリのスロットに合わせます。 2. 電源アダプタポートブラケットのネジ穴をパームレストアセンブリのネジ穴に合わせます。 3. 位置合わせポストを使用して、電源アダプタポートブラケットを電源アダプタポートにセットします。 4. 電源アダプタポートブラケットをパームレストアセンブリに固定するネジ(M2x3)を取り付けます。 5. 電源アダプタポートケーブルをパームレストアセンブリの配線ガイドに沿って配線します。 作業を終えた後に 1.
電源ボタンボードの取り外し メモ: コンピュータ内部の作業を始める前に、お使いのコンピュータに付属している「安全にお使いいただくための注意事項」を 読んで、「コンピュータ内部の作業を始める前に」の手順を実行してください。コンピュータ内部の作業を終えた後は、「コンピ ュータ内部の作業を終えた後に」の指示に従ってください。安全にお使いいただくためのベストプラクティスの詳細について は、規制順守ホームページ(www.dell.com/regulatory_compliance)をご覧ください。 前提条件 1. ベースカバーを取り外します。 2. ワイヤレスカードを取り外します。 3. ソリッドステートドライブを取り外します。 4. メモリモジュールを取り外します。 5. 背面 I/O カバーを取り外します。 6. コンピュータベースを取り外します。 手順 1. 電源ボタンボードをパームレストアセンブリに固定している 2 本のネジ(M2x3)を外します。 2.
電源ボタンボードの取り付け メモ: コンピュータ内部の作業を始める前に、お使いのコンピュータに付属している「安全にお使いいただくための注意事項」を 読んで、「コンピュータ内部の作業を始める前に」の手順を実行してください。コンピュータ内部の作業を終えた後は、「コンピ ュータ内部の作業を終えた後に」の指示に従ってください。安全にお使いいただくためのベストプラクティスの詳細について は、規制順守ホームページ(www.dell.com/regulatory_compliance)をご覧ください。 手順 1. 位置合わせポストを使用して、電源ボタンボードをパームレストアセンブリにセットします。 2. 電源ボタンボードのネジ穴をパームレストアセンブリのネジ穴に合わせます。 3. 電源ボタンボードをパームレストアセンブリに固定する 2 本のネジ(M2x3)を取り付けます。 作業を終えた後に 1. コンピュータベースを取り付けます。 2. 背面 I/O カバーを取り付けます。 3. メモリモジュールを取り付けます。 4. ソリッドステートドライブを取り付けます。 5. ワイヤレスカードを取り付けます。 6.
ディスプレイアセンブリの取り外し メモ: コンピュータ内部の作業を始める前に、お使いのコンピュータに付属している「安全にお使いいただくための注意事項」を 読んで、「コンピュータ内部の作業を始める前に」の手順を実行してください。コンピュータ内部の作業を終えた後は、「コンピ ュータ内部の作業を終えた後に」の指示に従ってください。安全にお使いいただくためのベストプラクティスの詳細について は、規制順守ホームページ(www.dell.com/regulatory_compliance)をご覧ください。 前提条件 1. ベースカバーを取り外します。 2. ワイヤレスカードを取り外します。 3. ソリッドステートドライブを取り外します。 4. メモリモジュールを取り外します。 5. 背面 I/O カバーを取り外します。 6. コンピュータベースを取り外します。 手順 1. ディスプレイアセンブリをパームレストアセンブリに固定している 6 本のネジ(M2.5x5)を外します。 2.
ディスプレイアセンブリの取り付け メモ: コンピュータ内部の作業を始める前に、お使いのコンピュータに付属している「安全にお使いいただくための注意事項」を 読んで、「コンピュータ内部の作業を始める前に」の手順を実行してください。コンピュータ内部の作業を終えた後は、「コンピ ュータ内部の作業を終えた後に」の指示に従ってください。安全にお使いいただくためのベストプラクティスの詳細について は、規制順守ホームページ(www.dell.com/regulatory_compliance)をご覧ください。 手順 1. ディスプレイヒンジのネジ穴とパームレストアセンブリのネジ穴の位置を合わせます。 2. ディスプレイアセンブリをパームレストアセンブリに固定する 6 本のネジ(M2.5x5)を取り付けます。 作業を終えた後に 1. コンピュータベースを取り付けます。 2. 背面 I/O カバーを取り付けます。 3. メモリモジュールを取り付けます。 4. ソリッドステートドライブを取り付けます。 5. ワイヤレスカードを取り付けます。 6.
バッテリーの取り外し メモ: コンピュータ内部の作業を始める前に、お使いのコンピュータに付属している「安全にお使いいただくための注意事項」を 読んで、「コンピュータ内部の作業を始める前に」の手順を実行してください。コンピュータ内部の作業を終えた後は、「コンピ ュータ内部の作業を終えた後に」の指示に従ってください。安全にお使いいただくためのベストプラクティスの詳細について は、規制順守ホームページ(www.dell.com/regulatory_compliance)をご覧ください。 前提条件 1. ベースカバーを取り外します。 2. ワイヤレスカードを取り外します。 3. ソリッドステートドライブを取り外します。 4. 背面 I/O カバーを取り外します。 5. コンピュータベースを取り外します。 手順 1. をパームレストアセンブリに固定している 4 本のネジ(M2.5x5)を取り外します。 2.
バッテリーの取り付け メモ: コンピュータ内部の作業を始める前に、お使いのコンピュータに付属している「安全にお使いいただくための注意事項」を 読んで、「コンピュータ内部の作業を始める前に」の手順を実行してください。コンピュータ内部の作業を終えた後は、「コンピ ュータ内部の作業を終えた後に」の指示に従ってください。安全にお使いいただくためのベストプラクティスの詳細について は、規制順守ホームページ(www.dell.com/regulatory_compliance)をご覧ください。 手順 1. 位置合わせポストを使用して、バッテリーをパームレストアセンブリにセットします。 2. バッテリーの 穴をパームレストの穴に合わせます。 3. をパームレストアセンブリに固定する 4 本のネジ(M2.5x5)を取り付けます。 作業を終えた後に 1. コンピュータベースを取り付けます。 2. 背面 I/O カバーを取り付けます。 3. ソリッドステートドライブを取り付けます。 4. ワイヤレスカードを取り付けます。 5.
タッチパッドの取り外し メモ: コンピュータ内部の作業を始める前に、お使いのコンピュータに付属している「安全にお使いいただくための注意事項」を 読んで、「コンピュータ内部の作業を始める前に」の手順を実行してください。コンピュータ内部の作業を終えた後は、「コンピ ュータ内部の作業を終えた後に」の指示に従ってください。安全にお使いいただくためのベストプラクティスの詳細について は、規制順守ホームページ(www.dell.com/regulatory_compliance)をご覧ください。 前提条件 1. ベースカバーを取り外します。 2. ワイヤレスカードを取り外します。 3. ソリッドステートドライブを取り外します。 4. 背面 I/O カバーを取り外します。 5. コンピュータベースを取り外します。 6. バッテリーを取り外します。 手順 1. ラッチを開き、タッチパッド ケーブルをシステム基板から外します。 2. ラッチを開き、タッチパッド ケーブルの反対側の端とタッチパッド ボタン ケーブルをタッチパッドから外しします。 3.
タッチパッドの取り付け メモ: コンピュータ内部の作業を始める前に、お使いのコンピュータに付属している「安全にお使いいただくための注意事項」を 読んで、「コンピュータ内部の作業を始める前に」の手順を実行してください。コンピュータ内部の作業を終えた後は、「コンピ ュータ内部の作業を終えた後に」の指示に従ってください。安全にお使いいただくためのベストプラクティスの詳細について は、規制順守ホームページ(www.dell.com/regulatory_compliance)をご覧ください。 手順 1. メモ: パームレスト アセンブリーの接着剤をすべてクリーニングし、タッチパッドとパームレスト アセンブリーの間にすき 間ができないようにします。 パームレスト アセンブリーの位置合わせポストを使用して、タッチパッドをパームレスト アセンブリーにセットします。 2. タッチパッド ブラケットのネジ穴をパームレスト アセンブリーのネジ穴の位置に合わせます。 3. タッチパッド ブラケットをパームレスト アセンブリーに固定する 5 本のネジ(M2x3)を取り付けます。 4.
作業を終えた後に 1. バッテリーを取り付けます。 2. コンピュータベースを取り付けます。 3. 背面 I/O カバーを取り付けます。 4. ソリッドステートドライブを取り付けます。 5. ワイヤレスカードを取り付けます。 6.
キーボードの取り外し メモ: コンピュータ内部の作業を始める前に、お使いのコンピュータに付属している「安全にお使いいただくための注意事項」を 読んで、「コンピュータ内部の作業を始める前に」の手順を実行してください。コンピュータ内部の作業を終えた後は、「コンピ ュータ内部の作業を終えた後に」の指示に従ってください。安全にお使いいただくためのベストプラクティスの詳細について は、規制順守ホームページ(www.dell.com/regulatory_compliance)をご覧ください。 前提条件 1. ベースカバーを取り外します。 2. ワイヤレスカードを取り外します。 3. ソリッドステートドライブを取り外します。 4. メモリモジュールを取り外します。 5. 背面 I/O カバーを取り外します。 6. コンピュータベースを取り外します。 7. コイン型電池を取り外します。 8. I/O ボードを取り外します。 9. サブウーハーを取り外します。 10. 電源アダプタポートを取り外します。 11. バッテリーを取り外します。 手順 1.
キーボードの取り付け メモ: コンピュータ内部の作業を始める前に、お使いのコンピュータに付属している「安全にお使いいただくための注意事項」を 読んで、「コンピュータ内部の作業を始める前に」の手順を実行してください。コンピュータ内部の作業を終えた後は、「コンピ ュータ内部の作業を終えた後に」の指示に従ってください。安全にお使いいただくためのベストプラクティスの詳細について は、規制順守ホームページ(www.dell.com/regulatory_compliance)をご覧ください。 手順 注意: キーボードの下にケーブルがないことを確認してください。 1. キーボードをパームレストアセンブリのタブの下にスライドさせます。 2. キーボードブラケットのネジ穴をパームレストアセンブリのネジ穴の位置に合わせます。 3.
作業を終えた後に 1. バッテリーを取り付けます。 2. 電源アダプタポートを取り付けます。 3. サブウーハーを取り付けます。 4. I/O ボードを取り付けます。 5. コイン型電池を取り付けます。 6. コンピュータベースを取り付けます。 7. 背面 I/O カバーを取り付けます。 8. メモリモジュールを取り付けます。 9. ソリッドステートドライブを取り付けます。 10. ワイヤレスカードを取り付けます。 11.
パームレストの取り外し メモ: コンピュータ内部の作業を始める前に、お使いのコンピュータに付属している「安全にお使いいただくための注意事項」を 読んで、「コンピュータ内部の作業を始める前に」の手順を実行してください。コンピュータ内部の作業を終えた後は、「コンピ ュータ内部の作業を終えた後に」の指示に従ってください。安全にお使いいただくためのベストプラクティスの詳細について は、規制順守ホームページ(www.dell.com/regulatory_compliance)をご覧ください。 前提条件 1. ベースカバーを取り外します。 2. ワイヤレスカードを取り外します。 3. ソリッドステートドライブを取り外します。 4. 背面 I/O カバーを取り外します。 5. コンピュータベースを取り外します。 6. コイン型電池を取り外します。 7. スピーカーを取り外します。 8. I/O ボードを取り外します。 9. サブウーハーを取り外します。 10. メモリモジュールを取り外します。 11. 電源ボタンボードを取り外します。 12. 電源アダプタポートを取り外します。 13.
パームレストの取り付け メモ: コンピュータ内部の作業を始める前に、お使いのコンピュータに付属している「安全にお使いいただくための注意事項」を 読んで、「コンピュータ内部の作業を始める前に」の手順を実行してください。コンピュータ内部の作業を終えた後は、「コンピ ュータ内部の作業を終えた後に」の指示に従ってください。安全にお使いいただくためのベストプラクティスの詳細について は、規制順守ホームページ(www.dell.com/regulatory_compliance)をご覧ください。 手順 パームレストを平らな面に置きます。 作業を終えた後に 1. ディスプレイアセンブリを取り付けます。 2. キーボードを取り付けます。 3. タッチパッドを取り付けます。 4. バッテリーを取り付けます。 5. 電源アダプタポートを取り付けます。 6. 電源ボタンボードを取り付けます。 7. メモリモジュールを取り付けます。 8. サブウーハーを取り付けます。 9. I/O ボードを取り付けます。 10. スピーカーを取り付けます。 11. コイン型電池を取り付けます。 12. コンピュータベースを取り付けます。 13.
ディスプレイベゼルの取り外し メモ: コンピュータ内部の作業を始める前に、お使いのコンピュータに付属している「安全にお使いいただくための注意事項」を 読んで、「コンピュータ内部の作業を始める前に」の手順を実行してください。コンピュータ内部の作業を終えた後は、「コンピ ュータ内部の作業を終えた後に」の指示に従ってください。安全にお使いいただくためのベストプラクティスの詳細について は、規制順守ホームページ(www.dell.com/regulatory_compliance)をご覧ください。 前提条件 1. ベースカバーを取り外します。 2. ワイヤレスカードを取り外します。 3. ソリッドステートドライブを取り外します。 4. メモリモジュールを取り外します。 5. 背面 I/O カバーを取り外します。 6. コンピュータベースを取り外します。 7. ディスプレイアセンブリを取り外します。 手順 1. てこの作用で、ディスプレイベゼルの内側の端を注意しながら指先で持ち上げます。 2. ディスプレイベゼルを慎重に持ち上げて裏返します。 3.
5.
ディスプレイベゼルの取り付け メモ: コンピュータ内部の作業を始める前に、お使いのコンピュータに付属している「安全にお使いいただくための注意事項」を 読んで、「コンピュータ内部の作業を始める前に」の手順を実行してください。コンピュータ内部の作業を終えた後は、「コンピ ュータ内部の作業を終えた後に」の指示に従ってください。安全にお使いいただくためのベストプラクティスの詳細について は、規制順守ホームページ(www.dell.com/regulatory_compliance)をご覧ください。 手順 1. Tobii アイトラッカーモジュール を取り付けます。 2. Tobii アイトラッカーボードケーブルを Tobii アイトラッカーモジュールに接続します。 3. ディスプレイベゼルを慎重に裏返します。 4. ディスプレイベゼルをとアンテナアセンブリに合わせて所定の位置にゆっくりとはめ込みます。 作業を終えた後に 1. ディスプレイアセンブリを取り付けます。 2. コンピュータベースを取り付けます。 3. 背面 I/O カバーを取り付けます。 4. メモリモジュールを取り付けます。 5.
Tobii アイトラッカーモジュールの取り外し メモ: コンピュータ内部の作業を始める前に、お使いのコンピュータに付属している「安全にお使いいただくための注意事項」を 読んで、「コンピュータ内部の作業を始める前に」の手順を実行してください。コンピュータ内部の作業を終えた後は、「コンピ ュータ内部の作業を終えた後に」の指示に従ってください。安全にお使いいただくためのベストプラクティスの詳細について は、規制順守ホームページ(www.dell.com/regulatory_compliance)をご覧ください。 前提条件 1. ベースカバーを取り外します。 2. ワイヤレスカードを取り外します。 3. ソリッドステートドライブを取り外します。 4. メモリモジュールを取り外します。 5. 背面 I/O カバーを取り外します。 6. コンピュータベースを取り外します。 7.
Tobii アイトラッカーモジュールの取り付け メモ: コンピュータ内部の作業を始める前に、お使いのコンピュータに付属している「安全にお使いいただくための注意事項」を 読んで、「コンピュータ内部の作業を始める前に」の手順を実行してください。コンピュータ内部の作業を終えた後は、「コンピ ュータ内部の作業を終えた後に」の指示に従ってください。安全にお使いいただくためのベストプラクティスの詳細について は、規制順守ホームページ(www.dell.com/regulatory_compliance)をご覧ください。 手順 メモ: Tobii アイトラッカーモジュールを取り付けてから、インターネットに接続し EyeX アプリケーションを起動すると自動的 にファームウェアをアップデートします。 位置合わせポストを使用して、Tobii アイトラッカーモジュールをディスプレイベゼルにセットし所定の位置にはめ込みます。 作業を終えた後に 1. ディスプレイアセンブリを取り付けます。 2. コンピュータベースを取り付けます。 3. 背面 I/O カバーを取り付けます。 4. メモリモジュールを取り付けます。 5.
ロゴボードの取り外し メモ: コンピュータ内部の作業を始める前に、お使いのコンピュータに付属している「安全にお使いいただくための注意事項」を 読んで、「コンピュータ内部の作業を始める前に」の手順を実行してください。コンピュータ内部の作業を終えた後は、「コンピ ュータ内部の作業を終えた後に」の指示に従ってください。安全にお使いいただくためのベストプラクティスの詳細について は、規制順守ホームページ(www.dell.com/regulatory_compliance)をご覧ください。 前提条件 1. ベースカバーを取り外します。 2. ワイヤレスカードを取り外します。 3. ソリッドステートドライブを取り外します。 4. 背面 I/O カバーを取り外します。 5. コンピュータベースを取り外します。 6. メモリモジュールを取り外します。 7. ディスプレイアセンブリを取り外します。 8. ディスプレイベゼルを取り外します。 手順 1. ロゴボードをディスプレイ背面カバーとアンテナアセンブリに固定している 2 本のネジ(M2x3)を外します。 2. ロゴボードを裏返します。 3.
ロゴボードの取り付け メモ: コンピュータ内部の作業を始める前に、お使いのコンピュータに付属している「安全にお使いいただくための注意事項」を 読んで、「コンピュータ内部の作業を始める前に」の手順を実行してください。コンピュータ内部の作業を終えた後は、「コンピ ュータ内部の作業を終えた後に」の指示に従ってください。安全にお使いいただくためのベストプラクティスの詳細について は、規制順守ホームページ(www.dell.com/regulatory_compliance)をご覧ください。 手順 1. トロンライトケーブル、ロゴボードケーブル、およびエイリアンヘッドケーブルをロゴボードに接続します。 2. エイリアンヘッドケーブルをロゴボードに固定するラッチを押します。 3. ロゴボードを裏返します。 4. 位置合わせポストを使用して、ロゴボードをディスプレイ背面カバーとアンテナアセンブリにセットします。 5. ロゴボードのネジ穴をディスプレイ背面カバーとアンテナアセンブリのネジ穴に合わせます。 6.
ディスプレイパネルの取り外し メモ: コンピュータ内部の作業を始める前に、お使いのコンピュータに付属している「安全にお使いいただくための注意事項」を 読んで、「コンピュータ内部の作業を始める前に」の手順を実行してください。コンピュータ内部の作業を終えた後は、「コンピ ュータ内部の作業を終えた後に」の指示に従ってください。安全にお使いいただくためのベストプラクティスの詳細について は、規制順守ホームページ(www.dell.com/regulatory_compliance)をご覧ください。 前提条件 1. ベースカバーを取り外します。 2. ワイヤレスカードを取り外します。 3. ソリッドステートドライブを取り外します。 4. メモリモジュールを取り外します。 5. 背面 I/O カバーを取り外します。 6. コンピュータベースを取り外します。 7. ディスプレイアセンブリを取り外します。 8. ディスプレイベゼルを取り外します。 9. ロゴボードを取り外します。 手順 1. ディスプレイパネルをとアンテナアセンブリに固定している 4 本のネジ(M2x3)を取り外します。 2.
ディスプレイパネルの取り付け メモ: コンピュータ内部の作業を始める前に、お使いのコンピュータに付属している「安全にお使いいただくための注意事項」を 読んで、「コンピュータ内部の作業を始める前に」の手順を実行してください。コンピュータ内部の作業を終えた後は、「コンピ ュータ内部の作業を終えた後に」の指示に従ってください。安全にお使いいただくためのベストプラクティスの詳細について は、規制順守ホームページ(www.dell.com/regulatory_compliance)をご覧ください。 手順 1. モニタ パネルをディスプレイ背面カバーに合わせます。 2. ディスプレイケーブルをディスプレイパネルのコネクタに差し込み、ラッチを閉じてケーブルを固定します。 3. ディスプレイケーブルをディスプレイパネルに固定するテープを貼り付けます。 4. ディスプレイパネルを裏返して、とアンテナアセンブリ上に丁寧にセットします。 5. ディスプレイパネルをとアンテナアセンブリに固定する 4 本のネジ(M2x3)を取り付けます。 作業を終えた後に 1. ロゴボードを取り付けます。 2.
カメラの取り外し メモ: コンピュータ内部の作業を始める前に、お使いのコンピュータに付属している「安全にお使いいただくための注意事項」を 読んで、「コンピュータ内部の作業を始める前に」の手順を実行してください。コンピュータ内部の作業を終えた後は、「コンピ ュータ内部の作業を終えた後に」の指示に従ってください。安全にお使いいただくためのベストプラクティスの詳細について は、規制順守ホームページ(www.dell.com/regulatory_compliance)をご覧ください。 前提条件 1. ベースカバーを取り外します。 2. ワイヤレスカードを取り外します。 3. ソリッドステートドライブを取り外します。 4. 背面 I/O カバーを取り外します。 5. コンピュータベースを取り外します。 6. メモリモジュールを取り外します。 7. ディスプレイアセンブリを取り外します。 8. ディスプレイベゼルを取り外します。 手順 1. プラスチックスクライブを使用して、カメラモジュールをとアンテナアセンブリから持ち上げます。 2. カメラモジュールからカメラケーブルを外します。 3.
カメラの取り付け メモ: コンピュータ内部の作業を始める前に、お使いのコンピュータに付属している「安全にお使いいただくための注意事項」を 読んで、「コンピュータ内部の作業を始める前に」の手順を実行してください。コンピュータ内部の作業を終えた後は、「コンピ ュータ内部の作業を終えた後に」の指示に従ってください。安全にお使いいただくためのベストプラクティスの詳細について は、規制順守ホームページ(www.dell.com/regulatory_compliance)をご覧ください。 手順 1. カメラモジュールにカメラケーブルを接続します。 2. カメラ モジュールをディスプレイ背面カバーとアンテナ アセンブリーにセットします。 3. カメラ モジュールをディスプレイ背面カバーとアンテナ アセンブリーに取り付けます。 作業を終えた後に 1. ディスプレイベゼルを取り付けます。 2. ディスプレイアセンブリを取り付けます。 3. メモリモジュールを取り付けます。 4. コンピュータベースを取り付けます。 5. 背面 I/O カバーを取り付けます。 6. ソリッドステートドライブを取り付けます。 7.
ディスプレイヒンジの取り外し メモ: コンピュータ内部の作業を始める前に、お使いのコンピュータに付属している「安全にお使いいただくための注意事項」を 読んで、「コンピュータ内部の作業を始める前に」の手順を実行してください。コンピュータ内部の作業を終えた後は、「コンピ ュータ内部の作業を終えた後に」の指示に従ってください。安全にお使いいただくためのベストプラクティスの詳細について は、規制順守ホームページ(www.dell.com/regulatory_compliance)をご覧ください。 前提条件 1. ベースカバーを取り外します。 2. ワイヤレスカードを取り外します。 3. ソリッドステートドライブを取り外します。 4. 背面 I/O カバーを取り外します。 5. コンピュータベースを取り外します。 6. メモリモジュールを取り外します。 7. ディスプレイアセンブリを取り外します。 8. ディスプレイベゼルを取り外します。 手順 1. ヒンジキャップを持ち上げてヒンジから取り外します。 2. ディスプレイアセンブリを裏返します。 3.
7. ディスプレイヒンジをとアンテナアセンブリに固定しているテープをはがします。 8. ヒンジをとアンテナアセンブリに固定している または 12 本のネジ(M2.5x3)を取り外します。 9.
ディスプレイヒンジの取り付け メモ: コンピュータ内部の作業を始める前に、お使いのコンピュータに付属している「安全にお使いいただくための注意事項」を 読んで、「コンピュータ内部の作業を始める前に」の手順を実行してください。コンピュータ内部の作業を終えた後は、「コンピ ュータ内部の作業を終えた後に」の指示に従ってください。安全にお使いいただくためのベストプラクティスの詳細について は、規制順守ホームページ(www.dell.com/regulatory_compliance)をご覧ください。 手順 1. ディスプレイヒンジのネジ穴をとアンテナアセンブリのネジ穴に合わせます。 2. ディスプレイヒンジをとアンテナアセンブリに固定する または 12 本のネジ(M2.5x3)を取り付けます。 3. ディスプレイヒンジをとアンテナアセンブリに固定するテープを貼り付けます。 4. アンテナケーブル、 、電源ボタンボードケーブル、ロゴボードケーブル、Tobii アイトラッカーボードケーブル、ディスプレイケ ーブルを、とアンテナアセンブリの配線ガイドに沿って配線します。 5. ディスプレイアセンブリを裏返します。 6.
ディスプレイ背面カバーとアンテナアセンブリの取 り外し メモ: コンピュータ内部の作業を始める前に、お使いのコンピュータに付属している「安全にお使いいただくための注意事項」を 読んで、「コンピュータ内部の作業を始める前に」の手順を実行してください。コンピュータ内部の作業を終えた後は、「コンピ ュータ内部の作業を終えた後に」の指示に従ってください。安全にお使いいただくためのベストプラクティスの詳細について は、規制順守ホームページ(www.dell.com/regulatory_compliance)をご覧ください。 前提条件 1. ベースカバーを取り外します。 2. ワイヤレスカードを取り外します。 3. ソリッドステートドライブを取り外します。 4. 背面 I/O カバーを取り外します。 5. コンピュータベースを取り外します。 6. バッテリーを取り外します。 7. メモリモジュールを取り外します。 8. ディスプレイアセンブリを取り外します。 9. ディスプレイベゼルを取り外します。 10. カメラを取り外します。 11. ロゴボードを取り外します。 12. ディスプレイパネルを取り外します。 13.
ディスプレイ背面カバーとアンテナアセンブリの取 り付け メモ: コンピュータ内部の作業を始める前に、お使いのコンピュータに付属している「安全にお使いいただくための注意事項」を 読んで、「コンピュータ内部の作業を始める前に」の手順を実行してください。コンピュータ内部の作業を終えた後は、「コンピ ュータ内部の作業を終えた後に」の指示に従ってください。安全にお使いいただくためのベストプラクティスの詳細について は、規制順守ホームページ(www.dell.com/regulatory_compliance)をご覧ください。 手順 1. ディスプレイ背面カバーとアンテナアセンブリを、清潔で平らな面に置きます。 2. ディスプレイケーブル、ロゴボードケーブル、およびカメラケーブルをディスプレイ背面カバーとアンテナアセンブリに取り付 けます。 作業を終えた後に 1. ディスプレイヒンジを取り付けます。 2. ディスプレイパネルを取り付けます。 3. ロゴボードを取り付けます。 4. カメラを取り付けます。 5. ディスプレイベゼルを取り付けます。 6. ディスプレイアセンブリを取り付けます。 7.
BIOS の概要 BIOS はコンピュータのオペレーティングシステムとハードディスク、ビデオアダプタ、キーボード、マウス、プリンタなどの取り 付けられているデバイス間のデータフローを管理します。 BIOS セットアッププログラムの起動 1. コンピュータの電源を入れます(または再起動します)。 2.
メイン Fourth HDD インストールされた 4 番目のハードドライブのタイプを表示 します。 M.2 PCIe SSD-1 インストールされたプライマリ SSD のタイプを表示します。 M.2 PCIe SSD-2 インストールされた 2 番目の SSD のタイプを表示します。 M.2 PCIe SSD-3 インストールされた 3 番目の SSD のタイプを表示します。 表 4.
詳細 Function Key Behavior ファンクションキーまたはマルチメディアキーをデフォルトの ファンクションキー動作として設定できます。 デフォルト:Function key(ファンクションキー) Express Charge 標準充電または高速充電モードを使用してお使いのコンピュー タのバッテリーを充電することができます。 デフォルト : Express Charge(高速充電) Touchpad Backlight タッチパッドのバックライトオプションを設定できます。 Battery Health バッテリーの状態を表示します。 Intel Software Guard Extensions Intel Software Guard Extensions を有効または無効にすること ができます。 デフォルト:Disabled(無効) BIOS Recovery ユーザーは、ユーザーのプライマリハードドライブのリカバリフ ァイルから、特定の破損した BIOS 状況をリカバリできます。 デフォルト:Enabled(有効) 性能オプション CPU パフォーマンス モード
セキュリティ HDD password ハードディスクドライブパスワードを設定、変更、または削除 できます。 Password Change システムパスワードまたは HDD パスワードの変更を、許可ま たは拒否することができます。 デフォルト:Permitted(許可) Computrace オプションの Absolute Software 社製 Computrace Service の BIOS モジュールインタフェースを有効または無効にします。 Firmware TPM ファームウェア TPM 機能を有効または無効にすることがで きます。 デフォルト:Enabled(有効) UEFI Capsule Firmware Updates UEFI カプセルアップデートパッケージで BIOS アップデート を有効または無効にします。 表 6.
3. コイン型電池を取り外します。 4. 1 分間待ちます。 5. コイン型電池を取り付けます。 6. バッテリーを取り付けます。 7. ベースカバーを取り付けます。 BIOS のフラッシュ 更新がある場合やシステム基板を取り付けるときに BIOS のフラッシュ(更新)を行う必要があります。 次の手順に従って、BIOS のフラッシュを行います。 1. コンピュータの電源を入れます。 2. www.dell.com/support にアクセスします。 3. Product Support(製品サポート)をクリックし、お使いのコンピュータのサービスタグを入力して、Submit(送信)をクリッ クします。 メモ: サービスタグがない場合は、自動検出機能を使用するか、お使いのコンピュータのモデルを手動で参照してください。 4. Drivers & downloads(ドライバとダウンロード) > Find it myself(自分で検索)をクリックします。 5. お使いのコンピュータにインストールされているオペレーティングシステムを選択します。 6. ページを下にスクロールして、 BIOS を展開します。 7.
診断 電源およびバッテリーステータスライト:電源およびバッテリーの充電状態を示します。 橙色 - コンピュータがバッテリーで動作しており、バッテリーの充電量は 10% 未満です。 ユーザー定義の色 ( AC モード ) - 電源アダプタが接続され、バッテリーはフル充電されています。 ユーザー定義の色 ( バッテリーモード ) - コンピュータがバッテリーで動作しており、バッテリーの充電量は 10% 以上です。 ユーザー定義の色(呼吸、つまりゆっくりと明るさが減少/増加) - コンピューターはスリープ状態です。 消灯 - コンピュータが休止状態、または電源が切れています。 電源およびバッテリーステータスライトが障害を示すビープコードと合わせて赤色と青色に点滅します。 例えば、電源およびバッテリーステータスライトが、赤色に 2 回点滅して停止し、次に青色に 3 回点滅して停止します。この 2,3 のパターンは、コンピュータの電源が切れるまで続き、メモリまたは RAM が検出されないことを示しています。 次の表は、異なるライトパターンとその意味を示しています。 表 8.
「困ったときは」と「Alienware へのお問い合わせ」 セルフヘルプリソース オンラインのセルフヘルプリソースを使って Alienware の製品とサービスに関するヘルプ情報を取得できます。 表 9. Alienware 製品とオンラインのセルフヘルプリソース Alienware 製品とサービスに関する情報は、 www.alienware.com Dell ヘルプとサポート アプリ ヒント サポートへのお問い合わせ Windows の[検索]に、サポートへのお問い合わせと入力し、 Enter を押します。 オペレーティングシステムのオンラインヘルプ www.dell.com/support/windows www.dell.com/support/linux トラブルシューティング情報、ユーザーズガイド、セットアップ www.alienware.com/gamingservices 方法、製品仕様、テクニカルサポートブログ、ドライバ、ソフ トウェアのアップデートなどは VR サポート www.dell.