Dell Precision™ T7400 Quick Reference Guide Model DCDO w w w. d e l l . c o m | s u p p o r t . d e l l .
Notes, Notices, and Cautions NOTE: A NOTE indicates important information that helps you make better use of your computer. NOTICE: A NOTICE indicates either potential damage to hardware or loss of data and tells you how to avoid the problem. CAUTION: A CAUTION indicates a potential for property damage, personal injury, or death. ____________________ Information in this document is subject to change without notice. © 2007 Dell Inc. All rights reserved.
Contents Finding Information . . . . . . . . . . . . . . . . . . . . Setting Up Your Computer . . . . . . . . . . . . . . . . . Changing Between Tower and Desktop Orientations . . . . . . . . . . . . . . . . . Installing Your Computer in an Enclosure . . . . . 9 10 13 . . . . . . . . . . . . . 16 . . . . . . . . . . . . . . . . . . 18 Power Protection Devices Front View (Tower Orientation) . . . . . . . . . . 18 Back View (Tower Orientation) . . . . . . . . . . 20 . . . . . . . . . . . .
Contents
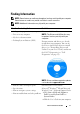
Finding Information NOTE: Some features or media may be optional and may not ship with your computer. Some features or media may not be available in certain countries. NOTE: Additional information may ship with your computer. What Are You Looking For? Find It Here • A diagnostic program for my computer Drivers and Utilities Disc • Drivers for my computer NOTE: The Drivers and Utilities disc may • My device documentation be optional and may not ship with your computer.
What Are You Looking For? Find It Here • Warranty information Dell™ Product Information Guide • Terms and Conditions (U.S. only) • Safety instructions • Regulatory information • Ergonomics information • End User License Agreement • Service Tag and Express Service Code • Microsoft® ® Windows Product Key Service Tag and Microsoft Windows Product Key These labels are located on your computer: • Use the Service Tag to identify your computer when you use support.dell.com or contact Dell support.
What Are You Looking For? Find It Here • Solutions — Troubleshooting hints and Dell Support Website — support.dell.com tips, articles from technicians, online NOTE: Select your region or business courses, and frequently asked questions segment to view the appropriate support site.
What Are You Looking For? Find It Here • How to use Windows XP Windows Help and Support Center 1 Click Start→ Help and Support. 2 Type a word or phrase that describes your problem and click the arrow icon. 3 Click the topic that describes your problem. 4 Follow the instructions on the screen.
What Are You Looking For? Find It Here • How to use Linux Dell Supported Linux Sites • E-mail discussions with users of Dell Precision products and the Linux operating system • linux.dell.com • lists.us.dell.
Switching From Desktop to Tower Orientation 1 Remove the floppy drive or media card reader (if installed) by following the steps in "Removing a Floppy Drive or a Media Card Reader (Desktop Computer)" in your User’s Guide, and then reinstall the floppy drive or media card reader by following the steps in "Installing a Floppy Drive or Media Card Reader (Tower Computer)" in your User’s Guide.
• Leave 10.2 cm (4 in) minimum clearance on all vented sides of the computer to permit the airflow required for proper ventilation. • If your computer is installed in a corner on or under a desk, leave 5.1 cm (2 in) minimum clearance from the back of the computer to the wall to permit the airflow required for proper ventilation. • If your enclosure has doors, ensure that they allow at least 30 percent airflow through the enclosure (front and back).
• 12 Do not install your computer in an enclosure that does not allow airflow. Restricting the airflow can cause your computer to overheat and may impact your computer’s performance.
Transferring Information to a New Computer You can use your operating system wizards to help you transfer files and other data from one computer to another computer.
Files and Settings Transfer Wizard (With the Operating System Disc) NOTE: The Files and Settings Transfer Wizard designates the source computer from which data is to be transferred as the old computer, and designates the destination computer to which the data is going to be transferred as the new computer. PREPARE THE DESTINATION COMPUTER FOR THE FILE TRANSFER — 1 Click Start→ All Programs→ Accessories→ System Tools→ Files and Settings Transfer Wizard.
TRANSFER DATA TO THE DESTINATION COMPUTER — 1 Go to the destination computer. 2 Under Now go to your old computer, click Next. 3 Under Where are the files and settings?, click to select the method you chose for transferring your settings and files, and then click Next. The wizard reads the collected files and settings and applies them to the destination computer. When the transfer is complete, the Finished screen appears. 4 Click Finished, and then restart the computer.
6 Under What do you want to transfer?, click to select the data you want to transfer, and then click Next. The selected data is copied and the Completing the Collection Phase screen appears. 7 Click Finish. TRANSFER DATA TO THE DESTINATION COMPUTER — 1 Go to the destination computer. 2 Under Now go to your old computer, click Next. 3 Under Where are the files and settings?, click to select the method you chose for transferring your settings and files, and then click Next.
Surge Protectors Surge protectors and power strips equipped with surge protection help prevent damage to your computer from voltage spikes that can occur during electrical storms or after power interruptions. Some surge protector manufacturers include warranty coverage for certain types of damage. Carefully read the device warranty when choosing a surge protector and compare joule ratings to determine the relative effectiveness of different devices.
About Your Computer Front View (Tower Orientation) 1 2 3 4 13 12 11 10 5 6 7 8 9 1–3 18 5.25-inch drive bays Can hold a CD/DVD drive, or a media card reader, floppy drive, or a SATA hard drive in a 5.25-inch drive bay carrier. The hard-drive carrier is only for use in the 5.25-inch drive bays. The floppy-drive/media card reader and hard-drive carriers are not interchangeable.
4 5.25-inch drive bay with special 3.5-inch drive panel plate Can hold a CD/DVD drive, or a media card reader, a floppy drive, or a SATA hard drive in a 5.25-inch drive bay carrier. The drive-panel plate shown here is only for use with a floppy drive or media card reader; you can install the plate in front of any of the four 5.25-inch drive bays. For more information, see "Drive Panels" in your User’s Guide. The hard-drive carrier is only for use in the 5.25-inch drive bays.
Back View (Tower Orientation) 1 2 3 1 power connector Connect the power cable. 2 card slots Slots 2–6 support full-length cards, including one PCI, two PCI Express 2.0 x16, and two PCI-X slots. Slots 1 and 7 support half-length cards, including one PCI Express x8 (wired as x4) and one PCI-X slot. 3 back panel connectors Plug USB, audio, and other devices into the appropriate connector (see "Back Panel Connectors" on page 21 for more information).
Back Panel Connectors 1 2 11 1 3 10 4 5 6 7 8 9 parallel connector Connect a parallel device, such as a printer, to the parallel connector. If you have a USB printer, plug it into a USB connector. NOTE: The integrated parallel connector is automatically disabled if the computer detects an installed card containing a parallel connector configured to the same address. For more information, see "System Setup Options" in your User’s Guide.
7 network adapter connector To attach your computer to a network or broadband device, connect one end of a network cable to either a network jack or your network or broadband device. Connect the other end of the network cable to the network adapter connector on your computer. A click indicates that the network cable has been securely attached. Do not plug a telephone cable into the network connector.
Cleaning Your Computer CAUTION: Before you begin any of the procedures in this section, follow the safety instructions in the Product Information Guide. Computer, Keyboard, and Monitor CAUTION: Before you clean your computer, disconnect the computer from the electrical outlet. Clean your computer with a soft cloth dampened with water. Do not use liquid or aerosol cleaners, which may contain flammable substances.
Floppy Drive NOTICE: Do not attempt to clean drive heads with a swab. The heads may become misaligned and prevent the drive from operating. Clean your floppy drive using a commercially available cleaning kit. These kits contain pretreated floppy disks to remove contaminants that accumulate during normal operation. CDs and DVDs NOTICE: Always use compressed air to clean the lens in the CD/DVD drive, and follow the instructions that come with the compressed air. Never touch the lens in the drive.
• • • • If the power light is off, the computer is either turned off or is not receiving power. – Reseat the power cable into both the power connector on the back of the computer and the electrical outlet. – If the computer is plugged into a power strip, ensure that the power strip is plugged into an electrical outlet and that the power strip is turned on. – Bypass power protection devices, power strips, and power extension cables to verify that the computer turns on properly.
Diagnostic Lights CAUTION: Before you begin any of the procedures in this section, follow the safety instructions in the Product Information Guide. To help troubleshoot a problem, your computer has four lights labeled 1, 2, 3, and 4 on the front panel (see "Front View (Tower Orientation)" on page 18). When the computer starts normally, the lights flash, and then turn off. If the computer malfunctions, use the sequence of the lights to help identify the problem.
Light Pattern Problem Description Suggested Resolution Memory modules are detected, but a memory failure has occurred. • If two or more memory modules are installed, remove the modules (see "Memory" in your User’s Guide), reinstall one module, and then restart the computer. If the computer starts normally, continue to install additional memory modules (one at a time) until you have identified a faulty module or reinstalled all modules without error.
Light Pattern Problem Description Suggested Resolution No memory • If two or more memory modules are modules are detected. installed, remove the modules (see "Memory" in your User’s Guide), reinstall one module, and then restart the computer. If the computer starts normally, continue to install additional memory modules (one at a time) until you have identified a faulty module or reinstalled all modules without error.
Light Pattern Problem Description A possible expansion card failure has occurred. Another failure has occurred. Suggested Resolution 1 Determine if a conflict exists by removing an expansion card (not a graphics card) and restarting the computer (see "Cards" in your User’s Guide). 2 If the problem persists, reinstall the card you removed, and then remove a different card and restart the computer. 3 Repeat this process for each expansion card installed.
Beep Codes Your computer may emit a series of beeps during start up. The series of beeps is called a beep code and can be used to help identify a problem with your computer. If your computer emits a series of beeps during start-up: 1 Write down the beep code. 2 Run the Dell Diagnostics to identify the cause (see "Dell Diagnostics" on page 33).
Code (repetitive short beeps) Description Suggested Remedy 4 RAM Read/Write failure. • Ensure that no special requirements for memory module/connector placement exist (see "Memory" in your User’s Guide). • Ensure that the memory you are using is supported by your computer (see "Memory" in your User’s Guide). • If the problem persists, contact Dell (see "Contacting Dell" in your User’s Guide). 5 Real time clock failure. • Replace the battery (see "Replacing the Battery" in your User’s Guide).
H A R D - D I S K R E A D F A I L U R E — Possible hard drive failure during hard-drive boot test (see "Contacting Dell" in your User’s Guide for assistance). K E Y B O A R D F A I L U R E — Keyboard failure or the keyboard cable is loose (see "Keyboard Problems" in your User’s Guide). N O B O O T D E V I C E A V A I L A B L E — The system cannot detect a bootable device or partition.
Windows Vista: 1 Click the Windows Vista start button , and click Help and Support. 2 Type hardware troubleshooter in the search field and press to start the search. 3 In the search results, select the option that best describes the problem and follow the remaining troubleshooting steps. Dell Diagnostics CAUTION: Before you begin any of the procedures in this section, follow the safety instructions in the Product Information Guide.
NOTE: If at any time a message appears stating that no diagnostics utility partition has been found, run the Dell Diagnostics from your Drivers and Utilities disc (see "Starting the Dell Diagnostics From the Drivers and Utilities Disc" on page 34). If you wait too long and the operating system logo appears, continue to wait until you see the Microsoft Windows desktop, and then shut down your computer and try again.
6 At the Boot Device Menu, use the up- and down-arrow keys or press the appropriate number on the keyboard to highlight Onboard or USB CD-ROM, and then press . NOTE: The Quickboot feature changes the boot sequence for the current boot only. Upon restart, the computer boots according to the boot sequence specified in the system setup program. 7 Press <1> to select the Dell Diagnostics. 8 At the Dell Diagnostics Menu, press <1> to select the Dell Diagnostics.
For any problem encountered during a test, a message appears with an error code and a description of the problem. Write down the error code and problem description exactly as it appears and follow the instructions on the screen. If you cannot resolve the problem, contact Dell (see "Contacting Dell" in your User’s Guide). NOTE: The Service Tag for your computer is located at the top of each test screen. When contacting Dell support, have your Service Tag ready.
• If an error message occurs in a program, see the program’s documentation. NOTE: The procedures in this document were written for the Windows default view, so they may not apply if you set your Dell™ computer to the Windows Classic view. Battery Problems CAUTION: There is a danger of a new battery exploding if it is incorrectly installed. Replace the battery only with the same or equivalent type recommended by the manufacturer. Discard used batteries according to the manufacturer's instructions.
Optical Drive Problems NOTE: High-speed optical drive vibration is normal and may cause noise, which does not indicate a defect in the drive or the disc. NOTE: Because of different regions worldwide and different disc formats, not all DVD titles work in all DVD drives. ADJUST THE WINDOWS VOLUME CONTROL — • Click the speaker icon in the lower-right corner of your screen. • Ensure that the volume is turned up by clicking the slidebar and dragging it up.
E-Mail, Modem, and Internet Problems CAUTION: Before you begin any of the procedures in this section, follow the safety instructions in the Product Information Guide. NOTE: Connect the modem to an analog telephone jack only. The modem does not operate while it is connected to a digital telephone network. NOTE: Do not plug a telephone cable into the network adapter connector (see "Back Panel Connectors" in your User’s Guide).
VE R I F Y T H A T T H E M O D E M I S C O M M U N I C A T I N G W I T H W I N D O W S — Windows XP: 1 Click Start→ Control Panel→ Printers and Other Hardware→ Phone and Modem Options→ Modems. 2 Click the COM port for your modem, and then click Properties→ Diagnostics→ Query Modem to verify that the modem is communicating with Windows. If all commands receive responses, the modem is operating properly. Windows Vista: 1 Click Start → Control Panel→ Hardware and Sound→ Phone and Modem Options→ Modems.
drive letter : \ I S N O T A C C E S S I B L E . T H E D E V I C E I S N O T R E A D Y — The drive cannot read the disk. Insert a disk into the drive and try again. I N S E R T B O O T A B L E M E D I A — Insert a bootable floppy disk, CD, or DVD. N O N - S YS T E M D I S K E R R O R — Remove the floppy disk from the floppy drive and restart your computer. NOT ENOUGH MEMORY OR RESOURCES. CLOSE SOME PROGRAMS AND TRY AGAIN — Close all windows and open the program that you want to use.
Keyboard Problems CAUTION: Before you begin any of the procedures in this section, follow the safety instructions in the Product Information Guide. CHECK THE KEYBOARD CABLE — • Ensure that the keyboard cable is firmly connected to the computer. • Shut down the computer (see "Turning Off Your Computer" in your User’s Guide), reconnect the keyboard cable as shown on the setup diagram for your computer, and then restart the computer.
A program crashes repeatedly NOTE: Most software includes installation instructions in its documentation or on a floppy disk, CD, or DVD. C H E C K T H E S O F T W A R E D O C U M E N T A T I O N — If necessary, uninstall and then reinstall the program.
BACK UP YOUR FILES IMMEDIATELY USE A VIRUS-SCANNING PROGRAM TO CHECK THE HARD DRIVE, FLOPPY DISKS, CDS, OR DVDS SAVE AND CLOSE ANY OPEN FILES OR PROGRAMS AND SHUT DOWN YOUR COMPUTER THROUGH THE START MENU Memory Problems CAUTION: Before you begin any of the procedures in this section, follow the safety instructions in the Product Information Guide.
RESTART THE COMPUTER — 1 Simultaneously press to display the Start menu. 2 Press , press the up- and down-arrow keys to highlight Shut down or Turn Off, and then press . 3 After the computer turns off, reconnect the mouse cable as shown on the setup diagram. 4 Turn on the computer. TE S T T H E M O U S E — Connect a properly working mouse to the computer, and then try using the mouse. CHECK THE MOUSE SETTINGS — Windows XP: 1 Click Start→ Control Panel→ Mouse.
Power Problems CAUTION: Before you begin any of the procedures in this section, follow the safety instructions in the Product Information Guide. I F T H E P O W E R L I G H T I S G R E E N A N D T H E C O M P U T E R I S N O T R E S P O N D I N G — See "Diagnostic Lights" on page 26. I F T H E P O W E R L I G H T I S B L I N K I N G G R E E N — The computer is in standby mode. Press a key on the keyboard, move the mouse, or press the power button to resume normal operation.
Printer Problems CAUTION: Before you begin any of the procedures in this section, follow the safety instructions in the Product Information Guide. NOTE: If you need technical assistance for your printer, contact the printer’s manufacturer. C H E C K T H E P R I N T E R D O C U M E N T A T I O N — See the printer documentation for setup and troubleshooting information. ENSURE THAT THE PRINTER IS TURNED ON CHECK THE PRINTER CABLE CONNECTIONS — • See the printer documentation for cable connection information.
C H E C K T H E S C A N N E R D O C U M E N T A T I O N — See the scanner documentation for setup and troubleshooting information. U N L O C K T H E S C A N N E R — Ensure that your scanner is unlocked (if the scanner has a locking tab or button). RESTART THE COMPUTER AND TRY THE SCANNER AGAIN CHECK THE CABLE CONNECTIONS — • See the scanner documentation for information on cable connections. • Ensure that the scanner cables are securely connected to the scanner and the computer.
TE S T T H E E L E C T R I C A L O U T L E T — Ensure that the electrical outlet is working by testing it with another device, such as a lamp. E L I M I N A T E P O S S I B L E I N T E R F E R E N C E — Turn off nearby fans, fluorescent lights, or halogen lamps to check for interference. RUN THE SPEAKER DIAGNOSTICS R E I N S T A L L T H E S O U N D D R I V E R — See "Drivers" in your User’s Guide.
• Swap the computer and monitor power cables to determine if the monitor’s power cable is defective. • Check the connectors for bent or broken pins (it is normal for monitor cable connectors to have missing pins). CHECK THE MONITOR POWER LIGHT — • If the power light is lit or blinking, the monitor has power. • If the power light is off, firmly press the button to ensure that the monitor is turned on. • If the power light is blinking, press a key on the keyboard or move the mouse to resume normal operation.
C H E C K T H E M O N I T O R S E T T I N G S — See the monitor documentation for instructions on adjusting the contrast and brightness, demagnetizing (degaussing) the monitor, and running the monitor self-test. M O V E T H E S U B W O O F E R A W A Y F R O M T H E M O N I T O R — If your speaker system includes a subwoofer, ensure that the subwoofer is positioned at least 60 centimeters (2 feet) away from the monitor.
Quick Reference Guide
Index B D battery problems, 37 Dell Diagnostics, 33 beep codes, 30 Desktop System Software, 7 Dell support site, 7 diagnostic lights, 26 C CD-RW drive problems, 38 Check Disk, 38 computer beep codes, 30 crashes, 42-43 stops responding, 42 conflicts software and hardware incompatibilities, 32 connectors headphone, 19 IEEE 1394, 19, 21 keyboard, 22 line-out, 21 mouse, 21 network adapter, 22 parallel, 21 serial, 22 sound, 21 USB, 19, 22 diagnostics beep codes, 30 Dell Diagnostics, 33 lights, 19, 26 dis
E I e-mail problems, 39 IEEE 1394 connectors, 19, 21 problems, 41 End User License Agreement, 6 ergonomics information, 6 error messages beep codes, 30 diagnostic lights, 26 problems, 40 Express Service Code, 6 IRQ conflicts, 32 K keyboard connector, 22 problems, 42 F Files and Settings Transfer Wizard (Windows XP), 13 H hard drive activity light, 19 problems, 38 hardware beep codes, 30 conflicts, 32 Dell Diagnostics, 33 Hardware Troubleshooter, 32 headphone connector, 19 Help and Support Center, 8
M P memory problems, 44 power button, 19 line conditioners, 16 problems, 46 protection devices, 16 surge protectors, 16 UPS, 16 messages error, 40 system, 31 modem problems, 39 monitor blank, 49 hard to read, 50 problems, 49 mouse connector, 21 problems, 44 N network connector, 22 problems, 45 O operating system reinstalling, 8 Operating System CD/DVD, 8 optical drive problems, 38 power light conditions, 46 printer connecting, 13 problems, 47 setting up, 13 problems battery, 37 beep codes, 30 blue sc
problems (continued) monitor hard to read, 50 monitor is blank, 49 mouse, 44 network, 45 optical drive, 38 power, 46 power light conditions, 46 printer, 47 program crashes, 43 program stops responding, 42 scanner, 47 screen hard to read, 50 screen is blank, 49 software, 42-43 video and monitor, 49 volume adjusting, 48 Product Information Guide, 6 R regulatory information, 6 S S.M.A.R.
V video problems, 49 volume adjusting, 48 W warranty information, 6 Windows Vista Help and Support Center, 8 reinstalling, 8 Windows Easy Transfer, 16 Windows XP Files and Settings Transfer Wizard, 13 Hardware Troubleshooter, 32 Help and Support Center, 8 reinstalling, 8 wizards Files and Settings Transfer Wizard (Windows XP), 13 Program Compatibility Wizard, 43 Windows Easy Transfer (Windows Vista), 16 Index 57
Index
Dell Precision™ T7400 Rövid referencia útmutató Típus DCDO w w w. d e l l . c o m | s u p p o r t . d e l l .
Megjegyzések, figyelmeztetések és óvintézkedések MEGJEGYZÉS: A MEGJEGYZÉSEK a számítógép biztonságosabb és hatékonyabb használatát elősegítő fontos tudnivalókat tartalmaznak. FIGYELMEZTETÉS: A „FIGYELMEZTETÉS“ hardver-meghibásodás vagy adatvesztés potenciális lehetőségére hívja fel a figyelmet, egyben közli a probléma elkerülésének módját. VIGYÁZAT! Az VIGYÁZAT esetleges tárgyi és személyi sérülésekre, illetve életveszélyre hívják fel a figyelmet.
Tartalomjegyzék Információkeresés A számítógép üzembe helyezése . 69 . . . . . . . . Torony (Tower) és Asztal (Desktop) orientáció közötti váltás . . . . . . . . . . . . . 69 . . . . . 70 A számítógép telepítése zárt helyen Információk átvitele egy új számítógépre . . . . 73 . . . . . . . . . 77 . . . . . . . . . . . . . . . . . . . . . 79 Tápfeszültség védő eszközök A számítógép 63 . . . . . . . . . . . . . . . . . .
Tartalomjegyzék
Információkeresés MEGJEGYZÉS: Mivel néhány funkció vagy adathordozó opcionális, elképzelhető, hogy nem képezi a számítógép részét. Elképzelhető, hogy számítógépe egyes funkciói vagy adathordozói bizonyos országokban nem működnek. MEGJEGYZÉS: A számítógéphez kiegészítő információk is tartozhatnak.
Témakör Itt találja meg • Alkatrészek eltávolítása és cseréje Dell Precision™ Felhasználói kézikönyv • Műszaki adatok • Rendszerbeállítások konfigurálása • Hibakeresés és -elhárítás • Garanciális tudnivalók • Eladási feltételek és kikötések az Egyesült Államokban • Biztonsági előírások • Szabályozással kapcsolatos információk • Ergonómiával kapcsolatos információk • Végfelhasználói licencmegállapodás 64 Rövid referencia útmutató Microsoft® Windows® XP and Microsoft Windows Vista™ Help and Support Ce
Témakör Itt találja meg • Szervizcímke és expressz szervizkód Szervizcímke és Microsoft Windows termékkulcs • Microsoft® Windows® Product Key (termékkulcs) Ezek a címkék a számítógépen találhatók: • A számítógépet a szervizcímkével lehet azonosítani a support.dell.com webhely használatakor vagy a műszaki támogatás igénybevételekor. • A Dell műszaki támogatás igénybevételekor az expressz szervizkód megadásával irányíthatja a hívást a megfelelő helyre.
Témakör Itt találja meg • Megoldások –– Hibakeresési útmutatások Dell támogatási weboldal — és tippek, cikkek technikusoktól, online support.dell.
Témakör Itt találja meg • Desktop System Software (DSS) — Az A Desktop System Software operációs rendszer újratelepítése esetén (asztali rendszerszoftver) letöltéséhez: számítógépén újra kell telepítenie a DSS 1 Menjen a support.dell.com webhelyre, segédprogramot is. A DSS automatikusan válassza ki országát/régióját, majd észleli a számítógépünket és operációs kattintson a Drivers & Downloads rendszerünket, és telepíti (Illesztőprogramok és letöltések) pontra.
Témakör Itt találja meg • Az operációs rendszer újratelepítése Az operációs rendszer lemeze Az operációs rendszer már telepítve van a számítógépen. Operációs rendszerének újratelepítéséhez használja a számítógépéhez kapott Operating System (Operációs rendszer) lemezt (Lásd a „Restoring Your Operating System“ (Az operációs rendszer visszaállítása) c. fejezetet a User’s Guide (Felhasználói kézikönyvben)).
A számítógép üzembe helyezése Torony (Tower) és Asztal (Desktop) orientáció közötti váltás VIGYÁZAT! Az ebben a részben ismertetett műveletek elvégzése előtt tanulmányozza a Termékismertetőt. MEGJEGYZÉS: Ahhoz, hogy a számítógépünk torony vagy asztal orientációját változtatni tudjuk, a Delltől opcionálisan beszerezhető készletet (kit) kell használnunk. Lásd a „Termékismertetőt“ a Felhasználói Kézikönyvben, hogyan lehet megrendelést feladni a Dellnek.
Toronyról asztal orientációra váltás 1 Távolítsuk el a hajlékony lemezes meghajtót vagy adathordozó kártya olvasót (ha telepítve volt) a Felhasználói kézikönyv „Removing a Floppy Drive or a Media Card Reader (Desktop Computer)“ (Hajlékony lemez meghajtó vagy adathordozó kártya olvasó eltávolítása (Asztali számítógép)) c.
• A megfelelő szellőzéshez hagyjon legalább 10,2 cm térközt a számítógép összes szellőzőnyílással ellátott oldalán. • Ha a számítógépet sarokban vagy egy asztal alatt telepítik, akkor hagyjon szabadon egy legalább 5,1 cm-es (2 hüvelyk) hézagot a számítógép hátulja és a fal között, hogy a megfelelő szellőzéshez szükséges légáramlás kialakulhasson. • Ha a zárt tér ajtókkal rendelkezik, akkor ügyeljünk, hogy az ajtók hagyjanak legalább 30 százalékos légáramlást a zárt téren keresztül (elől és hátul).
• 72 Ne telepítsük a számítógépet olyan zárt helyen, amely nem teszi lehetővé a légáramlást. A légáramlás akadályozása számítógépünk túlmelegedéséhez vezethet, és teljesítményét is befolyásolhatja.
Információk átvitele egy új számítógépre Igénybe vehetjük operációs rendszerünk varázslóit, hogy segítsenek fájlokat és más adatokat átvinni egyik számítógépről a másikra.
MEGJEGYZÉS: Az adatátvitellel kapcsolatos további információkért keressünk rá a support.dell.com webhelyen a 154781 számú dokumentumra (What Are The Different Methods To Transfer Files From My Old Computer To My New Dell™ Computer Using the Microsoft Windows XP Operating System? (Milyen módszerek vannak fájlok átvitelére régi számítógépemről az új Dell™ számítógépemre a Microsoft Windows XP operációs rendszer használatával?)).
3 A What do you want to do? (Mit akar tenni?) kérdés alatt kattintson a Transfer files and settings (Fájlok és beállítások átvitele) pontra. Megjelenik a Files and Settings Transfer Wizard (Fájlok és beállítások átvitele varázsló) ablaka. 4 Kattintson a Next (Tovább) gombra. 5 A Which computer is this? (Melyik ez a számítógép?) alatt kattintson az Old computer (Régi számítógép) kapcsolóra, majd kattintson a Next (Tovább) gombra.
MEGJEGYZÉS: A Files and Settings Transfer Wizard (Fájlok és beállítások átvitele varázsló) a forrás számítógépet, amelyről az adatokat át kell vinni old (régi) számítógépnek nevezi; a cél számítógépet pedig, amelyre az adatokat át kell vinni new (új) számítógépnek nevezi.
ADATOK ÁTVITELE A CÉL SZÁMÍTÓGÉPRE — 1 Menjen a cél számítógépre. 2 A Now go to your old computer (Menjen a régi számítógépére) alatt kattintson a Next (Tovább) gombra. 3 A Where are the files and settings? (Hol vannak a fájlok és a beállítások?) alatt kattintson arra a módszerre, amelyet beállításainak és fájljainak átviteléhez választ, majd kattintson a Next (Tovább) gombra. A varázsló olvassa az összegyűjtött fájlokat és beállításokat, majd a cél számítógépre viszi őket.
Túlfeszültség védők A túlfeszültség védők és a túlfeszültség elleni védelemmel felszerelt elosztós hosszabbítók segítenek megvédeni számítógépünket az olyan feszültségugrásoktól (tüskéktől) amelyek elektromos viharok során vagy feszültség-kimaradások után keletkeznek. Egyes túlfeszültség védők gyártói garanciát is mellékelnek bizonyos fajta károk esetére.
Az UPS véd a feszültség ingadozásai és kimaradásai ellen. Az UPS eszközök egy akkumulátort tartalmaznak, amely ideiglenesen ellátja tápfeszültséggel a csatlakoztatott eszközöket, amíg a villamos hálózatban feszültségkimaradás van. Amikor a hálózati feszültség jelen van, az akkumulátor töltődik. Nézzük meg az UPS gyártó dokumentációját az akkumulátor üzemidejét illetően, illetve győződjünk meg róla, hogy az eszközt jóváhagyta-e az Underwriters Laboratories (UL).
1–3 5,25 collos meghajtó helyek Tartalmazhatnak CD/DVD meghajtót, adathordozó kártya olvasót, hajlékonylemez-meghajtót, vagy egy SATA merevlemez-meghajtót egy 5,25 collos keretben. Merevlemez-keretek csak az 5,25 collos meghajtó helyeken használhatók. A hajlékonylemez-meghajtó/adathordozó kártya olvasó és a merevlemez-meghajtó-keretek nem cserélhetők fel egymással.
8 tápkapcsoló, tápfeszültség jelzőlámpa Nyomja meg a tápfeszültség gombját a számítógép bekapcsolásához. Az ennek a gombnak a közepén lévő lámpa jelzi a tápfeszültség állapotát. További tájékozódás végett lásd a „Controls and Lights (Kezelőszervek és jelzőlámpák)“ címszó alatt a Felhasználói kézikönyvben. MEGJEGYZÉS: Az adatvesztés elkerülése érdekében ne használjuk a tápfeszültség kapcsolóját a számítógép kikapcsolására. Ehelyett végezzük el az operációs rendszer szabályos leállítását (shutdown).
Hátulnézet (Torony orientáció) 1 2 3 1 hálózati csatlakozó Csatlakoztassa rá a hálózati tápkábelt. 2 kártya bővítőhelyek A 2. – 6. kártya bővítőhelyek a teljes hosszúságú kártyákat támogatják, konkrétan egy PCI kártyát, két PCI Express 2.0 x16 kártyát és két PCI-X kártyát. Az 1. és a 7. bővítőhely a félhosszúságú kártyákat támogatja, egy PCI Express x8 (x4-ként huzalozott) kártyát és egy PCI-X kártyát.
Hátlapi csatlakozók 1 2 11 1 párhuzamos csatlakozó 3 4 10 5 6 7 8 9 Csatlakoztasson egy párhuzamos eszközt, például párhuzamos nyomtatót a párhuzamos csatlakozóra. Ha USB nyomtatója van, akkor azt dugja egy USB csatlakozóba. MEGJEGYZÉS: A beépített párhuzamos csatlakozó automatikusan letiltódik, ha a számítógép olyan beszerelt kártyát talál, amely ugyanarra a címre konfigurált párhuzamos csatlakozót tartalmaz.
5 vonali kimenet (line-out) csatlakozó A zöld vonal kimeneti (line-out) csatlakozót használjuk fejhallgatók és a legtöbb beépített erősítős hangszóró csatlakoztatására. Hangkártyával rendelkező számítógépeknél használjuk a kártyán lévő csatlakozót. 6 számítógéphálózati kapcsolat sértetlenség jelzőlámpa Zöld — Jó a kapcsolat egy 10 Mbps sebességű számítógép-hálózat és a számítógép között. Narancssárga — Jó a kapcsolat egy 100 Mbps sebességű számítógép-hálózat és a számítógép között.
9 USB 2.0 csatlakozók (5) Ajánlatos az előlapi USB csatlakozókat olyan eszközökhöz használni, amelyeket csak alkalmilag csatlakoztatunk, pl. flash memória kulcsokhoz, kamerákhoz, vagy rendszerindításra alkalmas („bootolható“) USB eszközökhöz. A hátoldali USB csatlakozókat olyan eszközökhöz használjuk, amelyek rendszerint állandóan csatlakoztatva vannak, pl. a nyomtatóhoz és a billentyűzethez.
• Törölje le a billentyűzetet, a számítógépet, és a monitor műanyag részeit puha, vízzel megnedvesített tisztító ruhával. Ne áztassa el a ruhát, és ne hagyja, hogy víz csurogjon be a számítógép vagy a billentyűzet belsejébe. Egér (Nem optikai) 1 Forgassa az egér alján lévő rögzítő gyűrűt az óramutató járásával ellenkező irányba, majd vegye ki a golyót. 2 Törölje le a golyót tiszta, szöszmentes ruhával. 3 Gondosan fújjon bele a golyókosárba, hogy lejöjjön a por és a szösz.
2 Puha, szöszmentes ruhával óvatosan töröljük meg a lemez alsó részét (a címke nélküli oldalt) egyenes vonalban haladva középről a lemez külső széle felé (sugárirányban). A makacs piszok eltávolításához próbáljuk meg vizet vagy víz és enyhe szappan felhígított oldatát használni. Vásárolhatunk kereskedelmi termékeket is, amelyek megtisztítják a lemezeket és bizonyos védelmet biztosítanak a por, ujjlenyomatok és karcolások ellen. A CD-khez való tisztítószerek DVD-hez is biztonságosan használhatók.
• • • Ha a tápfeszültség jelzőlámpa sárgán villog, akkor a számítógép megkapja a tápfeszültséget, de valamilyen belső tápfeszültség-probléma állhat fenn. – Ügyeljen, hogy a feszültség választó kapcsoló úgy legyen beállítva, hogy megfeleljen a lakóhelyünknek megfelelő váltakozó áramnak. – Ügyeljünk, hogy a processzor tápkábele stabilan csatlakozzon a rendszerkártyához (Lásd a „System Board Components“ (Rendszerkártya alkotóelemek) c. fejezetet a Felhasználói kézikönyvben).
Diagnosztikai lámpakódok a POST folyamán Lámpa mintázat Probléma leírása Javasolt megoldás A számítógép normál kikapcsolt állapotban van, vagy pedig egy esetleges BIOS-előtti hiba lépett fel. Csatlakoztassa a számítógépet egy működő hálózati dugaszoló aljzatra és nyomja meg a tápfeszültség gombját. Valószínűleg BIOS • Futtassa a BIOS Recovery (Visszaállítás) hiba lépett fel; segédprogramot, várjon a visszaállítás a számítógép befejeződésére, majd indítsa újra visszaállítási (recovery) a számítógépet.
Lámpa mintázat Probléma leírása Javasolt megoldás Lehetséges, hogy a grafikus kártya hibásodott meg. • Vegyen ki és helyezzen vissza minden telepített grafikus kártyát (Lásd a „Cards“ (Kártyák) c. fejezetet a Felhasználói kézikönyvben). • Ha rendelkezésre áll, tegyen be egy működő grafikus kártyát a számítógépbe. • Ha a hiba továbbra is fennáll, forduljon a Dellhez (lásd „A Dell elérhetőségei“ címszó alatt a Felhasználói kézikönyvben).
Lámpa mintázat Probléma leírása Javasolt megoldás A rendszer nem ismeri • Ha kettő vagy annál több memória fel a memória modul van telepítve, akkor vegye ki modulokat. a modulokat (lásd „Memory“ (Memória) címszónál a Felhasználói kézikönyvben), utána tegyen vissza egy modult, majd indítsa újra a számítógépet.
Lámpa mintázat Probléma leírása Javasolt megoldás Valószínűleg rendszerkártya hiba és/vagy hardver hiba lépett fel. • Hajtsa végre a Felhasználói Kézikönyv „Restoring Your Operating System“ (Az operációs rendszer visszaállítása) c. fejezetében szereplő eljárásokat. • Ha a hiba továbbra is fennáll, forduljon a Dellhez (lásd „A Dell elérhetőségei“ címszó alatt a Felhasználói kézikönyvben). Lehetséges, hogy egy bővítő kártya hibásodott meg.
Lámpa mintázat Probléma leírása Javasolt megoldás Más hiba lépett fel. • Ügyeljen, hogy az összes merevlemezés CD/DVD meghajtó kábel megfelelően csatlakozzon a rendszerkártyához (Lásd a „System Board Components“ (Rendszerkártya alkotóelemek) c. fejezetet a Felhasználói kézikönyvben). • Ha olyan hibaüzenet jelenik meg a képernyőn, amelyik egy eszközzel kapcsolatos hibára utal (mint pl. hajlékonylemez-meghajtó vagy merevlemez-meghajtó), akkor ellenőrizze az eszközt, hogy meggyőződjön helyes működéséről.
2 Futtassuk le a Dell Diagnostics programot, hogy azonosítsuk az okot (lásd „Dell Diagnostics (Dell-diagnosztika)“, oldal: 98). Kód Ok 2 rövid, 1 hosszú BIOS ellenőrző összeg (kontrollszumma) hiba 1 hosszú, 3 rövid, 2 rövid Memória hiba 1 rövid F12 billentyű lenyomva Kód Leírás (ismétlődő rövid hangjelzések) Javasolt orvoslás 1 BIOS ellenőrzőösszeg Forduljon a Dellhez (lásd „A Dell hiba. Valószínű alaplap elérhetőségei“ címszó alatt a Felhasználói hiba. kézikönyvben).
Kód Leírás (ismétlődő rövid hangjelzések) Javasolt orvoslás 3 Valószínű alaplap hiba. Forduljon a Dellhez (lásd „A Dell elérhetőségei“ címszó alatt a Felhasználói kézikönyvben). 4 RAM olvasási/írási hiba. • Győződjön meg róla, hogy nincs speciális követelmény a memória modul ill. csatlakozó elhelyezésével kapcsolatban (lásd „Memory“ (Memória) címszónál a Felhasználói kézikönyvben).
Rendszerüzenetek MEGJEGYZÉS: Ha olyan üzenetet kapott, amely nem szerepel az alábbi felsorolásban, akkor vagy az operációs rendszer vagy az üzenet feltűnésekor futó program dokumentációjában keresse a hibaüzenetet. A L E R T ! (R I A S Z T Á S ! ) P R E V I O U S A T T E M P T S A T B O O T I N G T H I S S Y S T E M [ N N N N ]. (E N N E K A R E N D S Z E R N E K A Z ELINDÍTÁSÁRA (BOOT) TETT ELŐZŐ KÍSÉRLETEK NEM SIKERÜLTEK AZ [NNNN] ELLENŐRZŐPONTNÁL).
NO BOOT DEVICE AVAILABLE (NEM ÁLL RENDELKEZÉSRE R E N D S Z E R B E T Ö L T Ő E S Z K Ö Z ) — A rendszer nem ismer fel egy rendszerbetöltésre alkalmas („bootolható“) eszközt vagy partíciót. • Ha a hajlékonylemez-meghajtó a rendszerbetöltő eszközünk, akkor ügyeljen, hogy a kábelek csatlakoztatva legyenek és a meghajtóban legyen egy indító lemez.
Windows XP: 1 Kattintson a Start→ Help and Support (Súgó és támogatás) elemre. 2 Gépelje be a keresőmezőbe, hogy hardware troubleshooter majd nyomja meg az billentyűt a keresés elindításához. 3 A Fix a Problem (Probléma javítás) részben kattintson a Hardware Troubleshooter elemre. 4 A Hardware Troubleshooter listájában válassza ki azt a lehetőséget, amelyik leginkább leírja a problémát, majd kattintson a Next (Tovább) gombra, hogy követni tudja a hátralévő hibaelhárítási lépéseket.
A Dell-diagnosztika elindítása merevlemezes meghajtóról A Dell-diagnosztika a merevlemez egy rejtett diagnosztikai segédprogrampartíciójában található. MEGJEGYZÉS: Ha a számítógép nem képes valamilyen képernyő megjelenítésére, lásd a „A Dell elérhetőségei“ címszót a Felhasználói kézikönyvben. 1 Kapcsolja be (vagy indítsa újra) a számítógépet. 2 Amikor a DELL embléma megjelenik, azonnal nyomja meg az billentyűt.
5 Az összes teszt befejeződése után zárja be a tesztablakot, hogy visszatérhessen a Dell-diagnosztika Main Menu (Főmenü). 6 Zárja be a Main Menu (Főmenü) ablakát, hogy kiléphessen a Dell-diagnosztikából és újraindíthassa számítógépét. A Dell Diagnostics (Dell-diagnosztika) indítása a Drivers and Utilities (illesztő- és segédprogramokat tartalmazó) lemezről 1 Kapcsolja be a számítógépet. 2 Nyomja meg a lemezkidobó (eject) gombot az optikai meghajtó előlapján a lemeztálca kinyitásához.
9 A Dell-diagnosztika Main Menu (Főmenü), kattintson a bal egérgombbal, vagy nyomja meg a billentyűt, majd az billentyűt a futtatandó teszt kijelöléséhez (lásd „A Dell-diagnosztika főmenüje“, oldal: 101). MEGJEGYZÉS: Jegyezze fel az esetleges hibakódokat és problémaleírásokat pontosan úgy, ahogy azok megjelentek, és kövesse a képernyőn megjelenő utasításokat. 10 Az összes teszt befejeződése után zárja be a tesztablakot, hogy visszatérhessen a Dell-diagnosztika Main Menu (Főmenü).
Az alábbi fülek további információkat szolgáltatnak a Custom Test (Egyedi teszt) vagy Symptom Tree (Jelenség szerinti fa a vizsgálathoz) menüpontból futtatott tesztekhez: Fül Funkció Results (Eredmény) Megjeleníti a teszt eredményeit és az esetleg fellépett hibákat Errors (Hibák) Megjeleníti a talált hibákat, a hibakódokat és a probléma leírását. Help (Súgó) Ismerteti a tesztet és a teszt futtatásához szükséges minden követelményt.
Elemmel kapcsolatos problémák VIGYÁZAT! Fennáll a veszélye, hogy egy új elem felrobban, ha nem megfelelően tesszük be. Az elemet csak ugyanolyan típusúra vagy a gyártó által ajánlott egyenértékű típusúra cseréljük ki. A használt elemeket a gyártó utasításai szerint selejtezzük le. VIGYÁZAT! Az ebben a részben ismertetett műveletek elvégzése előtt tanulmányozza a Termékismertetőt.
Optikai meghajtóval kapcsolatos problémák MEGJEGYZÉS: A nagysebességű optikai meghajtó vibrációja normális, továbbá zajjal is járhat, ami nem arra utal, hogy a meghajtó vagy a lemez meghibásodott. MEGJEGYZÉS: Mivel világszerte különböző régiók és lemezformátumok vannak, ezért nem minden DVD játszható le minden DVD meghajtóban. ÁLLÍTSA BE A WINDOWS HANGERŐ SZABÁLYOZÓJÁT — • Kattintson a hangszóró ikonra képernyője jobb alsó sarkában.
3 Kattintson a Properties (Tulajdonságok)→ Tools (Eszközök)→ Check Now (Ellenőrzés most) lehetőségre. A User Account Control (Felhasználói fiók felügyelete) ablak megjelenhet. Ha Ön rendszergazda a számítógépen, akkor kattintson a Continue (Folytatás); gombra, egyébként pedig forduljon a rendszergazdához, hogy folytassa az elkezdett tevékenységet. 4 Kövesse a kijelzőn megjelenő utasításokat.
FUTTASSA A MODEM DIAGNOSZTIKAI ESZKÖZT — Windows XP: 1 Kattintson a Start→ All Programs (Minden program)→ Modem Helper (Modem segítő) pontra. 2 Kövesse a képernyőn megjelenő utasításokat a modemproblémák azonosítására és megoldására. A Modem Helper (Modem segítő) bizonyos számítógépeken nem áll rendelkezésre. Windows Vista: 1 Kattintson a Start → All Programs (Minden program)→ Modem Diagnostic Tool (Modem diagnosztikai eszköz) pontra.
Hibaüzenetek VIGYÁZAT! Az ebben a részben ismertetett műveletek elvégzése előtt tanulmányozza a Termékismertetőt a biztonsági előírásokat illetően. Ha a hibaüzenet nem szerepel a felsorolásban, akkor nézzen utána az operációs rendszer dokumentációjában, vagy annak a programnak a dokumentációjában, amelyik éppen futott, amikor az üzenet megjelent.
NOT ENOUGH MEMORY OR RESOURCES (NINCS ELEGENDŐ MEMÓRIA V A G Y E R Ő F O R R Á S ). C L O S E S O M E P R O G R A M S A N D T R Y A G A I N ( Z Á R J O N L E N É H Á N Y P R O G R A M O T É S P R Ó B Á L K O Z Z O N Ú J B Ó L ) — Zárjon be minden ablakot, és nyissa meg a használni kívánt programot. Bizonyos esetekben esetleg újra kell indítania a számítógépet a számítógép erőforrásainak helyreállításához. Ilyen esetben azt a programot futtassa, amelyiket először akar használni.
ENSURE THAT THE IEEE 1394 CARD IS PROPERLY SEATED (G O N D O S K O D J O N R Ó L A , H O G Y A Z I E E E 1 3 9 4 K Á R T Y A M E G F E L E L Ő E N ILLESZKEDJEN A HELYÉN) E NSURE THAT THE IEEE 1394 CABLE I S CONNECTED SECURELY T O THE SYSTEM B O A R D C O N N E C T O R A N D T H E C O N N E C T O R O N T H E F R O N T I / O PANEL (G ONDOSKODJON RÓLA , H O G Y A KÁBEL STABILAN CSATLAKOZZON A RENDSZERKÁRTYA CSATLAKOZÓJÁRA ÉS AZ ELŐLAPI I/O PANELRE) IF YOU HAVE PROBLEMS WITH A DELL IEEE 1394 DEVICE (H A P R
Lefagyások és szoftver problémák VIGYÁZAT! Az ebben a részben ismertetett műveletek elvégzése előtt tanulmányozza a Termékismertetőt a biztonsági előírásokat illetően. A számítógép nem indul el E L L E N Ő R I Z Z E A D I A G N O S Z T I K A I J E L Z Ő L Á M P Á K A T — Lásd: „Diagnosztikai jelzőlámpák“, oldal: 88.
Windows XP: A Program-kompatibilitás varázsló úgy konfigurálja a programot, hogy az a nem Windows XP operációs rendszerhez hasonló környezetben is futhasson. 1 Kattintson a következőkre: Start→ All Programs (Mindenprogram)→ Accessories (Tartozékok)→ Program Compatibility Wizard (Program-kompatibilitás varázsló)→ Next. 2 Kövesse a kijelzőn megjelenő utasításokat.
Memória problémák VIGYÁZAT! Az ebben a részben ismertetett műveletek elvégzése előtt tanulmányozza a Termékismertetőt a biztonsági előírásokat illetően. HA NEM ELEGENDŐ MEMÓRIÁRA UTALÓ ÜZENETET KAP — • Mentsen el és zárjon be minden nyitott fjlt és lépjen ki minden futó, de nem használt programból, hátha ez megoldja a problémát. • A minimális memóriaigényeket lásd a szoftver dokumentációban.
INDÍTSA ÚJRA A SZÁMÍTÓGÉPET — 1 Nyomja le egyszerre a billentyűt, hogy megjelenítse a Start menüt. 2 Nyomjon -t, nyomja a fel- és le-nyíl billentyűt, hogy kijelölje a Shut down (Leállítás) vagy Turn Off (Kikapcsolás) pontra, émajd nyomja meg az gombot. 3 A számítógép kikapcsolása után csatlakoztassa újra az egérkábelt a telepítési rajzon bemutatott módon. 4 Kapcsolja be a számítógépet.
E L L E N Ő R I Z Z E A S Z Á M Í T Ó G É P - H Á L Ó Z A T I B E Á L L Í T Á S A I T — Forduljon a hálózati rendszergazdához, vagy ahhoz a személyhez, aki a hálózat beállításait végezte, hogy ellenőrizze a hálózati beállításait, helyesek-e és a hálózat működik-e. F UTTASSA A HARDVER HIBAELHÁRÍTÓT (H ARDWARE TROUBLESHOOTER ) — Lásd a „Restoring Your Operating System“ (Az operációs rendszer visszaállítása) című részt a Felhasználói kézikönyvben.
HA A TÁPFESZÜLTSÉG JELZŐLÁMPA EGYENLETES SÁRGA FÉNNYEL V I L Á G Í T — Egy eszköz hibásan működhet vagy helytelenül van telepítve. • Vegyük ki, majd helyezzük vissza a memória modulokat (lásd „Removing the Front Panel“ (A számítógép előlap eltávolítása) c. fejezetet a Felhasználói kézikönyvben). • Vegyünk ki és helyezzünk vissza minden bővítőkártyát, a grafikus kártyákat is beleértve (Lásd a „Cards“ (Kártyák) c. fejezetet a Felhasználói kézikönyvben).
Windows Vista: 1 Kattintson a Start → Control Panel (Vezérlőpult)→ Hardware and Sound (Hardver és hang)→ Printer (Nyomtató) pontra. 2 Ha a nyomtató szerepel a felsorolásban, akkor kattintsunk rá a nyomtató ikonra. 3 Kattintson a Properties (Tulajdonságok) pontra, majd kattintson a Ports (Portok) pontra. 4 Végezze el a szükséges beállításokat.
Hang- és hangszóró problémák VIGYÁZAT! Az ebben a részben ismertetett műveletek elvégzése előtt tanulmányozza a Termékismertetőt. A hangszórók nem szólnak MEGJEGYZÉS: Az MP3 és más média lejátszók hangerő szabályozója felülírhatja a Windows hangerő beállítását. Mindig ügyeljünk, hogy a média lejátszó(k) hangereje ne legyen letekerve vagy kikapcsolva.
Á L L Í T S A B E A W I N D O W S H A N G E R Ő S Z A B Á L Y O Z Ó J Á T — Kattintson vagy kattintson kettőt a hangszóró ikonjára a képernyője jobb alsó sarkában. Gondoskodjon róla, hogy a hangerő fel legyen tekerve, és hogy a hang ne legyen elnémítva. Video és monitor problémák VIGYÁZAT! Az ebben a részben ismertetett műveletek elvégzése előtt tanulmányozza a Termékismertetőt a biztonsági előírásokat illetően.
TE S Z T E L J E A V I L L A M O S D U G A S Z O L Ó A L J Z A T O T — Győződjön meg róla egy másik eszközzel – mondjuk egy lámpával - hogy a dugaszoló aljzat jó-e. E L L E N Ő R I Z Z E A D I A G N O S Z T I K A I J E L Z Ő L Á M P Á K A T — Lásd: „Diagnosztikai jelzőlámpák“, oldal: 88. A képerny ő t nehéz olvasni ELLENŐRIZZE A MONITOR KÁBELCSATLAKOZÁSAIT — • Gondoskodjon róla, hogy a monitor kábele a megfelelő grafikus kártyára legyen rácsatlakoztatva (a kettős grafikus kártyás konfigurációknál).
HELYEZZE A MONITORT TÁVOLABB A KÜLSŐ TÁPFESZÜLTSÉG F O R R Á S O K T Ó L — Ventilátorok, fluoreszkáló lámpák, halogén lámpák, és más elektromos eszközök hatására a képernyő képe reszketegnek tűnhet. Az interferencia ellenőrzéséhez a közeli készülékeket kapcsolja ki.
Tárgymutató B D billentyűzet csatlakozó, 85 problémák, 109 Dell Diagnostics (Dell-diagnosztika), 98 biztonsági előírások, 64 Desktop System Software (Asztali rendszerszoftver), 67 C CD-RW meghajtó problémák, 104 Check Disk, 104 címkék Express szervizkód, 65 Microsoft Windows, 65 Szervizcímke, 65 conflicts software and hardware incompatibilities, 97 csatlakozók billentyűzet, 85 egér, 83 fejhallgató, 81 hálózati adapter, 84 hang, 84 IEEE 1394, 80, 83 párhuzamos, 83 soros, 85 USB, 80, 85 vonali kimenet (
E egér csatlakozó, 83 problémák, 112 elem problémák, 103 e-mail problémák, 105 ergonómiával kapcsolatos információk, 64 Express szervizkód, 65 F fejhallgató csatlakozó, 81 Felhasználói kézikönyv, 64 Files and Settings Transfer Wizard (Fájlok és beállítások átvitele varázsló) (Windows XP), 73 G hangerő beállítás, 117 hangjelzés kódok, 93 hardver Dell Diagnostics (Dell-diagnosztika), 98 hangjelzés kódok, 93 hardware conflicts, 97 Hardware Troubleshooter, 97 hibaelhárítás Dell Diagnostics (Dell-diagnosztika
információk átvitele egy új számítógépre Files and Settings Transfer Wizard (Fájlok és beállítások átvitele varázsló) (Windows XP), 73 Windows Easy Transfer (Windows könnyű átvitel) (Windows Vista), 77 merevlemezes meghajtó aktivitásjelző lámpa, 80 Internet problémák, 105 monitor nehéz olvasni, 119 problémák, 118 üres, 118 IRQ conflicts, 97 K képernyő.
problémák (folytatás) a program összeomlik, 110 a számítógép nem reagál, 110 a számítógép összeomlik, 110-111 általános, 110 billentyűzet, 109 CD-RW meghajtó, 104 Dell Diagnostics (Dell-diagnosztika), 98 diagnosztikai jelzőlámpák, 88 egér, 112 elem, 103 e-mail, 105 hálózat, 113 hangerő beállítás, 117 hangjelzés kódok, 93 hibaüzenetek, 107 IEEE 1394, 108 Internet, 105 kék képernyő, 111 képernyőt nehéz olvasni, 119 meghajtók, 103 memória, 112 merevlemez-meghajtó, 104 modem, 105 monitort nehéz olvasni, 119 nyo
tápfeszültség jelzőlámpák állapotok, 114 Termékinformációs kézikönyv, 64 troubleshooting conflicts, 97 Hardware Troubleshooter, 97 U UPS, 77 USB csatlakozó, 85 csatlakozók, 80 üzenetek hiba, 107 rendszer, 96 V W Windows Help and Support Center (Windows súgó és támogatás), 67 Windows Vista újratelepítés, 68 Windows Easy Transfer (Windows könnyű átvitel), 77 Windows Help and Support Center (Windows súgó és támogatás), 67 Windows XP Files and Settings Transfer Wizard (Fájlok és beállítások átvitele varázsló
Tárgymutató
Dell Precision™ T7400 Skrócone informacje o systemie Model DCDO w w w. d e l l . c o m | s u p p o r t . d e l l .
Uwagi, ostrzeżenia i przestrogi UWAGA: UWAGA oznacza ważną wiadomość, która pomoże lepiej wykorzystać komputer. OSTRZEŻENIE: OSTRZEŻENIE oznacza możliwość uszkodzenia sprzętu lub utraty danych, a także przedstawia sposób uniknięcia problemu. PRZESTROGA: PRZESTROGA informuje o sytuacjach, w których występuje ryzyko uszkodzenia sprzętu, obrażeń ciała lub śmierci. ____________________ Informacje zawarte w tym dokumencie mogą ulec zmianie bez uprzedzenia. © 2007 Dell Inc. Wszelkie prawa zastrzeżone.
Spis treści Wyszukiwanie informacji . . . . . . . . . . . . . 131 Konfiguracja komputera . . . . . . . . . . . . . 137 Zmienianie orientacji pionowej („wieża”) na poziomą („biurko”) i odwrotnie . . . . Instalowanie komputera w szafce . . 137 . . . . . . 138 Przenoszenie informacji do nowego komputera . . . . . . . . . . . . . . . . . . . . Informacje o komputerze . 141 . . . 145 . . . . . . . . . . . .
Narzędzia ułatwiające rozwiązywanie problemów . . . . . . . . . . . . . . . . . Lampki zasilania . . . . . 154 . . . . . . . . . . . . . . . . 154 . . . . . . . . . . . . . 155 . . . . . . . . . . . . . . . . 159 Lampki diagnostyczne Kody dźwiękowe Komunikaty systemowe . . . . . . . . . . . . Narzędzie do rozwiązywania problemów ze sprzętem . . . Program Dell Diagnostics . . . . . . . . . 163 . . . . . . . . . . . 164 Rozwiązywanie problemów Indeks 130 Spis treści 161 . . . . . . . . .
Wyszukiwanie informacji UWAGA: Niektóre funkcje lub nośniki są opcjonalne i mogą nie być dostarczane z zakupionym komputerem. Niektóre funkcje lub nośniki mogą być niedostępne w pewnych krajach. UWAGA: Z zakupionym komputerem mogą być dostarczone dodatkowe informacje.
Czego szukasz? Znajdziesz to tutaj • Wyjmowanie i wymiana podzespołów Podręcznik użytkownika komputera Dell Precision™ • Dane techniczne • Konfiguracja ustawień systemowych • Rozwiązywanie problemów • Informacje dotyczące gwarancji • Warunki sprzedaży w Stanach Zjednoczonych Centrum pomocy i obsługi technicznej systemu Microsoft® Windows® XP i Microsoft Windows Vista™ 1 Kliknij Start→ Help and Support (Pomoc i obsługa techniczna)→ Dell User and System Guides (Podręczniki użytkownika i systemowe dla ko
Czego szukasz? Znajdziesz to tutaj • Numer seryjny i Kod usług ekspresowych Numer seryjny (Service Tag) i klucz produktu Microsoft Windows • Klucz produktu systemu Microsoft® Windows® Te etykiety są umieszczone na komputerze: • Numer seryjny pozwala zidentyfikować komputer podczas korzystania z witryny support.euro.dell.com lub kontaktowania się z działem pomocy technicznej firmy Dell.
Czego szukasz? Znajdziesz to tutaj • Rozwiązania — wskazówki dotyczące rozwiązywania problemów, porady, artykuły techniczne, kursy online i często zadawane pytania Witryna pomocy technicznej firmy Dell — support.euro.dell.com UWAGA: Należy wybrać swój region lub sektor biznesowy, aby wyświetlić • Społeczność — rozmowy online z innymi odpowiednią stronę pomocy technicznej.
Czego szukasz? Znajdziesz to tutaj • Oprogramowanie Desktop System Aby pobrać oprogramowanie Desktop Software (DSS) — w przypadku System Software: ponownej instalacji systemu 1 Przejdź do strony operacyjnego na komputerze należy przed support.euro.dell.com, wybierz swój zainstalowaniem sterowników ponownie kraj lub region, a następnie kliknij łącze zainstalować program narzędziowy DSS. Drivers & Downloads (Sterowniki Program NSS automatycznie wykrywa i pliki do pobrania).
Czego szukasz? Znajdziesz to tutaj • Ponowne instalowanie systemu operacyjnego Dysk z systemem operacyjnym (Operating System) System operacyjny został już zainstalowany w komputerze. Aby ponownie zainstalować system operacyjny, należy użyć dysku Operating System (System operacyjny), dostarczonego z komputerem (zobacz „Przywracanie systemu operacyjnego” w Podręczniku użytkownika).
Konfiguracja komputera Zmienianie orientacji pionowej („wieża”) na poziomą („biurko”) i odwrotnie PRZESTROGA: Przed rozpoczęciem procedur opisanych w tej sekcji należy wykonać instrukcje dotyczące bezpieczeństwa zamieszczone w Przewodniku z informacjami o produkcie. UWAGA: Aby zmienić ustawienie komputera z pozycji pionowej („wieża”) na pozycję poziomą („biurko”) lub odwrotnie, należy użyć opcjonalnego zestawu udostępnianego przez firmę Dell.
Zmienianie orientacji poziomej na orientację pionową 1 Wymontuj napęd dyskietek lub czytnik kart (jeśli jest zainstalowany), wykonując czynności opisane w rozdziale „Wyjmowanie napędu dyskietek lub czytnika kart pamięci (komputer w orientacji poziomej)” w Podręczniku użytkownika, a następnie zainstaluj napęd dyskietek lub czytnik kart, wykonując czynności opisane w rozdziale „Instalowanie napędu dyskietek lub czytnika kart pamięci (komputer w orientacji pionowej)” w Podręczniku użytkownika.
• Dla zachowania prawidłowej wentylacji należy pozostawić odstęp co najmniej 10,2 cm (4 cale) od wszystkich wentylowanych boków urządzenia. • Jeśli komputer jest instalowany w rogu pomieszczenia lub pod biurkiem, należy pozostawić odstęp co najmniej 5,1 cm (2 cale) między tylną ścianką komputera a ścianą, aby umożliwić przepływ powietrza wymagany do zachowania prawidłowej wentylacji.
• 140 Nie należy instalować komputera w szafce, która nie umożliwia przepływu powietrza. Ograniczenie przepływu powietrza może spowodować przegrzanie komputera i obniżyć jego wydajność.
Przenoszenie informacji do nowego komputera Za pomocą kreatorów dostępnych w systemie operacyjnym można w prosty sposób przenieść pliki i inne dane z jednego komputera do innego.
Kreator transferu plików i ustawie ń (u ż ywanie dysku z systemem operacyjnym) UWAGA: W Kreatorze transferu plików i ustawień komputer źródłowy, z którego dane są przenoszone, jest oznaczony jako stary komputer, a komputer docelowy, na który dane są transferowane, jest oznaczony jako komputer nowy.
7 W obszarze What do you want to transfer? (Co chcesz transferować) zaznacz kliknięciem dane, które chcesz przenieść, a następnie kliknij przycisk Next (Dalej). Wybrane dane zostaną skopiowane i zostanie wyświetlony ekran Completing the Collection Phase (Kończenie fazy zbierania). 8 Kliknij przycisk Finish (Zakończ). PRZENIEŚ DANE NA KOMPUTER DOCELOWY — 1 Przejdź do komputera docelowego. 2 W obszarze Now go to your old computer (Przejdź teraz do starego komputera) kliknij przycisk Next (Dalej).
3 W obszarze Do you have a Windows XP CD? (Czy masz dysk CD systemu Windows XP) kliknij opcję I want to create a Wizard Disk in the following drive (Chcę utworzyć dysk kreatora w następującym napędzie), a następnie kliknij przycisk Next (Dalej). 4 Włóż do napędu zapisywalny dysk CD lub DVD, a następnie kliknij przycisk OK. 5 Przeczytaj informacje wyświetlone pod nagłówkiem Now go to your old computer (Przejdź teraz do starego komputera), a następnie przejdź do komputera źródłowego.
Microsoft Windows Vista 1 Kliknij przycisk Start systemu Windows Vista , a następnie kliknij Transfer files and settings (Transferuj pliki i ustawienia)→ Start Windows Easy Transfer (Uruchom Łatwy transfer w systemie Windows). 2 W oknie dialogowym User Account Control (Kontrola konta użytkownika) kliknij przycisk Continue (Kontynuuj). 3 Kliknij opcję Start a new transfer (Rozpocznij nowy transfer) lub Continue a transfer in progress (Kontynuuj transfer w toku).
Wiele modeli urządzeń przeciwprzepięciowych jest wyposażonych w gniazdko telefoniczne dla zabezpieczenia modemu. Instrukcję przyłączenia modemu można znaleźć w dokumentacji urządzenia przeciwprzepięciowego. OSTRZEŻENIE: Nie wszystkie urządzenia przeciwprzepięciowe oferują ochronę kart sieciowych. W czasie burzy z wyładowaniami zawsze należy odłączać kabel sieciowy od gniazdka sieciowego w ścianie. Stabilizatory zasilania OSTRZEŻENIE: Stabilizatory zasilania nie chronią przed przerwami zasilania.
Informacje o komputerze Widok z przodu (orientacja pionowa — „wieża”) 1 2 3 4 13 12 11 10 5 6 7 8 9 1–3 wnęki na napędy 5,25 cala Obsługuje napęd CD/DVD, czytnik kart pamięci, napęd dyskietek lub dysk twardy SATA w obejmie przeznaczonej do instalowania we wnęce 5,25 cala. Obejma dysku twardego może być stosowana tylko we wnękach na napęd 5,25 cala. Obejmy napędów dyskietek, czytników kart pamięci i dysków twardych nie są wymienne.
4 wnęka na napęd 5,25 cala z płytką panelową na napęd 3,5 cala Obsługuje napęd CD/DVD, czytnik kart pamięci, napęd dyskietek lub dysk twardy SATA w obejmie przeznaczonej do instalowania we wnęce 5,25 cala. Przedstawiona na rysunku płytka panelowa służy wyłącznie do montażu napędu dyskietek lub czytnika kart pamięci i może być instalowana w każdej z czterech wnęk na napęd 5,25 cala. Aby uzyskać więcej informacji, zobacz „Panele napędów” w Podręczniku użytkownika.
12 lampki diagnostyczne (4) Te lampki ułatwiają rozwiązywanie problemów z komputerem na podstawie kodów diagnostycznych. Aby uzyskać więcej informacji, zobacz „Lampki diagnostyczne” w Podręczniku użytkownika. 13 lampka aktywności sieci Lampka aktywności sieci jest włączona, gdy istnieje dobre połączenie między siecią o przepustowości 10 Mb/s, 100 Mb/s lub 1000 Mb/s (bądź 1 Gb/s) a komputerem.
PRZESTROGA: Nie wolno zasłaniać otworów wentylacyjnych w obudowie komputera. Zablokowanie dostępu powietrza do tych otworów może doprowadzić do awarii wywołanej wzrostem temperatury w komputerze. Złącza na panelu tylnym 1 2 11 1 złącze równoległe 3 10 4 5 6 7 8 9 Do złącza równoległego podłącza się urządzenia równoległe, takie jak drukarka. Drukarkę USB należy podłączać do złącza USB.
5 złącze wyjścia liniowego Zielone złącze wyjścia liniowego umożliwia podłączenie słuchawek i większości głośników z wbudowanymi wzmacniaczami. W komputerach z kartą dźwiękową należy użyć złącza na karcie. 6 lampka integralności łącza Zielona — istnieje dobre połączenie między komputerem a siecią o przepustowości 10 Mb/s. Pomarańczowa — istnieje dobre połączenie między komputerem a siecią o przepustowości 100 Mb/s.
10 złącze klawiatury Standardową klawiaturę PS/2 należy podłączać do purpurowego złącza klawiatury. Klawiaturę USB należy podłączać do złącza USB. 11 złącza szeregowe (2) Umożliwia podłączenie do portu szeregowego urządzeń szeregowych, takich jak urządzenia przenośne. W razie potrzeby adres tego portu można zmienić w programie konfiguracji systemu (zobacz „Program konfiguracji systemu” w Podręczniku użytkownika).
Mysz mechaniczna 1 Obróć pierścień ustalający na dolnej części myszy w kierunku przeciwnym do kierunku ruchu wskazówek zegara i wyjmij kulkę. 2 Przetrzyj kulkę czystą ściereczką nie pozostawiającą włókien. 3 Dmuchnij delikatnie we wnękę kulki, aby usunąć kurz i włókna. 4 Oczyść rolki we wnęce kulki bawełnianym wacikiem lekko zwilżonym alkoholem izopropylowym. 5 W razie potrzeby wyśrodkuj rolki w gniazdach. Upewnij się, czy na rolkach nie pozostały kłaczki z wacika.
Narzędzia ułatwiające rozwiązywanie problemów Lampki zasilania PRZESTROGA: Przed rozpoczęciem procedur opisanych w tej sekcji należy wykonać instrukcje dotyczące bezpieczeństwa zamieszczone w Przewodniku z informacjami o produkcie. Lampka przycisku zasilania, umieszczona z przodu komputera, świeci ciągłym światłem lub błyska, wskazując różne stany komputera: • Jeśli lampka zasilania świeci na zielono, a komputer nie reaguje na polecenia, zobacz „Lampki diagnostyczne” na stronie 155.
• • Jeśli lampka zasilania świeci ciągłym pomarańczowym światłem, jedno z urządzeń mogło ulec awarii lub jest nieprawidłowo zainstalowane. – Wyjmij, a następnie ponownie zainstaluj moduły pamięci (zobacz „Pamięć” w Podręczniku użytkownika). – Wyjmij, a następnie ponownie zainstaluj wszystkie karty rozszerzeń (zobacz „Karty” w Podręczniku użytkownika). Wyeliminuj źródła zakłóceń.
Stan lampek Opis problemu Sugerowane rozwiązanie Możliwa awaria • Uruchom narzędzie BIOS Recovery systemu BIOS; (Odzyskiwanie systemu BIOS), komputer jest w trybie zaczekaj na zakończenie odzyskiwania, odzyskiwania. a następnie uruchom ponownie komputer. • Jeśli problem nie ustąpi, skontaktuj się z firmą Dell (zobacz „Kontakt z firmą Dell” w Podręczniku użytkownika). Możliwa awaria procesora. • Popraw osadzenie procesora (zobacz „Procesor” w Podręczniku użytkownika).
Stan lampek Opis problemu Sugerowane rozwiązanie Możliwa awaria karty grafiki. • Popraw osadzenie wszystkich zainstalowanych w komputerze kart grafiki (zobacz „Karty” w Podręczniku użytkownika). • Jeśli dysponujesz nieuszkodzoną kartą grafiki, zainstaluj ją w komputerze. • Jeśli problem nie ustąpi, skontaktuj się z firmą Dell (zobacz „Kontakt z firmą Dell” w Podręczniku użytkownika). Możliwa awaria napędu dyskietek lub dysku twardego.
Stan lampek Opis problemu Sugerowane rozwiązanie Wystąpiła awaria płyty Skontaktuj się z firmą Dell (zobacz systemowej. „Kontakt z firmą Dell” w Podręczniku użytkownika). Moduły pamięci zostały wykryte, ale występuje błąd konfiguracji pamięci lub zgodności. • Sprawdź, czy istnieją jakiekolwiek szczególne wymagania dotyczące umieszczania modułów pamięci w złączach (zobacz „Pamięć” w Podręczniku użytkownika).
Stan lampek Opis problemu Sugerowane rozwiązanie Wystąpiła inna awaria. • Sprawdź, czy wszystkie kable dysków twardych i napędów CD/DVD są prawidłowo osadzone w płycie systemowej (zobacz „Komponenty płyty systemowej” w Podręczniku użytkownika). • Jeśli na ekranie pojawi się komunikat o błędzie wskazujący na wystąpienie problemu z urządzeniem (na przykład z napędem dyskietek lub dyskiem twardym), sprawdź, czy dane urządzenie działa poprawnie.
2 Uruchom program Dell Diagnostics, aby określić przyczynę problemu (zobacz „Program Dell Diagnostics” na stronie 164). Kod Przyczyna 2 sygnały krótkie, 1 długi Błąd sumy kontrolnej systemu BIOS 1 sygnał długi, 3 krótkie, 2 krótkie Błąd pamięci 1 krótki sygnał Naciśnięto klawisz F12 Kod (seria krótkich sygnałów) Opis Sugerowane rozwiązanie 1 Błąd sumy kontrolnej systemu BIOS. Możliwa awaria płyty głównej. Skontaktuj się z firmą Dell (zobacz „Kontakt z firmą Dell” w Podręczniku użytkownika).
Kod (seria krótkich sygnałów) Opis Sugerowane rozwiązanie 4 Błąd zapisu lub odczytu • Sprawdź, czy istnieją jakiekolwiek szczególne wymagania dotyczące pamięci operacyjnej umieszczania modułów pamięci (RAM). w złączach (zobacz „Pamięć” w Podręczniku użytkownika). • Upewnij się, że komputer obsługuje zainstalowane moduły pamięci (zobacz „Pamięć” w Podręczniku użytkownika). • Jeśli problem nie ustąpi, skontaktuj się z firmą Dell (zobacz „Kontakt z firmą Dell” w Podręczniku użytkownika).
CMOS CHECKSUM ERROR (B ŁĄD SUMY KONTROLNEJ PAMI Ę C I CMOS) — Możliwa awaria płyty głównej albo bateria zegara czasu rzeczywistego jest bliska wyczerpania. Wymień baterię (zobacz „Wymienianie baterii” albo „Kontakt z firmą Dell” w Podręczniku użytkownika, aby uzyskać pomoc). CPU FAN FAILURE (AWARIA WENTYLATORA PROCESORA CPU) — Awaria wentylatora procesora CPU. Wymień wentylator procesora CPU (zobacz „Wyjmowanie procesora” w Podręczniku użytkownika).
N O N - S Y S T E M D I S K O R D I S K E R R O R (D Y S K N I E J E S T D Y S K I E M S Y S T E M O W Y M L U B W Y S T ĄP I Ł B ŁĄD D Y S K U ) — Użyj dyskietki zawierającej startowy system operacyjny lub wyjmij dyskietkę z napędu A i uruchom komputer ponownie. N O T A B O O T D I S K E T T E (TO N I E J E S T D Y S K I E T K A S T A R T O W A ) — Włóż dyskietkę startową i uruchom ponownie komputer.
Windows Vista: 1 Kliknij przycisk Start systemu Windows Vista , a następnie kliknij polecenie Help and Support (Pomoc i obsługa techniczna). 2 W polu wyszukiwania wpisz wyrażenie hardware troubleshooter (narzędzie do rozwiązywania problemów ze sprzętem) i naciśnij klawisz , aby rozpocząć wyszukiwanie. 3 Z listy w wynikach wyszukiwania wybierz opcję, która najlepiej opisuje problem, i wykonaj pozostałe czynności rozwiązywania problemu.
2 Po wyświetleniu logo firmy DELL naciśnij niezwłocznie klawisz . UWAGA: Zbyt długie przytrzymanie wciśniętego klawisza może spowodować błąd klawiatury. Aby uniknąć błędu klawiatury, naciskaj i zwalniaj klawisz w równych odstępach czasu aż do chwili wyświetlenia Boot Device Menu (menu urządzeń startowych).
3 Umieść dysk Drivers and Utilities (Sterowniki i programy narzędziowe) pośrodku szuflady napędu, a następnie naciśnij przycisk wysuwu lub delikatnie pchnij szufladę, aby ją zamknąć. 4 Uruchom ponownie komputer. 5 Po wyświetleniu logo firmy DELL naciśnij niezwłocznie klawisz . UWAGA: Długie przytrzymywanie wciśniętego klawisza może spowodować błąd klawiatury.
Menu główne programu Dell Diagnostics W menu głównym programu Dell Diagnostics można wykonać następujące testy: Opcja Funkcja Express Test (Test szybki) Wykonywany jest przyspieszony test urządzeń systemu. Test tego rodzaju trwa od 10 do 20 minut i nie wymaga żadnych interwencji ze strony użytkownika. Test Express Test (Test szybki) należy uruchamiać jako pierwszy, gdyż zwiększa prawdopodobieństwo szybkiego wykrycia przyczyny problemu.
Karta Funkcja Configuration (Konfiguracja) (Tylko test niestandardowy) Parameters (Parametry) (Tylko test niestandardowy) Wyświetla konfigurację sprzętową wybranego urządzenia. Program Dell Diagnostics uzyskuje informacje o konfiguracji wszystkich urządzeń z programu konfiguracji systemu, pamięci i szeregu testów wewnętrznych, po czym wyświetla je na liście urządzeń w lewym okienku na ekranie.
PRZESTROGA: Przed rozpoczęciem procedur opisanych w tej sekcji należy wykonać instrukcje dotyczące bezpieczeństwa zamieszczone w Przewodniku z informacjami o produkcie. W Y M I E Ń B A T E R I Ę — Jeśli jest konieczne częste ustawianie daty i godziny po włączeniu komputera lub jeśli podczas uruchamiania systemu jest wyświetlana nieprawidłowa data lub godzina, należy wymienić baterię (zobacz „Wymienianie baterii” w Podręczniku użytkownika).
Problemy z napędami optycznymi UWAGA: Pracujący z dużą szybkością napęd optyczny powoduje wibracje i wywołuje hałas. Jest to zjawisko normalne, które nie oznacza uszkodzenia napędu ani dysku. UWAGA: Ze względu na różnice między poszczególnymi regionami świata oraz różne stosowane formaty dysków, nie wszystkie dyski DVD można odtwarzać w każdym napędzie DVD. D O S T O S U J G ŁO Ś N O Ś Ć W S Y S T E M I E W I N D O W S — • Kliknij ikonę głośnika, znajdującą się w prawym dolnym rogu ekranu.
3 Kliknij Properties (Właściwości)→ Tools (Narzędzia)→ Check Now (Sprawdź). Może zostać wyświetlone okno User Account Control (Kontrola konta użytkownika). Jeśli jesteś administratorem komputera, kliknij przycisk Continue (Kontynuuj); w przeciwnym razie zwróć się do administratora, aby wykonał tę czynność. 4 Postępuj zgodnie z instrukcjami wyświetlanymi na ekranie.
URUCHOM PROGRAM DO DIAGNOSTYKI MODEMU — Windows XP: 1 Kliknij Start→ All Programs (Wszystkie programy)→ Modem Helper. 2 Aby zidentyfikować i rozwiązać problemy z modemem, postępuj zgodnie z instrukcjami wyświetlanymi na ekranie. (Program Modem Helper nie jest dostępny na wszystkich komputerach). Windows Vista: 1 Kliknij Start → All Programs (Wszystkie programy)→ Modem Diagnostic Tool (Narzędzie diagnostyczne modemu).
Komunikaty o błędach PRZESTROGA: Przed rozpoczęciem procedur opisanych w tej sekcji należy wykonać instrukcje dotyczące bezpieczeństwa zamieszczone w Przewodniku z informacjami o produkcie. Jeśli komunikatu o błędzie nie ma na liście, należy zapoznać się z dokumentacją systemu operacyjnego lub programu, który był uruchomiony w momencie wyświetlenia komunikatu.
OPERATING SYSTEM NOT FOUND (NIE ODNALEZIONO SYSTEMU O P E R A C Y J N E G O ) — Skontaktuj się z firmą Dell (zobacz „Kontakt z firmą Dell” w Podręczniku użytkownika). Problemy z urządzeniami IEEE 1394 PRZESTROGA: Przed rozpoczęciem procedur opisanych w tej sekcji należy wykonać instrukcje dotyczące bezpieczeństwa zamieszczone w Przewodniku z informacjami o produkcie.
Problemy z klawiaturą PRZESTROGA: Przed rozpoczęciem procedur opisanych w tej sekcji należy wykonać instrukcje dotyczące bezpieczeństwa zamieszczone w Przewodniku z informacjami o produkcie. SPRAWDŹ KABEL KLAWIATURY — • Sprawdź, czy kabel klawiatury jest prawidłowo podłączony do komputera. • Wyłącz komputer (zobacz „Wyłączanie komputera” w Podręczniku użytkownika), podłącz kabel klawiatury zgodnie ze schematem konfiguracji komputera i uruchom ponownie komputer.
Program nie reaguje na polecenia Z A K O Ń C Z D Z I A ŁA N I E P R O G R A M U — 1 Naciśnij jednocześnie klawisze , aby otworzyć okno Task Manager (Menedżer zadań). 2 Kliknij kartę Applications (Aplikacje). 3 Kliknij nazwę programu, który nie reaguje na polecenia. 4 Kliknij przycisk End Task (Zakończ zadanie). Powtarzaj ą ce si ę awarie programu UWAGA: W dokumentacji oprogramowania, na dyskietce albo dysku CD lub DVD są zwykle dołączane instrukcje dotyczące instalowania.
Inne problemy z oprogramowaniem SPRAWDŹ DOKUMENTACJĘ DOSTARCZONĄ Z OPROGRAMOWANIEM LUB SKONTAKTUJ SIĘ Z PRODUCENTEM OPROGRAMOWANIA W CELU U Z Y S K A N I A I N F O R M A C J I N A T E M A T R O Z W I ĄZ Y W A N I A P R O B L E M Ó W — • Sprawdź, czy program jest zgodny z systemem operacyjnym zainstalowanym w komputerze. • Sprawdź, czy komputer spełnia minimalne wymagania sprzętowe potrzebne do uruchomienia programu. Zapoznaj się z dokumentacją oprogramowania.
• Upewnij się, że komputer obsługuje zainstalowane moduły pamięci. Aby uzyskać więcej informacji o typach pamięci obsługiwanych przez komputer, zobacz „Pamięć” w Podręczniku użytkownika. • Uruchom program Dell Diagnostics (zobacz „Program Dell Diagnostics” na stronie 164). Problemy z myszą PRZESTROGA: Przed rozpoczęciem procedur opisanych w tej sekcji należy wykonać instrukcje dotyczące bezpieczeństwa zamieszczone w Przewodniku z informacjami o produkcie.
Problemy z siecią PRZESTROGA: Przed rozpoczęciem procedur opisanych w tej sekcji należy wykonać instrukcje dotyczące bezpieczeństwa zamieszczone w Przewodniku z informacjami o produkcie. S P R A W D Ź L A M P K Ę K A R T Y S I E C I O W E J Z T Y ŁU K O M P U T E R A — Jeśli lampka integralności łącza jest wyłączona (zobacz „Sterowanie i lampki” w Podręczniku użytkownika), nie ma łączności sieciowej. Wymień kabel sieciowy.
J E Ś L I L A M P K A Z A S I L A N I A B ŁY S K A N A P O M A R A Ń C Z O W O — Komputer otrzymuje zasilanie z zewnątrz, ale mógł wystąpić wewnętrzny problem z zasilaniem. • Upewnij się, że przełącznik wyboru napięcia, jeśli istnieje, jest ustawiony zgodnie z napięciem prądu zmiennego w miejscu używania komputera. • Upewnij się, że główny kabel zasilania i kabel panelu przedniego są prawidłowo podłączone do płyty systemowej (zobacz „Komponenty płyty systemowej” w Podręczniku użytkownika).
SPRAWDŹ, CZY SYSTEM WINDOWS ROZPOZNAJE DRUKARKĘ — Windows XP: 1 Kliknij Start→ Control Panel (Panel sterowania)→ Printers and Other Hardware (Drukarki i inny sprzęt)→ View installed printers or fax printers (Wyświetl zainstalowane drukarki lub faks-drukarki). 2 Jeśli drukarka jest wymieniona na liście, kliknij prawym przyciskiem myszy jej ikonę. 3 Kliknij Properties (Właściwości)→ Ports (Porty).
SPRAWDŹ, CZY SKANER JEST ROZPOZNAWANY PRZEZ SYSTEM MICROSOFT WINDOWS — Windows XP: 1 Kliknij Start→ Control Panel (Panel sterowania)→ Printers and Other Hardware (Drukarki i inny sprzęt)→ Scanners and Cameras (Skanery i aparaty fotograficzne). 2 Jeśli skaner jest wymieniony na liście, został rozpoznany przez system Windows. Windows Vista: 1 Kliknij Start → Control Panel (Panel sterowania)→ Hardware and Sound (Sprzęt i dźwięk)→ Scanners and Cameras (Skanery i aparaty fotograficzne).
S P R A W D Ź G N I A Z D K O E L E K T R Y C Z N E — Upewnij się, że gniazdko elektryczne jest sprawne, podłączając do niego inne urządzenie, na przykład lampę. W Y E L I M I N U J P O T E N C J A L N E Ź R Ó D ŁA Z A K ŁÓ C E Ń — Wyłącz znajdujące się w pobliżu wentylatory i lampy fluorescencyjne lub halogenowe, aby sprawdzić, czy zakłócenia nie pochodzą od tych urządzeń.
• Sprawdź, czy kabel monitora jest podłączony zgodnie ze schematem konfiguracji komputera. • Odłącz wszelkie przedłużacze kabla wideo i podłącz monitor bezpośrednio do komputera. • Zamień kable zasilania komputera i monitora, aby sprawdzić, czy jest uszkodzony kabel zasilania. • Sprawdź, czy w złączach kabla nie ma wygiętych lub wyłamanych styków (brak niektórych styków w złączu kabla monitora jest rzeczą normalną).
S P R A W D Ź G N I A Z D K O E L E K T R Y C Z N E — Upewnij się, że gniazdko elektryczne jest sprawne, podłączając do niego inne urządzenie, na przykład lampę. S P R A W D Ź L A M P K I D I A G N O S T Y C Z N E — Zobacz „Lampki diagnostyczne” na stronie 155. S P R A W D Ź U S T A W I E N I A M O N I T O R A — W dokumentacji monitora można znaleźć informacje na temat dostosowywania kontrastu i jasności, rozmagnesowywania monitora i uruchamiania autotestu monitora.
Tylko fragment ekranu jest czytelny W ŁĄC Z K O M P U T E R I M O N I T O R , A N A S T Ę P N I E W Y R E G U L U J J A S N O Ś Ć I K O N T R A S T M O N I T O R A — Jeśli monitor działa, możliwe, że uszkodzona jest karta grafiki. Skontaktuj się z firmą Dell (zobacz „Kontakt z firmą Dell” w Podręczniku użytkownika).
Indeks B bateria problemy, 168 C Centrum pomocy i obsługi technicznej, 135 Check Disk, program, 170 D drukarka łączenie, 141 konfigurowanie, 141 problemy, 180 dysk CD/DVD Drivers and Utilities (Sterowniki i programy narzędziowe), 131 Dysk CD/DVD z systemem operacyjnym, 136 dysk twardy lampka aktywności, 148-149 problemy, 170 Dell Diagnostics, program, 164 Desktop System Software, 135 E diagnostyka Dell Diagnostics, program, 164 kody dźwiękowe, 159 lampki, 149, 155 ekran.
I konflikty IRQ, 163 Informacje dotyczące ergonomii, 132 Kreator transferu plików i ustawień (Windows XP), 141 informacje dotyczące gwarancji, 132 instrukcje dotyczące bezpieczeństwa, 132 kreatory Łatwy transfer w systemie Windows (Windows Vista), 145 Kreator transferu plików i ustawień (Windows XP), 141 kreator zgodności programów, 176 Internet problemy, 171 L Informacje dotyczące przepisów prawnych, 132 lampka zasilania stany, 179 K klawiatura problemy, 175 złącze, 152 Kod usług ekspresowych, 1
N napęd CD-RW problemy, 170 napęd optyczny problemy, 170 napędy problemy, 169 narzędzie do rozwiązywania problemów ze sprzętem, 163 numer seryjny, 133 O oprogramowanie konflikty, 163 problemy, 176-177 P pamięć problemy, 177 plik pomocy Centrum pomocy i obsługi technicznej systemu Windows, 135 Podręcznik użytkownika, 132 problemy awaria komputera, 175-176 awarie programu, 176 bateria, 168 brak obrazu na ekranie, 183 brak obrazu na monitorze, 183 problemy (ciąg dalszy) Dell Diagnostics, program, 164 drukar
przenoszenie informacji do nowego komputera Łatwy transfer w systemie Windows (Windows Vista), 145 Kreator transferu plików i ustawień (Windows XP), 141 Przewodnik z informacjami o produkcie, 132 sprzęt Dell Diagnostics, program, 164 kody dźwiękowe, 159 konflikty, 163 system operacyjny ponowna instalacja, 136 U Umowa licencyjna dla użytkownika końcowego, 132 R rozwiązywanie problemów Centrum pomocy i obsługi technicznej, 135 Dell Diagnostics, program, 164 kody dźwiękowe, 159 komunikaty systemowe, 161 kon
witryna pomocy technicznej firmy Dell, 134 wyświetlacz. Zobacz monitor Z złącza dźwięk, 151 karta sieciowa, 151 klawiatura, 152 mysz, 150 równoległe, 150 słuchawki, 148 szeregowe, 152 USB, 148, 151 wyjście liniowe, 151 złącze IEEE 1394, 148, 150 złącza dźwiękowe wyjście liniowe, 151 złącze IEEE 1394 problemy, 174 złącza, 148, 150 zasilacz awaryjny.
Indeks
Dell Precision™ T7400 Краткий справочник Модель DCDO w w w. d e l l . c o m | s u p p o r t . d e l l .
Примечания, замечания и предупреждения ПРИМЕЧАНИЕ. Содержит важную информацию, которая помогает более эффективно работать с компьютером. ВНИМАНИЕ. Указывает на опасность повреждения оборудования или потери данных и объясняет, как этого избежать. ПРЕДУПРЕЖДЕНИЕ. Указывает на потенциальную опасность повреждения имущества, получения травмы или угрозу для жизни. ____________________ Информация, содержащаяся в данном документе, может быть изменена без уведомления. © 2007 Dell Inc. Все права защищены.
Содержание Источники информации Настройка компьютера . . . . . . . . . . . . 197 . . . . . . . . . . . . . 203 Изменение положения корпуса компьютера (вертикальное или горизонтальное) . . . 203 Установка компьютера в ограниченное пространство . . . . . . . . . . . . . . . . Перенос информации на новый компьютер . . . . . . . . . . . . . Устройства защиты питания Сведения о компьютере . 204 . . . . . . 207 . . . . . . . . . . . . . . . . . . . . .
Средства поиска и устранения неисправностей . . . . . . . . . . Индикаторы питания . . . . . . . . 221 . . . . . . . . . . . . . 221 Диагностические индикаторы Кодовые сигналы . . . . . . . 222 . . . . . . . . . . . . . . . 228 Системные сообщения . . . . . . . . . . . Средство устранения неполадок оборудования . . . . . . . . . . . . Dell Diagnostics . . . . . 233 . . . . . . . . . . . . . . . . 233 Поиск и устранение неисправностей Указатель 196 Содержание 231 . . . . . . . . . . .
Источники информации ПРИМЕЧАНИЕ. Некоторые функции или диски могут являться дополнительными и не поставляться с компьютером. Некоторые функции или диски могут быть недоступны в определенных странах. ПРИМЕЧАНИЕ. Дополнительную информацию можно найти в документации, прилагаемой к компьютеру.
Что требуется найти? Информация находится здесь • Удаление и замена компонентов Руководство пользователя Dell Precision™ • Технические характеристики Центр справки и поддержки Microsoft® Windows® XP • Устранение неисправностей и решение и Microsoft Windows Vista™ проблем 1 Нажмите Пуск→ Справка и поддержка→ Dell User and System Guides (Руководства пользователя и системные руководства корпорации Dell)→ System Guides (Системные руководства). 2 Выберите Руководство пользователя для своего компьютера.
Что требуется найти? Информация находится здесь • Метка производителя и код экспрессобслуживания Метка производителя и ключ продукта Microsoft Windows • Ключ продукта Microsoft® Windows® Эти этикетки находятся на компьютере: • Метка производителя требуется для идентификации компьютера на вебсайте support.dell.com или при обращении в службу поддержки корпорации Dell. • Код экспресс-обслуживания вводится, чтобы связаться с соответствующими специалистами службы поддержки корпорации Dell. ПРИМЕЧАНИЕ.
Что требуется найти? Информация находится здесь • Solutions (Разрешение вопросов) — Подсказки и советы по поиску и устранению неисправностей, статьи технических специалистов, интерактивные курсы обучения и часто задаваемые вопросы Веб-сайт поддержки корпорации Dell — support.dell.
Что требуется найти? Информация находится здесь • Downloads (Данные для загрузки) — Сертифицированные драйверы, исправления и обновления программного обеспечения • Desktop System Software (Системное Порядок загрузки системного программное обеспечение настольного программного обеспечения настольного компьютера) (DSS) — В случае компьютера описан ниже. переустановки на компьютере 1 Перейдите на веб-сайт support.dell.
Что требуется найти? Информация находится здесь • Переустановка операционной системы Диск Operating System (Операционная система) Операционная система уже установлена на компьютере. Для переустановки операционной системы используйте диск Operating System (Операционная система), прилагаемый к компьютеру (смотрите раздел «Восстановление операционной системы» в Руководстве пользователя).
Настройка компьютера Изменение положения корпуса компьютера (вертикальное или горизонтальное) ПРЕДУПРЕЖДЕНИЕ. Перед тем как приступить к выполнению операций данного раздела, выполните инструкции по технике безопасности, описанные в Информационном руководстве по продуктам. ПРИМЕЧАНИЕ. Для изменения положения корпуса компьютера на вертикальное или горизонтальное необходимо использовать дополнительный комплект принадлежностей, который можно приобрести в торговой сети корпорации Dell.
2 Извлеките все установленные оптические дисководы, выполнив действия, описанные в разделе «Извлечение оптического дисковода (компьютер в вертикальном исполнении)» в Руководстве пользователя, а затем повторно установите дисководы, выполнив действия, описанные в разделе «Установка оптического дисковода (компьютер в настольном исполнении)» в Руководстве пользователя.
• Обеспечьте зазор не менее 10,2 см со всех сторон компьютера, в которых имеются вентиляционные отверстия, чтобы обеспечить приток воздуха, необходимый для надлежащей вентиляции. • Если компьютер устанавливается в угол рабочего стола или под стол, оставьте зазор не менее 5,1см между задней панелью компьютера и стенкой (перегородкой), чтобы обеспечить приток воздуха, необходимый для надлежащей вентиляции.
• 206 Не устанавливайте компьютер в замкнутое пространство, в котором отсутствует приток воздуха. Ограничение притока воздуха может привести к перегреву компьютера и повлиять на его работу.
Перенос информации на новый компьютер Для упрощения переноса файлов и других данных с одного компьютера на другой можно воспользоваться мастерами, входящими в состав операционной системы.
ПРИМЕЧАНИЕ. Дополнительную информацию по переносу данных смотрите на веб-сайте support.dell.com в документе №154781 под названием What Are The Different Methods To Transfer Files From My Old Computer To My New Dell™ Computer Using the Microsoft Windows XP Operating System? (Какими способами можно перенести файлы со старого компьютера на новый компьютер Dell™ с помощью операционной системы Microsoft Windows XP?). ПРИМЕЧАНИЕ.
5 В окне Это какой компьютер? выберите Исходный компьютер, а затем нажмите кнопку Далее. 6 В окне Выберите способ переноса выберите желаемый способ переноса, а затем нажмите кнопку Далее. 7 В окне Что необходимо перенести? выберите данные, которые вы хотите перенести, а затем нажмите кнопку Далее. Выполняется копирование выбранных данных и открывается окно Завершение этапа сбора данных. 8 Нажмите кнопку Готово. ПЕР ЕНЕСИТЕ ДАННЫЕ НА НОВЫЙ КОМПЬЮТЕР — 1 Перейдите к новому компьютеру.
3 В окне У вас есть компакт-диск с Windows XP? выберите Создать дискету мастера переноса в следующем дисководе, а затем нажмите кнопку Далее. 4 Вставьте сменный носитель, например, записываемый компакт-диск или диск DVD, а затем нажмите кнопку OK. 5 Ознакомьтесь с информацией в разделе Теперь перейдите к вашему исходному компьютеру, а затем перейдите к исходному компьютеру. Не нажимайте кнопку Далее.
Microsoft Windows Vista 1 Нажмите в Windows Vista кнопку «Пуск» , а затем нажмите Перенос файлов и параметров→ Запуск средства переноса данных Windows. 2 В диалоговом окне Контроль учетных записей пользователей нажмите кнопку Продолжить. 3 Нажмите Start a new transfer (Начать новый перенос) или Continue a transfer in progress (Продолжить выполнение переноса). Следуйте инструкциям, выводимым на экран мастером переноса данных Windows.
Стабилизаторы напряжения ВНИМАНИЕ. Стабилизаторы напряжения не обеспечивают защиту от перебоев электроснабжения. Стабилизаторы напряжения предназначены для поддержания напряжения переменного тока на достаточно постоянном уровне. Источники бесперебойного питания ВНИМАНИЕ. Потеря электропитания во время сохранения данных на жесткий диск может привести к потере данных или повреждению файла. ПРИМЕЧАНИЕ.
Сведения о компьютере Вид спереди (вертикальное положение корпуса) 1 2 3 4 13 12 11 10 5 6 7 8 9 1–3 5,25-дюймовые отсеки дисководов Могут использоваться для установки дисковода CD/DVD, устройства чтения мультимедийных карт, дисковода гибких дисков или жесткого диска SATA в 5,25-дюймовом держателе. Держатель жесткого диска предназначен для установки только в 5,25-дюймовые отсеки.
4 5,25-дюймовый отсек со специальной 3,5-дюймовой панелью дисковода Могут использоваться для установки дисковода CD/DVD, устройства чтения мультимедийных карт, дисковода гибких дисков или жесткого диска SATA в 5,25-дюймовом держателе. Показанная на рисунке панель дисковода предназначена для использования только с дисководом гибких дисков или устройством чтения мультимедийных карт; ее можно установить перед любым из четырех 5,25-дюймовых отсеков дисководов.
8 кнопка питания, индикатор питания Нажмите эту кнопку, чтобы включить компьютер. Индикатор в центре этой кнопки указывает состояние питания. Дополнительную информацию смотрите в разделе «Органы управления и световые индикаторы» в Руководстве пользователя. ПРИМЕЧАНИЕ. Во избежание потери данных не следует выключать компьютер нажатием кнопки питания. Вместо этого следует выполнить процедуру завершения работы операционной системы.
Вид сзади (вертикальное положение корпуса) 1 2 3 1 разъем питания К этому разъему подсоединяется кабель питания. 2 слоты для плат Слоты 2-6 поддерживают платы нормальной длины, в том числе один слот PCI, два слота PCI Express 2.0 x16 и два слота PCI-X. Слоты 1 и 7 поддерживают платы половинной длины, в том числе один слот PCI Express x8 (разводка по схеме x4) и один слот PCI-X.
Разъемы на задней панели 1 2 11 1 разъем параллельного порта 3 10 4 5 6 7 8 9 Служит для подключения параллельного устройства (например, принтера). Принтер USB подключается к разъему USB. ПРИМЕЧАНИЕ. Встроенный разъем параллельного порта автоматически отключается в случае обнаружения установленной платы с параллельным разъемом, которому назначен тот же адрес. Дополнительную информацию смотрите в разделе «Параметры настройки системы» в Руководстве пользователя.
5 разъем линейного выхода Зеленый разъем линейного выхода служит для подключения наушников и большинства динамиков со встроенными усилителями. На компьютерах со звуковой платой следует использовать разъем на плате. 6 индикатор состояния соединения Зеленый — Наличие устойчивого соединения между сетью 10 Мбит/с и компьютером. Оранжевый — Наличие устойчивого соединения между сетью 100 Мбит/с и компьютером. Желтый — Наличие устойчивого соединения между сетью 1 000 Мбит/с (или 1 Гбит/с) и компьютером.
9 разъемы USB 2.0 (5) Разъемы USB на передней панели рекомендуется использовать для подключения устройств, которыми вы пользуетесь время от времени (например, флэшнакопителей, камер или загрузочных устройств USB). Разъемы USB на задней панели используются для устройств, которые обычно постоянно подключены к компьютеру (например, принтеры и клавиатуры). 10 разъем клавиатуры Стандартная клавиатура PS/2 подключается к фиолетовому разъему клавиатуры. Клавиатура USB подключается к разъему USB.
• Протрите клавиатуру, компьютер и пластмассовый корпус монитора мягкой чистой тканью, слегка увлажненной водой. Не следует обильно смачивать ткань или допускать попадания воды внутрь компьютера или клавиатуры. Мышь (неоптическая) 1 Поверните фиксирующее кольцо с нижней стороны мыши против часовой стрелки, а затем извлеките шарик. 2 Протрите шарик чистой безворсовой тканью. 3 Осторожно подуйте в обойму шарика, чтобы удалить пыль.
2 Мягкой безворсовой тканью осторожно протрите нижнюю поверхность диска (сторону без этикетки) по прямой линии от центра к внешним краям. При наличии сильных загрязнений попробуйте использовать воду или разбавленный раствор воды и мыла мягкого действия. Можно также приобрести в магазине специальные средства, предназначенные для чистки дисков и обеспечивающие определенную защиту от пыли, отпечатков пальцев и царапин. Чистящие средства, предназначенные для компакт-дисков, подходят и для дисков DVD.
Убедитесь, что электрическая розетка исправна, проверив ее при помощи иного устройства, например светильника. – Убедитесь, что основной кабель питания и кабель передней панели надежно подсоединены к системной плате (смотрите раздел «Компоненты системной платы» в Руководстве пользователя). Если индикатор питания мигает желтым светом, на компьютер подается питание, но, возможно, имеется внутренняя неполадка питания.
ПРИМЕЧАНИЕ. После завершения самотестирования при включении питания компьютера все четыре индикатора гаснут перед загрузкой операционной системы. Коды диагностических индикаторов во время самотестирования при включении питания Сочетание индикаторов Описание проблемы Рекомендуемое решение Компьютер находится Подключите компьютер к исправной в нормальном розетке электросети и нажмите кнопку выключенном питания. состоянии или произошел сбой перед загрузкой BIOS.
Сочетание индикаторов Описание проблемы Рекомендуемое решение Модули памяти обнаружены, но произошел сбой памяти. • Если установлены два модуля памяти или более, извлеките эти модули (смотрите раздел «Память» в Руководстве пользователя), переустановите один модуль, а затем перезагрузите компьютер. Если запуск компьютера пройдет нормально, продолжайте устанавливать дополнительные модули памяти (по одному), пока не определите неисправный модуль или не установите обратно все модули без сбоев.
Сочетание индикаторов Описание проблемы Рекомендуемое решение Возможно, произошел сбой дисковода гибких дисков или жесткого диска. • Переустановите все кабели питания и кабели передачи данных, и перезапустите компьютер. Возможно, произошел сбой устройства USB. • Переустановите все устройства USB, проверьте правильность подключения всех кабелей, а затем перезагрузите компьютер.
Сочетание индикаторов Описание проблемы Рекомендуемое решение Произошел сбой системной платы. Обратитесь в корпорацию Dell (смотрите раздел «Обращение в корпорацию Dell» в Руководстве пользователя). Модули памяти обнаружены, но имеется ошибка конфигурации памяти или совместимости. • Убедитесь в отсутствии особых требований к размещению модулей памяти и разъемов для модулей памяти (смотрите раздел «Память» в Руководстве пользователя).
Сочетание индикаторов Описание проблемы Возможно, произошел сбой платы расширения. Рекомендуемое решение 1 Определите, имеется ли какой-либо конфликт, удалив плату расширения (не графический адаптер) и перезагрузив компьютер (смотрите раздел «Платы» в Руководстве пользователя). 2 Если устранить неполадку не удается, установите обратно извлеченную плату, а затем извлеките другую плату и перезагрузите компьютер. 3 Повторите эту процедуру для каждой установленной платы расширения.
Сочетание индикаторов Описание проблемы Рекомендуемое решение Произошел другой сбой. • Убедитесь, что кабели всех жестких дисков и дисководов CD/DVD надлежащим образом подсоединены к системной плате (смотрите раздел «Компоненты системной платы» в Руководстве пользователя). • Если на экран выдается сообщение об ошибке с указанием неполадки какого-либо устройства (например, дисковода гибких дисков или жесткого диска), проверьте это устройство и убедитесь, что оно работает надлежащим образом.
2 запустите диагностическую программу Dell Diagnostics, чтобы определить причину (смотрите раздел «Dell Diagnostics» на стр. 233). Код Причина 2 коротких, 1 длинный Ошибка контрольной суммы BIOS 1 длинный, 3 коротких, Ошибка памяти 2 коротких 1 короткий Нажата клавиша F12 Код Описание (повторяющиеся короткие звуковые сигналы) Рекомендуемый способ устранения неполадки 1 Ошибка контрольной Обратитесь в корпорацию Dell (смотрите суммы BIOS.
Код Описание (повторяющиеся короткие звуковые сигналы) Рекомендуемый способ устранения неполадки 3 Возможный отказ Обратитесь в корпорацию Dell материнской платы. (смотрите раздел «Обращение в корпорацию Dell» в Руководстве пользователя). 4 Сбой чтения/записи • Убедитесь в отсутствии особых требований к размещению модулей ОЗУ. памяти и разъемов для модулей памяти (смотрите раздел «Память» в Руководстве пользователя).
Системные сообщения ПРИМЕЧАНИЕ. Если какого-либо полученного сообщения нет в приведенной таблице, смотрите документацию по операционной системе или программе, которая работала в момент его появления. ALERT! PREVIOUS ATTEMPTS AT BOOTING THIS SYSTEM HAVE FAILED [ NNNN ]. F OR HELP IN RESOLVING THIS PROBLEM , PLEASE NOTE THIS CHECKPOINT AND CONTACT D ELL TECHNICAL S UPPORT (В НИМАНИЕ ! В О ВР ЕМЯ ПР ЕДЫД УЩИХ ЗАГР УЗОК СИСТЕМЫ ПР ОИСХОДИЛ С Б О Й В К О Н Т Р ОЛ Ь Н О Й Т ОЧ К Е [ N N N N ].
N O B O O T D E V I C E A V A I L A B L E (Н Е Т З А Г Р У ЗОЧ Н Ы Х УС Т Р О Й С Т В ) — Система не может обнаружить загрузочное устройство или загрузочный раздел. • Если загрузочным устройством является дисковод гибких дисков, убедитесь, что кабели подсоединены, а в дисковод вставлен загрузочный гибкий диск. • Если загрузочным устройством является жесткий диск, убедитесь, что кабели подсоединены, а диск правильно установлен и разбит на разделы как загрузочное устройство.
Средство устранения неполадок оборудования Если во время запуска операционной системы не обнаружено или обнаружено, но неправильно конфигурировано, какое-либо устройство, то для устранения ошибок несовместимости можно использовать средство устранения неполадок оборудования. Windows XP: 1 Нажмите Пуск→ Справка и поддержка. 2 Введите устранение неполадок оборудования в поле поиска и нажмите клавишу , чтобы запустить поиск. 3 В разделе Устранить неполадку нажмите Устранение неполадок оборудования.
Запустить программу Dell Diagnostics можно с жесткого диска или диска Drivers and Utilities (Драйверы и утилиты). Чтобы просмотреть информацию о конфигурации компьютера и убедиться, что устройство, которое вы хотите проверить, отображается в программе настройки системы и является активным, ознакомьтесь с разделом «Программа настройки системы» в Руководстве пользователя. ПРИМЕЧАНИЕ. Программа Dell Diagnostics работает только на компьютерах марки Dell. ПРИМЕЧАНИЕ.
3 С помощью клавиш «стрелка вверх» и «стрелка вниз» или нажатия соответствующей цифровой клавиши на клавиатуре выделите в Boot Device Menu (Меню загрузочного устройства) пункт Boot to Utility Partition (Загрузка с раздела с утилитой), а затем нажмите клавишу . ПРИМЕЧАНИЕ. Функция Quickboot (Быстрая загрузка) изменяет порядок загрузки только для текущей загрузки. После перезапуска компьютер загружается в соответствии с последовательностью загрузки, указанной в программе настройки системы.
6 С помощью клавиш «стрелка вверх» и «стрелка вниз» или нажатия соответствующей цифровой клавиши на клавиатуре выделите в Boot Device Menu (Меню загрузочного устройства) пункт Onboard or USB CD-ROM (Встроенный или USB-дисковод компакт-дисков), а затем нажмите клавишу . ПРИМЕЧАНИЕ. Функция Quickboot (Быстрая загрузка) изменяет порядок загрузки только для текущей загрузки. После перезапуска компьютер загружается в соответствии с последовательностью загрузки, указанной в программе настройки системы.
Главное меню программы Dell Diagnostics Из окна Main Menu (Главное меню) программы Dell Diagnostics можно запустить следующие тесты: Пункт меню Функция Express Test (Экспресс-тест) Быстрое тестирование системных устройств. Этот тест обычно продолжается 10-20 минут и не требует вашего участия. Выполните Express Test (Экспресс-тест) в первую очередь, чтобы увеличить вероятность быстрого обнаружения проблемы. Extended Test (Расширенный тест) Полная проверка системных устройств.
На указанных ниже вкладках приводится дополнительная информация по тестам, выполняемым при выборе пунктов Custom Test (Настраиваемый тест) или Symptom Tree (Дерево симптомов). Вкладка Функция Results (Результаты) Результаты теста и выявленные ошибки. Errors (Ошибки) Выявленные ошибки, их коды и описание проблемы. Help (Справка) Описание теста и любых требований для его запуска. Configuration (Конфигурация) Описание аппаратной конфигурации выбранного устройства.
Неполадки батарейки ПРЕДУПРЕЖДЕНИЕ. Существует опасность взрыва новой батарейки в случае неправильной установки. Заменять батарейку следует только такой же батарейкой или батарейкой аналогичного типа, рекомендованной изготовителем. Утилизируйте использованные батарейки в соответствии с инструкциями изготовителя. ПРЕДУПРЕЖДЕНИЕ. Перед тем как приступить к выполнению операций данного раздела, выполните инструкции по технике безопасности, описанные в Информационном руководстве по продуктам.
П ОЧ ИСТИТЕ ДИСКОВОД ИЛИ ДИСК — Смотрите раздел «Уход за компьютером» на стр. 219. П Р О В Е Р ЬТ Е П Р А В И Л Ь Н О С Т Ь П О Д С О Е Д И Н Е Н И Я К А Б Е Л Е Й З АПУСТИТЕ СР ЕДСТВО УСТР АНЕНИЯ НЕПОЛАДОК ОБОР УДОВАНИЯ — Смотрите раздел «Восстановление операционной системы» в Руководстве пользователя. ЗАПУСТИТЕ ПР ОГР АММУ DELL DIAGNOSTICS — Смотрите раздел «Dell Diagnostics» на стр. 233. Неполадки оптического дисковода ПРИМЕЧАНИЕ.
Неполадки жесткого диска З А П УС Т И Т Е П Р О Г Р А М М У П Р О В Е Р К И Д И С К А C H E C K D I S K — Windows XP: 1 Нажмите кнопку Пуск и выберите пункт Мой компьютер. 2 Щелкните правой кнопкой мыши значок Локальный диск C:. 3 Выберите Свойства→ Сервис→ Выполнить проверку.... 4 Выберите Проверять и восстанавливать поврежденные сектора и нажмите кнопку Запуск. Windows Vista: 1 Нажмите кнопку Пуск и выберите пункт Компьютер. 2 Щелкните правой кнопкой мыши значок Локальный диск C:.
П Р О В Е Р ЬТ Е П О Д К Л Ю Ч Е Н И Е К Т Е Л Е Ф О Н Н О Й Л И Н И И П Р О В Е Р ЬТ Е Т Е Л Е Ф О Н Н У Ю Р О З Е Т К У ПОДСОЕДИНИТЕ МОДЕМ НЕПОСР ЕДСТВЕННО К ТЕЛЕФОННОЙ Р ОЗЕТКЕ П О П Р О Б У Й Т Е И С П ОЛ Ь ЗО В А Т Ь Д Р У Г У Ю Т Е Л Е Ф О Н Н У Ю Л И Н И Ю — • Убедитесь, что телефонная линия подсоединена к разъему на модеме (на разъеме имеется зеленая этикетка или рядом с ним имеется значок в виде разъема). • Убедитесь, что при подсоединении разъема телефонного кабеля к модему слышен щелчок.
У Б Е Д И Т Е С Ь , Ч Т О В Ы П О Д К Л Ю Ч Е Н Ы К И Н Т Е Р Н Е Т У — Убедитесь, что вы оформили подписку на услуги доступа к Интернету. В открытой программе электронной почты Outlook Express откройте меню Файл. Если установлен флажок Работать автономно, снимите этот флажок и подключитесь к Интернету. Если потребуется помощь, обратитесь к поставщику услуг Интернета. Сообщения об ошибках ПРЕДУПРЕЖДЕНИЕ.
N O N - S Y S T E M D I S K E R R O R (Н Е С И С Т Е М Н Ы Й Д И С К ) — Извлеките гибкий диск из дисковода и перезагрузите компьютер. NOT ENOUGH MEMORY OR RESOURCES. CLOSE SOME PROGRAMS AND ( Н Е Д О С Т А Т ОЧ Н О П А М ЯТ И И Л И Р Е С У Р С О В . З А К Р О Й Т Е Н Е К ОТ О Р Ы Е П Р О Г Р А М М Ы И П О В Т О Р И Т Е П О П Ы Т К У ) — Закройте все окна и откройте программу, с которой вы хотите работать. В некоторых случаях для восстановления ресурсов компьютера может понадобиться перезагрузка.
П Р И Н А Л И Ч И И П Р О БЛЕМ С УС Т Р О Й С Т ВОМ IEEE 1394, П ОС Т А ВЛ ЯЕМ Ы М К О Р П О Р А Ц И Е Й D E L L — Обратитесь в корпорацию Dell (смотрите раздел «Обращение в корпорацию Dell» в Руководстве пользователя). П Р И НАЛИЧ ИИ ПР ОБЛЕМ С УСТР ОЙСТВОМ IEEE 1394, ПОСТАВЛЯЕМЫМ D E L L — Обратитесь к производителю устройства IEEE 1394. НЕ К О Р П О Р А Ц И Е Й Неполадки клавиатуры ПРЕДУПРЕЖДЕНИЕ.
Компьютер не реагирует на действия пользователя ВНИМАНИЕ. Если не удастся нормально завершить работу операционной системы, может произойти потеря данных. В Ы К Л Ю Ч И Т Е К О М П Ь Ю Т Е Р — Если компьютер не реагирует на нажатие клавиш на клавиатуре или перемещение мыши, нажмите кнопку питания и не отпускайте ее не менее 8-10 секунд (пока компьютер не выключится), а затем перезапустите компьютер.
Появляется сплошной синий экран В Ы К Л Ю Ч И Т Е К О М П Ь Ю Т Е Р — Если компьютер не реагирует на нажатие клавиш на клавиатуре или перемещение мыши, нажмите кнопку питания и не отпускайте ее не менее 8-10 секунд (пока компьютер не выключится), а затем перезапустите компьютер.
Е С Л И В О З Н И К А Ю Т Д Р У Г И Е П Р О БЛ Е М Ы С П А М ЯТ Ь Ю — • Извлеките и переустановите модули памяти (смотрите раздел «Снятие передней панели» в Руководстве пользователя), чтобы убедиться, что обмен данными между компьютером и модулями памяти осуществляется нормально. • Соблюдайте указания по установке модулей памяти (смотрите раздел «Установка модуля памяти» в Руководстве пользователя). • Убедитесь, что используемые модули памяти поддерживаются данным компьютером.
Windows Vista: 1 Нажмите Пуск → Панель управления→ Оборудование и звук→ Мышь. 2 Настройте параметры, как это необходимо. П Е Р Е УС Т А Н О В И Т Е Д Р А Й В Е Р М Ы Ш И — Смотрите раздел «Драйверы» в Руководстве пользователя. З А П УС Т И Т Е С Р Е Д С Т В О УС Т Р А Н Е Н И Я Н Е П ОЛ А Д О К О Б О Р УД О В А Н И Я — Смотрите раздел «Восстановление операционной системы» в Руководстве пользователя. Неполадки сети ПРЕДУПРЕЖДЕНИЕ.
Е С Л И И Н Д И К А Т О Р П И Т А Н И Я М И Г А Е Т З Е Л Е Н Ы М С В Е Т О М — Компьютер находится в ждущем режиме. Для возобновления нормальной работы нажмите любую клавишу на клавиатуре, переместите мышь, или нажмите кнопку питания. Е С Л И И Н Д И К А Т О Р П И Т А Н И Я Н Е Г О Р И Т — Компьютер выключен или не получает питание. • Повторно подсоедините кабель питания к разъему питания на задней панели компьютера и к электросети.
Неполадки принтера ПРЕДУПРЕЖДЕНИЕ. Перед тем как приступить к выполнению операций данного раздела, выполните инструкции по технике безопасности, описанные в Информационном руководстве по продуктам. ПРИМЕЧАНИЕ. Если потребуется техническая поддержка в отношении принтера, обратитесь к его производителю. П Р ОЧ И Т А Й Т Е Д О К У М Е Н Т А Ц И Ю П О П Р И Н Т Е Р У — Информацию по установке, настройке и устранению неполадок смотрите в документации по принтеру.
Неполадки сканера ПРЕДУПРЕЖДЕНИЕ. Перед тем как приступить к выполнению операций данного раздела, выполните инструкции по технике безопасности, описанные в Информационном руководстве по продуктам. ПРИМЕЧАНИЕ. Если потребуется техническая поддержка в отношении сканера, обратитесь к его производителю. П Р ОЧ И Т А Й Т Е Д О К У М Е Н Т А Ц И Ю П О С К А Н Е Р У — Информацию по установке, настройке и устранению неисправностей смотрите в документации по сканеру.
Не слышен звук из динамиков ПРИМЕЧАНИЕ. Регулятор громкости в проигрывателе MP3 и других мультимедийных проигрывателях может отменять настройки громкости, заданные в Windows. Обязательно проверяйте, не были ли убран или отключен звук в мультимедийном проигрывателе (или мультимедийных проигрывателях). П Р О В Е Р ЬТ Е П Р А В И Л Ь Н О С Т Ь П О Д С О Е Д И Н Е Н И Я К А Б Е Л Е Й — Убедитесь, что динамики подключены, как показано на схеме подключения, прилагаемой к динамикам.
Неполадки видеоадаптера и монитора ПРЕДУПРЕЖДЕНИЕ. Перед тем как приступить к выполнению операций данного раздела, выполните инструкции по технике безопасности, описанные в Информационном руководстве по продуктам. ВНИМАНИЕ. Если в купленный компьютер установлен графический адаптер PCI Express, то при установке дополнительных графических адаптеров извлекать этот адаптер не обязательно; однако, этот адаптер понадобится для поиска и устранения неполадок.
П Р О В Е Р ЬТ Е ЭЛ Е К Т Р И Ч Е С К У Ю Р О З Е Т К У — Убедитесь, что электрическая розетка исправна, проверив ее при помощи иного устройства, например светильника. П Р О В Е Р ЬТ Е Д И А Г Н О С Т И Ч Е С К И Е И Н Д И К А Т О Р Ы — Смотрите раздел «Диагностические индикаторы» на стр. 222.
О Т О Д В И Н ЬТ Е М О Н И Т О Р П О Д А Л Ь Ш Е ОТ В Н Е Ш Н И Х И С Т ОЧ Н И К О В П И Т А Н И Я — Вентиляторы, люминесцентные и галогенные светильники, а также другие электроприборы могут вызывать рябь изображения на экране. Выключите находящиеся поблизости электроприборы, чтобы проверить наличие помех.
Указатель А аудиоразъемы линейный выход, 218 Б батарейка неполадки, 239 В веб-сайт поддержки, 200 видео неполадки, 254 Г громкость настройка, 253 дисковод CD-RW неполадки, 240 дисководы неполадки, 239 дисплей. См.
Информационное руководство по продуктам, 198 индикатор питания внешний вид, 249 индикаторы активность жесткого диска, 214-215 активность сети, 218 диагностические, 215, 222 задняя панель компьютера, 222 сеть, 218 состояние соединения, 218 инструкции по технике безопасности, 198 информация по гарантийным обязательствам, 198 компакт-диск/DVD-диск Operating System (Операционная система), 202 конфликты несовместимость программного и аппаратного обеспечения, 233 конфликты запросов на прерывание, 233 Л Лицензио
модем неполадки, 241 монитор неполадки, 254 отсутствие изображения, 254 трудночитаемый текст, 255 Н наушники разъем, 215 неполадки Dell Diagnostics, 233 IEEE 1394, 244 аварийное завершение программы, 246 батарейка, 239 видео и монитор, 254 внешний вид индикатора питания, 249 диагностические индикаторы, 222 дисковод CD-RW, 240 дисководы, 239 жесткий диск, 241 Интернет, 241 клавиатура, 245 кодовые сигналы, 228 компьютер не реагирует на действия пользователя, 245-246 конфликты, 233 мышь, 248 модем, 241 общие,
П программа Check Disk, 241 память неполадки, 247 программное обеспечение конфликты, 233 неполадки, 246-247 перенос информации на новый компьютер мастер переноса файлов и параметров (Windows XP), 207 средство переноса данных Windows (Windows Vista), 211 питание ИБП, 211 кнопка, 215 неполадки, 249 стабилизаторы напряжения, 211 устройства защиты, 211 фильтры бросков напряжения, 211 поиск и устранение неисправностей Dell Diagnostics, 233 диагностические индикаторы, 222 индикаторы питания, 221 кодовые сигна
сообщения ошибка, 243 системные, 231 сообщения об ошибках диагностические индикаторы, 222 кодовые сигналы, 228 неполадки, 243 средство устранения неполадок оборудования, 233 Ф файл справки Центр справки и поддержки Windows, 201 Ц Центр справки и поддержки, 201 Э экран. См. монитор электронная почта неполадки, 241 этикетки Microsoft Windows, 199 код экспресс-обслуживания, 199 метка производителя, 199 I IEEE 1394 неполадки, 244 разъемы, 214, 217 S S.M.A.R.
Указатель
320 | אינדקס
פתרון בעיות 295 , Dell Diagnostics בעיות 299 , הודעות מערכת 293 , התנגשויות 294 , מרכז העזרה והתמיכה 271 , נוריות אבחון 288 , נוריות הפעלה 287 , פותר בעיות החומרה 294 , קודי צפצוף 292 , תיעוד ) המשך ( מדריך מידע על המוצר 268 , מקוון 270 , תקינה 268 , תצוגה .
מ מרכז העזרה והתמיכה 271 , מקלדת בעיות 304 , מחבר 285 , מדפסת בעיות 309 , הגדרה 276 , חיבור 276 , מדריך למשתמש 268 , מדריך מידע על המוצר 268 , מודם בעיות 301 , ס סוללה בעיות 299 , סורק בעיות 310 , מחברי שמע קו יציאה 284 , מחברים 284 ,282 , IEEE 1394 285 ,282 , USB א וזניות 282 , טורי 285 , מקבילי 284 , מקלדת 285 , מתאם רשת 285 , עכבר 284 , קו יציאה 284 , שמע 284 , מחשב מפסיק להגיב 305 , קודי
העברת מידע למחשב חדש Windows Easy Transfer )279 , (Windows Vista אשף העברת הקבצים וההגדרות ) 276 , ( Windows XP הפעלה ב עיות 308 , לחצן 282 , התנגשויות אי -תאימויות בתוכנה ובחומרה 294 , התנגשויות 294 , IRQ ו וידאו בעיות 311 , ז ז יכרון בעיות 306 , ח חומרה 295 , Dell Diagnostics התנגשויות 294 , קודי צפצוף 292 , חשמל 280 , UPS התקני הגנה 280 , מגיני נחשולים 280 , מייצבי קו 280 , כ כונן ) CD-RWצורב תקליטורים (
אשפים Program Compatibility Wizard )אשף תאימות תוכניות( 305 , Windows Easy Transfer )279 , (Windows Vista אשף העברת הקבצים וההגדרות ) 276 , ( Windows XP אתר אינטרנט של התמיכה 270 , אתר התמיכה של 270 , Dell ב בעיות 295 , Dell Diagnostics 304 , IEEE 1394 אינטרנט 301 , דואר אלקטרוני 301 , הודעות שגיאה 303 , המסך ריק 312 , הפעלה 308 , הצג ריק 312 , התנגשויות 294 , וידאו וצג 311 , זיכרון 306 , כוונון עוצמת הקול 311 , כונן ) C
אינדקס C W ) Check Diskבדיקת דיסק ( 301 , Windows Vista 279 , Windows Easy Transfer התקנה מחדש 272 , מרכז העזרה והתמיכה 271 , 295 , Dell Diagnostics Windows XP אשף העברת הקבצים וההגדרות 276 , התקנה מחדש 272 , מרכז העזרה והתמיכה 271 , פותר בעיות החומרה 294 , D / DVDתקליטור Drivers and ) Utilitiesמנהלי התקנים ותוכניות שירות ( 267 , / DVDתקליטור מערכת ההפעלה 272 , I IEEE 1394 בעיות 304 , מחברים 284 ,282 ,
בדוק א ת הגדרות הצג — להוראות לכוונון הניגודיות והבהירות ,לדמגנטיזציה )ביטול מיגנוט( של הצג ולהפעלת הבדיקה העצמית של הצג ,עיין בתיעוד של הצג. הרחק א ת הס אב -וופר מ ה צ ג — אם מערכת הרמקולים שלך כוללת סאב-וופר ,ודא שהסאב-וופר ממוקם במרחק של 30ס"מ לפחות מהצג. הרחק א ת הצג ממקורות חשמל ח י צ ו נ י י ם — מאווררים ,מנורות פלורסנט ,מנורות הלוגן ומכשירי חשמל אחרים עלולים לגרום לתמונת המסך לרעוד .כבה התקנים שנמצאים בקרבת הצג כדי לבדוק אם הם גורמים להפרעות.
המסך רי ק הערה :להליכי פתרון בעיות ,עיין בתיעוד של הצג. בדוק את חיבורי הכבלים של הצג — • ודא שכבל הצג מחובר לכרטיס הגרפי הנכון )בתצורות הכוללות שני כרטיסים גרפיים(. • אם אתה משתמש במתאם DVIל ,VGA-ודא שהמתאם מחובר כראוי לכרטיס הגרפי ולצג. • ודא שכבל הצג מחובר כפי שמודגם בתרשים ההתקנה של המחשב. • נתק כבלים מאריכים מהצג וחבר את הצג ישירות למחשב. • החלף בין כבלי החשמל של המחשב והמשך כדי לבדוק אם כבל החשמל של הצג פגום.
הרמקולים אינם משמיעים צליל הערה :בקרת עוצמת הקול של MP3ונגני מדיה אחרים עלולה לדרוס את הגדרת עוצמת הקול של .Windowsבדוק תמיד כדי לוודא שעוצמת הקול של נגן או נגני המדיה לא הוחלשה או הושתקה. בדוק את חיבורי ה כבלים של הרמ ק ול י ם — ודא שהרמקולים מחוברים כפי שמודגם בתרשים ההתקנה שצורף לרמקולים .אם רכשת כרטיס קול ,ודא שהרמקולים מחוברים לכרטיס. ודא שה סא ב -וופר ו ה רמ ק ול י ם מופ עלים — עיין בתרשים החיבור המצורף לרמקולים .
:Windows Vista ) Control Panel Iלוח בקרה() Hardware and Sound Iחומרה 1לחץ על ) Startהתחל( וצליל() Printer Iמדפסת(. 2אם המדפסת מופיעה ברשימה ,לחץ לחיצה ימנית על סמל המדפסת. 3לחץ על ) Propertiesמאפיינים( ,ולאחר מכן לחץ על ) Portsיציאות(. 4התאם את ההגדרות לפי הצורך. ה ת ק ן מחדש א ת מנהל ה ה ת ק ן של המדפסת — למידע על התקנה מחדש של מנהל התקן המדפסת ,ראה בתיעוד של המדפסת.
א ם נ ור ית ה הפ ע ל ה דולקת בכ ת ו ם — ייתכן שאירעה תקלה בהתקן או שהוא מותקן באופן שגוי. • הסר את כל מודולי הזיכרון ולאחר מכן התקן אותם מחדש )ראה "הסרת הלוח הקדמי" במדריך למשתמש(. • הסר את כל כרטיסי ההרחבה ,כולל כרטיסים גרפיים ,ולאחר מכן התקן אותם מחדש )ראה "כרטיסים" במדריך למשתמש(.
בעיות רשת זהירות :לפני שתתחיל לבצע הליך כלשהו בסעיף זה ,בצע את הוראות הבטיחות במדריך מידע המוצר. בדוק את נורית הרשת בחזית המחש ב — אם נורית תקינות הקישור כבויה )"ראה "בקרים ונוריות" במדריך למשתמש( ,סימן שלא מתקיימת תקשורת רשת .החלף את כבל הרשת. בדוק את מח בר ה כבל של הרשת — ודא שכבל הרשת מחובר היטב למחבר הרשת בגב המחשב ולשקע הרשת.
א ם אתה נתקל בבעיות זי כ ר ו ן אחרות — • התקן מחדש את מודולי הזיכרון )ראה "הסרת הלוח הקדמי" במדריך למשתמש( כדי להבטיח שהמחשב יתקשר בהצלחה עם הזיכרון. • ודא שאתה פועל על-פי ההנחיות להתקנת הזיכרון )ראה "התקנת מודול זיכרון" במדריך למשתמש(. • ודא שהזיכרון שאתה משתמש בו נתמך על-ידי המחשב .למידע נוסף על סוג הזיכרון הנתמך על-ידי המחשב ,ראה "הסרת הלוח הקדמי" במדריך למשתמש. • הפעל את תוכנית האבחון של ) Dellראה " "Dell Diagnosticsבעמוד .
מופיע מסך בצבע כחול מל א כבה את המחש ב — אם אינך מצליח לקבל תגובה על-ידי לחיצה על מקש במקלדת או הזזת העכבר, לחץ לחיצה ארוכה על לחצן ההפעלה למשך 8עד 10שניות לפחות )עד שהמחשב יכבה( ,ולאחר מכן הפעל את המחשב מחדש. בעיות תוכנה אחרו ת ע י י ן בתי עוד ה ת ו כ נ ה א ו פ נה ל י צ ר ן התוכנה לקבלת מ י ד ע לפתרון בעיות — • ודא שהתוכנית תואמת למערכת ההפעלה המותקנת במחשב. • ודא שהמחשב עונה על דרישות החומרה המינימליות הדרושות להפעלת התוכנה .לקבלת מידע ,עיין בתיעוד התוכנה.
המחשב מפסיק להגי ב שים לב :אם אינך מצליח לבצע כיבוי של מערכת ההפעלה ,הדבר עלול לגרום לאובדן נתונים. כבה א ת המחש ב — אם אינך מצליח לקבל תגובה על-ידי לחיצה על מקש במקלדת או הזזת העכבר, לחץ לחיצה ארוכה על לחצן ההפעלה למשך 8עד 10שניות לפחות )עד שהמחשב יכבה( ,ולאחר מכן הפעל את המחשב מחדש. תוכנית מפסיקה להגי ב ס י י ם א ת פ ע ו ל ת ה ת ו כ נ ית — 1הקש בו-זמנית על >
:Windows Vista ) Control Panel Iלוח בקרה() Hardware and Sound Iחומרה 1לחץ על ) Startהתחל( וצליל(. 2לחץ על ) Device Managerמנהל ההתקנים(. אם התקן IEEE 1394מופיע ברשימה ,סימן ש WINDOWS -מזהה את ההתקן.
:Windows Vista ) Control Panel Iלוח הבקרה() Programs Iתוכניות(I 1לחץ על ) Startהתחל( ) Programs and Featuresתוכניות ותכונות(. 2בחר בתוכנית שברצונך להסיר. 3לחץ על ) Uninstallהסרת התקנה(. 4לקבלת הוראות התקנה עיין בתיעוד התוכנית. ) d r i v e l e t t e r : \ I S N O T A C C E S S I B L Eה כ ונ ן א י נו נגיש (TH E D E V I C E I S N O T . ) R E A D Yהה ת ק ן א י נ ו מ ו כ ן ( — הכונן אינו יכול לקרוא את התקליטור .הכנס תקליטור לכונן ונסה שנית.
ודא ש המ וד ם מתקשר ע ם — WI N D O W S :Windows XP 1לחץ על ) Startהתחל() Control Panel Iלוח הבקרה(Printers and Other Hardware I )מדפסות ופריטי חומרה אחרים() Phone and Modem Options Iאפשרויות טלפון ומודם(I ) Modemsמודמים(. 2לחץ על יציאת ה COM -של המודם ,ולאחר מכן לחץ על ) Propertiesמאפיינים(Diagnostics I )אבחון() Query Modem Iתשאול מודם( כדי לוודא שהמודם מתקשר עם .Windows אם מתקבלת תגובה על כל הפקודות ,סימן שהמודם פועל כהלכה.
בעיות הקשורות לדואר אלקטרוני ,מודם ואינטרנט זהירות :לפני שתתחיל לבצע הליך כלשהו בסעיף זה ,בצע את הוראות הבטיחות במדריך מידע המוצר. הערה :חבר את המודם אך ורק לשקע טלפון אנלוגי .המודם לא יפעל כשהוא מחובר לרשת טלפונים דיגיטלית. הערה :אל תחבר כבל טלפון למחבר מתאם הרשת )ראה "מחברי הלוח האחורי" במדריך למשתמש(.
בעיות בכונן האופטי הערה :רעידות במהירות גבוהה של כונני CDאו DVDהן תופעה רגילה העלולה לגרום לרעשים ,אך הדבר אינו מצביע על תקלה בכונן או בתקליטור. הערה :בשל קיומם של אזורים שונים ופורמטים שונים של תקליטורים ,כותרי DVD מסוימים עלולים שלא לפעול בכונני DVDמסוימים. כ ו ו נ ן א ת ב קר ת ע ו צמת הקול של — W I N D O W S • לחץ על סמל הרמקול בפינה הימנית התחתונה של המסך. • ודא שעוצמת הקול מוגברת על-ידי לחיצה על המחוון וגרירתו כלפי מעלה.
בעיות סוללה זהירות :סוללה חדשה עלולה להתפוצץ אם אינה מותקנת כראוי .יש להחליף את הסוללה רק בסוללה מסוג זהה או דומה ,בהתאם להמלצת היצרן .השלך סוללות משומשות לפי הנחיות היצרן. זהירות :לפני שתתחיל לבצע הליך כלשהו בסעיף זה ,בצע את הוראות הבטיחות במדריך מידע המוצר. ה ת ק ן מחדש א ת הסוללה — אם עלייך להגדיר מחדש שוב ושוב את נתוני השעה והתאריך לאחר הפעלת המחשב ,או אם מופיעים שעה או תאריך שגויים בעת הפעלת המחשב ,החלף את הסוללה )ראה "החלפת הסוללה" במדריך למשתמש( .
הכרטיסיות הבאות מספקות מידע נוסף על בדיקות שניתן להפעיל באמצעות האפשרויות Custom Test )בדיקה מותאמת אישית( או ) Symptom Treeעץ התסמינים(: כרטיסייה פעולה ) Resultsתוצאות( הצגת תוצאות הבדיקה ומצבי שגיאה שבהם נתקלה המערכת. ) Errorsשגיאות( הצגת מצבי שגיאה שבהם נתקלה המערכת ,קודי שגיאה ותיאורי הבעיות. ) Helpעזרה( תיאור הבדיקה וציון הדרישות לביצוע הבדיקה. Configuration )הגדרת תצורה( ) Custom Testבלבד( הצגת הגדרת התצורה של המערכת עבור ההתקן שנבחר.
מסך ) Main Menuתפריט ראשי( של Dell Diagnostics ניתן להפעיל את הבדיקות הבאות מהתפריט הראשי של :Dell Diagnostics אפשרות פעולה Express Test )בדיקה מהירה( ביצוע בדיקה מהירה של התקני מערכת .הבדיקה נמשכת בדרך כלל בין 10ל 20 -דקות ואינה דורשת את התערבותך .הפעל את Express Test תחילה כדי לאתר את הבעיה במהירות. Extended Test )בדיקה מורחבת( ביצוע בדיקה מקיפה של התקני מערכת .בדיקה זו נמשכת בדרך כלל שעה או יותר ומחייבת אותך לענות על שאלות מסוימות מדי פעם.
הפעלת תוכנית האבחון של Dellמהתקליטור Drivers and Utilities 1הפעל את המחשב. 2לחץ על לחצן ההוצאה שבחזית הכונן האופטי כדי לפתוח את מגש הכונן. 3הנח את התקליטור Drivers and Utilitiesבמרכז מגש הכונן ולאחר מכן לחץ על לחצן ההוצאה או דחוף את המגש בעדינות כדי לסגור אותו. 4הפעל מחדש את המחשב. 5כאשר מופיע הלוגו DELLהקש מייד על >.
הפעלת תוכנית האבחון של Dellמהכונן הקשיח תוכנית האבחון של Dellממוקמת במחיצה נפרדת בכונן הקשיח ,המיועדת לתוכנית השירות. הערה :אם המחשב אינו מציג תמונת מסך ,עיין בסעיף "פנייה אל "Dellבמדריך למשתמש. 1הפעל )או הפעל מחדש( את המחשב. 2כאשר מופיע הלוגו DELLהקש מייד על >.
:Windows XP 1לחץ על ) Startהתחל() Help and Support Iעזרה ותמיכה(. 2הקלד ) hardware troubleshooterפותר בעיות החומרה( בשדה החיפוש והקש >
) D I S K E T T E R E A D F A I L U R Eכשל קריאת ת ק ל י ט ו ן ( — ייתכן שהתקליטון פגום או שהכבל אינו מחובר היטב .החלף את התקליטון ו/או בדוק את חיבורי הכבלים. ) H A R D - D I S K R E A D F A I L U R Eכשל קר יאת כ ו נ ן קשיח ( — כשל אפשרי בדיסק קשיח במהלך בדיקת אתחול של הדיסק הקשיח )לסיוע ,ראה "פנייה אל "Dellבמדריך למשתמש(. ) K E Y B O A R D F A I L U R Eכשל מ קלד ת ( — כשל במקלדת או שכבל המקלדת רופף )ראה "בעיות מקלדת" במדריך למשתמש(.
הצעת פתרון קוד )צפצופים קצרים חוזרים( תיאור 4 כשל קריאה/כתיבה .RAM 5 • החלף את הסוללה )ראה "החלפת הסוללה" כשל שעון זמן אמת .כשל במדריך למשתמש(. אפשרי בסוללה או כשל בלוח אם. • אם הבעיה נמשכת ,פנה אל ) Dellראה "פנייה אל • ודא שאין דרישות מיוחדות למיקום מודול זיכרון/מחבר זיכרון )ראה "זיכרון" במדריך למשתמש(. • ודא שהזיכרון שאתה משתמש בו נתמך על-ידי המחשב )ראה "זיכרון" במדריך למשתמש(.
קודי צפצוף במהלך אתחול ,ייתכן שהמחשב ישמיע סדרת צפצופים .סדרת הצפצופים מכונה קוד צפצוף וניתן להיעזר בה לזיהוי בעיה במחשב. אם המחשב משמיע סדרת צפצופים בעת הפעלה מחדש: 1רשום את קוד הצפצוף. 2הפעל את תוכנית האבחון של Dellכדי לזהות את הגורם )ראה ""Dell Diagnostics בעמוד .
דפוס נוריות תיאור הבעיה הצעת פתרון ייתכן שהתרחש כשל בכרטיס הרחבה. 1בדוק אם אירעה התנגשות על-ידי הסרת כרטיס ההרחבה )לא כרטיס גרפי( והפעלת המחשב מחדש )ראה "כרטיסים" במדריך למשתמש(. 2אם הבעיה נמשכת ,התקן מחדש את הכרטיס שהסרת ,הסר כרטיס אחר ולאחר מכן הפעל מחדש את המחשב. 3חזור על תהליך זה עבור כל כרטיס הרחבה מותקן .אם המחשב מופעל בצורה תקינה ,פתור את בעיית התנגשות המשאבים בכרטיס האחרון שהוסר מהמחשב )ראה "שחזור מערכת ההפעלה" במדריך למשתמש(.
דפוס נוריות תיאור הבעיה ייתכן שהתרחש כשל ב.USB- הצעת פתרון • התקן מחדש את כל התקני ה ,USB-בדוק את חיבורי הכבלים ולאחר מכן הפעל מחדש את המחשב. • אם הבעיה נמשכת ,פנה אל ) Dellראה "פנייה אל "Dellבמדריך למשתמש(. לא זוהו מודולי זיכרון. • אם מותקנים שני מודולי זיכרון או יותר ,הסר את המודולים )ראה "זיכרון" במדריך למשתמש( ,התקן מחדש מודול אחד ולאחר מכן הפעל מחדש את המחשב .
דפוס נוריות תיאור הבעיה ייתכן שהתרחש כשל ;BIOSהמחשב נמצא במצב התאוששות. הצעת פתרון • הפעל את תוכנית השירות ,BIOS Recovery המתן להשלמת ההתאוששות ולאחר מכן הפעל מחדש את המחשב. • אם הבעיה נמשכת ,פנה אל ) Dellראה "פנייה אל "Dellבמדריך למשתמש(. ייתכן שהתרחשה תקלה במעבד. • התקן מחדש את המעבד )ראה "מעבד" במדריך למשתמש(. • אם הבעיה נמשכת ,פנה אל ) Dellראה "פנייה אל "Dellבמדריך למשתמש(. מודולי זיכרון מזוהים ,אך התרחש כשל בזיכרון.
אם נורית ההפעלה מהבהבת בכתום ,המחשב מקבל חשמל ,אך ייתכן שקיימת בעיית חשמל פנימית. • • – ודא שמתג בחירת המתח )אם הוא זמין( מכוון לאספקת זרם החילופין הזמינה במיקומך. – ודא שכבל החשמל של המעבד מחובר היטב ללוח המערכת )ראה "רכיבי לוח מערכת" במדריך למשתמש(. אם נורית ההפעלה דולקת בכתום רציף ,ייתכן שארעה תקלה בהתקן או שהוא אינו מחובר כהלכה. • – הסר את מודולי הזיכרון ולאחר מכן התקן אותם מחדש )ראה "הסרת הלוח הקדמי" במדריך למשתמש(.
תקליטורים וDVD - שים לב :השתמש תמיד במכל אוויר דחוס לניקוי העדשה בכונן תקליטורים ,DVD/ועקוב אחר ההוראות המצורפות למכל האוויר הדחוס .אין לגעת בעדשה של הכונן. 1החזק את התקליטור בשוליו החיצוניים .ניתן גם לגעת בשוליים הפנימיים של החור שבמרכז. שים לב :כדי למנוע נזק לתקליטור ,אין לנגב אותו בתנועה סיבובית. 2היעזר במטלית בד לחה כדי לנגב בעדינות את חלקו התחתון של התקליטור )הצד ללא התווית( בקו ישר ,מהמרכז לעבר השוליים החיצוניים.
ניקוי המחשב זהירות :לפני שתתחיל לבצע הליך כלשהו בסעיף זה ,בצע את הוראות הבטיחות במדריך מידע המוצר. מחשב ,מקלדת וצג זהירות :לפני ניקוי המחשב ,נתק אותו משקע החשמל .יש לנקות את המחשב במטלית רכה ולחה .אין להשתמש בחומר ניקוי נוזלי או בתרסיס ,העלולים להכיל חומרים דליקים. • השתמש בשואב אבק בעל מברשת כדי להסיר בעדינות אבק מהחריצים ומהחורים שבמחשב ומהרווחים שבין מקשי המקלדת. שים לב :אל תנקה את הצג בנוזל המכיל סבון או אלכוהול .
7 מחבר מתאם רשת כדי לחבר את המחשב לרשת או להתקן פס-רחב ,חבר קצה אחד של כבל הרשת לשקע רשת או להתקן הרשת או הפס-הרחב .חבר את הקצה השני של כבל הרשת למחבר מתאם הרשת במחשב. צליל נקישה מציין שכבל הרשת חובר כהלכה. אל תחבר כבל טלפון למחבר הרשת. במחשבים עם כרטיס מחבר רשת נוסף ,השתמש במחברים שבכרטיס ושבגב המחשב ,בעת הגדרת חיבורי רשת מרובים )כגון רשת פנימית וחיצונית נפרדת(. מומלץ להשתמש בחיווט ובמחברים מקטגוריה 5עבור הרשת .
מחברי הלוח האחורי 7 8 6 5 9 3 4 10 1 2 11 חבר התקן מקבילי ,כגון מדפסת ,למחבר המקבילי .אם ברשותך מדפסת ,USBחבר אותה למחבר .USB 1 מחבר מקבילי 2 מחבר עכבר חבר עכבר PS/2רגיל למחבר העכבר הירוק .כבה את המחשב ואת כל ההתקנים המחוברים לפני חיבור העכבר למחשב .אם ברשותך עכבר ,USBחבר אותו למחבר .
מבט מאחור )תצורת (Tower 1 2 3 1מחבר חשמל חבר את כבל החשמל. 2חריצי כרטיסים חריצים 2-6תומכים בכרטיסים באורך מלא ,בכלל זה חריץ PCI אחד ,שני חריצי PCI Express 2.0 x16ושני חריצי .PCI-X חריצים 1ו 7 -תומכים בכרטיסים באורך חצי ,בכלל זה כרטיס PCI Express x8אחד )מחווט כ (x4 -וחריץ PCI-Xאחד. 3מחברי הלוח האחורי חבר התקן ,USBהתקן שמע והתקנים אחרים למחבר המתאים )למידע נוסף ,ראה "מחברי הלוח האחורי" בעמוד .
4 תא כונן בגודל 5.25אינטש עם לוח קדמי מיוחד לכונן בגודל 3.5 אינץ'. משמשים לאחסון כונן תקליטורים DVD/או קורא כרטיסי מדיה, כונן תקליטונים או דיסק קשיח מסוג SATAבמגש של תא כונן בגודל 5.25אינץ' .לוח הכונן הקדמי המוצג כאן מיועד לשימוש רק בכונן תקליטונים או בקורא כרטיסי מדיה .ניתן להתקינו בחזית של כל אחד מארבעת תאי הכונן בגודל 5.25אינץ' .לקבלת מידע נוסף ,עיין בסעיף "לוחות כונן" במדריך למשתמש. מנשאי הכונן הקשיח מיועדים לשימוש בתאי כונן בגודל 5.
אודות המחשב מבט מלפנים )תצורת (Tower 1 2 3 4 5 6 7 8 13 12 11 10 9 1-3 תאים לכונן בגודל 5.25 משמשים לאחסון כונן תקליטורים DVD/או קורא כרטיסי מדיה, כונן תקליטונים או דיסק קשיח מסוג SATAבמגש של תא כונן בגודל 5.25אינץ' .מנשאי הכונן הקשיח מיועדים לשימוש בתאי כונן בגודל 5.25אינץ' בלבד .אין אפשרות להחליף בין המגש של כונן-התקליטונים/קורא כרטיסי המדיה למגש הדיסק-הקשיח.
התקני הגנה מפני בעיות חשמל יש התקנים זמינים אחדים להגנה מפני תנודות ותקלות באספקת המתח: • מגן מנחשולים • מייצב מתח • אל-פסק )(UPS מגן מנחשולים מגינים מנחשולים ומפצלי חשמל המצוידים במגנים מנחשולים מסייעים למנוע נזק למחשב כתוצאה מנחשולי מתח העלולים להיגרם במהלך סופות רעמים וברקים או לאחר הפסקות חשמל .יצרנים מסוימים של מגינים מנחשולים מספקים אחריות לסוגים מסוימים של נזקים .
4תחת ?) Which computer is thisאיזה מחשב זה?( ,לחץ על ) Old computerמחשב ישן( ,ולאחר מכן לחץ על ) Nextהבא(. 5תחת ) Select a transfer methodבחר שיטת העברה( ,לחץ על שיטת ההעברה הרצויה, ולאחר מכן לחץ על ) Nextהבא(. 6תחת ?) What do you want to transferמה ברצונך להעביר?( ,לחץ כדי לבחור בנתונים שברצונך להעביר ולאחר מכן לחץ על ) Nextהבא(. הנתונים שנבחרו מועתקים ומוצג המסך ) Completing the Collection Phaseהשלמת שלב האיסוף(. 7לחץ על ) Finishסיום(.
ה ע ב ר נת ו נים למ חשב הי עד — 1עבור למחשב היעד. 2תחת ) Now go to your old computerכעת עבור למחשב הישן שלך( ,לחץ על Next )הבא(. 3תחת ?) Where are the files and settingsהיכן נמצאים הקבצים וההגדרות?( ,לחץ לבחירת השיטה שתשמש להעברת ההגדרות והקבצים ,ולאחר מכן לחץ על ) Nextהבא(. האשף קורא את הקבצים וההגדרות שנאספו ומחיל אותם על מחשב היעד .כשההעברה מסתיימת ,המסך ) Finishedהסתיים( מופיע. 4לחץ על ) Finishedהסתיים( ,ולאחר מכן הפעל מחדש את המחשב.
אשף העברת קבצים והגדרות ) עם תקליטור מערכת ההפע לה ( הערה :אשף העברת הקבצים וההגדרות מגדיר את מחשב המקור שממנו יועבר מידע כמחשב הישן ומגדיר את מחשב היעד שאליו יועבר המידע כמחשב החדש. ה כ ן את מחשב הי עד להעברת ה ק ב צ י ם — 1לחץ על ) Startהתחל() All Programs Iכל התוכניות() Accessories Iעזרים(I ) System Toolsכלי מערכת() Files and Settings Transfer Wizard Iאשף העברת הקבצים וההגדרות(.
העברת מידע למחשב חדש ניתן להסתייע באשפים שבמערכת ההפעלה כדי להעביר קבצים ונתונים אחרים ממחשב אחד למחשב אחר.
• אל תתקין את המחשב במעטפת שאינה מאפשרת זרימת אוויר .הגבלת זרימת האוויר עלולה לגרום להתחממות יתר של המחשב ,ועלולה להשפיע על ביצועי המחשב.
2הסר את כל הכוננים האופטיים המותקנים לפי השלבים המתוארים בסעיף "הסרת כונן אופטי )מחשב שולחן עבודה( במדריך למשתמש ,והתקן מחדש את הכוננים לפי השלבים המתוארים בסעיף "התקנת כונן אופטי )מחשב (Towerבמדריך למשתמש. התקנת המחשב במעטפת מגן התקנת המחשב במעטפת עלולה להגביל את זרימת האוויר ,לגרום להתחממות יתר של המחשב ולהשפיע על ביצועי המחשב .בעת התקנת המחשב במעטפת ,פעל על-פי ההנחיות הבאות. שים לב :טמפרטורת ההפעלה שמצוינת במדריך זה משקפת את טמפרטורת הסביבה המרבית להפעלה .
התקנת המחשב מעבר מתצורת Towerלתצורת שולחן עבודה זהירות :לפני שתתחיל לבצע הליך כלשהו בסעיף זה ,בצע את הוראות הבטיחות במדריך מידע המוצר. הערה :כדי לשנות את תצורת המחשב לתצורת Towerאו לתצורת שולחן עבודה ,עלייך להשתמש בערכה אופציונלית הניתנת לרכישה מ .Dell -לפרטים נוספים על הזמנה מ,Dell- ראה בסעיף "מידע מוצר" במדריך למשתמש. הערה :מחשב בתצורת Towerתומך בכונן 3.5נוסף בחזית לעומת מחשב בתצורת שולחן עבודה. 1פעל בהתאם להליכים בסעיף "לפני שתתחיל" במדריך למשתמש.
מה אתה מחפש? • כיצד להתקין מחדש את מערכת ההפעלה נמצא כאן תקליטור מערכת ההפעלה מערכת ההפעלה מותקנת כבר במחשב שלך .כדי להתקין מחדש את מערכת ההפעלה ,השתמש בתקליטור מערכת ההפעלה שצורף למחשב )ראה "שחזור מערכת ההפעלה" במדריך למשתמש(. לאחר התקנה מחדש של מערכת ההפעלה ,השתמש בתקליטור האופציונלי Drivers and Utilities )מנהלי התקנים ותוכניות שירות( כדי להתקין מחדש מנהלי התקנים עבור ההתקנים המצורפים למחשב. תווית מפתח המוצר של מערכת ההפעלה מודבקת על המחשב.
מה אתה מחפש? • תוכנת מערכת שולחנית ) — (DSSאם תתקין מחדש את מערכת ההפעלה במחשב ,עליך להתקין מחדש גם את תוכנית השירות DSS .DSSמזהה אוטומטית את המחשב ואת מערכת ההפעלה שלך, מתקין את העדכונים המתאימים להגדרות התצורה שלך ומספק עדכונים חיוניים למערכת ההפעלה שלך ותמיכה למעבדים ,לכוננים אופטיים, ולהתקני ,USBלמשל DSS .דרוש לשם הפעלה תקינה של מחשב Dellשברשותך. נמצא כאן כדי להוריד תוכנת מערכת שולחנית )Desktop :(System Software 1עבור אל ,support.dell.
מה אתה מחפש? • פתרונות — רמזים ועצות לפתרון בעיות, מאמרים של טכנאים ,קורסים מקוונים ושאלות נפוצות נמצא כאן אתר התמיכה של — Dell support.dell.com הערה :בחר את האזור או את המגזר העסקי • קהילה — קבוצות דיון מקוון עם לקוחות אחרים שאליו אתה שייך כדי להציג את אתר התמיכה המתאים.
נמצא כאן מה אתה מחפש? • תג שירות וקוד שירות מהיר • מפתח מוצר של ®Windows ®Microsoft תג שירות ומפתח מוצר של Microsoft Windows תוויות אלה נמצאות על המחשב: • השתמש בתג השירות כדי לזהות את המחשב שברשותך בעת השימוש באתר support.dell.comאו בעת פנייה לתמיכה של .Dell • הזן את קוד השירות המהיר כדי לנתב את השיחה בעת פנייה לתמיכה של .Dell הערה :כאמצעי לשיפור האבטחה ,תווית הרישיון החדשה של Microsoft Windows כוללת קטע חסר ,או חור ,להרתעה מהסרת התווית.
מה אתה מחפש? • כיצד להסיר ולהחליף חלקים מדריך למשתמש בDell Precision™ - ® • מפרט • כיצד להגדיר את תצורת המערכת • כיצד לאתר תקלות ולפתור בעיות • מידע על האחריות • תנאים והתניות )ארה"ב בלבד( • הוראות בטיחות • מידע תקינה • מידע ארגונומי • הסכם רישיון למשתמש קצה 268 נמצא כאן ⏐ מדריך עזר מהיר ® Microsoft Windows XPוMicrosoft - ™ Windows Vistaמרכז העזרה והתמיכה 1לחץ על התחל Iעזרה ותמיכה Iמדריך למשתמש ומדריך מערכת של IDellמדריכי מערכת.
חיפוש מידע הערה :חלק מהתכונות או סוגי המדיה הם אופציונליים ועשויים שלא להיות מצורפים למחשב שברשותך .ייתכן שתכונות אחדות או סוגי מדיה מסוימים לא יהיו זמינים בארצות מסוימות. הערה :ייתכן שמידע נוסף יצורף למחשב.
266 | תוכן
תוכן חיפוש מידע ........................................ 267 .................................... 273 ..... 273 274 276 280 ...................................... 281 ................... 281 283 284 ....................................... 286 וצג . . . . . . . . . . . . . . . . . . . . . . . . . . . . . . 286 286 286 287 ................................. 287 ...............................
עצות ,הערות ואזהרות הערה :מציינת מידע חשוב שיסייע לך לנצל את המחשב בצורה טובה יותר. שים לב :מציינת אפשרות של נזק לחומרה או אובדן נתונים ,ומסבירה כיצד להימנע מהבעיה. זהירות :מציינת אפשרות של נזק לרכוש ,פגיעה גופנית או מוות. ____________________ המידע במסמך זה עשוי להשתנות ללא הודעה. © Dell Inc. 2007כל הזכויות שמורות. חל איסור על שעתוק מסמך זה ,בכל דרך שהיא ,ללא קבלת רשות בכתב מאת .Dell Inc.
Dell Precision™ T7400 מדריך עזר מהיר DCDO דגם www.dell.com | support.dell.