
User's Manual
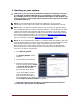
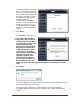
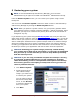
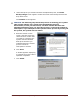
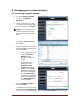
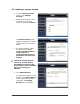
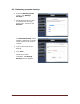
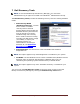
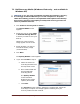
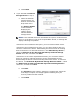
Table Of Contents
- Dell™ Backup and Recovery Manager V1.0 Overview
- Overview Screen
- Data Backup and Restore
- Backing up your system
- Restoring your system
- Managing your system backups
- Dell Recovery Tools
- Windows Recovery Environment
- Operating Systems Supported
- Supported Optical Media
- Other information you need to know
- Why do I need to back up?
- Backup Options Summary
- Restore Options Summary
Dell™ Backup and Recovery Manager V1.0 Page 19
7.1 Dell Recovery Media (Windows Vista only – not available in
Windows XP)
CAUTION: If you are using a notebook computer for backup or recovery,
it is strongly recommended that you run the computer on AC power
rather than battery power to avoid potential interruption to the backup
and recovery process. Interrupting a backup and recovery process can
result in potential data loss.
1. Click Create a recovery disk or device....
The Choose Media screen
appears.
2. Select the type of media (DVD
or External Storage Device)
to which you want to save your
backup.
Options for using a factory
image appear on the screen.
3. Select whether you want to
include the factory image
(recommended).
4. Click Next.
The Specify Details screen appears.
5. If you selected DVD in step 2:
a. Select the device for
recording the DVD from
the drop-down menu.
b. Place a blank DVD into
the selected DVD-
recording device.
The Specify Details
screen refreshes,
displaying the media
capacity of the DVD.
c. Click Next.
The Progress screen appears, displaying a progress bar. When the
recording is complete, a message appears indicating that your
recovery media has been created.