
Deployment Guide
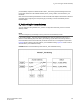

‐ A trunk group has the same link cost as the master ISL of the group, regardless of the
number of ISLs in the group. This allows slave ISLs to be added or removed without causing
data to be rerouted, because the link cost remains constant.
‐ The addition of a path that is shorter than existing paths causes traffic to be rerouted
through that path.
‐ The addition of a path that is longer than existing paths may not be useful, because the
traffic will choose the shorter paths first.
• Plan for future bandwidth addition to accommodate increased traffic.
For trunk groups over which traffic is likely to increase as business requirements grow, consider leaving
one or two ports in the group available for the future nondisruptive addition of bandwidth.
• Consider creating redundant trunk groups where additional ports are available or paths are
particularly critical.
This helps to protect against oversubscription of trunk groups, multiple ISL failures in the same group,
and the rare occurrence of an ASIC failure.
• To provide the highest level of reliability, deploy trunk groups in redundant fabrics to help ensure that
ISL failures do not disrupt business operations.
Configuring trunk groups
After you install the Trunking license, you must re-initialize the ports that are to be used in trunk groups
so that they recognize that trunking is enabled. This procedure needs to be performed only once, and is
required for all types of trunking.
To re-initialize the ports, you can either disable and then re-enable the switch, or disable and then re-
enable the affected ports.
1. Connect to the switch and log in using an account assigned to the admin role.
2. Enter the islShow command to determine which ports are used for ISLs.
3. Enter the portDisable command for each port to be used in a trunk group.
Alternatively, you can enter the switchDisable command to disable all ports on the switch.
4. Enter the portEnable command for each port that you disabled in step 3, or enter the switchEnable
command to enable all of the ports on the switch.
NOTE
F_Port trunking requires additional steps to configure the Trunk Area (TA). Refer to Configuring
F_Port trunking for an Access Gateway on page 520 or Configuring F_Port trunking for a Brocade
adapter on page 521 for information.
Enabling trunking
You can enable trunking for a single port or for an entire switch. Because trunking is automatically
enabled when you install the Trunking license, you need to use this procedure only if trunking has been
subsequently disabled on a port or switch. Enabling trunking disables and re-enables the affected ports.
As a result, traffic through these ports may be temporarily disrupted.
Configuring trunk groups
Fabric OS Administrators Guide 513
53-1003130-01