53-1001081-01 September 29, 2008 M5424 SAN I/O Module QuickStart Guide
Copyright © 2008 Brocade Communications Systems, Inc. All Rights Reserved. Brocade, Fabric OS, File Lifecycle Manager, MyView, and StorageX are registered trademarks and the Brocade B-wing symbol, DCX, and SAN Health are trademarks of Brocade Communications Systems, Inc., in the United States and/or in other countries. All other brands, products, or service names are or may be trademarks or service marks of, and are used to identify, products or services of their respective owners.
Overview This Quick Start guide is intended as an overview to help experienced installers unpack, install, and configure an 8 Gbps M5424 SAN I/O Module quickly. For detailed installation and configuration instructions, see the Brocade M5424 SAN I/O Module Hardware Reference Manual. NOTE Throughout this document, the M5424 SAN I/O Module is referred to as the SAN I/O Module.
Cabling guidelines After modifying the SAN I/O Module’s IP address and domain name (if Module is in Fabric OS Native mode), we recommend that you cable all external ports to fabric connections before bringing the SAN I/O Module online. Refer to “Configuring the SAN I/O Module” on page 6 for steps on modifying the IP address. Begin by cabling ports 17, 18, 19, 20, 21, 22, 23, and 0. Ports 17 and 18 are licensed at the factory as part of Dynamic Ports On Demand (DPOD).
• Access Gateway Administrator’s Guide • Web Tools Administrator’s Guide Modify the SAN I/O Module IP address By default, the IP address for the SAN I/O Module is configured as 10.77.77.77 with a default Ethernet subnet mask of 255.255.255.0. Reset the IP address using three methods. If the IP values are set using either of these methods, the IP values are stored on the SAN I/O Module. • SAN I/O Module Command Line Interface (CLI). • Blade Server Enclosure CMC CLI.
e. From the COM Port Properties window, select the following configuration values: • • • • • Bits per second: 9600 Databits: 8 Parity: None Stop bits: 1 Flow Control: None For LINUX or UNIX a. Enter the following at the command prompt: tip /dev/ttyb -9600 b. When the terminal application stops reporting information, press Enter to display the login prompt. c. Log in to the default administrative account using the following identification: Login: admin Password: password d.
4. Use the appropriate CLI commands to change the IP address of the selected SAN I/O module. Refer to your Blade Server Enclosure CLI documentation. Using the CMC GUI to set the IP address To change the IP address, use the following steps: 1. Open the CMC application’s Setup tab. 2. Enter the new information in the IP Address, Subnet Mask, and Gateway fields as appropriate and click Apply. 3. To enable DHCP, select DHCP Enabled and click Apply.
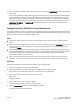
Connecting the SAN I/O Module to the fabric NOTE Refer to “Cabling guidelines” on page 6 before beginning the following procedure. Before beginning the following steps, determine whether the SAN I/O Module is in Access Gateway or Fabric OS Native mode. This affects the configuration process. Using the SAN I/O Module CLI, you can enter the ag –– modeShow command to determine the current operating mode. 1. If the SAN I/O Module is in Fabric OS Native mode, continue with step 2 and step 3.
snmp attributes (yes, y, no, n): [no] rpcd attributes (yes, y, no, n): [no] cfgload attributes (yes, y, no, n): [no] webtools attributes (yes, y, no, n): [no] System (yes, y, no, n): [no] WARNING: The domain ID will be changed. The port level zoning may be affected c. Re-enable the SAN I/O Module by entering the switchEnable command.
9. Back up the SAN I/O Module configuration to an FTP server by typing the configUpload command and following the prompts. This command uploads the SAN I/O Module configuration to the server, making it available for downloading to a replacement SAN I/O Module if necessary. Brocade recommends backing up the configuration on a regular basis to ensure that a complete configuration is available for downloading to a replacement SAN I/O Module.
NOTE You should save the configuration file if you are converting an SAN I/O Module to Access Gateway mode. To save your current configuration, click the Show Advanced Mode button in the top right-hand corner of the Switch Administration window. Select the Configure tab, then select the Upload/Download tab. Enter the relevant information to upload the configuration file. 6. From the Switch Status section, click Disable. 7. From the Access Gateway Mode section, click Enable. 8. Click Apply. 9.
For complete instructions on disabling Access Gateway Mode using the CLI and joining the switch to the fabric, refer to the “Disabling Access Gateway Mode” section in the Access Gateway Administrator’s Guide. NOTE Disabling Access Gateway mode is disruptive because the switch is disabled and rebooted. Always back up the current configuration before enabling or disabling Access Gateway mode. Enabling Access Gateway mode clears the security and zone databases.
Connecting to the SAN I/O Module Using Web Tools Complete the following steps to connect to the SAN I/O Module using Web Tools. 1. On the management console, open a Web browser such as Internet Explorer. The Web browser must be connected to the same network as the SAN I/O Module. 2. Enter the IP address of the SAN I/O Module in the address field and press Enter. For more information about using Web Tools, see the Web Tools Administrator’s Guide.
16 of 16 M5424 QuickStart Guide Publication Number: 53-1001081-01