
Users Guide


For Emulex Fibre Channel (FC) cards, the Enable/Disable Boot From SAN attribute in the Option ROM is disabled by default.
Enable the attribute in the Option ROM and apply the boot identify prole to the server for booting from SAN.
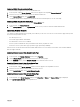
To save a prole, perform the following tasks:
1. Go to the Server Proles page. In the Boot Identity Proles section, select the server that has the required settings with
which you want to generate the prole and select FQDD from the FQDD drop-down menu.
2. Click Save Identity. The Save Identity section is displayed.
NOTE: Boot identity is saved only if the Network Share option is enabled and accessible, the details are displayed in
the Stored Proles section. If the Network Share is not connected, congure the network share for the chassis. To
congure the network share, click Edit in the Stored Proles section. For more information, see
Conguring
Network Share Using CMC Web Interface
.
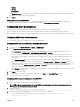
3. In the Base Prole Name and Number of Proles elds, enter the prole name and the number of proles that you want to
save.
NOTE: While saving a boot identity prole, the standard ASCII extended character set is supported. However, the
following special characters are not supported:
), “, ., *, >, <, \, /, :, |, #, ?, and ,
4. Select a MAC address for the base prole from the Virtual MAC Address drop-down and click Save Prole.
The number of templates created are based on the number of proles you specify. CMC communicates with the Lifecycle
Controller to get the available server prole settings and store them as a named prole. The format for the name le is — <base
prole name>_<prole number>_<MAC address>. For example: FC630_01_0E0000000000.
A progress indicator indicates that the save operation is in progress. After the action is complete, Operation Successful
message is displayed.
NOTE: The process to gather the settings occurs in the background. Hence, it may take some time before the new
prole is displayed. If the new prole is not displayed, check the prole log for errors.
Applying Boot Identity Proles
You can apply boot identity prole settings if the boot identity proles are available as stored proles on the network share. To initiate
a boot identity conguration operation, you can apply a stored prole to a single server.
NOTE: If a server does not support Lifecycle Controller or the chassis is powered o, you cannot apply a prole to the
server.
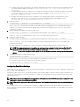
To apply a prole to a server, perform the following tasks:
1. Go to the Server Proles page. In the Boot Identity proles section, select the server on which you want to apply the selected
prole.
The Select Prole drop-down menu gets enabled.
NOTE: The Select Prole drop-down menu displays all available proles that are sorted by type from the network
share.
2. From the Select Prole drop-down menu, select the prole that you want to apply.
The Apply Identity option is enabled.
3. Click Apply Identity.
A warning message is displayed that applying a new identity overwrites the current settings and also reboots the selected
server. You are prompted to conrm if you want to continue the operation.
NOTE: To perform server conguration replication operations on the server, the CSIOR option must be enabled for
the servers. If CSIOR option is disabled, a warning message is displayed that CSIOR is not enabled for the server. To
complete the server conguration replication operation, enable the CSIOR option on the server.
4. Click OK to apply the boot identity prole to the selected server.
The selected prole is applied to the server and the server is rebooted immediately. For more information, see the CMC Online
Help.
103