
Users Guide


6. Using the LCD panel, navigate to the IP Summary and click on the Check button to select. Use the IP address for the CMC in the
management system browser (IE, Chrome, or Mozilla). To set up DHCP for CMC, use LCD panel to, click Main Menu > Settings >
Network Settings.
7. Connect to the CMC IP address by using a web browser by typing the default username (root) and password (calvin).
8. Provide each iDRAC with an IP address in the CMC web interface, and enable the LAN and IPMI interface.
NOTE: iDRAC LAN interface on some servers are disabled by default. This information can be found on the CMC web
interface under Server Overview > Setup. This might be an advanced license option; in which case you must use the
SetUp feature for each server).
9. Provide the IO module with an IP address in the CMC web interface. You can get the IP address by clicking I/O Module Overview,
and then clicking Setup.
10. Connect to each iDRAC through the Web browser and provide final configuration of iDRAC. The default user name is root and
password is calvin.
11. Connect to the I/O module by using the web browser and provide final configuration of the IO module.
12. Turn on the servers and install the operating system.
NOTE: CMC restarts, if the control panel is improperly installed on the chassis.
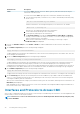
Basic CMC Network Connection
For the highest degree of redundancy, connect each available CMC to your management network.
Installing Remote Access Software on a
Management Station
You can access CMC from a management station using remote access software, such as Telnet, Secure Shell (SSH), or serial console
utilities provided on your operating system or using the web interface.
To use remote RACADM from your management station, install remote RACADM using the Dell Systems Management Tools and
Documentation DVD that is available with your system. This DVD includes the following Dell OpenManage components:
• DVD root — Contains the Dell Systems Build and Update Utility.
• SYSMGMT — Contains the systems management software products including Dell OpenManage Server Administrator.
• Docs — Contains documentation for systems, systems management software products, peripherals, and RAID controllers.
• SERVICE — Contains the tools required to configure your system, and delivers the latest diagnostics and Dell-optimized drivers for
your system.
For information about installing Dell OpenManage software components, see the Dell OpenManage Installation and Security User's Guide
available on the DVD or at dell.com/support/manuals. You can also download the latest version of the Dell DRAC Tools from
support.dell.com.
Installing RACADM on a Linux Management Station
1. Log in as root to the system running a supported Red Hat Enterprise Linux or SUSE Linux Enterprise Server operating system where
you want to install the managed system components.
2. Insert the Dell Systems Management Tools and Documentation DVD into the DVD drive.
3. To mount the DVD to a required location, use the mount command or a similar command.
NOTE:
On the Red Hat Enterprise Linux 5 operating system, DVDs are auto-mounted with the -noexec mount
option. This option does not allow you to run any executable from the DVD. You need to mount the DVD-ROM
manually, and then run the commands.
4. Navigate to the SYSMGMT/ManagementStation/linux/rac directory. To install the RAC software, type the following command:
rpm -ivh *.rpm
5. For help about the RACADM command, type racadm help after you run the previous commands. For more information about
RACADM, see the Chassis Management Controller for Dell PowerEdge VRTX RACADM Command Line Reference Guide.
NOTE:
When using the RACADM remote capability, you must have the 'write' permission on the folders where you
are using the RACADM subcommands, involving the file operations. For example, racadm getconfig -f <file
name>.
Installing and Setting Up CMC 25